Table of Contents
Advertisement
Quick Links
Find Quality Products Online at:
IMPORTANT
Read Before Using
Operating / Safety Instructions
Consignes d'utilisation/de sécurité
Instrucciones de funcionamiento y seguridad
3D40
Idea Builder
Call Toll Free for Consumer Information & Service Locations
Pour obtenir des informations et les adresses de nos centres de service après-vente, appelez ce numéro
gratuit Llame gratis para obtener información para el consumidor y ubicaciones de servicio
For English Version
See page 2
GlobalTestSupply
www.
IMPORTANT
Lire avant usage
Leer antes de usar
.com
IMPORTANTE
sales@GlobalTestSupply.com
Advertisement
Table of Contents

Related Manuals for Dremel 3D40-EDU


Summary of Contents for Dremel 3D40-EDU
- Page 1 IMPORTANT IMPORTANT IMPORTANTE Read Before Using Lire avant usage Leer antes de usar Operating / Safety Instructions Consignes d’utilisation/de sécurité Instrucciones de funcionamiento y seguridad 3D40 Idea Builder Call Toll Free for Consumer Information & Service Locations Pour obtenir des informations et les adresses de nos centres de service après-vente, appelez ce numéro gratuit Llame gratis para obtener información para el consumidor y ubicaciones de servicio For English Version See page 2...
-
Page 2: Table Of Contents
Kit Contents ..................10 Unpacking ..................11 Getting To Know Your Dremel 3D40 ..........12,13 Touch Screen................14-20 Initial Setup ..................21 Getting Started with Your Dremel 3D App .........22 Print Studio Software Overview ............23 Getting Ready to Build..............24-28 Building..................29-30 Removing Your Object ...............31 Maintenance ..................32 Troubleshooting .................33... -
Page 3: General Safety Warnings
General Safety Warnings Read all instructions in this manual and familiarize yourself with the WARNING Dremel 3D40 before setup and use. Failure to comply with the warnings and instructions may result in fire, equipment damage, property damage, or personal injury. - Page 4 16-29° C (60 - 85° F). Dremel 3D40 is maintained. Do not move or bump Dremel 3D40 or the Use only Dremel approved materials and extruder during operation. The object may components.
-
Page 5: Additional Safety Warnings
This symbol designates that this tool is listed by Underwriters Laboratories, to United States and Canadian Standards. Dremel Remote and Mobile Services Dremel remote and mobile services provide you product information, services, and products at with information and services regarding your your discretion and risk. -
Page 6: Fcc Compliance
The Dremel 3D40 may not be used to make objects protected by intellectual property If you use the Dremel 3D40 in any way other rights owned by third parties without such than as recommended and described in third parties’... -
Page 7: Specifications
• Pointing device: Three-button mouse 406mm x 394mm) ELECTRICAL REQUIREMENTS FILAMENT 3D40 input rating: 100-240V, 47-60Hz, ONLY works with Dremel 1.75mm filament 0.8A-1.8A FILAMENT STORAGE OPERATING ENVIRONMENT All polymers degrade with time. Do not Room Temperature: 16-29° C (60 - 85° F) unpack until filament is needed. -
Page 8: Resources
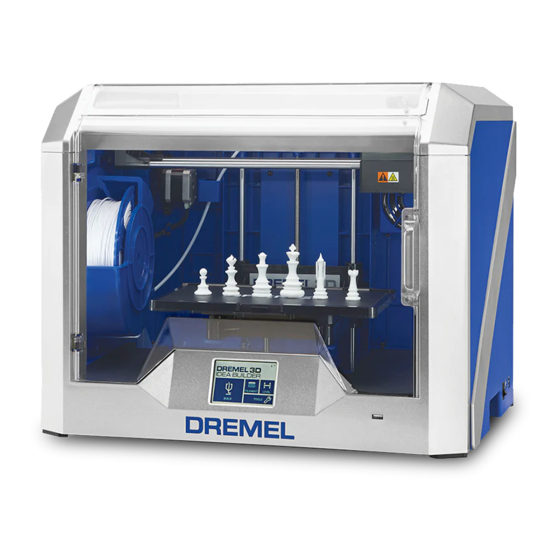
Door Your Dremel 3D40 has a door located on the front panel. This allows for easy access to the build platform, extruder, filament, and your objects. This door is made with a transparent material so you can monitor the progress of your objects while keeping the build environment stable. - Page 9 A sensor that detects the height of the build platform and assists in proper leveling. Your Dremel 3D40 has a pivoting lid on the top. This allows for more access to the build platform, extruder, filament, and objects when necessary.
-
Page 10: Introduction
WARNING READ ALL OPERATING/SAFETY INSTRUCTIONS IN THE MANUAL AND FAMILIARIZE YOURSELF WITH THE DREMEL 3D20 BEFORE SETUP AND USE. FAILURE TO COMPLY WITH THE WARNINGS AND INSTRUCTIONS MAY RESULT IN FIRE, EQUIPMENT DAMAGE, PROPERTY DAMAGE, OR PERSONAL INJURY. Dremel 3D40... -
Page 11: Unpacking
Unpacking 1. Place box on table, cut tape, and open. 6. Open door and remove middle insert. 2. Remove top insert. 3. Remove 3D40 and place on table. 7. Remove bottom insert. 4. Open lid and remove top insert. Tip: Keep packaging for future transportation and storage. -
Page 12: Getting To Know Your Dremel 3D40
Getting To Know Your 3D40 1. Lid 15. Filament Guide Tube 2. Extruder 16. Extruder Lever 3. Z-Axis Guide rail 17. Filament Guide Clip 18. Extruder Intake 4. Door 5. Gripping Handles 19. Extruder Fan 6. USB A Port 20. Ribbon Cable 7. - Page 13 17 18 D4000 Model 3D40 F0133 47–63 Hz 0.8–1. 100V– 240V~ Ø1.75m m (0.069 ") MM/Y YYY XXXX XXXX X LISTED 3D PRINTER E469311 KONIJ NENBE RG Dreme l Mount Prospe ct, 4825B D BREDA Made in China GlobalTestSupply www. .com Find Quality Products Online at: sales@GlobalTestSupply.com...
-
Page 14: Touch Screen
Touch Screen Using your Dremel 3D40 without a computer is easy with the onboard software and full color touch screen. Before building your model we want to familiarize you with the touch screen menu structure and options. Observe all provided warnings and safety instructions when using the WARNING Dremel 3D40. - Page 15 FILE DETAILS BUILD – Tap to begin build process. DELETE – Tap to remove model file from on-printer storage or USB flash drive. COPY TO PRINTER – From USB flash drive, tap to copy model file to on-printer storage. BUILD STATUS STOP –...
- Page 16 FILAMENT Tap to begin heating and start filament load/change process. (See page 24 for instructions on filament load/change process) LEVEL Tap to begin build platform leveling process. (see page 27 for instructions on leveling the build platform) GlobalTestSupply www. .com Find Quality Products Online at: sales@GlobalTestSupply.com...
- Page 17 TOOLS Tap to access the following individual printer functions and settings. SERVICE Tap to enter service menu to see customer service contact information. NETWORK Tap to enter Network menu to connect or disconnect WiFi and Set Proxy. CONNECT WIFI – Tap to connect to WiFi. DISCONNECT WIFI –...
- Page 18 CALIBRATE Tap to move extruder and build platform to zero position. JOG MODE Tap to display options to move extruder and build platform along the X, Y, and Z-axis. GlobalTestSupply www. .com Find Quality Products Online at: sales@GlobalTestSupply.com...
- Page 19 SETTINGS LANGUAGE – Tap to pick alternate menu language. DISPLAY – Tap to customize cabinet LEDs or main menu hotkeys. Z-AXIS OFFSET – Used to calibrate build plate height during assembly. SOUNDS – Tap to turn 3D40 sounds On/Off. DEMO MODE – Tap to turn retail demo mode On/Off.
- Page 20 ABOUT Tap to see 3D40 information such as firmware version, usage counter, printer status, MAC address, and token. Touch Screen Icons Indicates that there is an error such as filament empty or door open. Indicates that Ethernet is connected. Indicates WiFi signal strength and if connected to WiFi symbol will be blue.
-
Page 21: Initial Setup
Initial Setup The first time you power on your Dremel networks. When your wireless network 3D40 you will be prompted to perform an name is highlighted, tap “Accept”. initial setup of network, cloud services, and printer registration. Completing this process... -
Page 22: Getting Started With Your Dremel 3D App
Getting Started with Your Dremel 3D App The Dremel 3D app allows you to connect to your 3D40 from your mobile device. With the Dremel 3D app you can view models and projects in the Dremel 3D library, send, pause and cancel builds, monitor build status, receive push notification updates, and more. -
Page 23: Print Studio Software Overview
Print Studio Software Overview Supports – Create automatic or manual SETUP supports for parts with overhangs Printers – Choose you printer type Preview – Create and view the paths that the extruder will follow when building your Settings – Choose your material and build part resolution Print / Export –... -
Page 24: Getting Ready To Build
Getting Ready to Build Observe provided WARNING warnings safety instructions when using the Dremel 3D40. Failure to do so may result in fire, equipment damage, property damage or personal injury. Do not touch the extruder WARNING tip during operation or until it has cooled down to at least 60°C... - Page 25 8. Filament will be drawn into the extruder CAUTION damage the extruder tip and begin to exit from the hot extruder when clearing debris. Dremel 3D40 will not tip. work properly with a damaged extruder tip NOTE: Your Dremel 3D40 was tested by and will require replacement.
- Page 26 Before every build make CAUTION sure that the build platform is covered with Dremel specified build tape. Use of improper build tape may result in equipment damage and poor object build quality. 1. If build platform is installed, remove by pinching the clip located at the front of the FIG.
- Page 27 LEVELING BUILD PLATFORM Do not touch the extruder WARNING tip during Dremel 3D40 operation or until it has cooled down to 60°C (140°F). Contact with the extruder tip during or after operation before tip has cooled may result in personal injury.
-
Page 28: Building
2. Connect the included USB cable to your 3D40 and computer, figure 5. 3. Open software. 4. Turn your Dremel 3D40 on using the power switch to sync your computer to your Dremel 3D40. CONNECTING ETHERNET 1. Ensure 3D40 power switch is in the off FIG. - Page 29 BEFORE YOU BUILD 4. In the model detail page tap “Build” to begin building process. 1. Ensure an adequate amount of filament is loaded (see page 24). TIP: You can determine whether you have enough filament to complete your object before building by comparing the length of filament needed as displayed by Print Studio to the length of filament on spool...
- Page 30 “Decline” you can later access your Print Queue by tapping “Build” then BUILD FROM COMPUTER “Print Queue”. Dremel 3D40 is compatible with Print Studio from Autodesk. Follow the instructions that came with this software to complete a Build from your computer.
-
Page 31: Removing Your Object
BUILD PLATFORM FIG. 8 Do not touch the extruder WARNING tip during Dremel 3D40 operation or until it has cooled down to at least 60°C (140°F). Contact with the extruder tip during or after operation before tip has cooled may result in personal injury. -
Page 32: Maintenance
10. For steep overhangs (Less than 45 color. degree angle) it is recommended to build 5. It is important to watch your Dremel 3D40 with support. begin building objects. Your object is 11. Always remove the build platform before most likely to experience difficulty in the removing the object. -
Page 33: Troubleshooting
Clean the 3D40’s exterior with a lint free cloth. Clear the outer surfaces of any debris that is visible. To avoid damaging your Dremel 3D40 do not use water, chemicals or other cleaners on the 3D40. CLEANING THE EXTRUDER TIP 2. - Page 34 Troubleshooting PROBLEM CAUSE CORRECTIVE ACTION Extruder head building off Dremel 3D40 has lost track of Sending the extruder head to the center. the extruder head’s exact home position will recalibrate the location and is failing to build. Dremel 3D40. Cancel your object,...
- Page 35 PROBLEM CAUSE CORRECTIVE ACTION 3D40 will not connect to my Printer too far from wireless Reposition 3D40 to be closer to your network. router. router. Network password incorrect. Re-enter your password or verify your password with your network owner. 3D40 will not retrieve a token. Network password incorrect.
-
Page 36: Dremel ® Consumer Limited Warranty
If used for non-commercial or educational purposes, your Dremel 3D40 is warranted against defective materials or workmanship for a period of one year from the date of purchase. If the Dremel 3D40 is used for commercial purposes, this warranty will apply for 60 days from the date of purchase.