
Related Manuals for Viking VGIC5301


Summary of Contents for Viking VGIC5301
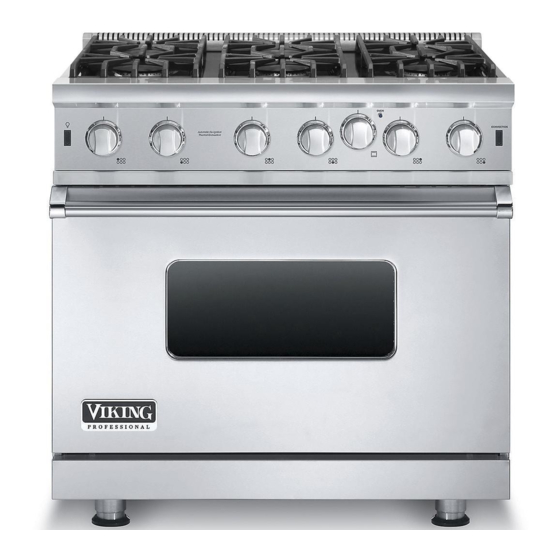
- Page 1 Use & Care Professional Freestanding Open Burner Ranges VGIC5301, CVGIC5301, VGIC5361, CVGIC5361...
-
Page 2: Table Of Contents
Congratulations Congratulations and welcome to an elite world of ownership. We hope you will enjoy and appreciate the care and attention we have put into every detail of your new, state-of-the-art self-cleaning range. Your range is designed to offer years of reliable service. This Use and Care Manual will provide you with the information you need to become familiar with your range’s care and operation. -
Page 3: Warnings
Warnings Warning and Important Safety Instructions appearing in this manual are not meant to cover all possible conditions and situations that may occur. Common sense, caution, and care must be exercised when installing, maintaining, or operating the appliance. ALWAYS contact the manufacturer about problems or conditions you do not understand. Recognize Safety Symbols, Words, Labels DANGER Hazards or unsafe practices which WILL result in... - Page 4 Warnings To Prevent Fire or Smoke Damage • Be sure all packing materials are removed from the appliance before operating it. • Keep area around appliance clear and free from combustible materials, gasoline, and other flammable vapors and materials. • If appliance is installed near a window, proper precautions should be taken to prevent curtains from blowing over burners. •...
- Page 5 Warnings • If you are “flaming” liquor or other spirits under an exhaust, TURN THE FAN OFF. The draft could cause the flames to spread out of control. • Once the unit has been installed as outlined in the Installation Instructions, it is important that the fresh air supply is not obstructed.
- Page 6 Warnings Power Failure If power failure occurs, the electric igniters will not work. No attempt should be made to operate the appliance during a power failure. Make sure the oven control is in the “OFF” position. Momentary power failure can occur unnoticed. The range is affected only when the power is interrupted. When it comes back on, the range will function properly without any adjustments.
-
Page 7: Before Using Range
Before Using Range All products are wiped clean with solvents at the factory to remove any visible signs of dirt, oil, and grease which may have remained from the manufacturing process. Before starting to cook, clean the range thoroughly with hot, soapy water. There may be some burn off and odors on first use of the appliance—this is normal. -
Page 8: Oven Functions And Settings
Simmering ensures gentler treatment than boiling to prevent food from toughening and/or breaking up. The size of the pan and the volume of food can have a significant effect on how high or low a flame is needed for simmering. For this reason, Viking range and rangetop burners are engineered with a Vari-Simmer setting. -
Page 9: Surface Cooking Tips
Surface Operation Surface Cooking Tips • Use low or medium flame heights when cooking in vessels that are poor conductors of heat, such as glass, ceramic, and cast-iron. Reduce the flame height until it covers approximately 1/3 of the cooking vessel diameter. This will ensure more even heating within the cooking vessel and reduce the likelihood of burning or scorching the food. -
Page 10: Oven Features
Oven Features Broiler element Oven lights Oven racks (3) Convection fan Removable bottom Bake burner Rack Positions Each oven is equipped with three tilt-proof racks. All ovens have six rack positions. Position 6 is the farthest from the oven bottom. Position 1 is the closest to the oven bottom. The racks can be easily removed and arranged at various levels. For best results with conventional baking, DO NOT use more than one rack at a time. -
Page 11: Baking
Baking BAKE (Natural Airflow Bake) Full power heat is radiated from the U-shaped bake burners in the bottom of the oven cavity and is circulated with natural airflow. This function is recommended for single rack baking. Many cookbooks contain recipes to be cooked in the conventional manner. - Page 12 Baking Conventional Baking Chart Single Rack Time Food Pan Size Position Temp (min) BREADS Biscuits Cookie sheet 3 or 4 400˚ F (204˚ C) 10 - 12 Yeast loaf Loaf pan 3 or 4 375˚ F (191˚ C) 30 - 35 Yeast rolls Cookie sheet 3 or 4...
- Page 13 Baking Convection Baking Chart Single Rack Time Food Pan Size Position Temp (min) BREADS Frozen Biscuits Cookie sheet 3 or 4 375˚ F (191˚ C) 7 - 9 Yeast loaf Loaf pan 3 or 4 375˚ F (191˚ C) 25 - 30 Yeast rolls Cookie sheet 3 or 4...
- Page 14 Baking Solving Baking Problems Baking problems can occur for many reasons. Check the chart below for the causes and remedies for the most common problems. It is important to remember that the temperature setting and cooking times you are accustomed to using with your previous oven may vary slightly from those required with this oven.
- Page 15 Broiling BROIL (Infrared Broil) The broil burner at the top of the oven heats the metal screen until it glows. Heat radiates from the GourmetGlo™ infrared broiler located at the top of the oven cavity. The distance between the foods and the broil elements determines broiling speed.
-
Page 16: Broiling
Broiling Rack Positions for Broiling Note: Position 6 is the closest to the broiler and position 1 is the closest to the oven bottom. Broiling Chart Type and Time Cut of Meat Weight Setting Rack (min) BEEF Sirloin, 1" Rare 12 oz Broil Medium... -
Page 17: Convection Dehydrate
Convection Dehydrate Convection Dehydrate This oven is designed not only to cook, but also to dehydrate fruits and vegetables. Warm air is circulated by a motorized fan in the rear of the oven and over a period of time, the water is removed from the food by evaporation. Removal of water inhibits growth of microorganisms and retards the activity of enzymes. -
Page 18: Cleaning And Maintenance
Cleaning and Maintenance WARNING BURN OR ELECTRICAL SHOCK HAZARD Make sure all controls are OFF and oven is COOL before cleaning. Failure to do so can result in burns or electrical shock. Any piece of equipment works better and lasts longer when maintained properly and kept clean. Cooking equipment is no exception. -
Page 19: Replacing Oven Lights
Replacing Oven Lights WARNING ELECTRICAL SHOCK HAZARD Disconnect the electric power at the main fuse or circuit breaker before replacing bulb. WARNING DO NOT touch bulb with bare hands. Clean off any signs of oil from the bulb and handle with a soft cloth. DO NOT touch bulb with bare hands. -
Page 20: Door Removal
Door Removal WARNING TO PREVENT PERSONAL INJURY Before removing the doors, make sure the pins are properly installed in the hinges. Failure to do so can result in personal injury to hands and/or fingers. Open door completely. Remove hinge trim screws Place pin in pin hole. -
Page 21: Troubleshooting
Troubleshooting Problem Possible Cause and/or Remedy Range will not function. Range is not connected to electrical power: Have electrician check power circuit breaker, wiring, and fuses. Broil does not work. Temperature control knob is rotated too far past broil position. Oven light will not work. -
Page 22: Service Information
Clearly describe the problem that you are having. If you are unable to obtain the name of an authorized service agency, or if you continue to have service problems, contact Viking Range, LLC at 1-888-845-4641, or write to: VIKING RANGE, LLC... -
Page 23: Warranty
(3) years from the date of original retail purchase or closing date for new construction, whichever period is longer. Viking Range, LLC, warrantor, agrees to repair or replace, at its option, any part which fails or is found to be defective during the warranty period. - Page 24 Viking Range, LLC 111 Front Street Greenwood, Mississippi 38930 USA (662) 455-1200 For product information, call 1-888-845-4641 or visit our web site at vikingrange.comin the US or brigade.ca in Canada (093015) 057732-000 EN...