TP-Link TL-WA901N User Manual
450mbps wireless n access point
Hide thumbs
Also See for TL-WA901N:
- Quick installation manual (2 pages) ,
- Quick installation manual (23 pages) ,
- User manual (58 pages)
Table of Contents
Advertisement
Quick Links
Advertisement
Table of Contents

Related Manuals for TP-Link TL-WA901N


Summary of Contents for TP-Link TL-WA901N
- Page 1 User Guide 450Mbps Wireless N Access Point TL-WA901N REV6.0.0 1910012719...
-
Page 2: Table Of Contents
Contents About This Guide ......................1 Chapter 1. Get to Know About Your Access Point ..... 2 1. 1. Product Overview............3 1. - Page 3 4. 4. 4. Wireless MAC Filtering ..........35 4.
-
Page 4: About This Guide
The Quick Installation Guide can be found where you find this guide or inside the package of the access point. Specifications can be found on the product page at https://www.tp-link.com. A TP-Link Community is provided for you to discuss our products at https://community.tp-link.com. Our Technical Support contact information can be found at the... -
Page 5: Chapter 1. Get To Know About Your Access Point
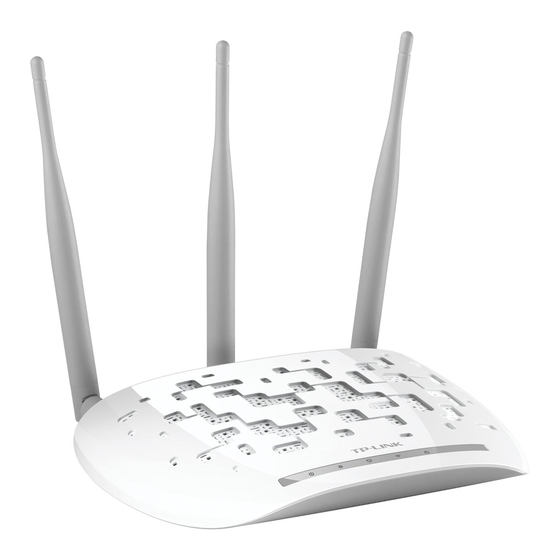
Chapter Get to Know About Your Access Point This chapter introduces what the access point can do and shows its appearance. It contains the following sections: • Product Overview • Panel Layout... -
Page 6: Product Overview
1. 1. Product Overview The TP-Link Wireless N Access Point, with multiple operation modes, is designed to establish or expand a scalable high-speed wireless N network or to connect an Ethernet enabled device such as a game console, digital media adapter, printer, or network attached storage device to a wireless network. -
Page 7: The Back Panel
Chapter 1 Get to Know About Your Access Point LED Explanation Name Status Indication Power is on. The system is starting up or the firmware is being upgraded. Do not Flashing (Power) disconnect or power off your access point. Power is off. The ETHERNET port is connected to a powered-on device. - Page 8 Chapter 1 Get to Know About Your Access Point Ports or Buttons Description If your client devices, such as wireless adapters, support Wi-Fi Protected Setup, then you can press this button to quickly establish a connection between the access point and the client devices and automatically configure wireless security for your wireless network.
-
Page 9: Chapter 2. Connect The Hardware
Chapter Connect the Hardware This chapter contains the following sections: • Position Your Access Point • Connect Your Access Point... -
Page 10: Position Your Access Point
This mode is suitable for dorm rooms or homes where there’s already a wired router but you need a wireless network. Internet TL-WA901N’s SSID Existing Router 1. Connect the AP device according to steps in the diagram. 2. Power on the access point, wait until the Power (... -
Page 11: Range Extender Mode
Internet Host AP’s SSID TL-WA901N’s SSID Other Wired Devices 1. Connect the AP device according to steps in the diagram. -
Page 12: Multi-Ssid Mode
Chapter 2 Connect the Hardware 2. 2. 4. Multi-SSID Mode In Multi-SSID mode, the access point creates multiple wireless networks to provide different security and VLAN groups. This mode is suitable when you want your devices connected to different wireless networks and become isolated by VLANs. VLAN 1 SSID 1 for VLAN 1 Internet... -
Page 13: Chapter 3. Set Up Internet Connection Via Quick Setup Wizard
Chapter Set Up Internet Connection Via Quick Setup Wizard This chapter introduces how to connect your access point to the internet via the web- based Quick Setup Wizard. It contains the following sections: • Log In to the Access Point •... -
Page 14: Log In To The Access Point
Chapter 3 Set Up Internet Connection Via Quick Setup Wizard 3. 1. Log In to the Access Point With a Web-based utility, it is easy to configure and manage the access point. The Web- based utility can be used on any Windows, Macintosh or UNIX OS with a Web browser, such as Microsoft Internet Explorer, Mozilla Firefox or Apple Safari. - Page 15 Chapter 3 Set Up Internet Connection Via Quick Setup Wizard 2. Select the LAN IP type of the access point or leave the default setting Smart IP for most cases, and then click Next. 3. Click Finish to complete the configuration. Reconnect your wireless devices to the new Wi-Fi network.
-
Page 16: Range Extender Mode
Chapter 3 Set Up Internet Connection Via Quick Setup Wizard 3. 2. 2. Range Extender Mode 1. If you select Range Extender mode, the AP will automatically detect wireless networks within its range. Find your host network in the AP list and click Connect. 2. -
Page 17: Client Mode
Chapter 3 Set Up Internet Connection Via Quick Setup Wizard 5. Relocate the access point to a good place. Connect your wireless devices to the Wi-Fi network using the access point’s SSID and password. 3. 2. 3. Client Mode 1. If you select Client mode, the AP will automatically detect wireless networks within its range. Find your host network in the AP list and click Connect. -
Page 18: Multi-Ssid Mode
Chapter 3 Set Up Internet Connection Via Quick Setup Wizard 3. Select the LAN IP type of the access point or leave the default setting Smart IP for most cases, and then click Next. 4. Click Finish to complete the configuration. Now your wired connected devices can enjoy the Internet surfing. - Page 19 Chapter 3 Set Up Internet Connection Via Quick Setup Wizard 2. Select the LAN IP type of the access point or leave the default setting Smart IP for most cases, and then click Next. 3. Click Finish to complete the configuration.
- Page 20 Chapter 3 Set Up Internet Connection Via Quick Setup Wizard 4. Connect your wireless devices to the different Wi-Fi networks to be isolated by VLANs.
-
Page 21: Chapter 4. Configure The Access Point
Chapter Configure the Access Point This chapter presents how to configure the various features of your access point. It contains the following sections: • Status • Operation Mode • Network • Wireless • System Tools • Logout... -
Page 22: Status
Chapter 4 Configure the Access Point 4. 1. Status 1. Visit http://tplinkap.net, and log in using the password you created. 2. Go to Status. You can view the current status information of the access point. • Firmware Version - The version information of the access point’s firmware. •... -
Page 23: Operation Mode
Chapter 4 Configure the Access Point • Received (Bytes) - Traffic in bytes received from the ETHERNET port. • Received (Packets) - Traffic in packets received from the ETHERNET port. • Sent (Bytes) - Traffic in bytes sent out from the ETHERNET port. •... -
Page 24: Dhcp Settings
Chapter 4 Configure the Access Point • MAC Address - The physical address of the LAN ports. The value can not be changed. • Type - Either select Smart IP(DHCP) to get IP address from DHCP server, or Static IP to configure IP address manually. -
Page 25: Dhcp Client List
Chapter 4 Configure the Access Point • Default Gateway (Optional) - It is suggested to input the IP address of the LAN port of the access point. The default value is 192.168.0.254. • Default Domain (Optional) - Input the domain name of your network. •... -
Page 26: Wireless
Chapter 4 Configure the Access Point 4. 4. Wireless 4. 4. 1. Wireless Settings 1. Visit http://tplinkap.net, and log in using the password you created. 2. Go to Wireless > Wireless Settings. 3. Four operation modes are supported here, including Access Point, Multi-SSID, Client, and Range... - Page 27 Chapter 4 Configure the Access Point • Enable Wireless Radio - Select or deselect this check box to allow or deny wireless stations to access the device. • Enable SSID Broadcast - Select or deselect this check box to allow or deny the device to broadcast its name (SSID) on the air.
- Page 28 Chapter 4 Configure the Access Point • 11g only - Only 802.11g wireless stations can connect to the device. • 11n only - Only 802.11n wireless stations can connect to the device. • 11bg mixed - Both 802.11b and 802.11g wireless stations can connect to the device.
- Page 29 Chapter 4 Configure the Access Point Range Extender Mode Wireless Bridge Setttings • Wireless Name of Remote AP - Enter the SSID of AP that you want to access or click Survey to find the network you want to connect to. •...
-
Page 30: Wireless Security
Chapter 4 Configure the Access Point • 11bg mixed - Both 802.11b and 802.11g wireless stations can connect to the device. • 11bgn mixed - All 802.11b, 802.11g and 802.11n wireless stations can connect to the device. • Channel Width - Determines the channel width to be used. - Page 31 Chapter 4 Configure the Access Point • Version - You can select one of following versions. • Automatic (Recommended) - Select WPA-Personal or WPA2-Personal automatically based on the wireless station’s capability and request. • WPA-PSK - Pre-shared key of WPA. •...
- Page 32 Chapter 4 Configure the Access Point • Key Type - You can select the WEP key length (64-bit, or 128-bit, or 152-bit.) for encryption. “Disabled” means this WEP key entry is invalid. • For 64-bit encryption - You can enter 10 hexadecimal digits (any combination of 0-9, a-f, A-F, zero key is not permitted) or 5 ASCII characters.
- Page 33 Chapter 4 Configure the Access Point • Automatic (Recommended) - Select WPA-Personal or WPA2-Personal automatically based on the wireless station’s capability and request. • WPA-PSK - Pre-shared key of WPA. • WPA2-PSK - Pre-shared key of WPA2. • Encryption - You can select either Automatic(Recommended), TKIP or AES. •...
- Page 34 Chapter 4 Configure the Access Point • Disable Security - Check this box radio button to disable wireless security. If disabled, the wireless stations will be able to connect this device without encryption. It is strongly recommended that you choose one of the security types to enable security. •...
- Page 35 Chapter 4 Configure the Access Point Range Extender • Disable Security - Check this box radio button to disable wireless security. If disabled, the wireless stations will be able to connect this device without encryption. It is strongly recommended that you choose one of the security types to enable security. •...
-
Page 36: Wps
Chapter 4 Configure the Access Point • Encryption - You can select either Automatic, TKIP or AES. • Radius Server IP - Enter the IP address of the Radius Server. • Radius Port - Enter the port used by radius service. •... - Page 37 Chapter 4 Configure the Access Point 1. Visit http://tplinkap.net, and log in using the password you created. 2. Go to WPS. 3. Follow one of the following three methods to connect your client device to the access point’s Wi-Fi network. Method ONE: Press the WPS Button on Your Client Device 1.
-
Page 38: Wireless Mac Filtering
Chapter 4 Configure the Access Point 3. A success message will appear on the WPS page if the client device has been successfully added to the access point’s network. Method Three: Enter the Access Point’s PIN 1. Keep the WPS Status as Enabled and get the Current PIN... -
Page 39: Wireless Advanced
Chapter 4 Configure the Access Point 4. Select Allow the stations specified by any enabled entries in the list to access as the filtering rule. 5. Delete all or disable all entries if there are any entries already. 6. Click Add New and fill in the blank. - Page 40 Chapter 4 Configure the Access Point • Transmit Power - Select High, Middle which you would like to specify for the access point. High is the default setting and recommended. • Beacon Interval - Enter a value between 40-1000 milliseconds for Beacon Interval here.
-
Page 41: Wireless Statistics
Chapter 4 Configure the Access Point 4. 4. 6. Wireless Statistics The configuration for each operation mode is almost the same, we take Access Point mode for example here. 1. Visit http://tplinkap.net, and log in using the password you created. 2. -
Page 42: System Tools
Chapter 4 Configure the Access Point • Rate - The Throughput unit. • Run Time - How long this function is running. • Transmit - Wireless transmit rate information. • Receive - Wireless receive rate information. Click Start/Stop to start or stop wireless throughput monitor. 4. -
Page 43: Diagnostic
Chapter 4 Configure the Access Point • Set Community - Enter the community name that allows Read/Write access to the Device’s SNMP information. The community name can be considered a group password. The default setting is “private”. • Set Source - Set source defines the IP address or subnet for management systems that can control this ‘set’... -
Page 44: Ping Watch Dog
Configure the Access Point • IP Address/Domain Name - Enter the destination IP address (such as 192.168.0.254) or Domain name (such as www.tp-link.com). • Pings Count - The number of Ping packets for a Ping connection. • Ping Packet Size - The size of Ping packet. -
Page 45: Firmware Upgrade
1. Download the latest firmware file for the access point from our website www.tp-link.com. 2. Visit http://tplinkap.net, and log in using the password you created. 3. Go to System Tools >... -
Page 46: Backup & Restore
Chapter 4 Configure the Access Point 4. 5. 6. Backup & Restore The configuration settings are stored as a configuration file in the access point. You can backup the configuration file in your computer for future use and restore the access point to the previous settings from the backup file when needed. -
Page 47: Password
Chapter 4 Configure the Access Point 4. 5. 8. Password 1. Visit http://tplinkap.net, and log in using the password you created. 2. Go to System Tools > Password, and you can change the factory default username and password of the access point. Note: The new password must be 6-32 characters long and not include any spacing. - Page 48 Chapter 4 Configure the Access Point • From - Your mail box address. The access point will connect it to send logs. • - Recipient’s mail address. The destination mailbox which will receive logs. • SMTP Server - Your smtp server. It corresponds with the mailbox filled in the From field.
-
Page 49: Logout
Chapter 4 Configure the Access Point • Save Log - Click to save all the logs in a txt file. • Mail Log - Click to send an email of current logs manually according to the address and validation information set in Mail Settings. •... -
Page 50: Faq
Q1. How do I restore the access point to its factory default settings? With the access point powered on, use a pin to press and hold the Reset button until the Power LED starts blinking, then release the button. Note: Upon resetting, all previous configurations will be cleared, and the access point will reset to the default Access Point Mode. - Page 51 the range of the host router. If that is not possible, place it closer to your wireless router to ensure stable performance. • Less Obstacles Ensure Better Performance Choose a location with less obstacles that may block the signal between the access point and the host network.
- Page 52 Specifications are subject to change without notice. is a registered trademark of TP-Link Technologies Co., Ltd. Other brands and product names are trademarks or registered trademarks of their respective holders. No part of the specifications may be reproduced in any form or by any means or used to make any derivative such as translation, transformation, or adaptation without permission from TP-Link Technologies Co., Ltd.
- Page 53 Component Name Model I.T.E. Power Supply T090085-2B1 Responsible party: TP-Link USA Corporation, d/b/a TP-Link North America, Inc. Address: 145 South State College Blvd. Suite 400, Brea, CA 92821 Website: http://www.tp-link.com/us/ Tel: +1 626 333 0234 Fax: +1 909 527 6803 E-mail: sales.usa@tp-link.com...
- Page 54 20 cm from all persons and must not be co- located or operating in conjunction with any other antenna or transmitter.” We, TP-Link USA Corporation, has determined that the equipment shown as above has been shown to comply with the applicable technical standards, FCC part 15. There is no unauthorized change is made in the equipment and the equipment is properly maintained and operated.
- Page 55 television reception, which can be determined by turning the equipment off and on, the user is encouraged to try to correct the interference by one or more of the following measures: • Reorient or relocate the receiving antenna. • Increase the separation between the equipment and receiver. •...
- Page 56 OPERATING FREQUENCY (the maximum transmitted power) 2412MHz—2483.5MHz(20dBm) EU declaration of conformity TP-Link hereby declares that the device is in compliance with the essential requirements and other relevant provisions of directives 2014/53/EU, 2009/125/EC 2011/65/EU and (EU)2015/863. The original EU declaration of conformity may be found at https://www.tp-link.com/en/ce...
- Page 57 Industry Canada Statement CAN ICES-3 (B)/NMB-3(B) Korea Warning Statements: 당해 무선설비는 운용중 전파혼신 가능성이 있음. NCC Notice & BSMI Notice: 注意! 依據 低功率電波輻射性電機管理辦法 第十二條 經型式認證合格之低功率射頻電機,非經許可,公司、商號或使用者均不得擅 自變更頻率、加大功率或變更原設計之特性或功能。 第十四條 低功率射頻電機之使用不得影響飛航安全及干擾合法通行;經發現有干擾現象 時,應立即停用,並改善至無干擾時方得繼續使用。前項合法通信,指依電信規定作業 之無線電信。低功率射頻電機需忍受合法通信或工業、科學以及醫療用電波輻射性電機 設備之干擾。 安全諮詢及注意事項 • 請使用原裝電源供應器或只能按照本產品注明的電源類型使用本產品。 • 清潔本產品之前請先拔掉電源線。請勿使用液體、噴霧清潔劑或濕布進行清潔。 • 注意防潮,請勿將水或其他液體潑灑到本產品上。 • 插槽與開口供通風使用,以確保本產品的操作可靠並防止過熱,請勿堵塞或覆蓋 開口。...
- Page 58 Продукт сертифіковано згідно с правилами системи УкрСЕПРО на відповідність вимогам нормативних документів та вимогам, що передбачені чинними законодавчими актами України. Safety Information • Keep the device away from water, fire, humidity or hot environments. • Do not attempt to disassemble, repair, or modify the device. •...