
Related Manuals for Heat Controller COMFORT-AIRE RG-51-5


Summary of Contents for Heat Controller COMFORT-AIRE RG-51-5
- Page 1 RG-51-5 CAUTION • BEFORE SERVICING THE UNIT, READ THE SAFETY PRECAUTIONS IN THIS MANUAL. • ONLY FOR AUTHORIZED SERVICE PERSONNEL.
-
Page 2: Table Of Contents
Air Conditioner Service Manual TABLE OF CONTENTS Safety Precautions............................3 Dimensions ..............................7 Outside Dimensions ...........................7 Product Specifications ..........................8 Installation ...............................9 Select the Best Location ..........................9 How to Install ..............................9 Installation Kits Contents .........................10 How to Secure the Drain Pipe ........................11 Operation ..............................12 Feature ..............................12 About the Controls of the Air Conditioner ....................13... -
Page 3: Safety Precautions
Safety Precautions Safety Precautions Safety Precautions Safety Precautions Safety Precautions Safety Precautions Safety Precautions Safety Precautions To prevent injury to the user or other people and property damage, the following instructions must To prevent injury to the user or other people and property damage, the following instructions must To prevent injury to the user or other people and property damage, the following instructions must To prevent injury to the user or other people and property damage, the following instructions must be followed. - Page 4 Safety Precautions Safety Precautions Safety Precautions Safety Precautions Operation Operation Operation Operation Plug in the power plug prop- Plug in the power plug prop- Plug in the power plug prop- Plug in the power plug prop- Do not operate or stop the Do not operate or stop the Do not operate or stop the Do not operate or stop the...
- Page 5 Close all doors, windows and other outside Ventilate before operating air conditioner openings to the room. when gas goes out. • The air conditioner must be operated in a enclosed • It may cause explosion, fire, and burn. area to be most effective. If water enters the product, turn off the power Do not clean the air conditioner with water.
- Page 6 Operation Operation Be cautious not to touch the Hold the plug by the head Unplug the air conditioner if sharp edges when installing when taking it out. it will not be used for a long period. • It may cause injury. •...
-
Page 7: Dimensions
Dimensions Dimensions Symbols Used in this Manual This symbol alerts you to the risk of electric shock. This symbol alerts you to hazards that could cause harm to the air conditioner. This symbol indicates special notes. NOTICE Outside Dimensions Model All Model Dimension mm(inch) -
Page 8: Product Specifications
Product Specifications Product Specifications Product Specifications Product Specifications Product Specifications Product Specifications Product Specifications Product Specifications MODELS MODELS MODELS MODELS RG-51-5 ITEMS ITEMS ITEMS ITEMS COOLING CAPACITY (BTU/h) COOLING CAPACITY (BTU/h) COOLING CAPACITY (BTU/h) COOLING CAPACITY (BTU/h) 5,000 POWER SUPPLY (Phase, V, Hz) POWER SUPPLY (Phase, V, Hz) POWER SUPPLY (Phase, V, Hz) POWER SUPPLY (Phase, V, Hz) -
Page 9: Installation
Installation Installation This air conditioner is designed with a button-down chassis so it can be easily installed in a window. Select the Best Location 1. To prevent vibration and noise, make sure the unit is installed securely and firmly. 2. Install the unit where the sun does not shine directly on INSIDE OUTSIDE the unit. -
Page 10: Installation Kits Contents
Installation Installation Kits Contents(some Models) HARDWARE TYPE A: 14EA TYPE B: 2EA TYPE C: 2EA TYPE D: 3EA (SHORT SCREW) (WOOD SCREW) (WOOD SCREW) (L BACKET) TYPE E: 1EA TYPE F: 1EA TYPE G: 2EA TYPE H: 1EA (SEAL STRIP) (SASH SEAL) (GUIDE PANEL) (UPPER GUIDE) -
Page 11: How To Secure The Drain Pipe
Installation CAUTION: During the following step, hold unit firmly until window sash is lowered to top channel behind side panel frames. Personal injury or property damage may result if unit falls from window. 3. Install the Air Conditioner in the Window a. -
Page 12: Operation
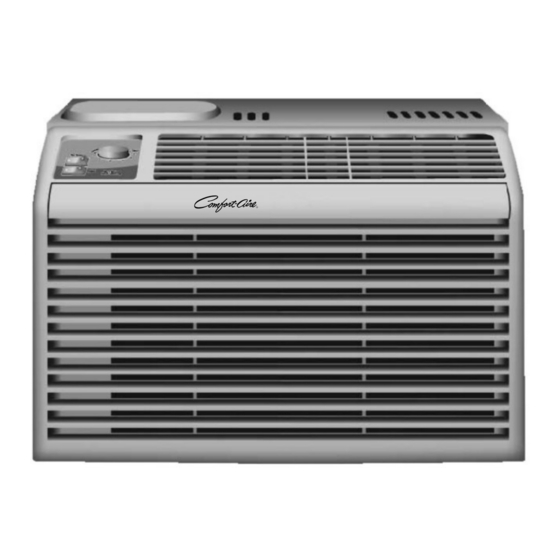
Operation Operation Feature • DESIGNED FOR COOLING ONLY • POWERFUL AND INCREDIBLE COOLING • TOP-DOWN CHASSIS FOR THE SIMPLE INSTALLATION AND SERVICE • BUILT-IN ADJUSTABLE THERMOSTAT • WASHABLE ONE-TOUCH FILTER • COMPACT SIZE Insulation Resistance Test 1. Unplug the power cord and connect a jumper between 2 pins (black and white). 2. - Page 13 POWER -Turns air conditioner off. FAN SPEED "Low" Low speed fan operation with cooling or not. FAN SPEED "High" Hi speed fan operation with cooling or not. This automatically controls the temperature of indoor air. Turn the knob so that arrow points to the cooler marks for more moderate cooling.
-
Page 14: Disassembly
Disassemblyly Disassembly Mechanical Parts 1. FRONT GRILLE 1. Disconnect the unit from source of power. 2. Using a screwdriver, remove the screw from the front grille. (See Figure 13) 3. Push the front grille up from the bottom. Pull the top of the front grille away from the cabinet as the top tabs lift out of their slots. -
Page 15: Air Handling Parts
Disassembly Air Handling Parts 4. AIR GUIDE UPPER 1. Disconnect the unit from the power source. 2. Remove the front grille. (Refer to Section 1) 3. Remove the cabinet. (Refer to Section 2) 4. Remove the control board. (Refer to Section 3) 5. -
Page 16: Electrical Parts
Disassembly 6. MOTOR 1. Disconnect the unit from the power source. 2. Remove the front grille. (Refer to Section 1) 3. Remove the cabinet. (Refer to Section 2) 4. Remove the control panel. (Refer to Section 3) 5. Remove the air guide upper. (Refer to Section 4) 6. -
Page 17: Refrigerating Cycle
Disassembly Disassembly Disassembly Disassembly 10. CAPACITOR 10. CAPACITOR 10. CAPACITOR 10. CAPACITOR 1. Remove the cabinet. (Refer to Section 2) 1. Remove the cabinet. (Refer to Section 2) 1. Remove the cabinet. (Refer to Section 2) 1. Remove the cabinet. (Refer to Section 2) Figure 26 2. - Page 18 Disassembly 15. EVAPORATOR slowly with the two full turns 1. Remove the cabinet. (Refer to Section 2) counter-clockwise. This will keep oil 2. Discharge the refrigerant by using a refrigerant from foaming and being drawn into recovery system. the vacuum pump. 3.
- Page 19 Disassembly Equipment needed: Vacuum pump, charging cylinder, manifold gauge, brazing equipment, pinch-off tool capable of making a vapor proof seal, leak detector, tubing cutter, hand tools to remove components and service valve. COMPOUND GAUGE MANIFOLD GAUGE CONDENSER SEE INSETS (HIGH PRESSURE SIDE) BELOW COMPRESSOR EVAPORATOR...
-
Page 20: Schematic Diagram
Schematic Diagram Schematic Diagram Circuit Diagram REF. NO DESCRIPTION & NAME Q'TY FAN MOTOR MAIN PCB DISPLAY TERMITOR COMPRESSOR POWER CORD ASSY CAPACITOR OVERLOAD PROTECTOR 20 Room Air Conditioner... -
Page 21: Electronic Control Device
Schematic Diagram Electronic Control Device Service Manual 21... -
Page 22: Components Location(For Main P.w.b Asm)
Trouleshooting Glwide Components Location (For Main P.W.B ASM) 22 Room Air Conditioner... -
Page 23: Troubleshooting Guide
Troubleshooting Guide Troubleshooting Guide Piping System CONDENSER COILS MOTOR CAPILLARY TUBE TURBO FAN EVAPORATOR COILS Following is a brief description of the important components and their function in what is called the refrigeration system. Reference should be made to Figure 32 to follow the refrigerating cycle and the flow of the refrigerant in the cooling cycle. -
Page 24: Troubleshooting Guide
Troubleshooting Guide Troubleshooting Guide In general, possible trouble is classified in two kinds. The one is called Starting Failure which is caused by an electrical defect. The other is Ineffective Air Conditioning caused by a defect in the refrigeration circuit and improper application. Unit is running but cooling is ineffective. - Page 25 Troubleshooting Guide Fails to Start Check of circuit breaker Check of power source. and fuse. Check of control switch Gas leakage of feeler setting. bulb of thermostat. Check control switch. Compressor fails only to Fan only fails to start. start. Improper wiring.
- Page 26 Troubleshooting Guide ELECTRIC PARTS TROUBLESHOOTING GUIDE: Possible Trouble 1 • The unit does not operate. • Check the Fuse. Is the Trans input power • Check the wiring diagram. AC 115V? • Check the Main Is the Trans output power Is shorted the Trans.
- Page 27 Troubleshooting Guide Possible Trouble 2 • The compressor does not operate. Is Temp. setting set lower than Room • Set the Temp. setting to lower Temp. Temp.-0.5°C? Is the voltage No.10 Is the voltage N0.7 of Is the Unit for 3 minutes of IC01M 0V? IC01M DC 5V? delay?
- Page 28 Troubleshooting Guide • Romote controller does not operate. Possible Trouble 5 Is the voltage of Battery • Exchange the battery. about over 2.3V? Is the voltage No.16 • Check the P.W.B pattern. of CN-DISP1 on Main P.W.B Ass'y DC 5V? •...
- Page 29 Troubleshooting Guide Room Air Conditioner Voltage Limits NAME PLATE RATING MINIMUM MAXIMUM 115V ± 10% 103.5V 126.5V COMPLAINT CAUSE REMEDY Fan motor will not run. No power Check voltage at outlet. Correct if none. Power supply cord Check voltage to rotary switch. If none, check power supply cord.
- Page 30 Troubleshooting Guide COMPLAINT CAUSE REMEDY Fan motor noise. Tubo Fan If cracked, out of balance, or partially missing, replace it. Axial Fan If cracked, out of balance, or partially missing, replace it. Loose set screw Tighten it. Worn bearings If knocking sounds continue when running or loose, replace the motor.
- Page 31 Troubleshooting Guide COMPLAINT CAUSE REMEDY Compressor cycles on Fan motor If not running, determine the cause. Replace if overload. required. Condenser air flow Remove the cabinet, inspect the interior surface restriction of the condenser. If restricted, clean carefully with a vacuum cleaner (do not damage fins) or brush.
-
Page 32: Exploded View
Exploded View Exploded View 264110 159830 149410 238310 266002-2 266002-1 137215 269310 147582-2 554030 147582-1 359011 148000 W0CZZ 135312 W48602 352380-1 346811 352115 W48602 249950 552113 349480 35211A 35211A 149980 354210 359012 352113 130910 352380-2 567502 130410 749740 554160 550140 26 Room Air Conditioner... -
Page 33: Replacement Parts List
Replacement Parts List Replacement Parts List Replacement Parts List RG-51-5 LocNo P/NO REMARK DESCRIPTION 130410 3041A10040P BASE ASSY SINGLE 352380-1 5238A10026A GUIDE ,AIR 352380-2 5238A10025A GUIDE ,AIR 349480 4948A20031B ORIFICE 148000 4800A30012A SUPPORTER 149980 4998A10028B SHROUD 359011 5900A20042A FAN,AXIAL 346811 4681A20116N MOTOR ASSEMBLY, AC 359012... - Page 34 February, 2007 P/No.: 3828A20517B Printed in China...