Table of Contents
Advertisement
Quick Links
Heavy-Gauge Charcoal Drum
Tambor de Grueso Calibre para Carbón
OWNER'S MANUAL
ASSEMBLY AND OPERATING IN STRUC TIONS
MANUAL DEL PROPIETARIO
INSTRUCCIONES DE ARMADO Y OPERACIÓN
SAVE THIS MANUAL FOR FUTURE REFERENCE
GUARDE ESTE MANUAL PARA REFERENCIA FUTURA
WARNING
NOTICE TO INSTALLER:
LEAVE THESE INSTRUCTIONS WITH
READ AND FOLLOW ALL WARNINGS AND
INSTRUCTIONS IN THIS MANUAL TO AVOID
THE GRILL OWNER FOR FUTURE
PERSONAL INJURY OR PROPERTY DAMAGE.
REFERENCE .
ADVERTENCIA
AVISO PARA EL INSTALADOR:
LEA Y SIGA TODAS LAS ADVERTENCIAS E
ENTREGUE ESTAS INSTRUCCIONES AL
INSTRUCCIONES EN ESTE MANUAL PARA
PROPIETARIO DE LA PARRILLA PARA
EVITAR LESIONES PERSONALES O DAÑOS
REFERENCIA FUTURA.
MATERIALES.
Advertisement
Table of Contents

Related Manuals for Brinkmann 855-3303-S


Summary of Contents for Brinkmann 855-3303-S
- Page 1 Heavy-Gauge Charcoal Drum Tambor de Grueso Calibre para Carbón OWNER’S MANUAL ASSEMBLY AND OPERATING IN STRUC TIONS MANUAL DEL PROPIETARIO INSTRUCCIONES DE ARMADO Y OPERACIÓN SAVE THIS MANUAL FOR FUTURE REFERENCE GUARDE ESTE MANUAL PARA REFERENCIA FUTURA WARNING NOTICE TO INSTALLER: LEAVE THESE INSTRUCTIONS WITH READ AND FOLLOW ALL WARNINGS AND INSTRUCTIONS IN THIS MANUAL TO AVOID...
-
Page 2: Important Safety Warnings
IMPORTANT SAFETY WARNINGS WE WANT YOU TO ASSEMBLE AND USE YOUR GRILL AS SAFELY AS POSSIBLE. THE PURPOSE OF THIS SAFETY ALERT SYMBOL IS TO ATTRACT YOUR ATTENTION TO POSSIBLE HAZARDS AS YOU ASSEMBLE AND USE YOUR GRILL. WHEN YOU SEE THE SAFETY ALERT SYMBOL, PAY CLOSE ATTENTION TO THE INFORMATION WHICH FOLLOWS! READ ALL SAFETY WARNINGS AND INSTRUCTIONS CAREFULLY BEFORE ASSEMBLING AND OPERATING YOUR GRILL. - Page 3 • We advise that a fire extinguisher be on hand. Refer to your local authority to determine proper size and type of fire extinguisher. • Accessory attachments not manufactured by The Brinkmann Corporation for this particular product are not recommended and may lead to personal injury or property damage.
- Page 4 ASSEMBLY INSTRUCTIONS READ ALL SAFETY WARNINGS & ASSEMBLY INSTRUCTIONS CAREFULLY BEFORE ASSEMBLING OR OPERATING YOUR GRILL. FOR MISSING PARTS, PLEASE CALL CUSTOMER SERVICE AT 800-527-0717. Inspect contents of the box to ensure all parts are included and undamaged. We recommend two people work together when as sem bling this unit. The following tools are required to assemble this Charcoal Drum: •...
-
Page 5: Parts Bag Contents
Parts Bag Contents 25 M6 X 12 mm Bolts 16 Flat Washers 2 M12 Nuts 25 M5 Nuts 1 M6 Cap Nut 1 M6 Spring 1 M5 X 14 mm Shoulder Bolt 1 M6 X 14 mm Shoulder Bolt M12 Nuts M6 X 12 mm Bolts M5 X 14 mm Shoulder Bolt M6 X 14 mm Shoulder Bolt... - Page 6 Clear an assembly area and get a friend Smoke Stack Opening to help you put your smoker together. Lay card board down to protect smoker finish and assembly area. Grill Body Assembly Step 1 Place the grill body assembly on its end with the lid open.
- Page 7 Bottom View Grill Body Step 4 Assembly Attach the left front and rear legs (with M6 X12 mm wheel axle holes) to the grill body Bolts assembly. First, insert the bottom shelf M6 Flat into the left rear leg, then move bolted Washers end of leg until bolts align with holes in the grill body assembly.
- Page 8 Step 6 Attach the air shutter door and air shutter to the left side of grill body assembly using M5 shoulder bolt as illustrated. Then attach M6 shoulder for door latch. Air Vent Door Air Vent M6 Shoulder Bolt M5 Shoulder Bolt Smoke Stack Step 7...
- Page 9 Step 8 M6 Cap Nut Place smoke stack damper and M6 spring onto pre-attached bolt on smoke stack as M6 Spring illustrated. Then screw on M6 cap nut to secure. Smoke Stack Damper Smoke Stack Step 9 Cooking Grills Open lid. Place heat distribution plate on top of fire pot down inside grill body as- sembly.
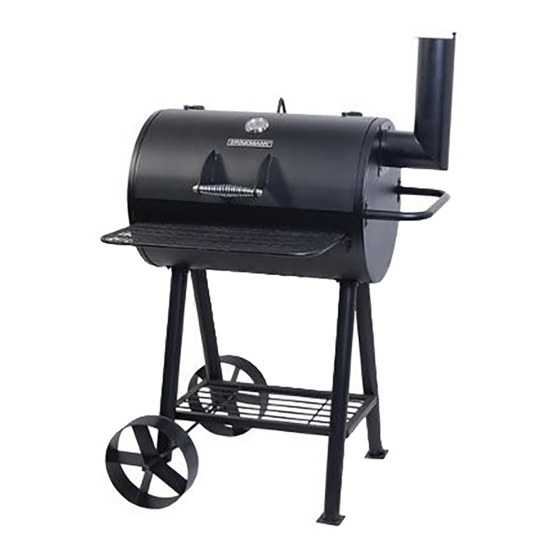
- Page 10 Heavy-Gauge Charcoal Drum (Assembled)
-
Page 11: Preparation For Use & Lighting In Struc Tions
PRO TECT ED FROM THE WIND. READ ALL SAFETY WARNINGS AND INSTRUCTIONS CAREFULLY BEFORE OPERATING YOUR GRILL. Prior to your first use of the Brinkmann Charcoal Drum, follow the in struc tions below Curing Your Grill carefully to cure your grill. Curing your grill will minimize damage to the exterior finish as well as rid the grill of paint odor that can impart unnatural flavors to the first meal prepared on your Brinkmann Charcoal Drum. - Page 12 1 hour then allow unit to cool completely. NOTE: Never exceed a temperature of 450°F in cooking chamber. It is important that the exterior of the smoker is not scraped or rubbed during the curing process. YOUR BRINKMANN CHARCOAL DRUM IS NOW CURED AND READY FOR USE.
- Page 13 OPERATING INSTRUCTIONS PLACE THE GRILL OUTDOORS ON A HARD, LEVEL, NON-COMBUSTIBLE SURFACE AWAY FROM ROOF OVERHANG OR ANY COMBUSTIBLE MATERIAL. NEVER USE ON WOODEN OR OTHER SURFACES THAT COULD BURN. PLACE THE GRILL AWAY FROM OPEN WIN DOWS OR DOORS TO PREVENT SMOKE FROM ENTERING YOUR HOUSE.
-
Page 14: Smoke Cooking Tips
Step 5 Open the air shutter approximately 1” to 2” and smokestack damper half way. With lid open, stand back and carefully light charcoal and allow to burn until covered with a light ash (ap prox i mate ly 20 minutes). WARNING: Charcoal lighting fluid must be allowed to com plete ly burn off prior to closing firebox lid (approximately 20 minutes). - Page 15 Step 1 Grilling In Cooking Chamber Remove cooking grills from cooking cham ber and set aside. Place charcoal grates lowest level of cooking chamber. Step 2 Place a tin can on the grease cup holder. A tin can must be placed under the grease hole at all times.
-
Page 16: Flavoring Wood
IF USING LIGHTER FLUID, PROCEED TO STEP 8 If using pre-treated charcoal, follow all manufacturer’s warnings and instructions regarding the use of their product. Start with 8 pounds of charcoal in cooking chamber. Open the air shutter approximately 1” to 2” and smokestack damper halfway. -
Page 17: Adding Charcoal/Wood During Cooking
Additional charcoal and/or wood may be re quired to maintain or increase cooking Adding Charcoal/Wood tem per a ture. During Cooking Step 1 Stand back and carefully open cooking chamber lid. Use caution since flames can flare-up when fresh air suddenly comes in contact with fire. Step 2 Wearing oven mitts/gloves, remove food and cooking grills. -
Page 18: After-Use Safety
• To protect your smoker from excessive rust, the unit must be properly cured and covered at all times when not in use. A Charcoal Drum cover may be ordered directly from Brinkmann by calling 800-468-5252. • Wash cooking grills and charcoal grates with hot, soapy water, rinse well and dry. - Page 19 1-YEAR LIMITED WARRANTY For 1-year from date of purchase, The Brinkmann Corporation warrants the Charcoal Drum against defects due to workmanship or materials to the original pur chas er. The Brinkmann Corporation’s obligations under this warranty are limited to the following guidelines: •...