Table of Contents
Advertisement
Quick Links
31/01/2022, 19:00
Dashboard
Community
Support
Contact Sales
»
Home
MR36H Installation Guide
Last updated: Dec 7, 2021
MR36H Installation Guide
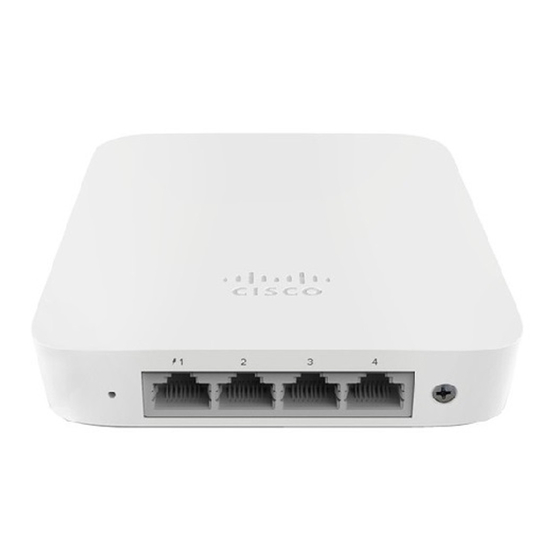
The Cisco Meraki MR36H is a dual-band 802.11ax cloud-managed access point with integrated Ethernet ports.
Designed for room wireless and wired connectivity, the MR36H is easy to install on the wall on a single gang
box, and is the rst cloud managed hospitality AP.
About this Guide
This guide provides instructions on how to install and con gure your MR36H access points. This guide also
provides mounting instructions and limited troubleshooting procedures. For more wireless installation guides,
refer to the
wireless installation guides section
Product Overview
Physical Speci cations
MR36H
Interfaces
1x Gigabit Ethernet (RJ45) with 802.3af Power over Ethernet output *
2x Gigabit Ethernet (RJ45) outputs
1 to 1 Passthrough port
How can we help you?
*it can work with 802.3af with lower capabilities
https://documentation.meraki.com/MR/MR_Installation_Guides/MR36H_Installation_Guide
MR - Wireless LAN
MR36H Installation Guide - Cisco Meraki
»
MR Installation Guides
on our documentation website.
»
MR
1/21
Advertisement
Table of Contents

Related Manuals for Cisco Meraki MR36H


Summary of Contents for Cisco Meraki MR36H
- Page 1 Last updated: Dec 7, 2021 MR36H Installation Guide The Cisco Meraki MR36H is a dual-band 802.11ax cloud-managed access point with integrated Ethernet ports. Designed for room wireless and wired connectivity, the MR36H is easy to install on the wall on a single gang box, and is the rst cloud managed hospitality AP.
-
Page 2: Package Contents
31/01/2022, 19:00 MR36H Installation Guide - Cisco Meraki Power Power over Ethernet: 37 - 57 (802.3at compatible) Power consumption: 25W max (802.3at) Power over Ethernet injector sold separately Environment Operating temperature: 32 °F to 104 °F (0 °C to 40 °C) ... -
Page 3: Mount Cradle
31/01/2022, 19:00 MR36H Installation Guide - Cisco Meraki Mount cradle Mount Kit Wall screws, wall screw anchors, and security screws Eject/Security Screw tool How can we help you? https://documentation.meraki.com/MR/MR_Installation_Guides/MR36H_Installation_Guide 3/21... -
Page 4: Security Features
31/01/2022, 19:00 MR36H Installation Guide - Cisco Meraki Security Features The MR36H features multiple options for physically securing the access point after installation: 1. Security screw – The accessory kit includes screws that can be used to secure the access point to the mount cradle. - Page 5 31/01/2022, 19:00 MR36H Installation Guide - Cisco Meraki LAN Access Ports The MR36H features 3x LAN ports labeled 1 through 3. Port 1 may provide 802.3af out to an end device if the MR36H is powered via a 802.3at power source. Con guration details can be found in the AP port pro les article. ...
-
Page 6: Power Source Options
31/01/2022, 19:00 MR36H Installation Guide - Cisco Meraki Power Source Options The MR36H access point can be powered via PoE using either the Meraki PoE Injector (sold separately), or a PoE switch. The MR36H will function in low power mode when powered by a 802.3af power source. While in low power mode, the MR36H will disable 802.3af out on the LAN1 port. - Page 7 31/01/2022, 19:00 MR36H Installation Guide - Cisco Meraki A - System Status LED B - Ethernet status LEDs System Status The MR36H is equipped with a multi-color LED light on the front of the unit on the top right to convey information about system functionality and performance.
-
Page 8: Pre-Install Preparation
31/01/2022, 19:00 MR36H Installation Guide - Cisco Meraki Orange - AP is booting (permanent Orange suggests hardware issue) Blinking Orange - AP can't nd uplink Rainbow - AP is initializing/scanning Blue - AP in Gateway mode with clients Blinking Blue - AP is upgrading... -
Page 9: Configure Your Network In Dashboard
31/01/2022, 19:00 MR36H Installation Guide - Cisco Meraki You should complete the following steps before going on-site to perform an installation. Configure Your Network in Dashboard The following is a brief overview only of the steps required to add an MR36H to your network. For detailed instructions about creating, configuring and managing Meraki wireless networks, refer to the online... -
Page 10: Collect Tools
31/01/2022, 19:00 MR36H Installation Guide - Cisco Meraki Static Assignment Static IPs are assigned using the local web server on each AP. The following procedure describes how to set the static IP: 1. Using a client machine (e.g., a laptop), connect to the AP wirelessly (by associating to any SSID broadcast by the AP) or over a wired connection. -
Page 11: Installation Instructions
31/01/2022, 19:00 MR36H Installation Guide - Cisco Meraki Installation Instructions Warning: Due to the heat dissipation in the back of APs during normal operation, please do not stack powered How can we help you? on APs on top of each other during pre-installation to avoid heat damage. -
Page 12: Choose Your Mounting Location
31/01/2022, 19:00 MR36H Installation Guide - Cisco Meraki Choose Your Mounting Location A good mounting location is important to getting the best performance out of your MR36H access point. Keep the following in mind: 1. The device should have an unobstructed line of sight to most coverage areas for highest performance. - Page 13 C ad e 31/01/2022, 19:00 MR36H Installation Guide - Cisco Meraki To attach the MR36H to the mount cradle properly, line up the top edge of the AP with the top tab of the mount cradle. Since the cradle is already mounted to the wall, guide the MR36H towards the top tab and insert the top tabs into the MR36H’s slot.
- Page 14 31/01/2022, 19:00 MR36H Installation Guide - Cisco Meraki Secure the MR36H Depending on your mounting environment, you may want to secure the MR36H to its mount location. Your MR36H can be secured via security screw (Torx security screws are included).
- Page 15 31/01/2022, 19:00 MR36H Installation Guide - Cisco Meraki Ejecting MR36H from mount plate To release the MR36H from the mount cradle, rst remove the security screw that secures the MR36H to the cradle’s bottom tab. While holding the MR36H with one hand, use the eject tool to trigger the release mechanism.
-
Page 16: Verify Device Functionality And Test Network Coverage
31/01/2022, 19:00 MR36H Installation Guide - Cisco Meraki Verify Device Functionality and Test Network Coverage 1. Check LEDs 1. The Power LED should be solid green (or blue, if clients are connected). If it is flashing blue, the firmware is upgrading and the LED should turn green when the upgrade is completed (normally within a few minutes). -
Page 17: Basic Troubleshooting
31/01/2022, 19:00 MR36H Installation Guide - Cisco Meraki 2. Verify access point connectivity 1. Use any 802.11 client device to connect to the MR36H and verify proper connectivity using the client’s web browser. 3. Check network coverage 4. Confirm that you have good signal strength throughout your coverage area. You can use the signal strength meter on a laptop, smart phone, or other wireless device. -
Page 18: Warranty
If you are still experiencing hardware issues, please contact Cisco Meraki support by logging in to dashboard and use the Help option near the top of the page, then open an email case or call using the contact information on that page. - Page 19 Meraki MR36H devices have been tested and found to comply with the limits for a Class B digital device, pursuant to part 15 of the FCC rules. These limits are designed to provide reasonable protection against harmful interference in a residential installation.
- Page 20 31/01/2022, 19:00 MR36H Installation Guide - Cisco Meraki © Copyright 2022 Cisco Meraki Powered by CXone Expert ® Company About Meraki Careers Privacy Trust GDPR Terms of Use Partners Partner Portal Login Become a Partner Manage Service Providers Service Providers...
- Page 21 31/01/2022, 19:00 MR36H Installation Guide - Cisco Meraki How can we help you? https://documentation.meraki.com/MR/MR_Installation_Guides/MR36H_Installation_Guide 21/21...