Table of Contents
Advertisement
Advertisement
Table of Contents

Related Manuals for Avery Dennison Monarch 9844


Summary of Contents for Avery Dennison Monarch 9844
- Page 2 © 1997-2008 by Avery Dennison. All rights reserved. Monarch®, 9844, and 9854 are trademarks of Paxar Americas, Inc. Avery Dennison® is a trademark of Avery Dennison Corp. Reprinting and reproduction of these documents, including extracts, is only allowed with the express permission of the manufacturer. More detailed information is available from your supplier.
-
Page 3: Safety Information
Warning notes and warning symbols are also attached directly to the printer and components. Pay attention to these safety notes as well. Warnings in the text Important information that must be followed is marked as follows:... -
Page 4: General Safety Notes
For this reason: Make sure that the printer’s power supply socket is readily accessible! In case of emergency, turn off the printer and disconnect the power supply cable! Keep these operating instructions in a safe place and make sure they are read. - Page 5 Protect against injuries that can result from electrical current WARNING! The printer is connected to a power supply! Contact with live electrical components can result in life-threatening currents through the body and burns. Only use the printer with the cover closed.
- Page 6 WEEE directives. Any product or accessory marked with the WEEE symbol must be returned to a designated collection facility. For proper disposal of the printer outside the U.S., send the printer and its accessories to: Paxar EMEA, 4 Awberry Court...
- Page 7 05/08 Rev. AB OPERATOR’S HANDBOOK Safety FCC Regulations - Class B WARNING This equipment has been tested and found to comply with the limits for a Class B digital device, pursuant to Part 15 of the FCC Rules. These limits are designed to provide reasonable protection against harmful interference when the equipment is operated in a commercial environment.
-
Page 8: Table Of Contents
Operating Modes...1-11 Using the Printer ...1-13 Connecting the Printer ...1-13 Setting the Interface ...1-14 Using the 9854 Printer with Internal Liner Takeup ...1-14 Using the 9854 Printer with Dispenser ...1-15 Offline Operation ...1-16 Online Operation...1-17 Creating a Print job ...1-18 Sending a Print Job ...1-18... -
Page 9: Getting Started
05/08 Rev. AB OPERATOR’S HANDBOOK 9844/9854 Getting Started Installing the Printer About the Printer Using the Printer... -
Page 10: Installing The Printer
1. Remove all loose objects from the packaging. 2. Carefully lift the printer and packaging out of the box. CAUTION! - Do not lift the printer by holding the plastic parts on the front and back! This could damage the printer. -
Page 11: Printer Contents
Internal Liner Housing front part, bottom side with screw (Fig. 3 right side) Takeup Reel Use the housing parts if the printer does not have the internal liner takeup reel (rewinder). Fig. 3: These housing parts are shipped loose with the printer with internal liner takeup. -
Page 12: Terms To Know
Foil OPERATOR’S HANDBOOK 9844/9854 Peel mode. The printer separates the backing paper from the label as it prints. The printer stops after each label to allow you to remove it. Supply (labels, tags, etc.) Labels Material (supply) sensor Die cut sensor Black mark/aperture sensor Die cut supply. -
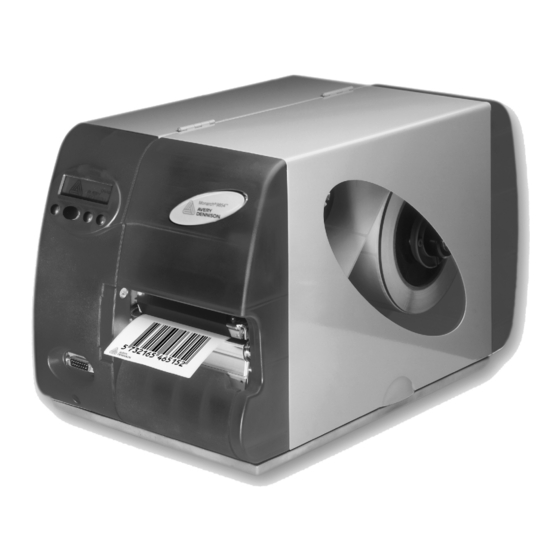
Page 13: About The Printer
Open when loading the material or foil or to clean the printhead or printing roller. Fig. 5: Operating parts. OPERATOR’S HANDBOOK 9844/9854 Adapter rings To set the core to the material roll’s diameter. Getting Started Cover Open to insert material and foil (ribbon). - Page 14 Press the button to release the Fig. 6: Additional operating parts of the printer with dispenser. Deflects the printed label without dispensing any Fig. 7: Additional operating parts of the printer with internal liner takeup. OPERATOR’S HANDBOOK 9844/9854 paper. sensor. tight over the dispensing roller.
-
Page 15: About The 9854 Dispenser (Peel) And Internal Liner Takeup
05/08 Rev. AB About the 9854 Dispenser (Peel) and Internal Liner Takeup The 9854 printer has an internal liner takeup reel, which allows labels to be dispensed (using the dispensing edge) or rewound inside the printer (using the deflector) after printing. -
Page 16: Identifying Printer Connections
05/08 Rev. AB Identifying Printer Connections CAUTION! - Only use approved add-on devices or damage to the printer may occur. Only connect devices that fulfill SELV (Safety Extra-Low Voltage) circuit requirements to EN 60950. Connect only original accessories. Refer to the “Advanced Applications” section on your CD-ROM for more information about the 9854 network connection. -
Page 17: Safety Information
The warning sign shown in Fig. 9 explains the risk of getting hands, fingers, loose clothing, jewelry, etc. caught between rotating parts of the printer. The warning sign shown in Fig. 9 warns of the risk of getting hands or fingers burned at hot surfaces close to the printhead. -
Page 18: Using The Control Panel (Display)
Scrolls down through the menu and selects menu items • Decreases values • Feed Button Feeds material when the printer is offline • Starts the printing process once feed has been stopped (in online mode) • Scrolls up through the menu and selects menu items •... -
Page 19: Operating Modes
Display OFFLINE Tab. 1:Display in offline mode. Settings can be made when the printer is offline. The offline mode is normally active when the printer is turned on. Print jobs are received with the selected interface, but not processed. To configure the printer so it goes online when turned on, set the following parameter to Online: SYSTEM PARAMETER >... - Page 20 Standalone In standalone mode, the print jobs are not transferred with a data cable, but Mode are stored on a Compact Flash card. They are selected from the printer’s (9854 only) display or a keyboard connected to the printer. Refer to the “Advanced Applications” section on your CD-ROM for more information on using standalone mode for the 9854 printer.
-
Page 21: Using The Printer
– it can be easily unplugged from the power outlet. 1. Turn off the printer. On the back of the printer press (O) to turn off the printer. 2. Connect the printer to the power supply using the cable provided. -
Page 22: Setting The Interface
05/08 Rev. AB Setting the Interface By factory default, the printer is set for data transfer using the Centronics interface. Print data can be transferred using the RS232, USB or Ethernet interface (9854 only). Select the interface with the following parameter: Set INTERF. -
Page 23: Using The 9854 Printer With Dispenser
Attach the end to the takeup reel and press Online. – The material is not stretched tightly. Press Online. The printer is now ready for the next print job. You may need to adjust the basic initialization settings because of: •... -
Page 24: Offline Operation
If using very short labels (< 40 mm) set PRINT PARAMETERS > Material length Label length < 40 mm < 40 mm (1.6 inches). The printer automatically initializes the material, which improves the impression accuracy of the printout. Refer to the “Info-Printouts and Parameters” section on your CD-ROM for more information on parameter DISPENSER PARA >... -
Page 25: Online Operation
Setting the label length automatically: OFFLINE After pressing the two buttons, the printer feeds the label material, until two punches have passed the label sensor. The measured label length is displayed and saved into parameter PRINT PARAMETERS > Material length. Next, the parameter PRINT PARAMETERS >... -
Page 26: Creating A Print Job
Windows operating system help to install a driver. • File with Print You can write a sequence of commands in a text file and send it to the printer. Commands To do this, you can use any text editor and the MS-DOS copy command. -
Page 27: Using Compact Flash Cards
Push the Compact Flash card into the slot until the release button (1) comes out. The card sits flush with the back wall. Fig. 12: Inserting a Compact Flash card into a 9854 printer. If the Compact Flash card is inserted correctly, it sits flush with the printer’s back wall (right). -
Page 28: Setting The Realtime Clock (9854 Only)
05/08 Rev. AB Setting the Realtime Clock (9854 only) The 9854 printer’s realtime clock can be used to calculate and print the expiration date of perishable goods. To set the realtime clock: 1. Navigate to the parameter SYSTEM PARAMETERS > Realtime clock Realtime clock dd.mm.yyyy hh:mm... -
Page 29: Setup
05/08 Rev. AB OPERATOR’S HANDBOOK Setup 9844/9854 Setup Loading Diagrams Printer with Dispenser (Peel) Selecting Ribbon/Material Loading Material Loading a Ribbon Material/Ribbon End Setting Printhead Support... -
Page 30: Loading Diagrams
05/08 Rev. AB Loading Diagrams The loading diagrams show the material and ribbon path through the printer. • Material is wound with the labels facing outwards • Ribbon is wound with the colored side facing inwards. Fig. 1: Material and ribbon path in printer. - Page 31 Internal liner takeup reel Deflection roller Material guide Light barrier fitting Deflection plate Print roller Adjusting wheel for printhead support Pressure lever Ribbon deflection roller Tab. 2: Operating parts of the printer with internal liner takeup. OPERATOR’S HANDBOOK 9844/9854 Setup...
- Page 32 Internal liner takeup reel Deflection roller Material guide Light barrier fitting Deflection plate Dispensing edge (peel) Adjusting wheel for printhead support Pressure lever Ribbon deflection roller Tab. 3: Operating parts of the printer with dispenser (peel). OPERATOR’S HANDBOOK 9844/9854 Setup...
-
Page 33: Selecting Ribbon/Material
05/08 Rev. AB Selecting Ribbon/Material About Material Use Monarch-approved material. See “Specifications” for more information. About Ribbons Use Monarch-approved ribbon. See “Specifications” for more information. OPERATOR’S HANDBOOK 9844/9854 Setup... -
Page 34: Loading Material
Do not operate the printer with the cover open! Be careful when touching the printhead. It may be hot. The printer can use both roll and fan-fold material. Follow these steps to load material. See “Specifications” for more information about the media. - Page 35 (6) until the pointer (7) is located above the material perforations (Fig. 4). The optional reflex sensor is located 5mm to the right of the pointer below the material! 8. Thermodirect printing: Close the pressure lever. Thermotransfer printing: See “Loading Ribbon” to continue. OPERATOR’S HANDBOOK 9844/9854 Setup...
- Page 36 (6) until the pointer (7) is located above the material perforations (Fig. 2). The optional reflex sensor is located 5mm to the right of the pointer below the material! 6. Thermodirect printing: Close the pressure lever. Thermotransfer printing: See “Loading Ribbon” to continue. OPERATOR’S HANDBOOK 9844/9854 Setup...
- Page 37 3. Choose the rotation direction of the takeup reel (face inside or outside): Select parameter REWINDER PARA > Rewind direction. After turning on the printer, the takeup reel rotates slowly until the material is pulled tight. You may see Status 5004 Rewinder mat.
- Page 38 (3). 7. Turn the takeup reel counter-clockwise until the backing paper is pulled tight. After turning on the printer, the reel rotates slowly until the material web is pulled tight (Fig. 3). You may see...
-
Page 39: Loading A Ribbon
(3). The ribbon turns counter-clockwise when unwinding. 4. Load the ribbon as shown into the printer (Figs. 1 and 2). Secure the ribbon end to the empty ribbon sleeve. 5. Turn the rewind reel counter-clockwise a few times until the ribbon is crease-free. - Page 40 (Fig. 2). Load the new ribbon as follows: 1. Push the ribbon, which is between the rolls, under the printhead (Fig. 2). 2. Push both ribbon rolls onto the ribbon reels as shown (Fig. 1). OPERATOR’S HANDBOOK 9844/9854 2-12 Setup...
-
Page 41: Material/Ribbon End
Ribbon end detection can be turned off for theromodirect printing. To do so, set the parameter SYSTEM PARAMETERS > Ribbon autoecon. to Thermal printing. Refer to the “Info-Printouts and Parameters” section on your CD-ROM for more information. OPERATOR’S HANDBOOK 9844/9854 5002 5008 2-13 Setup... -
Page 42: Setting Printhead Support
2. Print a test print and check for even print quality. If the print quality is still uneven, turn the adjusting wheel a little further. 3. Repeat steps 1 to 3 until the print quality is the same across the entire width of the label. OPERATOR’S HANDBOOK 9844/9854 2-14 Setup... -
Page 43: Setting The Material Parameters
. type Tab. 1:Important parameters for setting the material properties. Refer to the “Info-Printouts and Parameters” section on your CD-ROM for more information on setting parameters. OPERATOR’S HANDBOOK 9844/9854 Function Sets the material type (perforated or endless) Sets the material length... - Page 44 2-16 05/08 Rev. AB OPERATOR’S HANDBOOK Setup 9844/9854...
-
Page 45: Care & Maintenance
05/08 Rev. AB OPERATOR’S HANDBOOK 9844/9854 Care & Maintenance Cleaning the Printhead Cleaning the Print Roller Cleaning the Punch (Die Cut) Sensor... -
Page 46: Safety
Turn off the printer and disconnect the power supply before any cleaning or maintenance work! Do not spill liquid into the printer! Do not spray any cleaner directly on the printer! Moisten a cloth with the recommended cleaning agent to clean the printer! Troubleshooting... -
Page 47: Cleaning The Printhead
(1) a few times with the cleaning pen (Fig. 1). Cleaning with isopropyl alcohol: Use isopropyl alcohol if you do not have a cleaning pen. Moisten a cotton swab with isopropyl alcohol and wipe the printhead clean. OPERATOR’S HANDBOOK 9844/9854 Care & Maintenance... -
Page 48: Replacing The Printhead
Do not loosen the screws (3) attaching the printhead to the bracket. Removing the printhead: 1. Turn off the printer and disconnect the power supply. 2. Remove the material and ribbon. 3. Close the pressure lever (1). 4. Remove the two thumb screws (Fig. 1). -
Page 49: Cleaning The Print Roller
Cleaning the Print Roller Clean the print roller when you see adhesive buildup or dirt on the roller. 1. Turn off the printer and disconnect the power supply. 2. Remove the material and ribbon. You can easily access the print roller if you remove the tear-off edge (1) first. -
Page 50: Cleaning The Punch (Die Cut) Sensor
(4). You can find the reflex sensor about 5 mm further below. CAUTION! - The sensor surface is very sensitive to scratches! Do not use sharp objects or solvents when cleaning the sensors. OPERATOR’S HANDBOOK 9844/9854 Care & Maintenance... -
Page 51: Specifications
05/08 Rev. AB OPERATOR’S HANDBOOK 9844/9854 Specifications Printers Supplies (Material) Ribbon (Foil) - Page 52 Humidity: Printhead: Printing Method: Print Width: Print Speed: OPERATOR’S HANDBOOK 9844/9854 10.7 inches (272 mm) 10.3 inches (260 mm) 18.2 inches (462 mm) 31 lb. (14 kg) 35 lb. (16 kg) with dispenser (peel) 40° to 100°F (4° to 38°C) 24°...
-
Page 53: Supplies (Material
1.2 inches (30 mm) - 9854 with dispenser 8.35 inches (210 mm) maximum outer diameter 4.9 inches (125 mm) - 9854 with liner takeup 9844: 1.0 to 4.4 inches (25 to 110 mm) 9854: 1.0 to 4.5 inches (25 to 114 mm) 500 m (maximum) - Page 54 05/08 Rev. AB OPERATOR’S HANDBOOK Specifications 9844/9854...
- Page 56 Visit www.monarch.com for sales, service, supplies, information, and telephone numbers for our locations throughout the world. TOLL FREE: 1-800-543-6650 (In the U.S.A.) 1-800-363-7525 (In Canada)