
Related Manuals for Avery Dennison Monarch Freshmarx 9417+


Summary of Contents for Avery Dennison Monarch Freshmarx 9417+
- Page 1 SYSTEM ADMINISTRATOR’S GUIDE Avery Dennison ® Monarch ® FreshMarx ® 9417+ Solution Version 3.1 TC9417PSA Rev. AB 5/17 © 2016 Avery Dennison Corp. All rights reserved.
- Page 2 Each product and program carries a respective written warranty, the only warranty on which the customer can rely. Avery Dennison reserves the right to make changes in the product, the programs, and their availability at any time and without notice. Although Avery Dennison has made every effort to provide complete and accurate information in this manual, Avery Dennison shall not be liable for any omissions or inaccuracies.
-
Page 3: Table Of Contents
T A B L E O F C O N T E N T S INTRODUCTION ..........................1-1 Audience ..........................1-1 About the Printer ........................1-1 About the Setup Wizard ......................1-3 Using the Keypad ........................1-3 About Assigning Formats ......................1-4 About Freshness Labeling ...................... - Page 4 Assigning a Label Format ......................4-9 Editing Tab Names ........................4-10 Adding Timers .......................... 4-11 Exiting Edit Mode ........................4-13 BATCH PRINTING .......................... 5-1 Creating a Batch ........................5-1 Editing a Batch .......................... 5-3 Renaming a Batch ........................5-4 Deleting a Batch ........................5-4 UPDATING THE PRINTER .......................
- Page 5 Format 11 ..........................A-6 Format 12 ..........................A-7 Format 20 ..........................A-7 Format 21 ..........................A-8 Format 22 ..........................A-9 Format 30 ..........................A-10 Format 31 ..........................A-11 Format 32 ..........................A-12 Format 40 ..........................A-13 Format 41 ..........................A-14 Format 42 ..........................
- Page 6 iv System Administrator’s Guide...
-
Page 7: Introduction
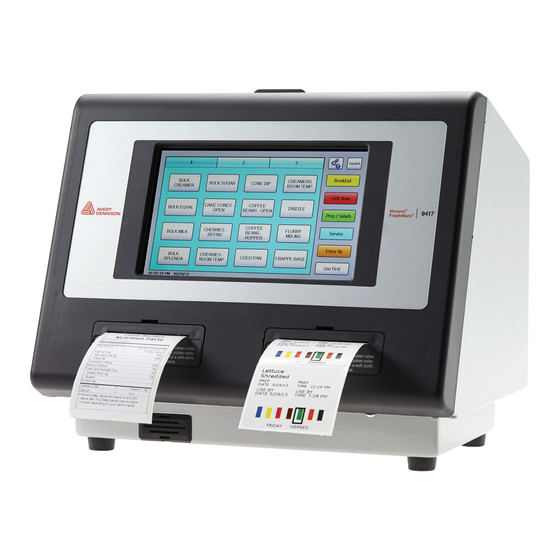
I N T R O D U C T I O N Use the Avery Dennison® Monarch® FreshMarx® 9417+ solution for product freshness and to label inventory. You may have a custom application that differs slightly from the examples in this manual. The screens and labels shown are for reference only of the dual printer. - Page 8 1 Cover 6 Power Cord Connection 2 Display 7 Ethernet Port 3 Left Printer 8 USB (Type B) Port 4 Right Printer 9 USB (Type A) Port 5 Speaker 10 Power Button 1-2 System Administrator’s Guide...
-
Page 9: About The Setup Wizard
A b o u t t h e S e t u p W i z a r d When the 9417+ printer is powered on for the first time or after updating the software, a setup wizard appears. The wizard guides you through important tasks such as setting the printer’s language and setting the time and date. -
Page 10: About Assigning Formats
A b o u t A s s i g n i n g F o r m a t s The Freshmarx application includes 21 standard formats for food freshness dating, nutrition, and grab-and-go labeling. See Appendix A, “Standard Label Formats”... -
Page 11: Timer Button Mode
A b o u t B u t t o n M o d e s Product buttons can have different modes (function). Button mode is set on the Button Properties screen when you create or edit a product button. For more information, refer to the EasyEdit+ System Administrator’s Guide and 9417+ Operator’s Handbook found on our Web site The button modes are:... - Page 12 1-6 System Administrator’s Guide...
-
Page 13: Setting The Time And Date
S E T T I N G T H E T I M E A N D D A T E This chapter explains how to set and format the printer’s time and date. A d j u s t i n g t h e T i m e a n d D a t e You can set the system time and date, format the time and date, select your time zone, and establish network time. - Page 14 Enter the Admin password and press (Enter). The default password is 1234. The Admin Tools screen displays your IP address (for LAN connections) or your wireless IP address. See “Adjusting the LAN Settings” or “Adjusting the Wireless Settings” for more information. Press Set Time / Date.
-
Page 15: Formatting The Time And Date
F o r m a t t i n g t h e T i m e a n d D a t e To change the way the time/date appears on printed labels: From the Admin Tools screen, press System Settings. Press Format Time / Date. - Page 16 Select the checkbox if you want to use a 24-hour clock. For example, 4:00 p.m. would appear as 16:00. Use the drop down menu to select the time separator to place between the hour, minute, and seconds (colon, period, comma, blank). Use the drop down menus to select the date format and the date separator (slash, hyphen, period, comma, blank).
-
Page 17: Setting Up The Printer
S E T T I N G U P T H E P R I N T E R 1 1 B 1 1 B 1 1 B This chapter explains how to adjust the printer’s print position, screen brightness, volume, language, and network settings. - Page 18 Enter the Admin password and press (Enter). The default password is 1234. The Admin Tools screen displays your IP address (for LAN connections) or your wireless IP address. See “Adjusting the LAN Settings” or “Adjusting the Wireless Settings” for more information. Press System Settings.
- Page 19 Adjust the print settings for the Left and Right Printer: Use the and buttons to adjust the X Print Position. Increasing the value moves the printed text to the right. Decreasing the value moves the printed text to the left. The range is -100 to 100 and the default is 0.
-
Page 20: Adjusting The Screen Brightness
A d j u s t i n g t h e S c r e e n B r i g h t n e s s You can adjust the brightness of the screen. The range is 0 to 100 percent. From the Admin Tools screen, press System Settings. -
Page 21: Changing The Administrator's Password
C h a n g i n g t h e A d m i n i s t r a t o r ’ s P a s s w o r d To change the administrator’s password: From the Admin Tools screen, press System Settings. Press Change Admin Password. -
Page 22: Adjusting The Language Settings
A d j u s t i n g t h e L a n g u a g e S e t t i n g s Use the Language Settings menu to set a primary system language, enable/disable alternate button names, and set an alternate system language. - Page 23 Press the language box under Select System Language to select a System Language. Select the language you want to use for all printer prompts and buttons. Select if you want to enable alternate button names (enter the product button names in a second language).
-
Page 24: Language Toggle Button
Language Toggle Button When an alternate system language is set, users can easily toggle between the primary and (Language Toggle) next to the Tools button. secondary languages by pressing 3-8 System Administrator’s Guide... -
Page 25: Adjusting The Lan (Local Area Network) Settings
A d j u s t i n g t h e L A N ( L o c a l A r e a N e t w o r k ) S e t t i n g s Use the LAN Settings menu to view the current LAN settings or set an IP Address. -
Page 26: Using Dhcp To Obtain An Ip Address
Using DHCP to Obtain an IP Address: You can use DHCP to automatically obtain the printer’s IP Address. From the LAN Settings screen, select Use DHCP to obtain IP Add automatically. Press OK. The printer automatically receives an IP address. Using a Static IP Address: You can assign the printer a static IP Address. -
Page 27: Adjusting The Wireless Settings
A d j u s t i n g t h e W i r e l e s s S e t t i n g s Your printer may have optional wireless networking installed. Press (Tools). Press Admin. Enter the Admin password and press (Enter). -
Page 28: Connectivity Troubleshooting
10. Touch the text box next to the Password. Enter the Password if necessary and press (Enter) on the keypad. 11. Press Apply to save the changes. The printer establishes a network connection using the provided information. 12. Press Refresh to refresh the settings and see the SSID, network status, and IP address, etc. -
Page 29: Selecting The Network Time Server
S e l e c t i n g t h e N e t w o r k T i m e S e r v e r If your printer is connected to a network with Internet access or to a network time server, use this screen to adjust the settings. -
Page 30: Updating The Printer Via Sftp
U p d a t i n g t h e P r i n t e r v i a S F T P You can use an SFTP server to update your printer’s Product Data File and Application Software. - Page 31 Press System Settings. Press Network Settings. Press SFTP Settings. Enter the credentials necessary – your SFTP Server Address, User Name, Password, etc. Setting Up the Printer 3-15...
-
Page 32: Automatically Check For Updates
Automaticall y Check for Updates Selecting “Automatically check for updates,” allows your printer to query the SFTP server for updates at a specified time and frequency. Use the and next to adjust the settings. You can set the printer to check for updates: ♦... -
Page 33: Editing Product Data
E D I T I N G P R O D U C T D A T A This chapter explains how to ♦ add and remove product buttons ♦ change the “use first” buttons description ♦ edit categories and tab names ♦... -
Page 34: Adding And Removing Products
A d d i n g a n d R e m o v i n g P r o d u c t s You must be in Edit Mode to add or remove product buttons. To add a product button: Press any empty product button. - Page 35 Enter the button name. Touch the text box next to each field to open the keypad. Press and hold a key to use symbols and accented characters. Press (Enter) on the keypad each time you complete a field. To modify the Must Use By description, touch the text box next to the Use By Description field to open the keypad.
- Page 36 Touch the text box next to the Use By Duration field. Use and to set the product’s expiration time in Days, Hours, and Minutes. ♦ ♦ Select Use “End of Day” expiration mode to only print the date on the label. The hours and minutes fields are disabled.
-
Page 37: To Remove A Product Button
To remove a product button: Press the product button you want to remove. Press Clear All. All existing product information is removed from the screen. Press Save. You return to the product screen; the selected button is blank. E d i t i n g P r o d u c t D e s c r i p t i o n s You must be in Edit Mode to change button information. -
Page 38: Editing The Use First Button
E d i t i n g t h e U s e F i r s t B u t t o n You must be in Edit Mode to change the Use First button. This field has a maximum of four words. -
Page 39: Editing Category Buttons
E d i t i n g C a t e g o r y B u t t o n s You can change the names of the category buttons. You can also select which format and printer (left or right) prints for each category. You must be in Edit Mode to edit categories. Settings apply to all product buttons within the selected category. - Page 40 Select the Left or Right printer to print the product labels for this category. This option does not appear for single printer models. Note: If you want the operator to select which printer (Left or Right) to use when a product button is pressed, assign all categories to the same format and the same printer (left or right).
-
Page 41: Assigning A Label Format
A s s i g n i n g a L a b e l F o r m a t You can select the label format for the category buttons. All products within a category must use the same label format. You must be in Edit Mode to assign a label format to a category. While in Edit Mode, select the category button to assign a format. -
Page 42: Editing Tab Names
E d i t i n g T a b N a m e s You can change the names of the product button tabs. You must be in Edit Mode to edit product button tabs. Tab s Select the category button for the tabs you want to edit. You may have to press the category button up to three times to open the editing screen. -
Page 43: Adding Timers
A d d i n g T i m e r s You must be in Edit Mode to create timers. Press any empty product button. Select Timer or Label & Timer as the Button Mode. Enter the Button Name. Touch the text box next to each field to open the keypad. Press and hold a key to use symbols and accented characters. - Page 44 Touch the text box next to the Time Duration field. Use and to set the timer’s expiration time in Hours, Minutes, and Seconds. Press OK. Press Save. The new timer button appears. If the button is a label & timer button, when the user presses the button, the label quantity screen opens.
-
Page 45: Exiting Edit Mode
E x i t i n g E d i t M o d e To exit Edit Mode: Press (Tools). Press Save & Exit to save all changes and return to the Product screen. Or, press Continue Editing to remain in Edit Mode and make additional changes. Editing Product Data 4-13... - Page 46 4-14 System Administrator’s Guide...
-
Page 47: Batch Printing
B A T C H P R I N T I N G 1 2 B 1 2 B 1 2 B This chapter explains how to create, edit and delete batches. A batch is a group of labels that print at one time. Many items can be added to a single batch. If you always print a certain number of labels per day for particular products, create a batch for them. - Page 48 Press Create Batch. Fill in the New Batch Name field. Press (Enter). You cannot have more than one batch with the same name. Press Add Item to add an item to the batch. Click on the item’s Product Button to add it to the batch. Select the number of labels to print for that batch item then press (Enter).
-
Page 49: Editing A Batch
10. Continue adding items to the batch as necessary. 11. When you are finished adding items to the batch press Save & Exit or press Cancel to delete the batch. E d i t i n g a B a t c h Press the Tools button. -
Page 50: Renaming A Batch
Press Add Item to add more items to the batch. Use and next to an item quantity to change the number of labels that print for that item. Press Delete to remove that item from the batch. Press Save & Exit or press Cancel to delete the batch. R e n a m i n g a B a t c h You cannot have more than one batch with the same name. -
Page 51: Updating The Printer
U P D A T I N G T H E P R I N T E R This chapter explains how to update the product data file, the FreshMarx application, formats, videos, or documents. U p d a t i n g Y o u r P r o d u c t D a t a F i l e v i a U S B You can use a USB Flash Drive to transfer your updated product data file from your PC to your printer. -
Page 52: Updating Your Application Software Via Usb
Press File Management. Press Update Product Data to update the data files. If you have more than one Product Data file stored on your USB Flash Drive, select the file you want to install then press Copy to Printer. You see a progress bar while the file is loaded. Once the process is complete, you see the home screen. - Page 53 Press File Management. Press Update Application Software. If you have more than one Application Software file stored on your USB Flash Drive, select the file you want to install then press OK. This may take several minutes. When the update is complete, the printer restarts. Remove the USB Flash Drive.
-
Page 54: Updating Formats
USB Flash Drive. To learn more about custom label formats, contact Avery Dennison. Plug the USB Flash Drive into the USB port on the side of the printer. -
Page 55: Updating Videos
Press Update Formats. Select the custom label format (only LNT file is visible) to copy then press Copy to Printer. Formats on your USB Flash Drive are indicated by (USB) after the file name. Formats already on your printer are listed without (USB). Remove the USB Flash Drive. -
Page 56: Video Conversion
Video Conversion Videos must be converted before they are viewable on the 9417+ printer. We recommend using this free conversion tool, Any Video Converter. http://www.any-video-converter.com/products/for_video_free/ Using this conversion tool, follow these instructions: For Video Format, select Customized AVI/Customized MP4/MPEG-1. Change the resolution to 800 x 480 (or use 720 x 480 for MPEG-1). For Video Options, select Xvid or MPEG-4. - Page 57 Press File Management. Press Update Videos. Select the video to copy then press Copy to Printer. To copy all videos on your USB Flash Drive, press Copy All to Printer. ♦ Videos on your USB Flash Drive are indicated by (USB) after the file name. Videos already on your printer are listed without (USB).
-
Page 58: Updating Documents
U p d a t i n g D o c u m e n t s You can use a USB Flash Drive to transfer documents from your PC to your printer. Save the documents in the root directory of a USB Flash Drive. Document Specifications The 9417+ printer supports the following document ypes: ♦... -
Page 59: Transferring Documents To/From The Printer
Transferring Documents to/from the Printer Plug the USB Flash Drive into the USB port on the side of the printer. Press the Tools button. Press Admin. Enter the Admin password then press (Enter). The default password is 1234. Press File Management. Press Update Documents. - Page 60 Select the document to copy then press Copy to Printer. To copy all documents on your USB Flash Drive, press Copy All to Printer. ♦ Documents on your USB Flash Drive are indicated by (USB) after the file name. Documents already on your printer are listed without (USB). ♦...
-
Page 61: Performing Maintenance
P E R F O R M I N G M A I N T E N A N C E P r i n t i n g D i a g n o s t i c L a b e l s Several diagnostic labels are available: Version Information, Network Information, Gray Scale, and Checkerboard. -
Page 62: Version Information
Version Information The Version Information label shows: ♦ Printer model number ♦ Application part number ♦ Application version ♦ Core version ♦ Print engine version ♦ Board version Netw ork Information The Network Information label shows: ♦ Method for obtaining IP address ♦... -
Page 63: Copying The Data File To A Usb Flash Drive
C o p y i n g t h e D a t a F i l e t o a U S B F l a s h D r i v e You can copy the Product Data File from the printer to a USB Flash Drive. Insert a USB Flash Drive into the port on the side of the printer. -
Page 64: Calibrating The Supply
C a l i b r a t i n g t h e S u p p l y You can calibrate the supply if your printer skips labels or prints off the label. Press (Tools). Press Admin. Enter the Admin password and press (Enter). -
Page 65: Calibrating The Sensor
C a l i b r a t i n g t h e S e n s o r You need to calibrate the sensor if your printer skips labels or prints off the label. Press (Tools). Press Admin. Enter the Admin password and press (Enter). -
Page 66: Calibrating The Touch Screen
Press Calibrate Left Sensor or Calibrate Right Sensor. A popup message appears to tell you if the calibration was successful. If calibration failed, make sure that only the liner is in the supply path and try the calibration again. C a l i b r a t i n g t h e T o u c h S c r e e n Calibrate the touch screen so the buttons respond correctly when pressed. -
Page 67: Performing A Factory Reset
P e r f o r m i n g a F a c t o r y R e s e t Use Factory Reset to delete all data files from the printer. Data files include the product button information, password, and printer configuration settings. - Page 68 7-8 System Administrator’s Guide...
- Page 69 L A B E L F O R M A T S This appendix shows a sample of each label format. Note: If an asterisk (*) prints after the time or date, the label was reprinted using the original expiration time or date. See “Setting the Options”...
- Page 70 F o r m a t 3 Prints 2.2” wide x 1.1” long labels. Enter the following information for each field: Field Description Description 1 Prints up to 35 characters. Description 2 Prints up to 35 characters. EMPL Employee ID must be 2-10 characters. Prep Numbers only.
-
Page 71: Label Formats
F o r m a t 5 Prints 2.2” wide x 1.5” long labels. Enter the following information for each field: Field Description Description 1 Prints up to 25 characters. Description 2 Prints up to 25 characters. Prep Numbers only. Days 0-365, hours 0-23, minutes 0-59. Must Use By Numbers only. - Page 72 F o r m a t 7 Prints 2.2” wide x 2.0” long labels. Indicates the da y-o f-w eek e xpiration Arrows point to the block that corresponds to the day-of-week expiration date while diagonal lines print through the color-coded boxes that do not apply. Enter the following information for each field: Field Description...
- Page 73 F o r m a t 8 Prints 1.2” wide x 1.1” long labels. Indicates the da y-o f-w eek e xpiration Arrows point to the block that corresponds to the day-of-week expiration date while diagonal lines print through the color-coded boxes that do not apply. Enter the following information for each field: Field Description...
- Page 74 F o r m a t 1 0 Prints 2.2” wide x 4.0” long labels. Enter the following information for each field: Field Description Store Name Prints up to 17 characters. Description 1 Prints up to 23 characters. Description 2 Prints up to 23 characters.
- Page 75 F o r m a t 1 2 Prints 2.2” wide x 4.0” long labels. Enter the following information for each field: Field Description Store Name Prints up to 17 characters. Description 1 Prints up to 23 characters. Description 2 Prints up to 23 characters.
- Page 76 F o r m a t 2 1 Prints 2.2” wide x 4.0” long labels. Enter the following information for each field: Field Description Store Name Prints up to 17 characters. Description 1 Prints up to 23 characters. Description 2 Prints up to 23 characters.
- Page 77 F o r m a t 2 2 Prints 2.2” wide x 4.0” long labels. Enter the following information for each field: Field Description Store Name Prints up to 17 characters. Description 1 Prints up to 23 characters. Description 2 Prints up to 23 characters.
- Page 78 F o r m a t 3 0 Prints 2.2” wide x 3.0” long labels. Enter the following information for each field: Field Description Store Name Prints up to 17 characters. Description 1 Prints up to 23 characters. Description 2 Prints up to 23 characters.
- Page 79 F o r m a t 3 1 Prints 2.2” wide x 4.0” long labels. Enter the following information for each field: Field Description Store Name Prints up to 17 characters. Description 1 Prints up to 23 characters. Description 2 Prints up to 23 characters.
- Page 80 F o r m a t 3 2 Prints 2.2” wide x 4.0” long labels. Enter the following information for each field: Field Description Store Name Prints up to 17 characters. Description 1 Prints up to 23 characters. Description 2 Prints up to 23 characters.
- Page 81 F o r m a t 4 0 Prints 2.2” wide x 3.0” long labels. Enter the following information for each field: Field Description Store Name Prints up to 17 characters. Description 1 Prints up to 23 characters. Description 2 Prints up to 23 characters.
- Page 82 F o r m a t 4 1 Prints 2.2” wide x 4.0” long labels. Enter the following information for each field: Field Description Store Name Prints up to 17 characters. Description 1 Prints up to 23 characters. Description 2 Prints up to 23 characters.
- Page 83 F o r m a t 4 2 Prints 2.2” wide x 4.0” long labels. Enter the following information for each field: Field Description Store Name Prints up to 17 characters. Description 1 Prints up to 23 characters. Description 2 Prints up to 23 characters.
- Page 84 F o r m a t 4 3 Prints 2.2” wide x 4.0” long labels. Enter the following information for each field: Field Description Description 1 Prints up to 23 characters. Store Name Prints up to 17 characters. Store Address Prints up to 45 characters on Line 1 Prints up to 45 characters on Line 2 Servings per pack...
- Page 85 A D V A N C E D W I - F I C O N F I G U R A T I O N Use this appendix to configure advanced 802.11a/b/g/n wireless (radio) card settings. Use the Laird WIFI Configuration (Summit Client Utility) available on the 9417+ printer to configure the printer’s wireless card to communicate with your network.
- Page 86 F i n d i n g a N e t w o r k The printer searches for available networks and lists the SSIDs, signal strength, and encryption. Connect to an existing network profile with the required network security information.
- Page 87 Press Scan. A list of available networks appears. Select your network, then press Configure. You are prompted to create a new profile. Advanced Wi-Fi Configuration B-3...
- Page 88 Press Yes to create a new profile. SCU creates a profile for the selected network. Enter the required information, then press OK. The Profile screen shows the newly created Profile. New Profile Press Commit to save the changes. When you are finished, press the Main tab. Your new profile appears in the Active Profile drop-down menu.
- Page 90 AMERICAS 170 Monarch Lane Miamisburg, OH 45342 937 865 2123 (direct) Tel +800 543 6650 (8:00 a.m. – 6:30 p.m., EDT) Fax +937 865 6663 ASIA No. 7 Chun Ying Street Tseung Kwan O Industrial Estate New Territories, Hong Kong Tel +852 2372 3169 Fax +852 2995 0014 WESTERN EUROPE...