
Related Manuals for Avery Dennison Monarch FreshMarx 9417+ Solution


Summary of Contents for Avery Dennison Monarch FreshMarx 9417+ Solution
- Page 1 OPERATOR’S HANDBOOK Avery Dennison ® Monarch ® FreshMarx ® 9417+ Solution TC9417POH Rev. A © 2016 Avery Dennison Corp. All rights reserved.
- Page 2 Each product and program carries a respective written warranty, the only warranty on which the customer can rely. Avery Dennison reserves the right to make changes in the product, the programs, and their availability at any time and without notice. Although Avery Dennison has made every effort to provide complete and accurate information in this manual, Avery Dennison shall not be liable for any omissions or inaccuracies.
-
Page 3: Table Of Contents
T A B L E O F C O N T E N T S GETTI NG STARTED ..........................1-1 Audienc e.............................. 1-1 Printer Overview ..........................1-1 Connec ting the Power Cord ......................... 1-2 About the Setup Wi zard ........................1-2 Using the Keypad .......................... - Page 4 TROUBLESHOOTI NG ..........................6-1 Error Codes ............................6-1 SPECIFICATIONS ............................1 System Spec ifications ..........................1 Supply Specific ations ..........................1 ii Operator’s Handbook...
-
Page 5: Getti Ng Started
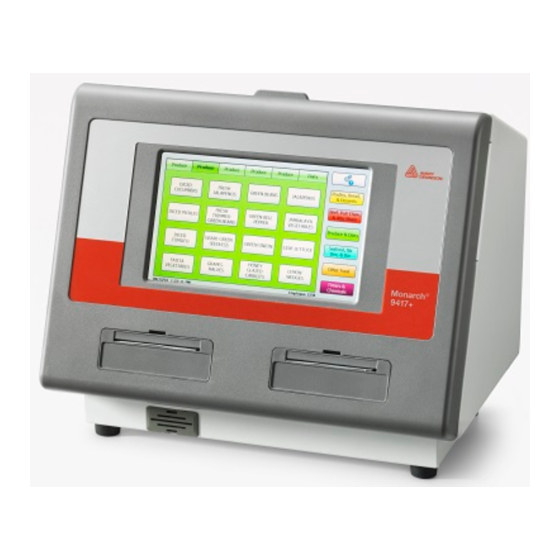
G E T T I N G S T A R T E D Us e the Avery Denn is on® Monarch® Fres hMarx® 94 17+ Solution for produc t freshness and to label inv entory. T he print er is availa ble as a single printer (lef t printer o nl y) or dual print er (left an d right printer). -
Page 6: Connec Ting The Power Cord
C o n n e c t in g th e Po we r Co r d 1 . Plug the power c ord into t he s oc ket on the s ide of the prin ter (#6 abo ve). 2 . -
Page 7: Loadi Ng Labels
L O A D I N G L A B E L S This c hapter describes how to load labels for a single pri nter (left printer on ly) and dual print er (left an d right pr inters). L o a d in g th e L e f t Pr in te r 1. - Page 8 5 . Place a roll of la bels (label side up) on the s upply ho lder. 6. Place the supply gui de on th e s upply ho lder unt il it t ouches the supply. Lock the supply guide.
-
Page 9: Loading The Right Printer
9. Slide the suppl y lev er next t o the s uppl y. Close the supply lever. 10. Close the c over. L o a d in g th e R ig h t P r in te r 1. - Page 10 5 . Place a roll of la bels (label side up) on the s upply ho lder. 6. Place the outer supply g uide o n the s uppl y hold er and lock it in p lace. 7 . Unloc k the inner suppl y guid e and m ove it until it touches the supply. Lock it in to plac e. 2-4 Operator’s Handbook...
- Page 11 8. Put the supply tab bac k. 9. Guide th e labe ls along th e outs ide edg e and into the slot. T he print er feeds the s upply. Note : Tear a s traight edge on the suppl y before feedin g it i nto the pr inter. 10.
- Page 12 2-6 Operator’s Handbook...
-
Page 13: Usi Ng The Appli Cati On
U S I N G T H E A P P L I C A T I O N E m p lo y e e ID The Employee ID login may appear. Th is option is set by your Mana ger. Your print er m ay be s et to log out aft er a s elected amount of print er idle tim e. -
Page 14: Logging Off
Logging Off To log off: 1. Press (Tools). T o o ls 2 . Pres s Emplo ye e Logout. 3-2 Operator’s Handbook... -
Page 15: Using The M Ain Sc Reen
U s in g th e M a in Sc r e e n The main screen consists of a language toggle button (o ptiona l, s et up by the System Administrator), tools button, six product c ategory butt ons , eac h with tabs of produc t button s . The product category butto ns and their ta bs of product buttons are color-coded s o you can easily print freshnes s labels . -
Page 16: Language Toggle
Language Tog gle Your pri nter may be set up to d is play two dif ferent l anguages . If your print er has the Language To ggle Butt on (next to the To ols button) you c an pres s it to show another langua ge. Press it again to return to the defaul t lang uage. -
Page 17: Button M Odes
B u tto n M o d e s The button modes are: ♦ Label – Prints lab els (See Chapter 4, “Printin g Labe ls”) ♦ Timer – Starts a tim er ♦ Vide o – Plays a video ♦... -
Page 18: Feeding A Label
F e e d in g a L a b e l To feed a l abel: Press (T ools). 2 . Press Fee d (left printer) or Fee d (right printer). The fee d arrow on the left feeds lab els on the left pri nter, the f eed arrow on th e right f eeds labels on the right pri nter. -
Page 19: Video Produc T Button
Video P roduc t But ton Product buttons that play a vid eo hav e a v ideo p layer icon i n the up per right corner. W hen you pres s a video button, the v ideo p layer op ens and pla ys the vid eo. The video pla yer opens the vide o in fu ll s creen mode. -
Page 20: Label & Video Produc T Button
Label & V ideo P roduc t But ton W hen you pres s a Label & Vid eo product butto n, the pr int qua ntity sc reen opens. To view the video press Play Vide o. Af ter the v ideo conc ludes , you ret urn to the print qu antity s creen where you can print l abels. -
Page 21: Doc Um Ent Produc T Button
V i e w in g Do c u m e n ts Documents can be viewed through the Tools menu or by press ing a butto n (if yo ur Administrator lin ked a d oc um ent to a button). 1. - Page 22 V i e w in g L o g F i l e s Two types of log fi les are viewable on the printer: SFTP logs and Pri nter logs. SFT P log Contains the files pus hed and proc ess ed and files pulled a nd proc es sed. For eac h file pul led, a log fi le “Fres hMarx-yy yymm ddThhmmss Z.log”...
-
Page 23: Starting A T Im Er
S t a r t in g a T im e r Tim ers mus t be created by your S ystem Administrator. 1. Press the produc t/timer button you want to start. You see the list of t im ers . 2 . -
Page 24: Rem Oving A T Imer
V i e w in g Ac t iv e T i m e r s You c an view a list of the ac tive tim ers . 1 . Press (Tools). 2 . Press Vie w T ime rs. You s ee a lis t of timers that are in use (c ounting down). 3 . - Page 25 V i e w in g A la r m s 1. Press (Tools) then pres s Vie w Al arms. You see a l ist of alarms . Note : Alarm s are c reated by your Sys tem Adm inis trator. Using the Application 3-13...
-
Page 26: Stopping An Alarm
Stopp ing an Alar m W hen an alarm goes off, the printer s hows the date, tim e, and name of the al arm. Press OK to s top the alarm. 3-14 Operator’s Handbook... -
Page 27: Using The Search Feature
U s in g th e Se a r c h F e a tu r e 1. Press (Tools) then pres s Se arch. 2. Enter the word to searc h. Using the Application 3-15... - Page 28 3. The search box drops down to s uggest poss ible results. 4. Press the show/hide keypa d button to exp and the drop down. If you s ee what you want to search, select it then pres s (Ente r). Otherwise, continue typing your searc h words then press (Enter).
-
Page 29: Exiting The Applic Ation
5. The resulting produc t butt ons are dis played in the color of their c ategor y. Press the button you want to pri nt/vi ew. E x i t in g th e Ap p l ic a t io n Your System Adm inis trator may have ins talled a dditio nal ap plic ations on your printer. - Page 30 3-18 Operator’s Handbook...
-
Page 31: Pri Nti Ng Labels
P R I N T I N G L A B E L S This c hapter describes how to print fres hness and Use Firs t labels and batches of labels. P r in t in g F r e s h n e s s L a b e ls 1. -
Page 32: Printing Use First Labels
P r in t in g Us e F i r s t L a b e ls Appl y a “ Use First” label to an y produc t that n eeds to be used firs t. 1 . Press (Tools). -
Page 33: Printing A Batc H
P r in t in g a Ba tc h You can print a batch of l abels . Batc hes mus t be created by your System Administrator. 1. Press (Tools). T o o ls Bu t to n 2. - Page 34 3. Selec t the batch to print. Al l lab els in the b atc h print. 4-4 Operator’s Handbook...
-
Page 35: Care & M Aintenance
C A R E & M A I N T E N A N C E This c hapter tells you how to ♦ clear label jam s ♦ clean the plate n roller and prin thead ♦ clean the printer. C l e a r in g L a b e l J a m s To clear a jam: 1. -
Page 36: Cleaning The Display
3 . Use the plastic utensil to pres s the L-shaped bar. Th e plate n roller is released. You m ay need to slight ly ope n the fron t c over to ejec t the platen roller. Note : Art is cut-away to s how detail. - Page 37 T R O U B L E S H O O T I N G This c hapter lists some c ommon printer problems and solutions. Proble m Action The sc reen is off or the Pres s the Power Button to turn the printer off, press it again to printer is not responding .
- Page 38 6-2 Operator’s Handbook...
- Page 39 S P E C I F I C A T I O N S S y s te m Sp e c if ic a t io n s He ight: 10.06” (255.55 mm) Width : 11.86" (301. 41 m m) De pth: 8.36”...
- Page 40 A-2 Operator’s Handbook...
- Page 42 AMERICAS 170 Monarch Lane Miamisburg, OH 45342 937 865 2123 (direct) Tel +800 543 6650 (8:00 a.m. – 6:30 p.m., EDT) Fax +937 865 6663 ASIA No. 7 Chun Ying Street Tseung Kwan O Industrial Estate New Territories, Hong Kong Tel +852 2372 3169 Fax +852 2995 0014 WESTERN EUROPE...