
Related Manuals for Avery Dennison Monarch FreshMarx 9417+


Summary of Contents for Avery Dennison Monarch FreshMarx 9417+
- Page 1 OPERATOR’S HANDBOOK Avery Dennison ® Monarch ® FreshMarx ® 9417+ Solution Version 3.1 TC9417POH Rev. AB 6/17 © 2016 Avery Dennison Corp. All rights reserved.
- Page 2 Each product and program carries a respective written warranty, the only warranty on which the customer can rely. Avery Dennison reserves the right to make changes in the product, the programs, and their availability at any time and without notice. Although Avery Dennison has made every effort to provide complete and accurate information in this manual, Avery Dennison shall not be liable for any omissions or inaccuracies.
-
Page 3: Table Of Contents
T A B L E O F C O N T E N T S GETTING STARTED ........................1-1 Audience ........................... 1-1 Printer Overview ........................1-1 Connecting the Power Cord ......................1-2 About the Setup Wizard ......................1-2 Using the Keypad ........................1-2 LOADING LABELS .......................... - Page 4 ii Operator’s Handbook...
-
Page 5: Getting Started
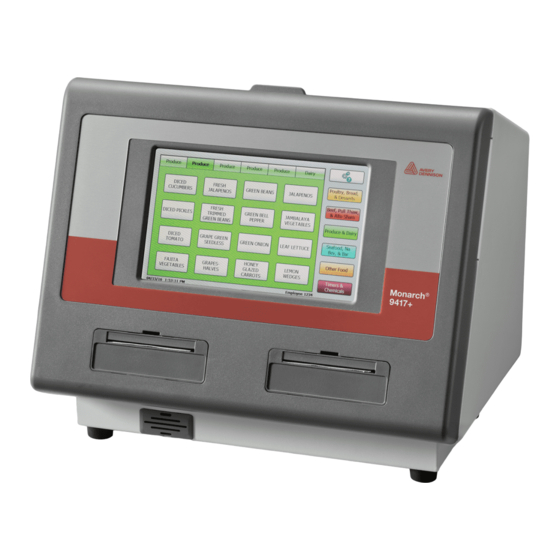
G E T T I N G S T A R T E D Use the Avery Dennison® Monarch® FreshMarx® 9417+ Solution for product freshness and to label inventory. The printer is available as a single printer (left printer only) or dual printer (left and right printer). -
Page 6: Connecting The Power Cord
C o n n e c t i n g t h e P o w e r C o r d Plug the power cord into the socket on the side of the printer (#6 above). Plug the other end of the power cord into a grounded electrical outlet. Turn on the printer. -
Page 7: Loading Labels
L O A D I N G L A B E L S This chapter describes how to load labels for a single printer (left printer only) and dual printer (left and right printers). L o a d i n g t h e L e f t P r i n t e r Turn on the printer. - Page 8 Place a roll of labels (label side up) on the supply holder. Place the supply guide on the supply holder until it touches the supply. Lock the supply guide. Put the supply tab back. Guide the labels along the inside edge and into the slot (behind the white roller). The printer feeds the supply.
-
Page 9: Loading The Right Printer
Slide the supply lever next to the supply. Close the supply lever. 10. Close the cover. L o a d i n g t h e R i g h t P r i n t e r Turn on the printer. Press the power button on the side of the printer. Open the cover. - Page 10 Place a roll of labels (label side up) on the supply holder. Place the outer supply guide on the supply holder and lock it in place. Unlock the inner supply guide and move it until it touches the supply. Lock it into place. 2-4 Operator’s Handbook...
- Page 11 Put the supply tab back. Guide the labels along the outside edge and into the slot. The printer feeds the supply. Note: Tear a straight edge on the supply before feeding it into the printer. 10. Slide the supply lever next to the supply and close it. 11.
- Page 12 2-6 Operator’s Handbook...
-
Page 13: Using The Application
U S I N G T H E A P P L I C A T I O N E m p l o y e e I D The Employee ID login may appear. This option is set by your Manager. Logging On To log on: Turn on the printer. -
Page 14: Logging Off
Logging Off To log off: Press (Tools). Tools Press Employee Logout. 3-2 Operator’s Handbook... -
Page 15: Using The Main Screen
U s i n g t h e M a i n S c r e e n The main screen consists of a language toggle button (optional, set up by the System Administrator), tools button, six product category buttons, each with tabs of product buttons. The product category buttons and their tabs of product buttons are color-coded so you can easily print freshness labels. -
Page 16: Language Toggle
Language Toggle Your printer may be set up to display two different languages. If your printer has the Language Toggle Button (next to the Tools button) you can press it to show another language. Press it again to return to the default language. Note: English and Spanish were used as an example;... -
Page 17: Button Modes
B u t t o n M o d e s The button modes are: ♦ Label – Prints labels (See Chapter 4, “Printing Labels”) ♦ Timer – Starts a timer ♦ Video – Plays a video ♦ Document – Opens a document viewer ♦... -
Page 18: Feeding A Label
F e e d i n g a L a b e l To feed a label: Press (Tools). Press Feed (left printer) or Feed (right printer). The feed arrow on the left feeds labels on the left printer, the feed arrow on the right feeds labels on the right printer. If your printer only has a left printer, the Feed (right printer) is disabled. -
Page 19: Video Product Button
Select the video you want to play, then press Play. Video Product Button Product buttons that play a video have a video player icon in the upper right corner. When you press a video button, the video player opens and plays the video. The video player opens the video in full screen mode. -
Page 20: Label & Video Product Button
Label & Video Product Button When you press a Label & Video product button, the print quantity screen opens. To view the video press Play Video. After the video concludes, you return to the print quantity screen where you can print labels. 3-8 Operator’s Handbook... -
Page 21: Document Product Button
V i e w i n g D o c u m e n t s Documents can be viewed through the Tools menu or by pressing a button (if your Administrator linked a document to a button). Press (Tools). Press View Document. - Page 22 V i e w i n g L o g F i l e s Two types of log files are viewable on the printer: SFTP logs and Printer logs. SFTP log Contains the files pushed and processed and files pulled and processed. For each file pulled, a log file “FreshMarx-yyyymmddThhmmssZ.log”...
-
Page 23: Setting A Timer
S e t t i n g a T i m e r Timers must be created by your System Administrator. Press the product/timer button you want to set. You see the list of timers. 2 . Press Return to go back to the Main screen. The timer continues to count down. The timer icon appears at the bottom of the Main screen. -
Page 24: Removing A Timer
V i e w i n g A c t i v e T i m e r s You can view a list of the active timers. Press (Tools). Press View Timers. You see a list of timers that are in use (counting down). Press Return to go back to the Main screen. -
Page 25: Using The Search Feature
U s i n g t h e S e a r c h F e a t u r e Press (Tools) then press Search. Enter the word to search. Using the Application 3-13... - Page 26 The search box drops down to suggest possible results. Press the show/hide keypad button to expand the drop down. If you see what you want to search, select it then press (Enter). Otherwise, continue typing your search words then press (Enter). To cancel the search at any time, press Cancel.
- Page 27 The resulting product buttons are displayed in the color of their category. Press the button you want to print/view. Using the Application 3-15...
-
Page 28: Exiting The Application
E x i t i n g t h e A p p l i c a t i o n Your System Administrator may have installed additional applications on your printer. To open one of these applications: Press (Tools). Press Exit FreshMarx. -
Page 29: Printing Labels
P R I N T I N G L A B E L S This chapter describes how to print freshness and Use First labels and batches of labels. P r i n t i n g F r e s h n e s s L a b e l s Turn on the printer. -
Page 30: Printing Use First Labels
P r i n t i n g U s e F i r s t L a b e l s Apply a “Use First” label to any product that needs to be used first. Press (Tools). Press Use First. Enter the quantity of Use First labels you need to print and press (Enter). -
Page 31: Printing A Batch
P r i n t i n g a B a t c h You can print a batch of labels. Batches must be created by your System Administrator. Press (Tools). Tools Bu tton Press Print Batch. Note: If you do not see the Print Batch button, your System Administrator has not created any batches. - Page 32 Select the batch to print. All labels in the batch print. 4-4 Operator’s Handbook...
-
Page 33: Care & Maintenance
C A R E & M A I N T E N A N C E This chapter tells you how to ♦ clear label jams ♦ clean the platen roller and printhead ♦ clean the printer. C l e a r i n g L a b e l J a m s To clear a jam: Open the cover. -
Page 34: Cleaning The Display
Use the plastic utensil to press the L-shaped bar. The platen roller is released. You may need to slightly open the front cover to eject the platen roller. Note: Art is cut-away to show detail. Clean the platen roller and printhead using a cotton swab moistened with isopropyl alcohol. Allow time for the parts to dry. -
Page 35: Troubleshooting
T R O U B L E S H O O T I N G This chapter lists some common printer problems and solutions. Problem Action The screen is off or the Press the Power Button to turn the printer off, press it again to printer is not responding. - Page 36 If these solutions do not work or you receive an error message that is not listed, call Technical Support at the number listed on the back of this manual. 6-2 Operator’s Handbook...
-
Page 37: Specifications
S P E C I F I C A T I O N S S y s t e m S p e c i f i c a t i o n s Height: 10.06” (255.55 mm) Width: 11.86" (301.41 mm) Depth: 8.36”... - Page 38 A-2 Operator’s Handbook...
- Page 40 AMERICAS 170 Monarch Lane Miamisburg, OH 45342 937 865 2123 (direct) Tel +800 543 6650 (8:00 a.m. – 6:30 p.m., EDT) Fax +937 865 6663 ASIA No. 7 Chun Ying Street Tseung Kwan O Industrial Estate New Territories, Hong Kong Tel +852 2372 3169 Fax +852 2995 0014 WESTERN EUROPE...