
Related Manuals for Denon PMA-900HNE


Summary of Contents for Denon PMA-900HNE
- Page 1 Contents Connections Playback Settings Tips Appendix PMA-900HNE INTEGRATED NETWORK AMPLIFIER Owner’s Manual Remote control Front panel Rear panel Index unit...
- Page 2 Contents Connections Playback Settings Tips Appendix Connections Accessories Inserting the batteries Connecting speakers Operating range of the remote control unit Connecting the speaker cables Part names and functions Connecting the subwoofer Front panel Speaker connection Rear panel Bi-wiring connection Remote control unit Connecting a playback device Connecting a recording device Connecting to a device with digital audio connectors...
- Page 3 Contents Connections Playback Settings Tips Appendix Playback Listening to music on a Bluetooth device Listening to music on a Bluetooth device Basic operation Pairing with other Bluetooth devices Turning the power on Reconnecting to this unit from a Bluetooth device Switching the power to standby Playing digital input Selecting the speakers for audio output...
-
Page 4: Auto Standby
Contents Connections Playback Settings Tips Appendix Settings Listening to Internet Radio Playing music stored on your mobile Menu map Playing back files stored on a PC or NAS Menu operation Playing music from a USB flash drive Audio AirPlay function Volume Limit Playing songs from your iPhone, iPod touch or iPad Playing iTunes music with this unit... - Page 5 Contents Connections Playback Settings Tips Appendix Tips Appendix Tips Playing back a USB flash drives Troubleshooting D/A converter Power does not turn on / Power is turned off Playing back a Bluetooth device Operations cannot be performed through the remote control unit Playing back files stored on a PC and NAS Display on this unit shows nothing Playing back Internet Radio...
- Page 6 Playback Settings Tips Appendix Thank you for purchasing this Denon product. To ensure proper operation, please read this owner’s manual carefully before using the product. After reading this manual, be sure to keep it for future reference. Accessories Check that the following parts are supplied with the product.
- Page 7 Contents Connections Playback Settings Tips Appendix Inserting the batteries NOTE 0 To prevent damage or leakage of battery fluid: 0 Do not use a new battery together with an old one. Remove the rear lid in the direction of the arrow and 0 Do not use two different types of batteries.
-
Page 8: Front Panel
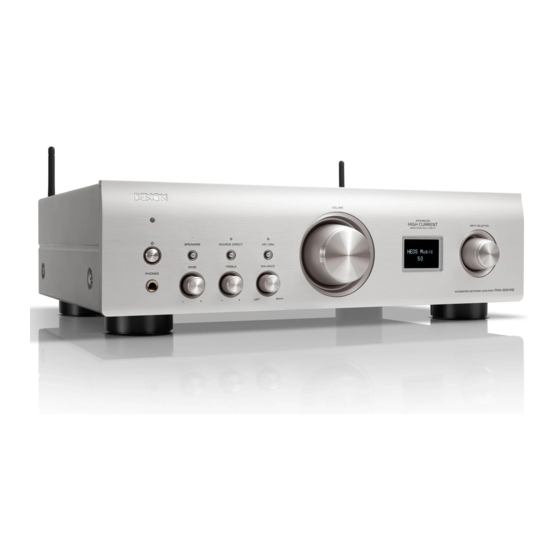
Contents Connections Playback Settings Tips Appendix Part names and functions Front panel For details, see the next page. Remote control Front panel Rear panel Index unit... - Page 9 Contents Connections Playback Settings Tips Appendix D SPEAKERS button tyuio This selects the speaker for audio output. (v p. 33) E SPEAKERS indicator This is lit as follows, according to the speaker output setting. SPEAKERS A: Green SPEAKERS B: Green SPEAKERS A+B: Green Speaker output off: Off F SOURCE DIRECT button...
- Page 10 Contents Connections Playback Settings Tips Appendix M BASS control knob This setting adjusts the volume level for the bass. (v p. 59) N TREBLE control knob This setting adjusts the volume level for the treble. (v p. 59) O BALANCE control knob This adjusts the balance of the volume output from the left and right speakers.
-
Page 11: Rear Panel
Contents Connections Playback Settings Tips Appendix Rear panel For details, see the next page. Remote control Front panel Rear panel Index unit... - Page 12 Contents Connections Playback Settings Tips Appendix B DIGITAL AUDIO IN connectors Used to connect devices equipped with digital audio output connectors. (v p. 25) C USB port (T) This is used to connect USB storages (such as USB flash drives). (v p.
- Page 13 Contents Connections Playback Settings Tips Appendix H AUDIO IN connectors Used to connect devices equipped with analog audio output connectors. “Connecting a playback device” (v p. 23) “Connecting a recording device” (v p. 24) I AUDIO OUT connectors Used to connect the input connector of a recorder. (v p. 24) J PRE OUT connector Used to connect a subwoofer with a built-in amplifier.
-
Page 14: Remote Control Unit
Tips Appendix Remote control unit The remote control provided with this unit can control a Denon CD player. “CD player operations” (v p. 17) o Operating this unit To operate this unit, press REMOTE MODE AMP button to switch the remote control operating mode to this unit. - Page 15 Contents Connections Playback Settings Tips Appendix D Input source select button (SOURCE) This switches input sources. (v p. 33) E CONNECT button Used for Wi-Fi setup. (v p. 70) F SOURCE DIRECT button Switches the source direct mode. (v p. 59) G ENTER button This determines the selection.
- Page 16 Contents Connections Playback Settings Tips Appendix M OPTION button This displays the option menu on the display. 0 An option menu is not displayed for some input sources. N MUTE button (:) This mutes the output audio. (v p. 34) O SETUP button The setting menu is displayed on the display.
- Page 17 Tips Appendix o CD player operations A Denon CD player can be operated. To operate CD player, press REMOTE MODE CD button to switch the remote control to the CD player operation mode. A Power operation button (CD POWER X)
- Page 18 Contents Connections Playback Settings Tips Appendix o Contents o Cables used for connections Provide necessary cables according to the devices you want to Connecting speakers connect. Connecting a playback device Connecting a recording device Speaker cable Connecting to a device with digital audio connectors Connecting a USB flash drive to the USB port Connecting to a home network (LAN) Subwoofer cable...
- Page 19 Contents Connections Playback Settings Tips Appendix Connecting speakers Connecting the speaker cables NOTE Carefully check the left (L) and right (R) channels and + (red) and – (black) 0 Disconnect this unit’s power plug from the power outlet before connecting the speakers.
- Page 20 Contents Connections Playback Settings Tips Appendix Connecting the subwoofer When using a banana plug Tighten the speaker terminal firmly before inserting the banana plug. Use a subwoofer cable to connect the subwoofer. Subwoofer 0 The subwoofer volume is linked to the Speaker A volume. 0 When the speaker for audio output is set to “Speakers B”, this unit does not output to the subwoofer.
- Page 21 Contents Connections Playback Settings Tips Appendix Speaker connection This unit is equipped with two sets of speaker terminals (SPEAKER SYSTEMS A and B). One set of speakers can be connected to each set of terminals, and a total of two sets of speakers can be connected. The same signal is output from the SPEAKER SYSTEMS A and B terminals.
- Page 22 Contents Connections Playback Settings Tips Appendix Bi-wiring connection This connection limits the effects of signal interference between the high range speakers (tweeters) and low range speakers (woofers), allowing you to enjoy high quality playback. When bi-wiring with bi-wireable speakers, connect the mid and high range terminals to SPEAKER SYSTEMS A (or B), the low range terminals to SPEAKER SYSTEMS B (or A).
- Page 23 Contents Connections Playback Settings Tips Appendix Connecting a playback device You can connect turntables, CD players and Blu-ray disc player to this unit. If you set this unit’s input source to “PHONO” and accidentally increase the volume without connecting a turntable, you may hear a humming noise from the speakers.
- Page 24 Contents Connections Playback Settings Tips Appendix Connecting a recording device Recording device AUDIO OUT AUDIO IN NOTE 0 Never insert the short-circuiting pin plug into the analog audio output connectors (AUDIO OUT RECORDER). Doing so could result in damage. Remote control Front panel Rear panel Index...
- Page 25 Contents Connections Playback Settings Tips Appendix Connecting to a device with digital audio connectors Use this connection to input digital audio signals to this unit, and convert the signals for playback using the D/A converter of this unit. (v p. 39) TV / Satellite receiver etc.
- Page 26 Contents Connections Playback Settings Tips Appendix 0 When connecting a TV to this unit, turn off the audio output of the TV’s internal speakers. See the owner’s manual of your TV for details. NOTE 0 Linear PCM signals with a sampling frequency of 32 kHz, 44.1 kHz, 48 kHz, 88.2 kHz, 96 kHz, 176.4 kHz, or 192 kHz can be input into this unit. 0 Do not input non-PCM signals, such as Dolby Digital, DTS and AAC.
- Page 27 USB flash drive 0 Denon does not guarantee that all USB flash drives will operate or receive power. When using a portable USB hard disk drive (HDD) which came with an AC adapter, use that device’s supplied AC adapter. NOTE 0 USB flash drives will not work via a USB hub.
- Page 28 Contents Connections Playback Settings Tips Appendix Connecting to a home network (LAN) This unit can connect to a network using a wired LAN or wireless LAN. Wired LAN You can connect this unit to your home network (LAN) to enable various types of playback and operations as described below.
- Page 29 Contents Connections Playback Settings Tips Appendix Wireless LAN 0 When using this unit, we recommend you use a router equipped with the following When connecting to the network via wireless LAN, connect the external functions: antennas for Bluetooth/wireless connectivity connection to the rear panel 0 Built-in DHCP server and stand them upright.
- Page 30 Contents Connections Playback Settings Tips Appendix Connecting the power cord After completing all the connections, insert the power plug into the power outlet. To household power outlet (AC 120 V, 60 Hz) Power cord(supplied) Remote control Front panel Rear panel Index unit...
- Page 31 Contents Connections Playback Settings Tips Appendix o Contents Playback a device Basic operation Playing CDs Turning the power on Listening to music on a Bluetooth device Switching the power to standby Playing digital input Selecting the speakers for audio output Selecting the input source Convenience functions Adjusting the volume...
- Page 32 Contents Connections Playback Settings Tips Appendix Basic operation Turning the power on AMP POWER X Press AMP POWER X to turn on. Input source The power indicator lights green. select buttons 0 You can also press X on the main unit to turn on power from standby mode. 0 You can also press 1/3 to turn on power from standby mode.
- Page 33 Contents Connections Playback Settings Tips Appendix Selecting the speakers for audio output Selecting the input source Press SPEAKERS on the main unit to select the Press the input source select button to be played back. speaker system to be used for playback. The selected input source appears on the display.
- Page 34 Contents Connections Playback Settings Tips Appendix Adjusting the volume Use VOLUME df to adjust the volume. The volume level appears on the display. 0 You can also adjust the volume by turning VOLUME on the main unit. Turning off the sound temporarily (Muting) Press :.
- Page 35 Contents Connections Playback Settings Tips Appendix Playing CDs Prepare for playback. Check the connection, then turn on this units. (“Connecting a AMP POWER playback device” (v p. 23)) Press AMP POWER X to turn the power on. Press the input source select button (CD) to switch the input source to “CD”.
- Page 36 Contents Connections Playback Settings Tips Appendix Listening to music on a Bluetooth device Music files stored on Bluetooth devices such as smartphones, digital music players, etc. can be enjoyed on this unit by pairing and connecting this unit with the Bluetooth device. AMP POWER Communication is possible up to a range of about 98.4 ft/30 m.
- Page 37 Contents Connections Playback Settings Tips Appendix Listening to music on a Bluetooth Select this unit when its name appears in the list of device devices displayed on the screen of the Bluetooth device. In order to enjoy music from a Bluetooth device on this unit, the Bluetooth Connect to the Bluetooth device while “Bluetoorh Pairing...”...
- Page 38 Contents Connections Playback Settings Tips Appendix Pairing with other Bluetooth devices Reconnecting to this unit from a Bluetooth device Pair a Bluetooth device with this unit. After pairing is completed, the Bluetooth device can be connected without Activate the Bluetooth settings on your Bluetooth performing any operations on this unit.
- Page 39 Contents Connections Playback Settings Tips Appendix Playing digital input Prepare for playback. Check the connection, then turn on this units. (“Connecting to a device with digital audio connectors” (v p. 25)) Press COAXIAL or OPTICAL to switch the input source OPTICAL to “COAXIAL”...
- Page 40 Contents Connections Playback Settings Tips Appendix 0 When “TV Input” is set in the menu, this unit automatically turns on when the TV connected to the unit is turned on, and the input source switches to “COAXIAL” or “OPTICAL”. (v p. 65) NOTE 0 Do not input non-PCM signals, such as Dolby Digital, DTS and AAC.
- Page 41 Contents Connections Playback Settings Tips Appendix Getting the HEOS App You can use many online music streaming services from the HEOS App. Depending upon your geographical location, there are several options to choose from. Download the HEOS App for iOS or Android by searching App Store, Google Play store or Amazon Appstore for “HEOS”. 0 Specifications of the HEOS App may be changed without prior notice for improvement purposes.
- Page 42 Contents Connections Playback Settings Tips Appendix Setting up the HEOS App for the first Make sure your mobile device is connected to your time with a HEOS built-in device wireless network (the network you want to connect to this device). Once you have placed this unit in your listening room and have You can check this in the “Settings”...
- Page 43 Contents Connections Playback Settings Tips Appendix o Adding wireless HEOS built-in devices Adding the registration of HEOS built- in devices in the HEOS App You can add additional wireless HEOS built-in devices to your HEOS system by selecting “Add Device” from the HEOS App’s settings menu and follow the instructions: The HEOS system is a true multiroom audio system that automatically synchronizes audio playback between multiple HEOS built-in devices so...
-
Page 44: Heos Account
Contents Connections Playback Settings Tips Appendix o Changing your HEOS Account HEOS Account HEOS Accounts can be registered in “HEOS Account” (v p. 44) in the Tap the “Music” tab. menu of this unit or by tapping “Music” tab - “Settings” icon in the Select the Settings icon in the upper left corner of... - Page 45 Some services may be added or discontinued from time to time based on decisions of the music service providers or others. o Selecting a room/device Tap the “Rooms” tab. Select “Denon PMA-900HNE” if Rooms Music Now Playing there are multiple HEOS devices.
- Page 46 Contents Connections Playback Settings Tips Appendix o Selecting the music track or station from music sources Music Tap the “Music” tab and select a music source. 0 All music services displayed may not be available in your location. Rooms Music Now Playing Remote control Front panel...
-
Page 47: Heos Favorites
Contents Connections Playback Settings Tips Appendix Browse the music to play. Album Now Playing After selecting a music track or radio station the app will Artist Album automatically change to the “Now Playing” screen. 10 Tracks,60 Mins.,2014 1 Track 1 0:20 0 When you select a music track to play you will be asked how you want to 0:50... - Page 48 Contents Connections Playback Settings Tips Appendix Listening to the same music in multiple Rooms Rooms rooms Drag one room into another to group them Drag one room into another to group them Dining Dining Song Name 1 The HEOS system is a true multi-room audio system that automatically Song Name 1 synchronizes audio playback between multiple HEOS devices so that the Living...
- Page 49 Contents Connections Playback Settings Tips Appendix o Ungrouping rooms Rooms Rooms Drag one room into another to group them Drag one room into another to group them Press and hold your finger on room that you want to Dining remove from the group. Dining Song Name 1 Song Name 1...
- Page 50 Contents Connections Playback Settings Tips Appendix o Grouping all rooms (party mode) Rooms Rooms You can easily group 16 rooms together into Party Mode by using a Drag one room into another to group them Drag one room into another to group them “pinch”...
- Page 51 Contents Connections Playback Settings Tips Appendix o Ungrouping all rooms Rooms Rooms You can easily ungroup all of your rooms and exit Party Mode by using Drag one room into another to group them Drag one room into another to group them a “spread”...
- Page 52 Contents Connections Playback Settings Tips Appendix Listening to Internet Radio Playing music stored on your mobile Perform this operation on the HEOS App. Download the HEOS App in advance to your iOS or Android device. (v p. 41) Perform this operation on the HEOS App. Download the HEOS App in The HEOS system includes access to more than 100,000 free internet advance to your iOS or Android device.
- Page 53 Contents Connections Playback Settings Tips Appendix Playing back files stored on a PC or Playing music from a USB flash drive Perform this operation on the HEOS App. Download the HEOS App in Perform this operation on the HEOS App. Download the HEOS App in advance to your iOS or Android device.
- Page 54 “Playing back a USB flash drives” (v p. 91). NOTE 0 Note that Denon will accept no responsibility whatsoever for any problems arising with the data on a USB memory device when using this unit in conjunction with the USB memory device.
- Page 55 Contents Connections Playback Settings Tips Appendix AirPlay function Music files stored on your iPhone, iPod touch, iPad or iTunes can be Router This unit played on this unit via the network. 0 Input source will be switched to “AirPlay” when AirPlay playback is started. 0 You can stop AirPlay playback by choosing other input source.
- Page 56 Contents Connections Playback Settings Tips Appendix Playing songs from your iPhone, iPod Playing iTunes music with this unit touch or iPad Install iTunes 10, or later, on a Mac or Windows PC that If you update your “iPhone/iPod touch/iPad” to iOS 10.0.2 or later, you can is connected to the same network as this unit.
- Page 57 Songs from an iPhone, iPod touch or iPad operating iOS 11.4 or later can be synced with multiple AirPlay 2 supported devices for simultaneous iPhone playback. Denon xxxxxxxx Speakers Play the song on your iPhone, iPod touch or iPad. AirPlay icon is displayed on the iPhone, iPod touch or iPad screen.
- Page 58 Contents Connections Playback Settings Tips Appendix Spotify Connect function Spotify is all the music you’ll ever need. Millions of songs available Playing Spotify music with this unit instantly. Just search for the music you love, or let Spotify play you something great.
-
Page 59: Sleep Timer
Contents Connections Playback Settings Tips Appendix Convenience functions Adjusting the tone and balance AMP POWER X Press SOURCE DIRECT and set it to “SOURCE DIRECT OFF”. Input source select buttons Turn the BASS, TREBLE and BALANCE on the main unit to adjust the tone and balance. Playback in source direct mode The signal does not pass through the tone adjustment circuitry (BASS, SOURCE DIRECT... - Page 60 Contents Connections Playback Settings Tips Appendix Switching the display’s brightness Using the sleep timer The display brightness can be adjusted between four levels. Switching the You can have the power automatically switched to standby once a set time display off reduces a source of noise that affects sound quality, enabling has elapsed.
- Page 61 Contents Connections Playback Settings Tips Appendix Recording Audio signals input into this unit can be output to an external recording device. When recording audio from a playback device connected to this unit, audio can be recorded with the playback device still connected to this unit.
- Page 62 Contents Connections Playback Settings Tips Appendix Menu map For menu operations, see the following page. By default, this unit has recommended settings defined. You can customize this unit based on your existing system and your preferences. Setting items Detailed items Description Page Audio...
- Page 63 Contents Connections Playback Settings Tips Appendix Menu operation Press SETUP. The menu is displayed on the display. Use ui to select the menu to be set or operated, then press ENTER. Use ui to change to desired setting. Press ENTER to enter the setting. To return to the previous item, press BACK.
- Page 64 Contents Connections Playback Settings Tips Appendix Audio Make audio-related settings. Volume Limit Make a setting for maximum volume. The volume cannot be increased above this setting. Do not set a maximum volume. (100) (Default): 95 / 90 / 85 / 80 Remote control Front panel Rear panel...
- Page 65 Contents Connections Playback Settings Tips Appendix TV Input Auto-Play Set the input source to be used when playing audio from the TV through When a TV audio source is input to this unit, the unit automatically this unit. Set this according to the jack on this unit being used to connect to switches to the input source set in “TV Input”...
- Page 66 Contents Connections Playback Settings Tips Appendix General Auto-Standby Reset Sets the amount of time that must elapse without unit operation or an input Perform this procedure if the display is abnormal or if operations cannot be signal before the unit goes into standby automatically. performed.
- Page 67 Contents Connections Playback Settings Tips Appendix Network Network & USB-A Wi-Fi The network and USB playback (USB-A) functions can be stopped to The Wi-Fi function can be stopped to prevent noise that affects the sound prevent noise that affects the sound quality. This enables playback with a quality.
- Page 68 Contents Connections Playback Settings Tips Appendix Network Control Enables network communication in standby power mode. Network is on during standby. Main unit operable with a network compatible (Default): controller. Off: Suspend network function during standby. 0 When using the HEOS App, use with the “Network Control” setting set to “On”. NOTE 0 When “Network Control”...
- Page 69 WAC setup mode manually, press the BACK button. At the bottom of the Wi-Fi setup screen for iOS devices, select “Denon PMA-900HNE” from “SET UP NEW AIRPLAY SPEAKER...”. Make sure the iOS device is connected to the wireless LAN (Wi- Fi) router.
- Page 70 Contents Connections Playback Settings Tips Appendix Connecting by using the WPS button on the router If you are using a wireless router that supports WPS (Wi-Fi Protected Setup™), connect to the network with the "push button method". (Wi-Fi Protected Setup™ is trademarks of Wi-Fi Alliance.) Press the WPS button on your router.
- Page 71 I want the volume not to become too loud by mistake Bluetooth cannot be played back I want to operate a Denon CD player with this unit’s remote control The Internet radio cannot be played back Music files on PC or NAS cannot be played back (Music server)
-
Page 72: Tips
Contents Connections Playback Settings Tips Appendix Tips I want to listen to high sound performance playback The network and USB memory playback (USB-A) functions can be stopped to prevent noise that affects the sound quality. Set “Network & USB-A” to “Off”... - Page 73 (v p. 64) I want to operate a Denon CD player with this unit’s remote control Denon CD players can be operated with this unit’s remote control. Refer to the instruction manual of the CD player too. (v p. 17) Remote control...
-
Page 74: Troubleshooting
Contents Connections Playback Settings Tips Appendix Troubleshooting If a problem should arise, first check the following: 1. Are the connections correct? 2. Is the set being operated as described in the owner’s manual? 3. Are the other devices operating properly? 0 If steps 1 to 3 above do not improve the problem, restarting the device may improve the problem. - Page 75 Contents Connections Playback Settings Tips Appendix Power does not turn on / Power is turned off Power is not turned on. Check whether the power plug is correctly inserted into the power outlet. (v p. 30) This unit is in standby mode. Press the X button on the unit or the AMP POWER X button on the remote control. (v p. 32) Power automatically turns off.
- Page 76 Contents Connections Playback Settings Tips Appendix The power turns off and the protection circuit indicator shows one long blink and four short blinks in red. The protection circuit has been activated due to a rise in temperature within this unit. Turn the power off, wait about an hour until this unit cools down sufficiently, and then turn the power on again.
- Page 77 Contents Connections Playback Settings Tips Appendix Operations cannot be performed through the remote control unit Operations cannot be performed through the remote control unit. Batteries are worn out. Replace with new batteries. (v p. 7) Operate the remote control unit within a distance of about 23 ft/7 m from this unit and at an angle of within 30°. (v p. 7) Remove any obstacle between this unit and the remote control unit.
- Page 78 Contents Connections Playback Settings Tips Appendix No sound comes out No sound comes out of speakers. Check the connections for all devices. (v p. 18) Insert connection cables all the way in. Check that input connectors and output connectors are not reversely connected. Check cables for damage.
- Page 79 Contents Connections Playback Settings Tips Appendix Sound is interrupted or noise occurs During playback from the Internet radio or USB flash drive, sound is occasionally interrupted. When the transfer speed of the USB flash drive is slow, sound may occasionally be interrupted. The network communication speed is slow or the radio station is busy.
- Page 80 Contents Connections Playback Settings Tips Appendix When playing a record, the sound is distorted. Adjust to a proper needle pressure. Check the tip of the needle. Replace the cartridge. When playing a record, a humming noise comes out of the speakers. Check that the turntable is connected correctly.
- Page 81 Contents Connections Playback Settings Tips Appendix Desired sound does not come out The volume does not increase. The maximum volume is set too low. Set the maximum volume using “Volume Limit” on the menu. (v p. 64) Left/right volume balance is unbalanced. Adjust the BALANCE control knob.
- Page 82 Contents Connections Playback Settings Tips Appendix AirPlay cannot be played back The AirPlay icon is not displayed on iTunes / iPhone / iPod touch / iPad. This unit and PC / iPhone / iPod touch / iPad are not connected to the same network (LAN). Connect it to the same LAN as this unit. (v p. 28) The firmware on iTunes / iPhone / iPod touch / iPad is not compatible with AirPlay.
-
Page 83: Usb Flash Drive
Contents Connections Playback Settings Tips Appendix USB flash drives cannot be played back USB flash drive is not recognized. Disconnect and reconnect the USB flash drive. (v p. 27) Mass storage class compatible USB flash drives are supported. This unit does not support a connection through a USB hub. Connect the USB flash drive directly to the USB port. The USB flash drive must be formatted to FAT32 or NTFS. - Page 84 Contents Connections Playback Settings Tips Appendix Bluetooth cannot be played back Bluetooth devices cannot be connected to this unit. The Bluetooth function in the Bluetooth device has not been enabled. See the Owner’s Manual of the Bluetooth device to enable the Bluetooth function. Bring the Bluetooth device near to this unit.
- Page 85 Contents Connections Playback Settings Tips Appendix The Internet radio cannot be played back A list of radio stations is not displayed in the HEOS App. The LAN cable is not properly connected, or the network is disconnected. Check the connection status. (v p. 28) Internet Radio cannot be played.
-
Page 86: Nas
Contents Connections Playback Settings Tips Appendix Music files on PC or NAS cannot be played back (Music server) Files stored on a computer cannot be played. Files are stored in a non-compatible format. Record in a compatible format. (v p. 94) Files that are copyright protected cannot be played on this unit. - Page 87 Contents Connections Playback Settings Tips Appendix Various online services cannot be played Various online services cannot be played. The online service may have been discontinued. Cannot connect to a wireless LAN network Cannot connect to the network. Make sure your mobile device is connected to your wireless network before setting up this unit. (v p. 42) You can connect this unit to your network router using an Ethernet cable sold separately.
- Page 88 Contents Connections Playback Settings Tips Appendix Audio from digital devices cannot be played back (Coaxial/Optical) “Unlocked” is displayed. When digital audio signals cannot be detected properly, “Unlocked” is displayed. (v p. 39) “Unsupported” is displayed. “Unsupported” is displayed when audio signals that are not supported by this unit are input. Check the audio output signal format from your digital device.
- Page 89 Contents Connections Playback Settings Tips Appendix Update/upgrade error messages If an update/upgrade is interrupted or fails, an error message appears. Display Description Connection failed. Please check your network, then try The network connection is unstable. again. Connection to the server failed. Check your network environment and try the update again.
- Page 90 Contents Connections Playback Settings Tips Appendix Restoring the firmware to the factory defaults When the unit or the network functions do not work properly, operation may be improved by restoring the firmware to the factory defaults. Perform this operation if it does not work after attempting “General” - “Reset” of the settings menu. (v p. 66) After the firmware is restored, various settings are reset to the default settings.
- Page 91 Contents Connections Playback Settings Tips Appendix Playing back a USB flash drives This unit is compatible with MP3 ID3-Tag (Ver. 2) standard. This unit is compatible with WMA META tags. If the image size (pixels) of an album artwork exceeds 500 × 500 (WMA/MP3/Apple Lossless/DSD) or 349 × 349 (MPEG-4 AAC), then music may not be played back properly.
- Page 92 Contents Connections Playback Settings Tips Appendix D/A converter o Maximum number of playable files and folder The limits on the number of folders and files that can be displayed by this unit are as follows. o Specifications of supported audio formats Media USB flash drive Coaxial/Optical...
- Page 93 Contents Connections Playback Settings Tips Appendix Playing back a Bluetooth device This unit supports the following Bluetooth profile. A2DP (Advanced Audio Distribution Profile) : When a Bluetooth device that supports this standard is connected, monaural and stereo sound data can be streamed at a high quality. AVRCP (Audio/Video Remote Control Profile)...
- Page 94 Contents Connections Playback Settings Tips Appendix Playing back files stored on a PC and NAS This unit is compatible with MP3 ID3-Tag (Ver. 2) standard. This unit is compatible with WMA META tags. If the image size (pixels) of an album artwork exceeds 500 × 500 (WMA/MP3/WAV/FLAC) or 349 × 349 (MPEG-4 AAC), then music may not be played back properly.
- Page 95 Contents Connections Playback Settings Tips Appendix Playing back Internet Radio o Playable broadcast station specifications Sampling frequency Bit rate Extension 32/44.1/48 kHz 48 – 192 kbps .wma 32/44.1/48 kHz 32 – 320 kbps .mp3 .aac/ MPEG-4 AAC 32/44.1/48 kHz 48 – 320 kbps .m4a Last function memory This function stores the settings which were made before going into the...
- Page 96 Contents Connections Playback Settings Tips Appendix Explanation of terms o Audio FLAC (Free Lossless Audio Codec) FLAC stands for Free lossless Audio Codec, and is a lossless free audio Apple Lossless Audio Codec file format. Lossless means that the audio is compressed without any loss This is a codec for lossless audio compression method developed by in quality.
- Page 97 Contents Connections Playback Settings Tips Appendix THIS SOFTWARE IS PROVIDED BY THE COPYRIGHT HOLDERS AND MP3 (MPEG Audio Layer-3) CONTRIBUTORS “AS IS” AND ANY EXPRESS OR IMPLIED This is an internationally standardized audio data compression scheme, WARRANTIES, INCLUDING, BUT NOT LIMITED TO, THE IMPLIED using the “MPEG-1”...
- Page 98 Contents Connections Playback Settings Tips Appendix o Network Sampling frequency Sampling involves taking a reading of a sound wave (analog signal) at AirPlay regular intervals and expressing the height of the wave at each reading in AirPlay sends (plays) contents recorded in iTunes or on an iPhone/iPod digitized format (producing a digital signal).
-
Page 99: Pairing
Contents Connections Playback Settings Tips Appendix o Other WPA-PSK/WPA2-PSK (Pre-shared Key) This is a simple authentication system for mutual authentication when a Source direct preset character string matches on the wireless LAN access point and Playback with higher fidelity to the source becomes possible, as input client. - Page 100 Contents Connections Playback Settings Tips Appendix Trademark information Apple, AirPlay, iPad, iPad Air, iPad Pro and iPhone are trademarks of The Wi-Fi CERTIFIED logo is a registered trademark of the Wi-Fi Apple Inc., registered in the U.S. and other countries. Alliance.
- Page 101 Contents Connections Playback Settings Tips Appendix Specifications o Power amplifier section Rated output power: 2-channel driving (CD → SP OUT) 50 W + 50 W (8 Ω/ohms, 20 Hz - 20 kHz, T.H.D. 0.07 %) 85 W + 85 W (4 Ω/ohms, 1 kHz, T.H.D. 0.7 %) Total harmonic distortion: 0.01 % (Rated output: –3 dB), 8 Ω/ohms, 1 kHz Output terminals:...
- Page 102 Contents Connections Playback Settings Tips Appendix o Overall performance SN Ratio (A network): PHONO (MM): 86 dB (With input terminals short-circuited, 5 mV input signal) PHONO (MC): 71 dB (With input terminals short-circuited, 0.5 mV input signal) CD, AUX, RECORDER: 105 dB (input terminals short-circuited) Frequency response: 5 Hz –...
-
Page 103: Wireless Lan
Contents Connections Playback Settings Tips Appendix o Wireless LAN section Network type (wireless LAN standard): Conforming to IEEE 802.11a/b/g/n/ac (Wi-Fi ® compliant) Security: WEP 64 bit, WEP 128 bit WPA/WPA2-PSK (AES) WPA/WPA2-PSK (TKIP) Used frequency range: 2.4 GHz, 5 GHz z1 The Wi-Fi ®... - Page 104 Contents Connections Playback Settings Tips Appendix o Bluetooth section Communications system: Bluetooth Specification Version 4.2 Transmission power: Bluetooth Specification Power Class 1 Maximum communication range: Approx. 98.4 ft/30 m in line of sight Used frequency range: 2.4 GHz Modulation scheme: FHSS (Frequency-Hopping Spread Spectrum)...
- Page 105 Contents Connections Playback Settings Tips Appendix o General Operating temperature: 41 °F - 95 °F (5 °C - 35 °C) Power supply: AC 120 V, 60 Hz Power consumption: 200 W Power consumption in standby mode : 0.2 W Power consumption in “Network Control” – “On”...
- Page 106 Contents Connections Playback Settings Tips Appendix o Dimensions (Unit : in. (mm)) 17.1 (434) (60) (45) 13.5 (344) (45) Weight : 18 lbs 5 oz (8.3 kg) Remote control Front panel Rear panel Index unit...
-
Page 107: Table Of Contents
Contents Connections Playback Settings Tips Appendix Index Front panel ............8 Menu map ............62 AirPlay ............55 HEOS Account ..........44 NAS ............53, 94 Auto Standby ..........66 HEOS Favorites ..........47 Network settings ..........67 Bluetooth device ..........36 Input source ........... - Page 108 Contents Connections Playback Settings Tips Appendix Rear panel ............11 USB flash drive ......... 27, 53 Remote control unit ........14 Wi-Fi settings ..........67 Sleep timer ............. 60 Wired LAN ..........28, 67 Spotify ............58 Wireless LAN ........... 29, 67 Tips ..............
- Page 109 3520 10839 00AD ©2022 Sound United. All Rights Reserved.