Wolf E Series General Information Manual
Hide thumbs
Also See for E Series:
- Technical & service manual (106 pages) ,
- Use and care manual (73 pages) ,
- Installation manual (44 pages)
Table of Contents
Advertisement
General Information
GENERAL INFORMATION
SERVICE MANUAL INTRODUCTION
This service manual helps with troubleshooting and diagnosing
malfunctions, completion of repairs, and return of the product to
proper operating condition. Read the complete instructions
contained within before initiating any repairs.
This guide is intended for use by Factory Certified Service. Wolf
Appliance, Inc. recommends that only Factory Certified Service
companies do repairs.
Warning and Caution product safety labels appear throughout
this manual. Product safety labels appear at the beginning of
some sections. Follow the instructions in the product safety
labels to avoid personal injury and/or product damage. The
sample safety labels explain the types of notices that appear in
this manual.
WARNING
States a hazard that may cause serious injury or
death if precautions are not followed.
CAUTION
Indicates minor injury or product damage may occur
if precautions are not followed.
IMPORTANT NOTE: Highlights especially important information.
TIP: Indicates additional, useful information.
Information and images contained herein are copyright of Wolf
Appliance, Inc. Neither this manual nor any information or
images contained herein may be copied or used in whole or in
part without the express written consent of Wolf Appliance, Inc.
©
Wolf Appliance, Inc., all rights reserved.
WOLF PRODUCT RATING PLATE INFORMATION
Important information for each product is listed on the product
rating plate. Rating plates identify:
•
Model
•
Serial number
•
Electrical information
MODEL DESCRIPTIONS AND SALES ACCESSORIES
For more details on individual model descriptions and a listing
of all compatible sales accessories, see the
Sales Accessory Reference Guide
829345 REVA
Wolf Product and
.
E SERIES OVEN MODEL KEY
Model Character
ICB
SO
DO
24, 30
50
PE
TE
CE
/B
/S
/T
/P
PRODUCT USE AND CARE AND INSTALLATION GUIDES
Product use and care guides, installation guides, and other
product specifications are available in the
Specifications and Manuals Library
UNIT WARRANTY
Product warranty is determined by the installation location and
the date of installation.
•
View product warranties at
warranty
.
•
Warranties start on the day of product installation.
•
Search for warranty and service information by serial
number, customer last name, and address using Unit
http://service.subzero.com/Tools/UnitHistory
History at
1
E Series Oven
service.subzero.com
Description
International designation
Single oven
Double oven
Width (in inches)
Model differentiator
Professional E Series
Transitional E Series
Contemporary E Series
Black trim
Stainless steel trim
Tubular handle
Professional handle
Product
.
https://www.subzero-wolf.com/
.
Advertisement
Table of Contents

Related Manuals for Wolf E Series


Summary of Contents for Wolf E Series
- Page 1 International designation proper operating condition. Read the complete instructions contained within before initiating any repairs. Single oven This guide is intended for use by Factory Certified Service. Wolf Double oven Appliance, Inc. recommends that only Factory Certified Service 24, 30 Width (in inches) companies do repairs.
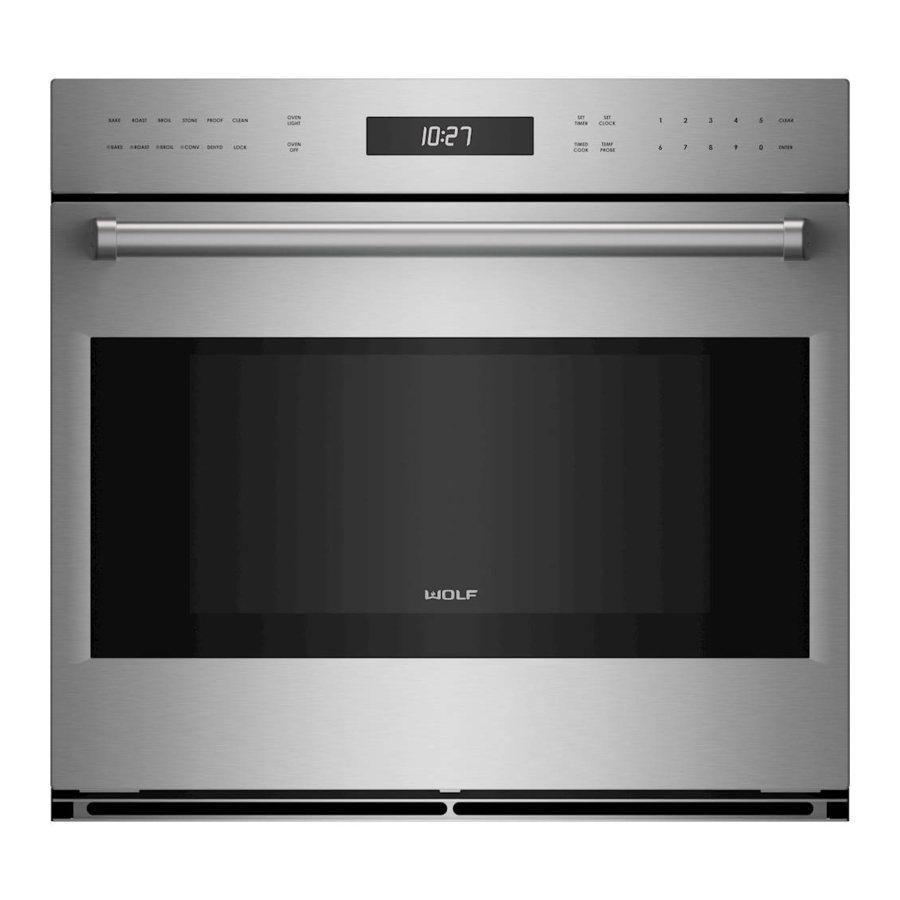
- Page 2 SETTINGS Touch Set or Start/Enter. The confirmation screen appears. E SERIES OVEN CONTROL PANEL The E Series Ovens control panel allows you to turn the oven on or off, select cooking modes, and set the timer and temperature. Single Oven Control Panel If the model number is correct, touch Confirm or Start/Enter.
- Page 3 E Series Oven Settings service.subzero.com SET THE LANGUAGE ON POWER-UP (continued) Scroll left or right to highlight the desired language. Touch Start/Enter or the highlighted selection. The Set Language screen appears. Touch Start/Enter or Set. Set the Time on Power-Up The Select Time Format screen appears.
- Page 4 System information, including the oven serial number. Temp Offset Increase or decrease the temperature up to 35°F (19°C) from the RTD temperature being used by the controls. This internal offset is reflected in the temperature display. Wolf Appliance's assistance is recommended. Calibration Calibrate the touch location to graphic elements on the display.
- Page 5 E Series Oven Settings service.subzero.com SET THE TIME (continued) Touch Start/Enter or Time. The Select Time Format screen Touch Settings. The Settings screen appears. appears. Scroll left or right to highlight the 12-Hour or 24-Hour Scroll to select Sabbath on the UIM. Touch Sabbath or option.
- Page 6 E Series Oven Settings service.subzero.com SET SABBATH MODE (continued) Touch Set or Start/Enter. The Home screen with the Touch Start/Enter. The Stop Time screen appears. Sabbath icon appears. • Touch the control panel to enter the stop time. • Changing the stop time changes the time the oven Touch Bake, Roast, More, or Warm on the control panel.
- Page 7 E Series Oven Settings service.subzero.com SET THE CLOCK STYLE (continued) Touch Settings. The Settings screen appears. Touch Set or Start/Enter. The Home screen appears. Scroll to Clock on the UIM. Touch Clock or Start/Enter. The Clock Display Style screen appears.
-
Page 8: Set Standby
E Series Oven Settings service.subzero.com ENABLE THE CONNECTED FEATURE (continued) Scroll to Connect on the UIM. Touch Connect or Start/Enter. SET STANDBY The Connect On or Off screen appears. Touch the screen. The Home screen appears. Touch Settings. The Settings screen appears. -
Page 9: Set The Language
E Series Oven Settings service.subzero.com SET STANDBY (continued) Scroll left or right to highlight the On or Off option. Touch Touch Settings. The Settings screen appears. the highlighted selection or Start/Enter. The Standby set screen appears. Scroll to Language on the UIM. Touch Language or Start/ Enter. -
Page 10: Change Temperature Units
E Series Oven Settings service.subzero.com SET THE LANGUAGE (continued) Scroll left or right to highlight the desired language. Touch Scroll to Units on the UIM. Touch Units or Start/Enter. The Start/Enter or the highlighted selection. The Set Language Units Selection screen appears. -
Page 11: Option Info
E Series Oven Settings service.subzero.com SET SHOWROOM MODE (continued) Touch Settings. The Settings screen appears. OPTION INFO Touch the screen. The Home screen appears. Scroll to Showroom on the UIM. Touch Showroom or Start/ Touch Settings. The Settings screen appears. - Page 12 E Series Oven Settings service.subzero.com OPTION INFO (continued) Touch Info or Start/Enter. The Info screen appears. Scroll until the desired option is centered on the UIM. Touch the option or Start/Enter. The home screen of that option appears. Selecting an option gives information on what the option is.
- Page 13 E Series Oven Settings service.subzero.com About (Unit Information) (continued) ABOUT (UNIT INFORMATION) ADJUST TEMPERATURE OFFSET Touch the screen. The Home screen appears. Touch the screen. The Home screen appears. Touch Settings. The Settings screen appears. Touch Settings. The Settings screen appears.
-
Page 14: Calibrate The Screen
E Series Oven Settings service.subzero.com ADJUST TEMPERATURE OFFSET (continued) Scroll to set the Temp Offset between -35°F to 35°F (-19°C Scroll to Calibration on the UIM. Touch Calibration or Start/ to 19°C). Touch the temperature offset or Start/Enter. The Enter. The Calibration screen appears. -
Page 15: Adjust Brightness
E Series Oven Settings service.subzero.com ADJUST VOLUME AND TONE (continued) Touch Settings. The Settings screen appears. Scroll to select Mute, 1, 2, 3, 4, or 5. Touch the selected volume or Start/Enter. The Tone screen appears. Scroll to Sound on the UIM. Touch Sound or Start/Enter. - Page 16 E Series Oven Settings service.subzero.com ADJUST BRIGHTNESS (continued) Touch Settings. The Settings screen appears. Scroll to Brightness on the UIM. Touch Brightness or Start/ Enter. The Brightness screen appears. Scroll to adjust the brightness between 0% and 100% in 5% increments. Touch the selected percentage or Start/ Enter.
-
Page 17: Oven Modes
E Series Oven Oven Modes service.subzero.com OVEN MODES OVEN COOKING MODES Touching a mode on the control panel shows the mode or mode options on the user interface module (UIM). COOKING MODES Mode Preset Temperature Minimum Temperature Maximum Temperature Bake 350°F (175°C) -
Page 18: Roast Mode
E Series Oven Oven Modes service.subzero.com Roast Mode (continued) ROAST MODE Touch the control panel to enter the temperature. Then touch Start/Enter. Touch the screen. The Home screen appears. • Touching Start/Enter without adjusting the temperature turns the oven on at the preset temperature. -
Page 19: Warm Mode
E Series Oven Oven Modes service.subzero.com BROIL MODE (continued) Touch Broil on the control panel. The Broil screen appears. Touch Warm on the control panel. The Warm screen appears. Touch 1 on the control panel to set the Broil to low, touch 2 to set the Broil to medium, and touch 3 to set the Broil to Touch the control panel to enter the temperature. -
Page 20: Convection Mode
E Series Oven Oven Modes service.subzero.com CLEAN MODE (continued) Touch Clean on the control panel. The Clean screen When the Clean cycle is complete, the oven chimes four appears. times. • The oven door unlocks when the temperature is below Touch Start or Start/Enter. -
Page 21: Convection Roast Mode
E Series Oven Oven Modes service.subzero.com CONVECTION MODE (continued) Touch the control panel to enter the temperature. Then Touch Roast on the control panel. The Roast screen touch Start/Enter. appears. • Touching Start/Enter without adjusting the temperature turns the oven on at the preset temperature. -
Page 22: Proof Mode
E Series Oven Oven Modes service.subzero.com Proof Mode (continued) Done screen shows the rack position, mode, temperature, PROOF MODE probe temperature, and any special instructions. Touch the screen. The Home screen appears. Touch the screen. The Home screen appears. Touch Proof. -
Page 23: More Mode
E Series Oven Oven Modes service.subzero.com GOURMET MODE (continued) Scroll to select an option on the UIM. Touch the selection or Place the food in the oven according to the instructions. Start/Enter. If there are no further options, the Done screen Touch Start/Enter or Start. - Page 24 E Series Oven Oven Modes service.subzero.com CONNECT MODE (continued) Open and close the oven door. The Connect feature is ready Scroll to Stone. for use. Touch the control panel to enter the temperature. Then The customer can now connect to the appliance from the touch Start/Enter.
-
Page 25: Eco Mode
E Series Oven Oven Modes service.subzero.com ECO Mode (continued) ECO MODE Touch the control panel to enter the temperature. Then touch Start/Enter. Touch the screen. The Home screen appears. • Touching Start/Enter without adjusting the temperature turns the oven on at the preset temperature. - Page 26 E Series Oven Oven Modes service.subzero.com DEHYDRATE MODE (continued) Touch More on the control panel. The More Mode options appear. Scroll to Dehydrate. Touch the control panel to enter the temperature. Then touch Start/Enter. • Touching Start/Enter without adjusting the temperature turns the oven on at the preset temperature.
-
Page 27: Auxiliary Controls
E Series Oven Auxiliary Controls service.subzero.com AUXILIARY CONTROLS AUXILIARY CONTROLS There are options on the UIM Home screen and in cooking modes that allow for convenient control of the unit. AUXILIARY CONTROLS Symbol Location Function Special Functions Lock Home screen Lock or unlock UIM. -
Page 28: Timed Cook
E Series Oven Auxiliary Controls service.subzero.com PROBE (continued) Touch OK or Start/Enter. The Set Probe screen appears. When cooking is in progress, the probe registers the internal temperature of the food. Touch the control panel to enter the temperature. Then •... -
Page 29: Timer 1 And Timer
E Series Oven Auxiliary Controls service.subzero.com TIMED COOK (continued) The Select Cook Time Duration screen appears. TIMER 1 AND TIMER 2 From the Home screen or cooking mode, touch Timer 1 or Timer 2. • Touch the control panel to enter the cook time duration. - Page 30 E Series Oven Auxiliary Controls service.subzero.com TIMER 1 AND TIMER 2 (continued) Touch Start/Enter. The screen returns to the Home screen The oven light turns on. "Light" on the screen turns bold. or cooking mode. • Turning the light on or off in Sabbath Mode lasts for as •...
-
Page 31: General Diagnostics
E Series Oven Diagnostics service.subzero.com DIAGNOSTICS GENERAL DIAGNOSTICS DIAGNOSTICS Touch the screen. The Home screen appears. Diagnostics gives the service technician the ability to inspect and test the unit. DIAGNOSTIC TABS Name Function General • Start self-test • Reposition screen •... - Page 32 E Series Oven Diagnostics service.subzero.com Touch and hold OK for 5 seconds. The Diagnostics menu Once self-test is complete, the results appear. appears. Touch OK or Start/Enter. The Diagnostics menu or Faults screen appears. Run Self-Test On the Diagnostics menu, touch Start Self-Test. The Self- Reposition the Screen Test Running screen appears.
- Page 33 E Series Oven Diagnostics service.subzero.com See Model Info (continued) See Model Info Scroll up or down to highlight the correct model number. On the Diagnostics menu, touch Model Info. The Model Info screen appears. Touch Set or Start/Enter. The configuration screen appears.
- Page 34 E Series Oven Diagnostics service.subzero.com TEST SCREEN (continued) The Test screen is a series of screens (red, green, blue, FAULTS white, black, and checkered) that shows any bad pixels in Touch the screen. The Home screen appears. the UIM display.
- Page 35 E Series Oven Diagnostics service.subzero.com Touch and hold OK for 5 seconds. The Diagnostics menu STATISTICS appears. Touch the screen. The Home screen appears. Touch Settings. The Settings screen appears. Touch the Faults tab. Scroll to About on the UIM. Touch About or Start/Enter. The About screen appears.
- Page 36 E Series Oven Diagnostics service.subzero.com Touch and hold OK for 5 seconds. The Diagnostics menu ACTIVATE COMPONENTS appears. Touch the screen. The Home screen appears. Touch Settings. The Settings screen appears. Touch the Statistics tab. Scroll to About on the UIM. Touch About or Start/Enter. The About screen appears.
- Page 37 E Series Oven Diagnostics service.subzero.com Touch and hold OK for 5 seconds. The Diagnostics menu SENSORS appears. Touch the screen. The Home screen appears. Touch Settings. The Settings screen appears. Touch the Control tab. Scroll to About on the UIM. Touch About or Start/Enter. The About screen appears.
- Page 38 E Series Oven Diagnostics service.subzero.com Touch and hold OK for 5 seconds. The Diagnostics menu There are multiple screens of oven feedback. appears. • To scroll through the sensors, touch the arrow keys on the right-hand side of the screen.
-
Page 39: Installation And Removal
E Series Oven Unit Removal and Installation Sections service.subzero.com UNIT REMOVAL AND INSTALLATION SECTIONS INSTALLATION AND REMOVAL WARNING Disconnect electrical power to any appliance covered in this manual before servicing. If electrical power is needed for component testing or diagnostics, disconnect electrical power immediately after testing or diagnostics are completed. - Page 40 E Series Oven Oven Door Component Removal and Installation service.subzero.com OVEN DOOR COMPONENT REMOVAL AND INSTALLATION Pull the door from the unit. DOOR MAGNET REMOVAL Remove the Door Magnet Use a putty knife to pry the door magnet from the top of the door liner.
-
Page 41: Door Handle Installation
E Series Oven Oven Door Component Removal and Installation service.subzero.com REMOVE THE OVEN DOOR LINER (continued) Lift the door liner away from the door skin. Remove the Door Handle TIP: The tubular handle and pro handle are removed the same way. The pro handle is shown below. - Page 42 E Series Oven Top Component Removal and Installation service.subzero.com TOP COMPONENT REMOVAL AND INSTALLATION CONTROL PANEL INSTALLATION CONTROL PANEL REMOVAL After installing the control panel, install: Upper air inlet cover WARNING Disconnect the product from the power source before starting this procedure.
- Page 43 E Series Oven Top Component Removal and Installation service.subzero.com Connected Module Installation (continued) CONNECTED MODULE INSTALLATION UPPER - SINGLE OVEN MOTOR DOOR LOCK INSTALLATION After installing the connected module, install: After installing the motor door lock on the single oven or upper...
- Page 44 E Series Oven Top Component Removal and Installation service.subzero.com REMOVE THE MOTOR DOOR LOCK (MDL) FOR THE LOWER OVEN (continued) Remove the MDL from the unit. Install the Motor Door Lock (MDL) TIP: On the left-hand switch (door lock switch), connect the white wire to common and the black wire to Normally Open (NO).
-
Page 45: Enclosure Cover Installation
E Series Oven Top Component Removal and Installation service.subzero.com REMOVE THE DOOR SWITCH SENSOR (continued) Remove the door switch assembly from the unit. Install the Door Switch Sensor Insert the door switch sensor wire harness and connector through the opening in the door switch bracket. - Page 46 E Series Oven Top Component Removal and Installation service.subzero.com Install the Enclosure Cover (continued) Install the Enclosure Cover Install the Relay Board Place the enclosure cover on the unit. Install the back edge Connect the wire harnesses to the top of the relay board.
- Page 47 E Series Oven Cavity Component Removal and Installation service.subzero.com CAVITY COMPONENT REMOVAL AND INSTALLATION Remove the middle air inlet cover from the unit. UPPER AIR INLET COVER REMOVAL Remove the Upper Air Inlet Cover Use a T-15 Torx bit to remove the upper air inlet cover mounting screws.
- Page 48 E Series Oven Cavity Component Removal and Installation service.subzero.com REMOVE THE MIDDLE VENT CHANNEL (continued) Remove the middle vent channel from the unit. Remove the halogen bulb. MIDDLE VENT CHANNEL INSTALLATION LIGHT BULB INSTALLATION After installing the middle vent channel, install:...
-
Page 49: Gasket Installation
E Series Oven Cavity Component Removal and Installation service.subzero.com REMOVE THE COVER COLLAR (continued) Remove the cover collar from the unit. Remove the gasket from the unit. COVER COLLAR INSTALLATION GASKET INSTALLATION After installing the cover collar, install: After installing the gasket, install:... - Page 50 E Series Oven Cavity Component Removal and Installation service.subzero.com REMOVE THE BROIL ELEMENT (continued) Remove the broil element from the unit. Remove the broil element panel from the unit. BROIL ELEMENT INSTALLATION BROIL ELEMENT PANEL INSTALLATION After installing the broil element, install:...
- Page 51 E Series Oven Cavity Component Removal and Installation service.subzero.com REMOVE THE SMOKE CATALYST (continued) Remove the smoke catalyst from the unit. Remove the lower trim seal from the unit. SMOKE CATALYST INSTALLATION LOWER TRIM SEAL INSTALLATION After installing the smoke catalyst, install:...
-
Page 52: Hinge Installation
E Series Oven Cavity Component Removal and Installation service.subzero.com REMOVE THE HINGE (continued) Pull the hinge from the unit. Remove the RTD from the unit. HINGE INSTALLATION TEMPERATURE SENSOR (RTD) INSTALLATION After installing the hinge, install: Install the Temperature Sensor... - Page 53 E Series Oven Cavity Component Removal and Installation service.subzero.com REMOVE THE CONVECTION FAN BAFFLE (continued) Pull the convection fan baffle forward from the unit. Use needle-nose pliers to disconnect the wire connectors from the convection element terminals. CONVECTION FAN BAFFLE INSTALLATION...
- Page 54 E Series Oven Cavity Component Removal and Installation service.subzero.com REMOVE THE CONVECTION FAN ASSEMBLY (continued) Remove the convection fan assembly from the unit. Remove the Bake Tray Assembly Use a T-15 Torx bit to remove the bake assembly spacing bracket screws.
- Page 55 E Series Oven Rear Component Removal and Installation service.subzero.com REAR COMPONENT REMOVAL AND INSTALLATION COOLING FAN REMOVAL UPPER BACK COVER REMOVAL WARNING Disconnect the product from the power source WARNING before starting this procedure. Disconnect the product from the power source before starting this procedure.
-
Page 56: Thermal Cutout (Tco) Removal
E Series Oven Rear Component Removal and Installation service.subzero.com Install the Cooling Fan (continued) Install the Cooling Fan Remove the TCO from the unit. Connect the wire harnesses to the cooling fan. Double check the HES wire harness connection. Place the cooling fan onto the unit. -
Page 57: Troubleshooting Guide
Circuit board that This section defines the error codes in a E Series Oven. carries the main The error code table shows a "priority" for each error. operating intelligence. - Page 58 E Series Oven Troubleshooting service.subzero.com WALL OVEN ERROR CODES WALL OVEN ERROR CODES Error Message Priority Component Service Instruction Code 0021 Bake Element Drive Shorted Upper/Single oven Replace the relay board. 0022 Bake Element Drive Shorted Lower oven Replace the relay board.
- Page 59 E Series Oven Troubleshooting service.subzero.com Wall Oven Error Codes WALL OVEN ERROR CODES Error Message Priority Component Service Instruction Code 1022 Bake Element Drive Open Lower oven Replace the relay board. 1121 R Conv Element Drive Open Upper/Single oven Replace the relay board.
- Page 60 E Series Oven Troubleshooting service.subzero.com Wall Oven Error Codes WALL OVEN ERROR CODES Error Message Priority Component Service Instruction Code 1B21 Cooling Fan Drive Open Upper/Single oven Check the cooling fan circuit. Replace the relay board. 1B22 Cooling Fan Drive Open Lower oven Check the cooling fan circuit.
- Page 61 E Series Oven Troubleshooting service.subzero.com Wall Oven Error Codes WALL OVEN ERROR CODES Error Message Priority Component Service Instruction Code 3221 RTD Open Upper/Single oven Check the RTD circuit. Replace the RTD if bad. Replace the relay board. 3222 RTD Open Lower oven Check the RTD circuit.
- Page 62 E Series Oven Troubleshooting service.subzero.com Wall Oven Error Codes WALL OVEN ERROR CODES Error Message Priority Component Service Instruction Code 3B20 Low Input Voltage Check the electrical supply to the unit. Voltage was below 177 volts. 3C20 High Input Voltage Check the electrical supply to the unit.
- Page 63 E Series Oven Troubleshooting service.subzero.com Wall Oven Error Codes WALL OVEN ERROR CODES Error Message Priority Component Service Instruction Code Replace the relay board. Check the convection fan. Check the convection fan connections. 4521 R Conv Fan Load Missing Upper/Single oven Check the voltage to the convection fan.
- Page 64 E Series Oven Troubleshooting service.subzero.com Wall Oven Error Codes WALL OVEN ERROR CODES Error Message Priority Component Service Instruction Code 5021 High Temperature During Clean Upper/Single oven Check the oven temperature. Check the RTD circuitry. Replace the RTD. Replace the relay board.
- Page 65 E Series Oven Troubleshooting service.subzero.com Wall Oven Error Codes WALL OVEN ERROR CODES Error Message Priority Component Service Instruction Code Reseat the MCB wire connections. Reseat the relay board wire connections. Replace the MCB. Reset the electrical supply. Reseat the MCB wire connections.
- Page 66 E Series Oven Troubleshooting service.subzero.com WALL OVEN ERROR CODES Error Message Priority Component Service Instruction Code B120 Class B communication Fault Reset the electrical supply. Reseat the MCB to control panel wire connections. Replace the control panel assembly. B220 RCB class B Fault Reset the electrical supply.
-
Page 67: Technical Data
E Series Oven Technical Data service.subzero.com TECHNICAL DATA E SERIES OVEN TECHNICAL DATA COMPONENT RATING CHART Part Description Part Number Voltage Amperage Watts Ohms Motorized latch 828242 Temperature Sensor 829884 1095 @ 77°F (25°C) Oven Light - Large 825350 Element, Convection... -
Page 68: Wiring Diagrams
E Series Oven Wiring Diagrams service.subzero.com WIRING DIAGRAMS E SERIES OVEN WIRING DIAGRAMS 829345 REVA... - Page 69 E Series Oven Wiring Diagrams service.subzero.com E Series Oven Wiring Diagrams 829345 REVA...
- Page 70 E Series Oven Wiring Diagrams service.subzero.com 829345 REVA...