Viessmann VITOCELL 140-E Installation And Service Instructions Manual
Solar buffer cylinder
Hide thumbs
Also See for VITOCELL 140-E:

Related Manuals for Viessmann VITOCELL 140-E


Summary of Contents for Viessmann VITOCELL 140-E
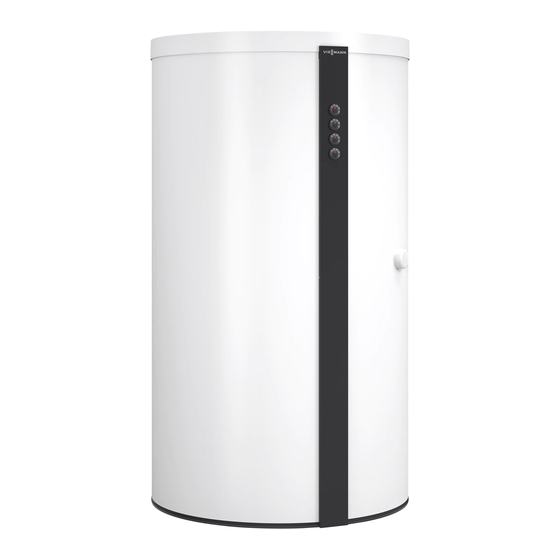
- Page 1 VIESMANN Installation and service instructions for contractors Vitocell 140-E/160-E Type SEIA Type SESA Solar buffer cylinder For applicability, see the last page VITOCELL 140-E/160-E Please keep safe. 5517 155 GB 3/2014...
- Page 2 Faulty components must be replaced with origi- sate or other causes. Ensure a sufficient supply of nal Viessmann spare parts. combustion air. Instruct system users that subsequent modifications to the building characteristics are not permissible (e.g.
- Page 3 Installing non-authorised components and making non-approved modifications or con- versions can compromise safety and may inva- lidate the warranty. For replacements, use only original spare parts supplied or approved by Viessmann.
-
Page 4: Table Of Contents
Index Index Intended use Installation information Product information ................Vitocell 140-E, type SEIA and Vitocell 160-E, type SESA (750 and ■ 950 l) ....................Connections ..................■ Siting information ................■ Installation sequence Vitocell without fitted Solar-Divicon ............Siting and levelling the Vitocell ............ - Page 5 Intended use Intended use The appliance is only intended to be installed and operated in sealed unvented systems that comply with EN 12828 / DIN 1988, or solar thermal systems that comply with EN 12977, with due attention paid to the associated installation, service and operating instruc- tions.
- Page 6 Installation information Product information Vitocell 140-E, type SEIA and Vitocell 160-E, type SESA (750 and 950 l) Solar buffer cylinder made from steel, for central Suitable for systems to EN 12828 and DIN 4753 ■ ■ heating backup in combination with heat pumps, Vitocell 160-E, type SESA also includes a stratifi- ■...
- Page 7 Installation information Product information (cont.) Heating water flow 1 to the heating circuits/air vent valve Heating water flow 2 from the heat source Sensor well for cylinder temperature sensor Thermometer sensor retainer Sensor well 2 for cylinder temperature sensor and thermometer sensor Heating water flow 3/heating water return Heating water return 2...
- Page 8 Installation information Product information (cont.) Cylinder capacity Output Dim. a Immersion heater 750 and 950 l 6 kW min. 500 mm 12 kW min. 700 mm Note The unheated length of any threaded immersion heater installed on site must be at least 100 mm.
-
Page 9: Installation Sequence
Installation sequence Vitocell without fitted Solar-Divicon See page 16 for installation of the version with fitted Solar-Divicon (accessories). Siting and levelling the Vitocell Please note The thermal insulation must not come into con- tact with naked flames. Exercise caution when welding and brazing. Fig. -
Page 10: Fitting The Thermometer Sensor (If Supplied)
Installation sequence Vitocell without fitted Solar-Divicon (cont.) Fitting the thermometer sensor (if supplied) Fig. 5 1. Guide the thermometer sensor through the cover 4. Depending on where the thermometer sensor is to strip and insert the thermometer. be fitted, secure it in the clamping bracket or pull the sensor retainer out of the sensor well. -
Page 11: Fitting The Vitotrans
Installation sequence Vitocell without fitted Solar-Divicon (cont.) Fitting the Vitotrans Fig. 6 Fig. 7 1. Fit the bolts to the cylinder. 3. Wind the nuts onto the bolts until hand-tight. 2. Fit the module. -
Page 12: Fitting The Thermal Insulation Jacket
Installation sequence Vitocell without fitted Solar-Divicon (cont.) DE F Fig. 8 1. Connect heating water flow connection pipe 3. Connect heating water stratification connection pipe connection on the Vitotrans. to connection on the Vitotrans. 4. Screw the pipes onto the cylinder connections. 2. - Page 13 Installation sequence Vitocell without fitted Solar-Divicon (cont.) Fig. 9 1. At the back of the cylinder: Attach 6 clip fasteners 3. Push the clip fasteners as close together as possi- to the edges of the right and left sections of the ble.
-
Page 14: Fitting The Cover Strip
Installation sequence Vitocell without fitted Solar-Divicon (cont.) Fitting the cover strip Fig. 10 Type plate (self-adhesive) 1. Tighten the nuts on the bolts. 5. Push the cylinder thermal insulation towards the front by patting it. This reduces the gap between 2. -
Page 15: Fitting The Cover
Vitocell without fitted Solar-Divicon (cont.) Fitting the cover Fig. 11 Viessmann logo Installing an air vent valve on the solar side Fig. 12 1. Push the corrugated hose into the elbow fitting. Route the drip hose of the air vent valve into a vessel. -
Page 16: Vitocell With Fitted Solar-Divicon
Installation sequence Vitocell with fitted Solar-Divicon Siting and levelling the Vitocell Fig. 13 Type plate Bag with 3 adjustable feet Insert the adjustable feet into the legs as far as possi- If no immersion heater is being installed, seal the front ble, then adjust them to level the heating water buffer female connection with the supplied plug R1 ½... -
Page 17: Fitting The Support Panel
Installation sequence Vitocell with fitted Solar-Divicon (cont.) Fitting the support panel Fig. 14... -
Page 18: Connections On The Solar Side
Installation sequence Vitocell with fitted Solar-Divicon (cont.) Connections on the solar side Fig. 15 1. Remove the bottom pipes. 3. Fit the pipes. 2. Rotate the pipes towards the front until they touch the front adjustable foot. -
Page 19: Mounting The Solar-Divicon
Installation sequence Vitocell with fitted Solar-Divicon (cont.) Fig. 16 1. Push the corrugated hose into the elbow fitting. 4. Fit the solar flow pipe. 2. Screw the air vent plug into the elbow fitting. 5. Fit the solar return pipe. 3. -
Page 20: Connecting The Solar-Divicon On The Solar Side And Checking For Leaks
Installation sequence Vitocell with fitted Solar-Divicon (cont.) Fig. 17 Connecting the Solar-Divicon on the solar side and checking for leaks Please note 1. Connect all pipework with detachable fittings. Once the thermal insulation and thermal insula- tion cover are in place, the fittings are no longer 2. -
Page 21: Fitting The Thermal Insulation Cover
Installation sequence Vitocell with fitted Solar-Divicon (cont.) Fitting the thermal insulation cover Fig. 18... -
Page 22: Fitting The Thermometer Sensor (If Supplied)
Installation sequence Vitocell with fitted Solar-Divicon (cont.) Fitting the thermometer sensor (if supplied) Fig. 19 1. Guide the thermometer sensor through the retainer 5. Secure the sensor to the outside of the sensor and insert the thermometer. retainer contact spring so that it is flush with the front of the spring. -
Page 23: Fitting The Vitotrans
Installation sequence Vitocell with fitted Solar-Divicon (cont.) Fitting the Vitotrans Fitting the Vitotrans Fig. 20 Fig. 21... -
Page 24: Fitting The Lower Thermal Insulation Mat
Installation sequence Vitocell with fitted Solar-Divicon (cont.) DE F Fig. 22 1. Connect heating water flow connection pipe 3. Connect heating water stratification connection pipe connection on the Vitotrans. to connection on the Vitotrans. 4. Connect the pipes to the cylinder connections. 2. - Page 25 Installation sequence Vitocell with fitted Solar-Divicon (cont.) Note 2 people are required for the following work. ■ Ensure that no fleece remnants enter the heating ■ water buffer cylinder through the cylinder connec- tions. Fig. 24 1. At the back of the cylinder: Attach 6 clip fasteners 3.
-
Page 26: Fitting The Cover Strips
Installation sequence Vitocell with fitted Solar-Divicon (cont.) Fitting the cover strips Fig. 25 Type plate 1. Tighten the nuts on the bolts. 4. Fit the rear strip to the cylinder. 2. Fit the front section of the Vitotrans thermal insula- 5. -
Page 27: Fitting The Cover
Installation sequence Vitocell with fitted Solar-Divicon (cont.) Fitting the cover Fig. 26 Installing the cylinder temperature sensor The cylinder temperature sensor is supplied in the Never wrap insulating tape around the sensor. ■ ■ control unit pack. Insert the sensor retainer with sensor into the sensor ■... -
Page 28: Connections On The Heating Water Side
Installation sequence Installing the cylinder temperature sensor (cont.) Fig. 27 Sensor well for cylinder temperature sensor Connections on the heating water side Adjust the temperature controller and the high limit 1. Install the flow lines with a rise. Fit an air vent valve ■... - Page 29 Commissioning, inspection, maintenance Venting the solar side Fig. 28 1. Open the clip fasteners and pull them apart. 2. Slightly pull the thermal insulation to the side. Vent at vent plug on the solar side. 3. Close the thermal insulation back up again. Insert the rear sections of the Vitotrans thermal insulation.
-
Page 30: Cylinder Assembly
Parts lists Cylinder assembly Pos. Designation Serial no. (see type plate) 7201940 7201941 7201942 7201943 Part no. 0001 Adjustable foot 7825600 7825600 7825600 7825600 0002 Sensor retainer 7819654 7819654 7819654 7819654 0003 Vitocell type plate 5470963 5470964 5470965 5470966 0004 Clamping bracket 7819655 7819655... -
Page 31: Thermal Insulation Assembly
7835742 0008 Thermometer cover (grey) 7820231 7820231 7820231 7820231 0009 Thermometer 30 to 120 °C 7819509 7819509 7819509 7819509 0010 VIESSMANN logo (curved) 7819230 7819230 7819230 7819230 0011 Cover strip 7835743 7835752 7835743 7835743 0012 Pipe collar (3 pce) 7835767... -
Page 32: Connection Set Assembly (Accessories)
Parts lists Connection set assembly (accessories) Pos. Designation Serial no. (see type plate) 7201940 7201941 7201942 7201943 Part no. 0001 Panel with rivet 7839399 7839399 7839399 7839399 0002 EPP retainer for thermometer 7839400 7839400 7839400 7839400 0003 Fixing kit 7839401 7839401 7839401 7839401... -
Page 33: Commissioning/Service
Commissioning/service reports Commissioning/service reports Commissioning Service Service date: Service Service Service date: Service Service Service date: Service Service Service date: Service Service Service date:... -
Page 34: Product Characteristics
Product characteristics Product characteristics Type SEIA SESA Cylinder capacity kWh/24 h 1.63 1.67 1.63 1.67 Standby heat loss with 45 K temperature differential (standby section volume) (solar section volume) Standard parameter... -
Page 35: Immersion Heater Specification
Accessories Immersion heater specification Rated output in standard mode Rated voltage 3/N/PE 400 V/50 Hz Rated current 17.4 17.4 17.4 Type SEIA (750 l) Heat-up time from 10 to 60 10.9 ° ■ Content that can be heated by the immer- ■... -
Page 36: Declaration Of Conformity
Certificates Declaration of conformity We, Viessmann Werke GmbH & Co KG, D-35107 Allendorf, confirm as sole responsible body that the products Vitocell 140-E and Vitocell 160-E comply with the following standards: DIN 4753 DIN EN 12897 AD2000 datasheets These products are designated...