Table of Contents
Advertisement
Quick Links
WireLeSS
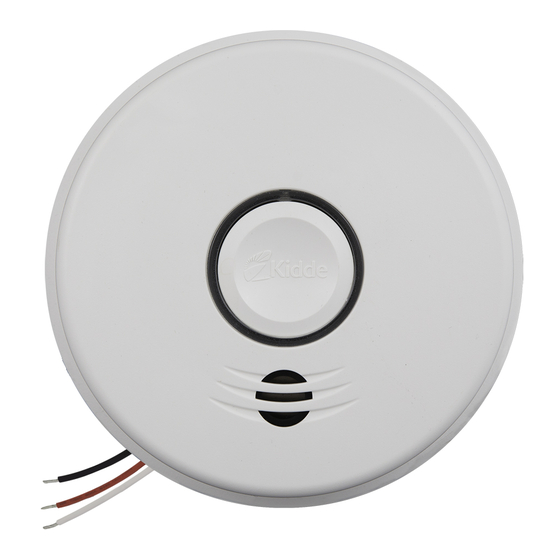
Hardwire Photoelectric Smoke Alarm
with Voice and Wireless Interconnect
User Guide
Model P4010ACS-WCA
Model P4010LACS-WCA (Safety Light)
WireLeSS interconnect:
You do NOT need a home wi-fi system
to use these units. Multiple wireless
units create their own independent
wireless alarm network.
SMoke aLarM
120 V HardWire
10-year battery backUp
HardWire & WireLeSS
interconnect
Voice aLarM
1
Advertisement
Table of Contents

Related Manuals for Kidde P4010ACS-WCA


Summary of Contents for Kidde P4010ACS-WCA
- Page 1 WireLeSS Hardwire Photoelectric Smoke Alarm with Voice and Wireless Interconnect User Guide Model P4010ACS-WCA Model P4010LACS-WCA (Safety Light) WireLeSS interconnect: You do NOT need a home wi-fi system to use these units. Multiple wireless units create their own independent wireless alarm network.
- Page 2 Teach children how to respond to the alarm and that they should never play with the unit. Your Kidde Smoke Alarm was designed for use in a residential environment. It is not designed for use in a recreational vehicle (RV) or boat.
-
Page 3: Table Of Contents
Contents 1. Smoke Alarm: What To Do When The Alarm Sounds ..4 2. Carbon Monoxide Alarm: What To Do When The Alarm Sounds ..5 3. -
Page 4: Smoke Alarm: What To Do When The Alarm Sounds
1. Smoke Alarm: What To Do When the Alarm Sounds Smoke alarm pattern is three long beeps with voice “Fire!,” a 1.5 second pause, and three long beeps repeating. The red LED blinks in time with alarm pattern. • Alert small children in the home as well as anyone else that might have difficulty recognizing the importance of the alarm sounding or that might have difficulty leaving the area without help. -
Page 5: Carbon Monoxide Alarm: What To Do When The Alarm Sounds
2. Carbon Monoxide Alarm: What To Do When the Alarm Sounds This is not a carbon monoxide (CO) alarm, but will receive and transmit a CO alarm signal (with note: voice message) from an interconnected CO or combination smoke / CO alarm. Carbon monoxide (CO) alarm pattern is four quick beeps with voice “Warning! Carbon Monoxide”... -
Page 6: Other Alarm Visual And Audible Indicators
3. Other Alarm Visual and Audible Indicators Operational Mode Visual Indications Audible Indications Action/Note: normal (standby) AC power: Green LED on continuously during light conditions, or blink every 60 sec during dark conditions. DC power: Green LED blink approx every 60 sec. test (button press when •... -
Page 7: Troubleshooting Guide
Hush Voice “Temporarily (after button push Silenced.” during network error) If you require further information please contact Product Support at 1-800-880-6788 or write us at: Kidde Canada Inc., P.O. Box 40, Apsley, ON K0L 1A0. Our internet address is www.kiddecanada.com. -
Page 8: Introduction, Product Features & Specifications
5. Introduction, Product Features and Specifications introdUction This alarm detects products of combustion using photoelectric technology. Ten (10) years after the unit is installed, this unit will automatically alert you that it is time to replace the unit. This is called “End of Unit Life” mode. -
Page 9: Limitations Of Smoke Alarms
6. Limitations of Smoke Alarms WarninG: pLeaSe read careFULLy and tHoroUGHLy • Life safety from fire in residential occupancies is based primarily on early notification to occupants of the need to escape, followed by the appropriate egress actions by those occupants. •... -
Page 10: Recommended Locations For Smoke Alarms
10 cm 10 cm (4") 7. Recommended Locations for Smoke Alarms (4") ANYWHERE ALONG ANYWHERE ALONG THIS BOLD SURFACE 10 cm THIS BOLD SURFACE (4") 30.5 cm 10 cm (12") (4") 30.5 cm (12") • Locate smoke alarms in all sleeping areas. Try to monitor the exit path as the bedrooms are usually farthest 30.5 cm (12") Locations permitted for smoke... - Page 11 • For mobile home installation, select locations carefully to avoid thermal barriers that may form at the ceiling. For more details, see MOBILE HOME INSTALLATION section. • When mounting an alarm on the ceiling, locate it at a minimum of 10 cm (4") from the side wall. •...
-
Page 12: Locations To Avoid
8. Locations to Avoid • In the garage. Products of combustion are present when you start your automobile. • Normal cooking may cause nuisance alarms. If a kitchen alarm is desired, it should have an alarm silence feature or be a photoelectric type. •... -
Page 13: Setting Up A Wireless Alarm Network
At any time during wireless alarm network setup, if you have a problem, you can push and hold note: the Test/Hush button on any problem unit until you hear three (3) beeps (approx 8 sec), and then release the button. The unit will reset the unit’s wireless settings (described in Section 9.3). Once wireless network settings are reset, the unit will prompt the user to follow Quickstart instructions. -
Page 14: Adding Another Device To An Existing Wireless Alarm Network
d. pick one deVice “Searching for other devices.” Press and hold the button on only ONE device until you hear two beeps. Release button. You will hear “Searching for other devices”. Hold for DON'T press buttons • 5 seconds on other devices The light will pulse and device will sound a continuous “Sonar”... - Page 15 a. reMoVe tHe neW deVice FroM itS packaGinG. b. poWer Up neW deVice USE ACTIVATION TOOL OR SCREWDRIVER Locate the red wheel on the back of the device being added. Turn the red wheel to the “ON” position using the white activation tool included in the Quick Start Guide or a standard screwdriver.
-
Page 16: Resetting A Device's Wireless Settings
F. pick tHe inStaLLed deVice “Setup complete!” Press and hold the button on the INSTALLED device for 5 SECONDS until you hear two beeps. Release button. ”Sonar” ping will stop. • Device will announce that setup is complete and the number of Installed Device Added Device connected devices. -
Page 17: Wiring Instructions
10. Wiring Instructions WirinG reqUireMentS • This alarm should be installed on a CSA-Listed or recognized junction box. All connections should be made by a qualified electrician and all wiring used shall be in accordance with codes having jurisdiction in your area. The multiple station interconnect wiring to the alarms must be run in the same raceway or cable as the AC power wiring. - Page 18 • A maximum of 24 Kidde Safety devices may be interconnected in a multiple station arrangement. The interconnect system should not exceed the NFPA interconnect limit of 12 smoke alarms and/or 18 alarms total (smoke, CO, Smoke/ CO Combination, heat, etc.). With 18 alarms interconnected, it is still possible to interconnect up to a total of 6 remote signaling devices and / or relay modules.
- Page 19 AC power should be turned off at this stage. note: • After selecting the proper location for your Alarm, and wiring the AC QUICK CONNECT harness as described in the WIRING INSTRUCTIONS, attach the mounting bracket to the electrical box. To ensure aesthetic alignment of the alarm with the hallway, or wall, the “A”...
- Page 20 KN-SMFM-I-CA, KN-COB-ICB-CA, KN-COSM-IBCA, KN-COB-IC-CA, KN-COSM-ICA, KN-COP-IC-CA, KN-COPE-ICA, P12040CA, Pi2000CA, Pi2010CA, SM120X, CO120X, SLED177iCA, P4010ACLEDSCA, P4010ACLEDSCOCA, P4010ACSCO-WCA, P4010ACSCOCA, P4010LACS-WCA, P4010ACS, P4010ACS-WCA. WireLeSS aLarM interconnect ModeL coMpatibiLity • The following models can be interconnected using wireless interconnect.
-
Page 21: Operation And Testing
11. Operation and Testing operation The alarm is operating once it is activated and testing is complete. When products of combustion (smoke) are sensed, the unit sounds a loud alarm with a voice message. See Sections 1 and 2 for alarm signal descriptions. teStinG Test your alarm weekly by pressing and releasing the test button quickly. -
Page 22: Recognizing Nuisance Alarms
aMbient LiGHt SenSinG In low light ambient conditions, the green LED ring fades to off, and then blinks approx every 60 seconds. This unit samples the ambient light conditions of the alarm’s location and, if possible, determines a Night / Day cycle. - Page 23 Dense smoke will override Hush and sound a continuous alarm. If no fire is present, check to note: ® see if one of the reasons listed in Section 8. LOCATIONS TO AVOID may have caused the alarm. If a fire is discovered, get out and call the fire department. This alarm is designed to minimize nuisance alarms.
-
Page 24: Battery Backup
13. Battery Backup note: This alarm is powered with AC power, but also contains a sealed lithium battery backup system. No battery installation or replacement is necessary for the life of the alarm. iMportant: AC power must be connected to obtain the full 10 year battery and unit life. Constant exposure to high or low humidity or temperatures may reduce battery life. -
Page 25: Permanently Disable Alarm / Discharge Battery
14. Permanently Disable Alarm / Discharge Battery WarninG: FaiLUre to diScHarGe aLarM battery aS inStrUcted prior to diSpoSaL May create potentiaL For LitHiUM battery reLated Fire or Hazard. WarninG: diScHarGinG tHe aLarM battery iS perManent • Once the alarm battery has been discharged, it cannot be reactivated! •... -
Page 26: Cleaning Your Alarm
15. Cleaning Your Alarm yoUr aLarM SHoULd be cLeaned at LeaSt once a year You can clean the interior of your alarm (sensing chamber) by using compressed air or a vacuum cleaner hose and blowing or vacuuming through the openings around the perimeter of the alarm. -
Page 27: Good Safety Habits
16. Good Safety Habits deVeLop and practice a pLan oF eScape Prepare and practice a home escape plan twice a year, including drills at night. Know two ways out of every room (door & window) and identify a meeting place outside the home where everyone will gather once they have exited the residence. - Page 28 • Install and maintain fire extinguishers on every level of the home and in the kitchen, basement and garage. Know how to use a fire extinguisher prior to an emergency. Fire preVention Never smoke in bed, or leave cooking food unattended. Teach children never to play with matches or lighters! Train everyone in the home to recognize the smoke alarm pattern and to leave the home using their escape plan when it’s heard.
- Page 29 nFpa (nationaL Fire protection aSSociation) Fire SaFety in tHe HoMe: nFpa 72 iS intended to proVide reaSonabLe SaFety For perSonS in FaMiLy LiVinG UnitS. reaSonabLe Fire SaFety can be prodUced tHroUGH tHe FoLLoWinG tHree-point proGraM: (1) Minimizing fire hazards (2) Providing fire-warning equipment (3) Having and practicing an escape plan.
-
Page 30: Service And Warranty
Kidde warrants that the enclosed alarm will be free from defects in material and workmanship or design under normal use and service for a period of ten years from the date of purchase. The obligation of Kidde under this warranty is limited to repairing or replacing the alarm or any part which we find to be defective in material, workmanship or design, free of charge, upon receiving the alarm with proof of date of purchase, postage and return postage prepaid, to: Kidde Canada Inc., P.O.