Table of Contents
Advertisement
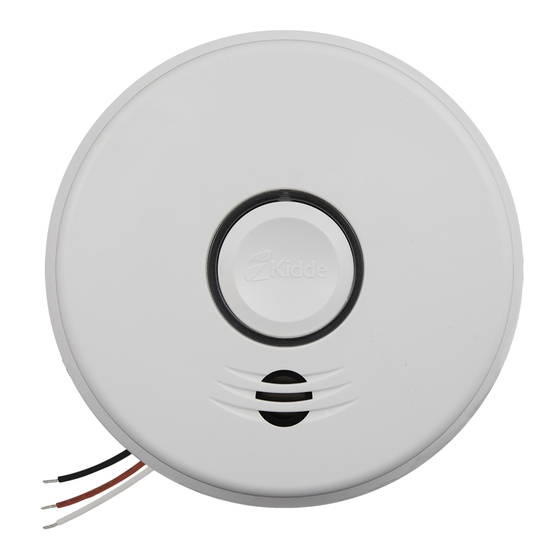
IntellIgent WIre-Free
Smoke and Carbon Monoxide Alarm User guide
Combination Photoelectric Smoke & Carbon Monoxide Alarm
with Voice and Hardwire/Wireless Interconnect
Model P4010ACSCO-W
WIre-Free InterConneCt:
You do NOT need a home wi-fi system to use
these units. Multiple wireless units create their
own independent wireless alarm network.
CoMbInAtIon AlArM
120V HArdWIre
10-yeAr bAttery bACkUp
HArdWIre & WIre-Free
InterConneCt
VoICe AlArM
1
Advertisement
Table of Contents

Related Manuals for Kidde P4010ACSCO-W


Summary of Contents for Kidde P4010ACSCO-W
- Page 1 Smoke and Carbon Monoxide Alarm User guide Combination Photoelectric Smoke & Carbon Monoxide Alarm with Voice and Hardwire/Wireless Interconnect Model P4010ACSCO-W WIre-Free InterConneCt: You do NOT need a home wi-fi system to use these units. Multiple wireless units create their own independent wireless alarm network.
- Page 2 Thank You for Purchasing this Kidde Alarm Hardwired for 120VAC, this model features a non-replaceable, sealed-in battery backup. It also contains a voice message system and SMART HUSH® Control to temporarily silence nuisance alarms. It is capable of both Hardwire and Wireless Interconnect.
-
Page 3: Table Of Contents
Contents 1. Smoke Alarm: What To Do When The Alarm Sounds ... . 4 2. Carbon Monoxide Alarm: What To Do When The Alarm Sounds ..5 3. -
Page 4: Smoke Alarm: What To Do When The Alarm Sounds
1. Smoke Alarm: What To Do When the Alarm Sounds Smoke alarm pattern is three long beeps with voice “Fire!,” a 1.5 second pause, and three long beeps repeating. The red LED blinks in time with alarm pattern. The smoke alarm takes precedence when both smoke and carbon monoxide are present. •... -
Page 5: Carbon Monoxide Alarm: What To Do When The Alarm Sounds
2. Carbon Monoxide Alarm: What To Do When the Alarm Sounds 2. Carbon Monoxide Alarm: What To Do When the Alarm Sounds Carbon monoxide (CO) alarm pattern is four quick beeps with voice “Warning! Carbon Monoxide” repeating every 5 seconds. The red LED blinks in time with alarm pattern. Warning: CarbOn MOnOxiDE aLarM aCTivaTiOn inDiCaTEs ThE prEsEnCE Of CarbOn MOnOxiDE (CO) aT high COnCEnTraTiOns WhiCh Can kiLL yOu. -
Page 6: Other Alarm Visual And Audible Indicators
3. Other Alarm Visual and Audible Indicators Operational Mode Visual Indications Audible Indications Action/Note: normal (standby) AC power: Green LED on continuously during light conditions, or blink every 60 sec during dark conditions. DC power: Green LED blink approx every 60 sec. test (button press when •... -
Page 7: Troubleshooting Guide
Hush Voice “Temporarily (after button push Silenced.” during network error) If you require further information please contact Product Support at 1-800-880-6788 or write us at: Kidde, 1016 Corporate Park Drive, Mebane, NC 27302. Our internet address is www.kidde.com. - Page 8 Network Error Troubleshooting Tips If you have a unit (or units) in network error and you would like to silence them, you can push and release the Test/Hush button once on each unit in network error to silence them for 24 hours at a time. NOTE: when you do this, the red LED will blink out an error code (number of blinks) when the Test/Hush button is push/released once.
- Page 9 4. Once you have located the Coordinator of the wireless network, take the Coordinator down and swap it with the unit that was deemed to be in the center of the house (found in steps 1 and 2). 5. Go to each unit that is in network error and press/hold the button on that unit for 4-5 seconds until you hear 2 beeps. a.
-
Page 10: Introduction, Product Features & Specifications
5. Introduction, Product Features and Specifications Introduction This alarm detects products of combustion using photoelectric technology and carbon monoxide using an electrochemical cell. Many times throughout this User Guide, we will refer to Carbon Monoxide as “CO.” Ten (10) years after the unit was installed, this unit will automatically alert you that it is time to replace the unit. -
Page 11: Limitations Of Smoke And Carbon Monoxide Alarms
6. Limitations of Smoke and Carbon Monoxide Alarms WArnIng: pleASe reAd CAreFUlly And tHoroUgHly • Life safety from fire in residential occupancies is based primarily on early notification to occupants of the need to escape, followed by the appropriate egress actions by those occupants. •... - Page 12 WArnIng: pleASe reAd CAreFUlly And tHoroUgHly • IMPORTANT: This alarm is designed to detect carbon monoxide gas from ANY source of combustion. It is NOT designed to detect any other gas. CAUtIon: This alarm will only indicate the presence of carbon monoxide gas at the sensor. Carbon monoxide gas may be present in other areas.
-
Page 13: Recommended Locations For Smoke Alarms
7. Recommended Locations for Smoke Alarms ANYWHERE ALONG THIS BOLD SURFACE • Locate smoke alarms in all sleeping areas. Try to monitor the exit path as the bedrooms are usually farthest from the exit. If more than one sleeping area exists, locate additional alarms in each sleeping area. Locations permitted for smoke ANYWHERE ALONG alarms and smoke detectors... - Page 14 • For mobile home installation, select locations carefully to avoid thermal barriers that may form at the ceiling. For more details, see MOBILE HOME INSTALLATION section. • When mounting an alarm on the ceiling, locate it at a minimum of 4” (10 cm) from the side wall. •...
-
Page 15: Locations To Avoid
8. Locations to Avoid • In the garage. Products of combustion are present when you start your automobile. • Normal cooking may cause nuisance alarms. If a kitchen alarm is desired, it should have an alarm silence feature or be a photoelectric type. •... -
Page 16: Setting Up A Wireless Alarm Network
9.1 Setting Up a Wireless Alarm Network Creating an interconnected wireless alarm network is a simple process, with intelligent “self-enrollment” features, and user-friendly voice prompts. USE ACTIVATION TOOL OR SCREWDRIVER A. reMoVe All deVICeS FroM tHeIr pACkAgIng b. poWer Up All deVICeS •... -
Page 17: Adding Another Device To An Existing Wireless Alarm Network
e. pICk one deVICe Press and hold the button on only ONE device until you hear 2 beeps. Release button. “Sonar” ping will stop. • Device will announce that setup is complete and the number of connected devices. Hold for 5 seconds F. - Page 18 C. pICk one InStAlled deVICe Press and hold the button on ONE INSTALLED device on your network until “Searching for other devices.” you hear two beeps. Release button. You will hear “Searching for other devices.” • Light will pulse green and device will sound a continuous “Sonar” ping Device Being Added Installed Device until step E is completed.
-
Page 19: Resetting A Device's Wireless Settings
9.3 Resetting a Device’s Wireless Settings If you encounter an issue at any point during the wireless network setup process, you may reset the device by following the directions below. A. begIn reSet “Resetting wireless Press and hold the button on the device for 8-9 seconds until you hear 3 settings.”... - Page 20 When alarms are hardwire interconnected, all interconnected units must be powered from a single circuit. • A maximum of 24 Kidde Safety devices may be interconnected in a multiple station arrangement. The intercon- nect system should not exceed the NFPA interconnect limit of 12 smoke alarms and/or 18 alarms total (smoke, CO, Smoke/ CO Combination, heat, etc.).
- Page 21 Use standard UL Listed household wire (as required by local codes) available at all electrical supply stores and most hardware stores. Figure 10-A, Interconnect Wiring Diagram FUSE OR CIRCUIT BREAKER BLACK BLACK BLACK WHITE WHITE WHITE Kidde Relay Module SM120X, CO120X or both Optional Accessory First Additional Additional Alarm Alarm...
- Page 22 If you are installing for wireless interconnect function, and have not yet setup your wireless alarm network, do not connect your wireless unit to the AC quick connect harness or mounting bracket yet. Go back to Section 9: ACTIVATION AND WIRELESS ALARM NETWORK. If you are not using the wireless interconnect function, or if you have finished wireless alarm setup, then proceed with the following three steps.
-
Page 23: Operation And Testing
Wireless alarm Interconnect Model Compatibility • The following models can be interconnected using wireless interconnect. AC Models: P4010ACSCO-W, P4010LACS-W, P4010ACS-W. DC Models: P4010LDCS-W, P4010DCS-W, P4010DCSCO-W • Maximum distance between wireless interconnect models is greater than 300 feet in open air. - Page 24 testing Test your alarm weekly by pressing and releasing the test button quickly. A quick beep will confirm the button has been pushed followed by voice prompts that will inform you of the upcoming test sequence. See Other Alarm Visual and Audible Indicators table.
-
Page 25: Recognizing Nuisance Alarms
12. Recognizing Nuisance Alarms Smoke nuisance HUSH®: If you know why the alarm is sounding, and you can verify that it is not a life threatening situation, you can push the button on the initiating unit (green LED flashing every second) to silence the alarm for 8-10 minutes. If the smoke is not too dense, that unit, and all interconnected units will silence. -
Page 26: Battery Backup
locate In an interconnected system (all units will be alarming together), a unit that detects smoke or CO and initiates an alarm is called the “initiating alarm unit.” Initiating alarm units will be flashing the Green LED every second during alarm. De- pending on unit locations, and the location of the source of smoke or CO, it is possible to have more than one initiating unit. -
Page 27: Permanently Disable Alarm / Discharge Battery
low battery This alarm is equipped with a low battery monitor circuit. If the battery capacity can no longer provide adequate power for all alarm functions, the low battery condition will occur. See Troubleshooting Guide. The unit must be replaced with- in 7 days of the first occurrence of the “Low Battery Warning”... -
Page 28: General Carbon Monoxide (Co) Information
15. General Carbon Monoxide (CO) Information Carbon monoxide (CO) is a colorless, odorless, and tasteless poison gas that can be fatal when inhaled. CO inhibits the blood’s capacity to carry oxygen. possible Sources of Co Inside your home, appliances used for heating and cooking are the most likely sources of CO. Vehicles running in attached garages can also produce dangerous levels of CO. - Page 29 HVAC contractors will perform CO inspections. Some contractors may charge for this service. It’s advisable to inquire about any applicable fees prior to having the service performed. Kidde will not pay for, or reimburse the owner or user of this product, for any repair or dispatch calls related to the alarm sounding.
-
Page 30: Cleaning Your Alarm
16. Cleaning Your Alarm your Alarm Should be Cleaned at least once a year You can clean the interior of your alarm (sensing chamber) by using compressed air or a vacuum cleaner hose and blow- ing or vacuuming through the openings around the perimeter of the alarm. The outside of the alarm can be wiped with a damp cloth. -
Page 31: Good Safety Habits
17. Good Safety Habits develop and practice a plan of escape Prepare and practice a home escape plan twice a year, including drills at night. Know two ways out of every room (door & window) and identify a meeting place outside the home where everyone will gather once they have exited the resi- dence. - Page 32 nFpA (national Fire protection Association) For your information, the National Fire Protection Association’s Standard 72 reads: Where required by other Fire Safety in the Home: NFPA 72 is intended to governing laws, codes, or standards for a specific type of occupancy, approved single and multiple-station smoke provide reasonable safety for persons in family alarms shall be installed as follows:...
- Page 33 FCC (FCC Id: SAk25569999) This equipment has been tested and found to comply with the limits for a Class B digital device, pursuant to part 15 of the FCC Rules. These limits are designed to provide reasonable protection against harmful interference in a residential installation.
-
Page 34: Service And Warranty
Kidde warrants that the enclosed alarm will be free from defects in material and workmanship or design under normal use and service for a period of ten years from the date of purchase. The obligation of Kidde under this warranty is limited...