Table of Contents
Advertisement
Quick Links
Advertisement
Table of Contents

Related Manuals for NCR XL15W


Summary of Contents for NCR XL15W
- Page 1 User Guide NCR XL15W (5916) Display BCC5-0000-5310 Issue A...
- Page 2 NCR, therefore, reserves the right to change specifications without prior notice. All features, functions, and operations described herein may not be marketed by NCR in all parts of the world. In some instances, photographs are of equipment prototypes. Therefore, before using this document, consult with your NCR representative or NCR office for information that is applicable and current.
- Page 3 Audience This book is written for hardware installer/service personnel, system integrators, and field engineers. Notice: This document is NCR proprietary information and is not to be disclosed or reproduced without consent. Safety Requirements The NCR XL15W (5916) Display conforms to all applicable legal requirements. To view...
- Page 4 If you do not have access to a computer, you may leave a voice message at: 1-800-528- 8658 (USA), or (International) +1-770-623-7400. When leaving a message, please provide a phone number and/or an email address so NCR can contact you if additional details are needed.
- Page 5 • Description of the problem, including any system error codes, error condition, or guidance to the area of failure The NCR Agent will provide you with a work order number, which serves as your Return Material Authorization (RMA). Please provide the RMA on the outside of the shipping box.
-
Page 7: Table Of Contents
Table of Contents Chapter 1: Product Overview Base Models Features and Benefits Optional Features Specifications Display Mounts XL-Series Stand (5916-F033/5915-K033) X-Series Table Top Stand (5968-K031) Integration Tray Mount (5968-K024) Checkstand Mount (5968-K039) Wall Mount (7702-K320) Third Party Mounts Quick Release Bracket (5915-K320) VESA Bracket Adapter Plate (5915-K330) Label Locations Power LED... - Page 8 Touchscreen Cleaning Procedures Magnetic Stripe Reader Using the MSR Care of Cards Card Thickness Cabinet Cleaning Procedures Chapter 4: NCR Software OSD Utility Supported Features Installing the Utility Running the Utility (GUI Version) Main Menu Monitors Detected Panel Center Panel...
-
Page 9: Chapter 1: Product Overview
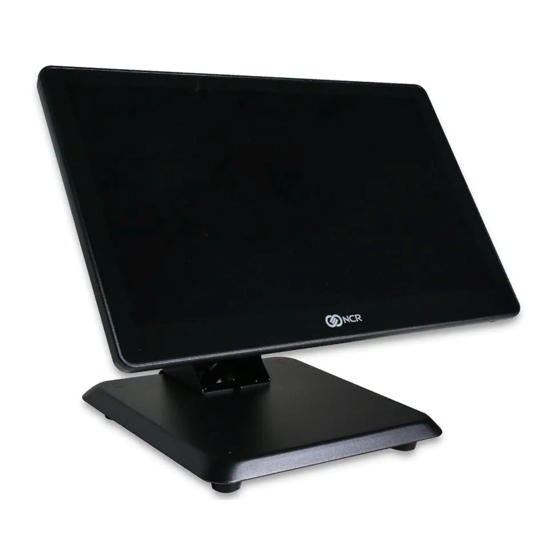
This stylish display is available as a 15.6–inch projected capacitive (PCAP) touchscreen, or LED backlight non–touch. The XL15W is compatible with any product that has a display port video and a USB interface and can be used as an associate display or rear mounted to a terminal or free standing to display pricing and promotional messages. -
Page 10: Features And Benefits
• 1920x1080 Resolution • Display Port • Software OSD Support Peripherals MSR, NCR Encrypted USB 3-Track Provides a 3-Track, Encrypting MSR. RFID Provides a RFID. Filler Plate, Right Side Provides a filler plate when a Port A (Right Side) feature is not installed. -
Page 11: Optional Features
Product Overview Optional Features Optional Features Description Power Cord 1416–C325–0030 US Power Cord Provides a 3m (118.11 in.) power 5916–F100 cord for an external power supply. 1416–C323–0030 International Power Cord 5916–F101 1416–C321–0030 UK Power Cord 5916–F102 1416–C322–0030 Australia Power Cord 5916–F103 1416–C391–0030 China Power Cord 5916–F104 1416–C320–0030... - Page 12 Product Overview Optional Features Description External Power 5916–F120 Universal Switching Provides a 12VDC Power Cables MEPS Power Supply - 12V, Adapter, 40W, DOE VI, 4 pin 2.5 A output for Touch Mini-DIN connector. (ROHS) 1432–C591–0013 1.3m USB Type A with Provides a 1.3m (51.18 in.) 5916–F121 power connector USB cable with latching 1x8...
- Page 13 Product Overview Optional Features Description Powered USB Cables 1432–C477–0005 0.5m 12V Powered USB Provides a 0.5m (19.68 in.) 12V USB power cable with latching 1x8 connector on the display end and a latching 12V USB + Power connector on the terminal end. Provides both power and touch communication.
- Page 14 Product Overview Optional Features Description Miscellaneous 1432–C790–0001 Cable, HDMI (Terminal) to Allows connection of a display Adapters DisplayPort (Display) with DisplayPort to a terminal active adapter with an HDMI connection. Must also order the DisplayPort cable. Powered by a USB port on terminal.
-
Page 15: Specifications
(terminal). 1W nominal, 1.5W maximum. Power 1x8 latching 12V USB from POS or external power supply Power consumption 6.4W (Typical) External USB Connectivity None MSR Option NCR Encrypted 3-Track Biometrics None Camera None Physical Mounting Interface VESA & NCR 100 mm... - Page 16 Product Overview Feature Specifications Color Black LED Life 30,000 hours (hours to ½ brightness of backlight) Retail Hardened Integrated Enclosure, Mounting, Sealed, Software OSD, Latching Cables, IPX3 Certifications TUV/UL/CU/NOM/KC/CCC Display Area 344.16(H) x 193.59(V) Operating Temperature 5° to 40°C Operating Humidity 10% to 90% Dimensions 383mm (15.08”) x 35mm (1.38”) x 240mm (9.45”)
-
Page 17: Display Mounts
Product Overview Display Mounts XL-Series Stand (5916-F033/5915-K033) X-Series Table Top Stand (5968-K031) -
Page 18: Integration Tray Mount (5968-K024)
1-10 Product Overview Integration Tray Mount (5968-K024) Checkstand Mount (5968-K039) Wall Mount (7702-K320) -
Page 19: Third Party Mounts
Product Overview 1-11 Third Party Mounts Quick Release Bracket (5915-K320) Quick release bracket for easy cable access for third party mounts. The bracket provides hooks and two mounting points, and replaces the standard four mounting points on third party pole arms. VESA Bracket Adapter Plate (5915-K330) Adapter plate to mount displays with 100mm x 100mm VESA patterns to mounts with a 75mm x 75mm VESA pattern. -
Page 20: Label Locations
1-12 Product Overview Label Locations Power LED The Power LED is located on the bottom of the Display. Color Description System OFF or No Power, No Video Signal Green System ON... -
Page 21: Chapter 2: Hardware Installation
Hardware Installation Chapter 2: Installation Restrictions Before installing the NCR XL15W (5916) Display, read and follow the guidelines in the NCR XL15W (5916) Display Site Preparation Guide and the NCR Workstation and Peripheral AC Wiring Guide (BST0-2115-53). • Install the display near an electrical outlet that is easily accessible. Use the power cord as a power disconnect device. -
Page 22: Ergonomic Workplace
2-14 Hardware Installation Ergonomic Workplace The NCR XL15W (5916) Display has a high brightness LCD, please observe the following when considering the terminal workplace: • Avoid direct–glaring and reflective–glaring light. Locate the terminal in a controlled luminance surrounding. When installed next to windows position the terminal so it does not reflect the outside light. -
Page 23: Installing The Display
Hardware Installation 2-15 Installing the Display The NCR XL15W (5916) Display can be mounted using a variety of mounts: • XL-Series Stand (5916-F033/5915-K033) • X-Series Table Top Stand (5968-K031) • Integration Tray Mount (5968-K024) • Checkstand Mount (5968-K039) • Wall Mount (7702-K320) • Third-Party VESA Mounts This chapter explains how to perform an "Out–of–box"... -
Page 24: Mounting On Xl-Series Stand
2-16 Hardware Installation Mounting on XL-Series Stand 1. Connect the Display cables and route them according to the imprinted routing guide. a. Connect and route the Audio Cable first. Route the cable looping around the cable strain relief posts as shown. b. - Page 25 Hardware Installation 2-17 2. Mount the XL–Series Stand on the Display. a. Insert the Mounting Bracket tabs into the slots in the rear of the Display and then slowly rotate the stand assembly downward. b. Rotate the Stand to the orientation shown below. 3.
- Page 26 2-18 Hardware Installation 4. Pivot the Stand towards the back as shown. 5. Route and secure the Display cables to the Mounting Bracket then through the Stand and then out the base opening. a. Route the Audio Cable first to the left slot and make sure it is behind the tab in the slot.
- Page 27 Hardware Installation 2-19 d. Route the cables through the neck slot then push cables through the curved neck opening and then out the base opening. Align the Audio Cable and Display Port Cable to the left side and the 12V USB Cable to the right side. e.
-
Page 28: Connecting To A Pos Terminal
2-20 Hardware Installation Connecting to a POS Terminal The following illustrations show the host terminal cable connections. The required cables vary depending on the available video connectors on the host terminal. Display Port Cable The Display Port Cable provides video to the display. •... -
Page 29: External Power Cables
Hardware Installation 2-21 External Power Cables An External Power Cable provides both USB and power to the display when the host terminal does not have a USB 12V port available, but does have an available standard USB port. 1. Connect the External Power Cable to the display Power connector. 2. -
Page 30: Powered Usb Cable
2-22 Hardware Installation Powered USB Cable The Powered USB Cable provides both USB and power to the display. Audio Cable The Audio Cable provides audio to the display. • Connect the Audio cable to the Audio Port connectors on both the display and the terminal. -
Page 31: Adapters
Hardware Installation 2-23 Adapters HDMI to Display Port Adapter The HDMI to Display Port Adapter allows connection of a display with Display Port to a host terminal with an HDMI connection. The adapter must be used with a Display Port Cable. - Page 32 2-24 Hardware Installation DVI-D to HDMI Adapter The DVI-D to HDMI Adapter allows connection of a display with Display Port to a host terminal with a DVI connection. The adapter must be used with a Display Port Cable and an HDMI to Display Port Adapter. 1.
- Page 33 Hardware Installation 2-25...
- Page 34 2-26...
-
Page 35: Chapter 3: Operation And Cleaning
Since most surface contamination do not cause interference to the touchscreen the NCR XL15W (5916) Display can be used in public or severe environmental conditions. Using the PCap Touchscreen The PCap touchscreen responds to the lightest touches. Touching with a single finger resembles the left mouse button. -
Page 36: Magnetic Stripe Reader
3-28 Operation and Cleaning Magnetic Stripe Reader The NCR XL15W (5916) Display features an ISO 3-Track Encrypted MSR head. The card reading is bi-directional and is mounted on the right side of the display. Using the MSR Swipe the card through the slot in the MSR in a quick and steady movement. The magnetic stripe must be facing up and with the stripe in the slot. -
Page 37: Cabinet Cleaning Procedures
Operation and Cleaning 3-29 Cabinet Cleaning Procedures 1. Disconnect the unit from the power outlet before cleaning. 2. Use a cloth lightly dampened with a mild detergent. 3. Do not use alcohol (methyl, ethyl, or isopropyl) or any strong dis-solvent. Do not use thinner or benzene, abrasive cleaners, or compressed air. - Page 38 3-30...
-
Page 39: Chapter 4: Ncr Software Osd Utility
NCR Software OSD Utility Chapter 4: The NCR Software OSD is an application that is used to adjust display parameters, such as brightness, contrast, and color. It also provides monitor identification information, such as the name, serial number, and manufacturer. -
Page 40: Installing The Utility
4-32 NCR Software OSD Utility Installing the Utility 1. Download the OSD Utility from the NCR website: http://www.ncr.com a. At this site, select the Support tab. b. Select Drivers and Patches Retail Support Files→ NCR RealPOS and → Peripherals→ Displays→ 5916. -
Page 41: Running The Utility (Gui Version)
NCR Software OSD Utility 4-33 Running the Utility (GUI Version) 1. Unzip the application to a folder of your choice on the target system. 2. In the unzipped folder, navigate to the OSD executable. Example: (32-Bit version) NCR_Software_OSD_GUI_x86_V2.1.6.3>> NCR_Software_OSD_GUI_x86.exe 3. Execute the file to start the application. -
Page 42: Control Buttons
4-34 NCR Software OSD Utility Control Buttons The Control Buttons show the available features that can be modified. Unavailable features are greyed out. Refresh Button Refreshes data in the Monitors Detected panel (OSD does not auto detect). Use this button after connecting a new monitor to refresh the data. - Page 43 NCR Software OSD Utility 4-35 Brightness Provides tools for adjusting Display brightness settings. Contrast Provides tools for adjusting Display contrast settings. Positioning Provides tools for gradually moving the image on the Display to a specific region (either left, right, up, or down).
-
Page 44: Display Adjustment Procedures
4-36 NCR Software OSD Utility Language Provides listing of the supported languages and permits changing the OSD language. Display Adjustment Procedures The adjustment procedures are similar for most features. The color adjustment shown below is an example. Colour 1. Select the button. -
Page 45: Resetting Factory Defaults
NCR Software OSD Utility 4-37 Resetting Factory Defaults Should the need arise the display settings can be reset to the factory defaults. Restore 1. Select the button. 2. All settings or just specific groups can be reset. Select the button of choice in the Restore window. -
Page 46: Running The Utility (Console Version)
5. Execute the file to start the application. NCR_Software_OSD_Console_x86.exe >> [Enter] A list of the available script command options are displayed, followed by several example scripts. If you need further assistance with creating scripts please contact your NCR representative for help.