Advertisement
Quick Links
Start-up/Service Instructions
for use by heating contractor
Vitodens 200-W, WB2B Series
Models WB2B 80, 105
Wall-mounted, natural gas-fired condensing boiler
For operation with natural gas and liquid propane gas
Heating input 104 to 370 MBH
30 to 108 kW
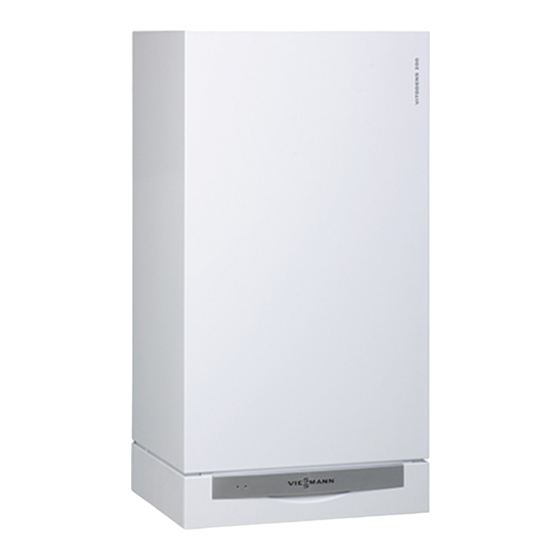
VITODENS 200-W
5443 207 v1.5 11/2012
IMPORTANT
Read and save these instructions
for future reference.
This trademark is registered with the U.S. Patent and Trademark Office.
Advertisement

Related Manuals for Viessmann Vitodens 200-W WB2B 80


Summary of Contents for Viessmann Vitodens 200-W WB2B 80
- Page 1 Start-up/Service Instructions for use by heating contractor Vitodens 200-W, WB2B Series Models WB2B 80, 105 Wall-mounted, natural gas-fired condensing boiler For operation with natural gas and liquid propane gas Heating input 104 to 370 MBH 30 to 108 kW VITODENS 200-W ...
- Page 2 Safety, Installation and Warranty Requirements Safety, Installation and Warranty Requirements Please ensure that these instructions are read and understood before commencing installation. Failure to comply with the instructions listed below and details printed in this manual can cause product/property damage, severe personal injury, and/or loss of life.
- Page 3 Table of Contents Page General Information Safety, Installation and Warranty Requirements ........Operating and Service Documentation .
- Page 4 - Start-up/Service Instructions Viessmann for additional copies. - Operating Instructions and User’s Information Manual This product comes with several - Instructions of other Viessmann safety instruction labels attached. products utilized and installed Do not remove! - Installation codes mentioned Contact Viessmann immediately if in this manual replacement labels are required.
- Page 5 CSD-1 Field Testing of High Limit Switches for Vitodens boilers - where required by law. VIESSMANN IS NOT RESPONSIBLE FOR ANY DAMAGES THAT THE FOLLOWING TEST PROCEDURE MAY RESULT IN BY OVERHEATING THE SYSTEM.
- Page 6 General Information About these Start-up/Service Instructions Take note of all symbols and notations intended to draw attention to potential hazards or important product information. These include ”WARNING”, ”CAUTION”, and ”IMPORTANT”. See below. Warnings draw your attention to the WARNING presence of potential hazards or important product information.
- Page 7 General Information General Information Applicability CAUTION The boiler serial number must be provided when ordering replacement parts. Some replacement parts are 12-digit ASME/NB serial number not reverse compatible with previous (located on metallic plate riveted versions of the Vitodens 200-W to the heat exchanger) WB2B boiler.
- Page 8 General Information Mechanical Room During the early stages of designing a new home, we recommend that proper consideration be given to constructing a separate mechanical room dedicated to the gas- or oil-fired heating equipment and domestic hot water storage tank(s). The boiler must be located in a heated indoor area, near a floor drain, and as close as possible to a wall.
- Page 9 General Information Removing Front Enclosure Panel Some of the following start-up/service steps require the removal of the front enclosure panel. To avoid personal injury and/or product damage of any kind please follow the instructions below carefully when removing the front enclosure panel. 1.
- Page 10 Initial Start-up and Service Steps 1. Bleed air from boiler heat exchanger nitial start-up 1. Close isolation valves (not shown) connected to A and B. 2. Connect drain hose to drain valve C, and connect fill hose to boiler fill valve F. 3.
- Page 11 Initial Start-up and Service Steps (continued) 3. Fill heating system with water nitial start-up 1. Open system isolation valves at C Please note: and D (if installed). Before filling the heating system with water, check that all necessary flow check valves are installed. 2.
- Page 12 Initial Start-up and Service Steps (continued) 4. Check power supply connection nitial start-up A power/pump module is supplied with IMPORTANT the Vitodens 200-W, WB2B boiler, which requires a 120VAC power supply from a wall receptacle. In Canada all electrical wiring is to be done in accordance with the latest The module contains a 120/230VAC edition of CSA C22.1 Part 1 and/or...
- Page 13 Initial Start-up and Service Steps (continued) 6. Select language nitial start-up H When the boiler is started up for the Please note: first time the display appears in At any time after the initial start-up, to select a language: German (factory default setting). - with two heating circuits A1, M2 - Press “i”...
- Page 14 5,000 ft. / 1,500 m. For operation in higher altitudes, the existing coding card must be replaced with a high altitude coding card. See table below or the Viessmann Price List for order information. 1. Pull out the existing coding card, cut and remove it from the cable tie.
- Page 15 Initial Start-up and Service Steps (continued) 10.Measure static pressure and running pressure nitial start-up ervice 1. To measure static and/or running IMPORTANT pressure remove boiler enclosure panel as indicated page 9 in these inlet instructions. A CO measurement (see page 24) must be taken before and after working on 2.
- Page 16 Initial Start-up and Service Steps (continued) Sequence of operation and potential faults during each start-up cycle Display message Corrective action Increase boiler water set-point temperature Call for heat by control. and ensure that there is heat demand. Blower starts up. Fault F9 after Check cabling and plug-in connectors of the blower, as well as the blower itself.
- Page 17 Initial Start-up and Service Steps (continued) 11. Set maximum input nitial start-up H The maximum input (or output) for The input for DHW production can be heating operation can be limited. The limited as well. To do so, change limit is set via the modulation range. coding address “6F”...
- Page 18 Steps (continued) 14. Check coaxial venting system for leaks (circular air gap measurement) nitial start-up Viessmann strongly recommends that The vent pipe adaptor comes with the heating contractor perform a two measurement ports, one for simplified leak test during boiler combustion air-intake measurement start-up.
- Page 19 Initial Start-up and Service Steps (continued) 16. Check burner refractory and cylinder assembly ervice Check the burner refractory ring C and cylinder burner assembly E for damage and replace if necessary. 1. Remove electrode block and ionization electrode A. 2. Undo the three retaining clips B at the refractory ring C and remove refractory ring C.
- Page 20 Initial Start-up and Service Steps (continued) 18. Clean combustion chamber/heat exchanger surface ervice 1. Remove front enclosure panel (if still installed) as per the instructions on page 9 in this manual, and reinstall panel upon completion of service work. 2. Remove burner assembly as per Please note: instructions on page 18.
- Page 21 Initial Start-up and Service Steps (continued) 19. Check condensate drain ervice 1. Check that condensate can drain IMPORTANT freely at the siphon trap C. If the condensate does not drain freely, 2. If necessary clean siphon trap C condensate will accumulate in bottom by pulling off cap A downwards, part of boiler resulting in a burner undoing union nut B and pulling...
- Page 22 Initial Start-up and Service Steps (continued) 21. Check diaphragm expansion tank and system pressure nitial start-up ervice Perform check with the system cold. 1. Drain boiler/system and reduce pressure until the manometer reading is ”0”. 2. If the nitrogen pressure of the Example: precharged expansion tank is less Static head of 33 ft.
- Page 23 Initial Start-up and Service Steps (continued) 23. Check electrical connections nitial start-up ervice Ensure all plug-in connectors and strain Installation Instructions reliefs make positive contact and are Power/Pump Module seated properly. 24. Check gas pipes and fittings for leaks nitial start-up ervice WARNING The gas supply piping must be leak...
- Page 24 The Vitodens 200-W, WB2B boiler is equipped with the Lambda Pro Combustion Management System developed by Viessmann which ensures optimal combustion quality independent of gas quality and type. (For a description of the Lambda Pro Combustion Management System, see page 27 in this manual.) During initial start-up and maintenance you will only need to check the CO content at the boiler vent pipe adaptor.
- Page 25 Initial Start-up and Service Steps (continued) 26. Clock natural gas meter nitial start-up ervice Clock natural gas meter to verify input. Ensure all other gas equipment For example: served by the meter is turned off A Vitodens 200-W, WB2B 105 boiler during timing of gas input to the (370 000 Btu/h input) requires 97 Vitodens 200-W, WB2B boiler.
- Page 26 Control Technology Outdoor Reset Programming Unit (Vitotronic 200, HO1) Overview of controls and indicators Boiler temp. RESET A Pressure gage D Reset button B Fault display (red) E ON / OFF switch C Operating status display (green) Boiler temp. ºF Fig.
- Page 27 Control Technology Outdoor Reset Programming Unit (continued) Functional description Space heating mode Domestic hot water supply DHW boost heating / additional heating The control unit calculates a boiler with gas-fired space heating boiler function water setpoint temperature based on Domestic hot water heating is This function will heat your DHW tank the outdoor or room temperature activated when the tank temperature is...
- Page 28 Control Technology Outdoor Reset Programming Unit (continued) Heating system types During initial start-up the control until must be matched to the type of heating system installed. In the factory default setting, the heating system type is coded as ”00:1” (heating system with one heating circuit without mixing valve, without domestic hot water heating.
- Page 29 Control Technology Outdoor Reset Programming Unit (continued) Heating system types (continued) System type 4 or 5 (with or without low-loss header) Heating system with one heating circuit without mixing valve, one heating circuit with mixing valve, with/without domestic hot water heating. Coding address “00:5”...
- Page 30 Control Technology Outdoor Reset Programming Unit (continued) Heating curve adjustment The heating curves represent the ºF / ºC relationship between the outdoor temperature and the boiler water or supply temperature. Put simply: The lower the outdoor temperature, the higher the boiler water or supply temperature.
- Page 31 Control Technology Outdoor Reset Programming Unit (continued) Heating curve adjustment (continued) 1. To change the slope Change with coding address “d3“ in 230/ coding level 1. Setting range 2 to 35 (equals slope 0.2 to 3.5). +68/20 -4/20 Outdoor temperature in ºF/ºC Fig.
- Page 32 Control Technology Outdoor Reset Programming Unit (continued) Room temperature setpoint adjustment Standard Room Temperature r “ flashes on the 1. Press “⊕”. “1r Temperature conversion: ˚C ˚F display. 2. Press “ ” to select a heating circuit without a mixing valve r “...
- Page 33 Control Technology Outdoor Reset Programming Unit (continued) Connecting the boiler control to a LON system Vitocom LON Communication Module (accessory) must be connected. Installation Instructions LON Communication Module Note: Data transfer via LON can take several minutes. Single-boiler system with Vitotronic 200-H, HK1M and Vitotronic 200-H, HK1S mixing valve controls and Vitocom LON communication module Set up the LON participant numbers and other functions via coding level 2 (see table below).
- Page 34 Control Technology Outdoor Reset Programming Unit (continued) Connecting the boiler control to a LON system (continued) Updating the LON participant list Only possible if all participants are connected and the control unit is programmed to be fault manager (coding address ”79:1”). 1.
- Page 35 Control Technology Outdoor Reset Programming Unit (continued) Connecting the boiler control to a LON system (continued) Performing participant check User check Conditions: : 01 O O O O H The control unit must be programmed as fault manager (code ”79:1”) H The LON participant number must be programmed in all control units (see table on previous page)
- Page 36 Control Technology Outdoor Reset Programming Unit (continued) Scanning and resetting the “Service” display The red fault indicator flashes when the limits for the maintenance interval (set via coding address ”21”) and the burner service interval (coding address ”23”) have been reached. On the programming unit the word “Service” flashes. Note: Set coding address “24”...
- Page 37 Coding Coding Level 1 Accessing coding level 1 Note: H All codes are displayed as plain text. H Codes that are irrelevant due to the system equipment level or the setting of other codes will not be displayed. H Heating systems with one heating circuit without mixing valve and one heating circuit with mixing valve Initially, coding addresses ”A0”...
- Page 38 Coding Coding Level 1 (continued) Overview of coding addresses Coding addresses not discussed in this section must not be changed. See page 37 for information of how to access the coding addresses in coding level 1. Coding (factory default setting) Possible change System design 00 :1...
- Page 39 Coding Coding Level 1 (continued) Overview of coding addresses (continued) Coding (factory default setting) Possible change Summer setback (econ.) A1, M2 A5:5 With heating circuit pump logic function A5:0 Without heating circuit pump logic function Minimum supply temperature C5:20 Electronic minimum supply temperature C5:1 Minimum limit adjustable from 34 to 261°F / limit 68°F / 20°C...
- Page 40 Coding Coding Level 2 Accessing coding level 2 Note: H All codes are displayed as plain text. H Codes that are irrelevant due to the system equipment level or the setting of other codes will not be displayed. r w“ 1.
- Page 41 Coding Coding Level 2 (continued) Overview of coding addresses Coding (factory default setting) Possible change System design 00 :1 System type 1, 2: 00 :2 System type 1, 2: 1 heating circuit without mixing 1 heating circuit without a mixing valve, valve, without DHW heating with DHW heating 00 :3...
- Page 42 Coding Coding Level 2 (continued) Overview of coding addresses (continued) Boiler pump sÖ Heating circuit pump Heating circuit pump DHW circulation pump Value coding address Heating circuit Heating circuit 32: ... without mixing valve with mixing valve Control function Control function Control function Control function Control function...
- Page 43 Coding Coding Level 2 (continued) Overview of coding addresses (continued) Boiler pump sÖ Heating circuit pump Heating circuit pump DHW circulation pump Value coding address Heating circuit Heating circuit 34: ... without mixing valve with mixing valve Control function Control function Control function Control function Control function...
- Page 44 Coding Coding Level 2 (continued) Overview of coding addresses (continued) Coding (factory default setting) Possible change Domestic hot water (DHW) 5b:0 DHW tank directly connected to the 5b:1 DHW tank connected downstream of the boiler low-loss header 60:20 During DHW heating, the boiler water 60:5 The difference between the boiler water temperature is max.
- Page 45 Coding Coding Level 2 (continued) Overview of coding addresses (continued) Coding (factory default setting) Possible change General 7F:1 Detached house 7F:0 Apartment Separate adjustment of holiday program and time program for DHW heating, as option 80:1 80:1 A fault message is displayed, providing a A fault message is displayed, providing a 80:0 Immediate fault message...
- Page 46 Coding Coding Level 2 (continued) Overview of coding addresses (continued) Coding (factory default setting) Possible change General 9F:8 Differential temperature 8 K; only in 9F:0 Differential temperature adjustable from 0 to conjunction with the mixing valve circuit 40 K (0 to 72°F) 9F:40 Boiler circuit, mixing valve circuit A0:0...
- Page 47 Coding Coding Level 2 (continued) Overview of coding addresses (continued) Coding (factory default setting) Possible change Boiler circuit, mixing valve circuit A4:0 With frost protection A4:1 No frost protection, adjustment only possible if coding address ”A3: -9” has been selected. Note: Observe the note for code ”A3”...
- Page 48 Coding Coding Level 2 (continued) Overview of coding addresses (continued) Coding (factory default setting) Possible change Boiler circuit, mixing valve circuit A9:7 With pump stop function: Heating circuit A9:0 Without pump stop function pump ”OFF” if the setpoint changes pump ”OFF” if the setpoint changes A9:1 With pump stop function;...
- Page 49 Coding Coding Level 2 (continued) Overview of coding addresses (continued) Coding (factory default setting) Possible change Boiler circuit, mixing valve circuit d5:0 External heating program changeover via d5:1 Heating program changes to constant plug aVD: Heating program changes to operation with normal room temperature constant operation with reduced room temperature E5:0...
- Page 50 Coding Coding Coding Level 2 (continued) Resetting coding addresses to the factory default setting r w“ 1. Press “w“ + “r simultaneously for approx. 2 sec. 2. Press “ ”. “Factory set? Yes” appears. 3. Press “ ” to confirm. 4.
- Page 51 Service Scans Service Scans Service Level Overview (continued) Coding level 1 Press “9” and “w” Press “9” and “w” for approx. 1 sec. Plain text display for approx. 2 sec. simultaneously. simultaneously. Coding level 2 Press “w” and “rw” for Press “w”...
- Page 52 Service Scans Service Scans Temperatures, Boiler Coding Card and Brief Scans (continued) Brief Display screen scan Software version Type Burner control Equipment type Burner control unit unit 0: no external 0: no external External 0 to 10V hook-up demand blocking Display in °C 1: external 1: external...
- Page 53 Service Scans Scanning Operating Conditions and Sensors 1. Press “i“. “Select heating circuit” If one heating circuit A1. Press “⊕“ is displayed. for required operating condition. 2. Press “ “ to confirm. Wait approx. 4 sec. 3. Press “i“ again. 4.
- Page 54 Troubleshooting Diagnostics Fault display Outside temp. sensor RESET A Fault display C Fault number B Fault symbol D Fault code The red fault indicator flashes for every fault. A fault in the burner control unit causes the display to show ” ”. The display flashes ”Fault”...
- Page 55 Troubleshooting Diagnostics (continued) Retrieving an acknowledged fault message 1. Press “ “ for approx. 3 sec. 2. Press “⊕ / “ to select the acknowledged fault. Retrieving fault codes from the fault memory (fault history) The ten most recent faults are saved and can be scanned. The faults are in order of date, so the most recent fault is fault number 1.
- Page 56 Troubleshooting Diagnostics (continued) Fault codes (continued) Fault code on display System behavior Cause Corrective action Mixing valve closes Heating circuit with mixing Check the supply valve supply temperature temperature sensor sensor shorted out (see page 60). Mixing valve closes Heating circuit with mixing Check the supply valve supply temperature temperature sensor...
- Page 57 Troubleshooting Diagnostics (continued) Fault codes (continued) Fault code on display System behavior Cause Corrective action Mixing valve regulates to a Communication fault - Check accessory kit supply temperature of 20°C accessory kit for heating connections and coding. circuit with mixing valve Turn on the accessory kit.
- Page 58 Troubleshooting Diagnostics (continued) Fault codes (continued) Fault code on display System behavior Cause Corrective action Burner in fault mode The ionization current lies Check the ionization electrode and outside the permissible range cable. Press ” RESET”. Burner in fault mode The ionization current lies Check the ionization electrode and outside the permissible range...
- Page 59 Troubleshooting Diagnostics (continued) Fault codes (continued) Fault code on display System behavior Cause Corrective action Burner in fault mode Fixed high limit switch open Check heating system fill (activated). level. Check the circulation pump. Bleed air from the system. Check fixed high limit switch and connecting cables.
- Page 60 Troubleshooting Corrective Action Check outdoor temperature sensor 1. Pull plug ”X3” from the control unit. 2. Test the resistance of the outdoor temperature sensor across terminals ”X3.1” and ”X3.2” on the disconnected plug and compare it with the curve. 3. Where actual values strongly deviate from the curve values, disconnect the wires at the sensor and repeat test immediately at the sensor.
- Page 61 Troubleshooting Corrective Action (continued) Check boiler temperature sensor, tank temperature sensor or supply temperature sensor of the low-loss header (continued) 2. Check the sensor resistance and WARNING compare the actual values with the curve in the chart. The boiler temperature sensor is immersed in the heating water (risk 3.
- Page 62 Troubleshooting Corrective Action (continued) Check fixed high limit Check the fixed high limit, if the burner control cannot be reset after a fault shutdown, although the boiler water temp. is below approx. 75°C / 167°F: 1. Remove cables from the fixed high limit A.
- Page 63 Troubleshooting Corrective Action (continued) Check accessory kit for heating circuit with mixing valve Checking the rotational direction of the mixing valve motor: 1. Switch ON/OFF switch A at the IMPORTANT accessory kit first OFF and then ON again. The device will perform the following self-check: The supply temperature sensor must H Mixing valve ”Close”...
- Page 64 Additional Information Control Functions External heating program changeover The ”External heating program changeover” function is connected via input ”aVD” in the power/pump module. You can select which heating circuits the heating program changeover affects in coding address ”91”: Heating program changeover Coding No changeover 91:0...
- Page 65 Additional Information Control Functions (continued) Air bleed program During the air bleed program, the circulation pump will be alternately switched ON and OFF for 30 sec. at a time over a period of 20 min. The burner is switched OFF during the air bleed program. The program is activated via code ”2F:1” and automatically disabled after 20 min.
- Page 66 Additional Information Control Functions (continued) Reducing the heat-up time During the transition from operation with reduced room temperature to operation with standard room temperature, the boiler water or supply temperature will be raised in accordance with the selected heating curve. The boiler water or supply temperature can be automatically increased.
- Page 67 Additional Information Burner Program Sequence of Operation Ignition / safety Additional Burner Stand by Stand-still Pre-purge Pre-purge Combination Pre-ignition Post-purge status test speed test timing / flame modulation gas valve proof Post-purge speed test (blower) stabilization or calibration and closure test (if initiated) Call for heat Water-flow...
- Page 68 Additional Information Wiring Diagram 99 C 210 F 190A X1 X2 INTERNAL CONNECTIONS X8.1 X8.10 X8.11 X9.1 GC131 BURNER IGNITION MODULE X9.3 X9.4 WARNING! DISCONNECT POWER BEFORE SERVICING BOILER. CAUTION! LABEL ALL WIRES PRIOR TO DISCONNECTION WHEN SERVICING CONTROLS. WIRING ERRORS CAN CAUSE IMPROPER AND 1 2 3 4 5 6 7 DANGEROUS OPERATION.
- Page 69 Additional Information Wiring Diagram (continued) Legend Outside Temperature Sensor Fixed High Limit A1 Main PCB (GC131 Ignition Module) Flow Temperature Sensor/Low Loss Header A2 Internal Power Supply Unit Fault Alarm Output Ignition Transformer Boiler Water Temperature Sensor A3 Optolink DHW Temperature Sensor Power Supply Accessory (Not Used) A4 Burner Control Unit Ionization Electrode...
- Page 70 WB2B 105 7424194 Ordering Replacement Parts: Please provide model no. from rating plate and serial no. when ordering replacement parts. Order replacement components from your Viessmann distributor. Parts 008 Gas distribution pipe 009 Gas connection pipe 011 Gasket set 012 Gaskets NG/LPG...
- Page 71 Additional Information Parts Lists (continued) Model No.Serial No. NG Only jjjjjjjjj WB2B 80 7374868 jjjjjjjjj WB2B 105 7374869 NG and LPG jjjjjjjjj WB2B 80 7424193 jjjjjjjjj WB2B 105 7424194 Parts 001 Gasket for flue gas, d=100mm 002 Gasket for air intake, d=150mm 003 Vent pipe adaptor, 110/150 004 Condensate hose 006 Heat exchanger assembly, ASME...
- Page 72 Additional Information Parts Lists (continued) Model No.Serial No. NG Only jjjjjjjjj WB2B 80 7374868 jjjjjjjjj WB2B 105 7374869 NG and LPG jjjjjjjjj WB2B 80 7424193 jjjjjjjjj WB2B 105 7424194 Parts 005 Press. gage, PSI 100 Control console 101 Back cover for control console 102 Fastening clip (set of 10) 103 Control housing, bottom...
- Page 73 5443 207 v1.5 Service Measurements Service Service Service Service Setpoint value Service date: date: date: date: date: date: max. Static pressure “w.c. 14 “w.c. Running pressure (supply pressure) j Natural gas “w.c. 4-14 ”w.c. “w.c. j LPG 110-14 “w.c Check gas type Carbon dioxide content CO H at lower end of rated input range vol.-%...
- Page 74 Additional Information Technical Data Boiler Model Model No. WB2B- 105* Natural gas / Liquid propane gas CSA input 104-285 104-370 30-83 30-108 95-260 98-350 CSA output/DOE heating capacity 28-76 29-103 Net I=B=R rating Heat exchanger surface area 28.88 28.88 2.68 2.68 Min.
- Page 75 Do not attempt to common-vent Vitodens 200-W with any other appliance. Venting material to be supplied by Viessmann only; side wall vent installation must include Viessmann protective screen! For details refer to the Installation Instructions for the Vitodens 200-W, WB2B Venting System.
- Page 76 Lighting and Operating Instructions FOR YOUR SAFETY READ BEFORE OPERATING W A R N I N G: If you do not follow these instructions exactly, a fire or explosion may result causing property damage, personal injury or loss of life. A.
- Page 77 5443 207 v1.5...
- Page 78 5443 207 v1.5...
- Page 79 5443 207 v1.5...
- Page 80 Technical information subject to change without notice. 5443 207 v1.5 5443 207 v1.5 Printed on environmentally friendly (recycled and recyclable) paper.