
Related Manuals for Bosch HGD74W455A


Summary of Contents for Bosch HGD74W455A
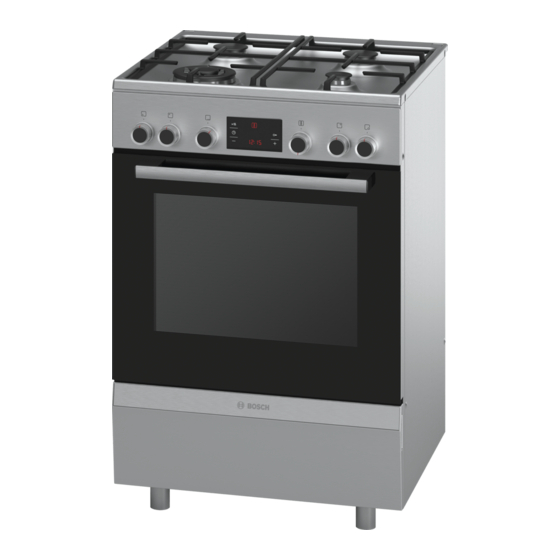
- Page 1 Free standing cooker HGD74W455A [en] Instruction manual This cooker is approved for use with Natural and ULPG Gas. LEAVE INSTRUCTIONS WITH OWENER...
-
Page 3: Table Of Contents
Optional accessories ..............11 Additional information on products, accessories, replacement After-sales service products ............12 parts and services can be found at www.bosch-home.com and Before using the oven for the first time........13 in the online shop www.bosch-eshop.com Setting the time ................13 Heating up the oven................ -
Page 4: Important Safety Information
: Important safety information Read these instructions carefully. Only then ventilation holes open or install a will you be able to operate your appliance mechanical ventilation device (mechanical safely and correctly. Retain the instruction extractor hood). manual and installation instructions for Prolonged intensive use of the appliance future use or for subsequent owners. - Page 5 or switch off the fuse in the fuse box. Shut accessories or ovenware from the cooking off the gas supply. compartment. Hot oil and fat can ignite very quickly. Alcoholic vapours may catch fire in the hot Risk of fire! Risk of burns! ■...
- Page 6 Incorrect repairs are dangerous. Repairs Risk of fire! ■ may only be carried out, and damaged Loose food residues, grease and meat ■ power and gas lines replaced, by an after- juices may catch fire during the Self- sales engineer trained by us. If the cleaning cycle.
-
Page 7: Causes Of Damage
Causes of damage steam. The temperature change can cause damage to the enamel. Caution! Moist food: do not store moist food in the cooking ■ Only use the burners when cookware has been placed on ■ compartment when it is closed for prolonged periods This will top. -
Page 8: Moving The Appliance By The Gas Line Or Door Handle
Moving the appliance by the gas line or door Levelling the cooker handle Always place the cooker directly on the floor. Do not move the appliance while holding the gas line; the gas The cooker has height-adjustable feet. This allows you to raise pipe could be damaged. -
Page 9: Your New Appliance
Your new appliance In this section you will find information on the appliance, the operating modes and the accessories. General information Cooking area The design depends on the respective appliance model. Here is an overview of the control panel. The design depends on the respective appliance model. -
Page 10: Control Panel
Control panel Details may vary depending on the appliance model. While the oven is heating up, the temperature symbol lights up in the display. If heating is interrupted, the symbol goes out. Function control knob For some settings, it does not light up. The function control knob is used to select the type of heating. -
Page 11: Your Accessories
Your accessories The accessories supplied with your appliance are suitable for The accessories can be pulled out approximately halfway until making many meals. Ensure that you always insert the they lock in place. This allows dishes to be removed easily. accessories into the cooking compartment the right way round. -
Page 12: After-Sales Service Products
Optional accessories HEZ number Function Grill tray HEZ325000 Used for grilling instead of the grill wire rack or used as a splatter guard to protect the oven from becoming heavily soiled. Only use the grill tray with the universal pan. Grilling on the grill tray: only shelf positions 1, 2 and 3 can be used. -
Page 13: Before Using The Oven For The First Time
Before using the oven for the first time Heating up the oven In this section, you can find out what you must do before using your oven to prepare food for the first time. First read the To remove the new cooker smell, heat up the oven when it is section on Safety information. -
Page 14: Suitable Pans
Table – Cooking Cooking times may vary depending on the type of food, its weight and quality. You yourself can best judge the optimal Select the right pan size for each hotplate. The diameter of the cooking time. pot or pan base should be the same as that of the hotplate. Use as little water as possible when cooking, so that the food retains its vitamins and minerals. -
Page 15: Programming The Oven
Programming the oven There are different ways to programme the oven. Programming The oven heats up. the type of heating, temperature or grill power. The oven can be Switching off the oven programmed with the cooking time (duration) and the end time for each dish. -
Page 16: Cooking Time
Cooking time End time The oven allows you to set the cooking time for each type of The oven allows you to set the time when you want the food food. The oven switches off automatically when the cooking ready. The oven switches on automatically and switches off at time has finished. -
Page 17: Time
Set the time with the buttons Viewing the time settings If several time functions are programmed, the corresponding The programmed time is displayed after a few seconds. symbols light up on the display panel. The symbol for the time function in the foreground is in brackets. Changing the time No other time function can be programmed. -
Page 18: Care And Cleaning
Care and cleaning With attentive care and cleaning, your hob and oven will retain Zone Cleaning agent its looks and remain in good working order for a long time. We Upper glass cover* Glass cleaner: will explain here how you should care for and clean them Clean with a soft cloth. -
Page 19: Cleaning The Self-Cleaning Surfaces In The Oven
Zone Cleaning agent Zone Cleaning agent Glass hob* Care: Protective/care products for glass Accessories Hot soapy water: Cleaning: Cleaning agents for glass. Soak and then clean with a dish cloth or (depending on Follow the cleaning instructions on the a brush. appliance model) packaging. -
Page 20: Detaching And Refitting The Rails
Detaching and refitting the rails Detaching the door The rails can be removed for cleaning. The oven must have Open the oven door fully. cooled down. Fold up the two locking levers on the left and right (figure A). Close the oven door as far as the limit stop. With both hands, Detaching the rails grip the door on the left and right-hand sides. -
Page 21: Removing And Installing The Door Panels
Removing and installing the door panels Risk of injury! To facilitate cleaning, you can remove the glass panels from the Scratched glass in the appliance door may develop into a oven door. crack. Do not use a glass scraper, sharp or abrasive cleaning aids or detergents. -
Page 22: Replacing The Bulb In The Oven Ceiling Light
Replacing the bulb in the oven ceiling light If the bulb in the oven light fails, it must be replaced. Heat- resistant, 40 watt spare bulbs can be obtained from our after- sales service or a specialist retailer. Only use these bulbs. Risk of electric shock! Switch off the circuit breaker in the fuse box. -
Page 23: Tested For You In Our Cooking Studio
Tested for you in our cooking studio Here you will find a selection of dishes and the ideal settings for Universal pan: level 3 ■ them. We will show you which type of heating and which Baking tray: level 1 ■... - Page 24 Cakes on trays Accessories Level Type of Temperature Cooking time heating in °C in minutes Sponge mixture or yeast dough with dry Baking tray 170-190 20-30 topping Universal pan + baking 150-170 35-45 tray Sponge mixture or yeast dough with Universal pan 160-180 40-50...
-
Page 25: Baking Tips
Baking tips You wish to bake according to your own Use similar items in the baking tables as a guide. recipe. How to establish whether sponge cake Approximately 10 minutes before the end of the baking time specified in the recipe, stick is baked through. - Page 26 Meat Weight Accessories and Level Type of Temperature Cooking time ovenware heating in °C, grill set- in minutes ting Beef Pot-roasted beef 1.0 kg Covered 200-220 1.5 kg 190-210 2.0 kg 180-200 Fillet of beef, medium 1.0 kg Uncovered 210-230 1.5 kg 200-220 Sirloin, medium...
-
Page 27: Tips For Roasting And Grilling
upwards. Placing half a potato or a small ovenproof container Fish in the belly of the fish will make it more stable. Turn the pieces of fish after of the time. If you are grilling directly on the wire rack, the universal pan Whole fish does not have to be turned. -
Page 28: Preprepared Products
Preprepared products The cooking result greatly depends on the quality of the food. Pre-browning and irregularities can sometimes even be found Observe the instructions on the packaging. on the raw product. If you line the accessories with greaseproof paper, make sure that the paper is suitable for these temperatures. -
Page 29: Special Dishes
Special dishes Preheat the cooking compartment as indicated. Place the cups or jars on the cooking compartment floor and At low temperatures, 3D hot air is equally useful for incubate as indicated. producing creamy yoghurt as it is for proving light yeast dough. First, remove accessories, hook-in racks or telescopic shelves Proving dough from the cooking compartment. -
Page 30: Acrylamide In Foodstuffs
After 25 to 35 minutes of residual heat, remove the preserving Preserving jars from the cooking compartment. If they are allowed to cool Fruit for longer in the cooking compartment, germs could multiply, After approx. 40 to 50 minutes, small bubbles begin to form at promoting acidification of the preserved fruit. -
Page 31: Test Dishes
Test dishes These tables have been produced for test institutes to facilitate the inspection and testing of the various appliances. In accordance with EN 50304/EN 60350 (2009) and IEC 60350. Baking Baking on 2 levels: Always insert the universal pan above the baking tray. Baking on 3 levels: Insert the universal pan in the middle. - Page 32 Robert Bosch Hausgeräte GmbH Carl-Wery-Straße 34 81739 München Germany www.bosch-home.com *9001151590* 061095 9001151590...