
Related Manuals for FujiFilm B9136


Summary of Contents for FujiFilm B9136
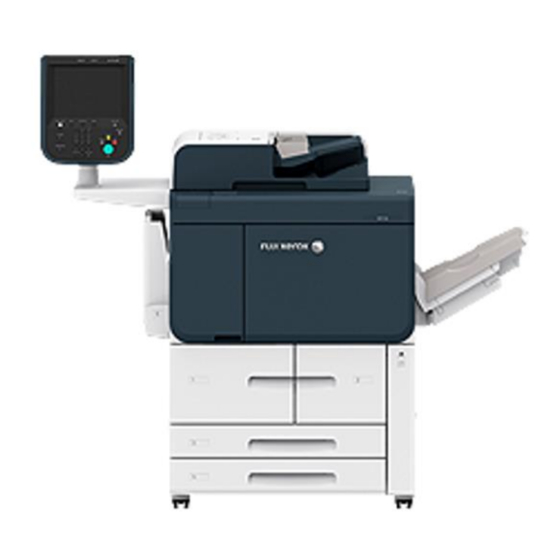
- Page 1 Quick Reference Notes - Print 簡易操作 – 列印 B9136_9125_9110_9100 Prepared by Customer Training Team © FUJIFILM Business Innovation Hong Kong Limited...
-
Page 2: Table Of Contents
CONTENTS 目錄 Select Printer 選擇印表機 ..................... 1 Configure the properties 設定列印內容 ..............2 1.1 Select Paper Tray and Select Paper Type 選擇紙盤及紙張種類。 ............2 Tray 5 (Bypass) 紙盤 5(手送) ......................3 1.1.1 Tray 6 and 7 紙盤 6 和 7 (Optional)...................... 5 1.1.2 1.2 2 Sided Print 雙面列印... -
Page 3: Select Printer 選擇印表機
選擇印表機 ELECT RINTER 1. 選擇應用程式【檔案】選單中的【列印】 。 1. Select [Print] from the [File] menu of the 2. 在印表機 【名稱】 選單,選擇合適的印表機。 application 3. 按 【確定】 開始列印。 2. Choose an appropriate printer from [Name:] list 4. 或按 【內容】以設定列印選項。 3. Click [OK] to send print job. 4. -
Page 4: Configure The Properties 設定列印內容
設定列印內容 ONFIGURE THE PROPERTIES 選擇紙盤及紙張種類。 1.1 S ELECT APER RAY AND ELECT APER 按 以進入【 詳細紙張設定】. 五項關於紙張 Click button to go to [Advanced Paper 的設定可在此更改(紙盤選擇 / 原稿文件尺寸 / 倍 Selection], 5 items available. (Paper Tray 率選擇 / 輸出紙張尺寸 / 紙張種類 )。 Original Document Size / Scale Options / Output Paper Size / Paper Type). -
Page 5: Tray 5 (Bypass) 紙盤 5(手送
Tray 5 (Bypass) 紙盤 5(手送) 1.1.1 無法置入紙盤 1 至 4 的紙張,請置入紙盤 5 (手 If you want to make copies on paper that cannot 送紙盤)中進行列印。 be loaded in the Trays 1 to 4, use the Tray 5 (Bypass). 將要列印的紙張(空白面)朝上放於【紙盤 5 (手送 Load paper print side up in [Tray 5 (Bypass)]. - Page 6 選擇手送紙盤紙張類型。 Select Bypass Paper Type. 選擇手送紙盤送紙方向。 Select Bypass Feed Orientation. Page 4 of 28...
-
Page 7: Tray 6 And 7 紙盤 6 和 7 (Optional)
Tray 6 and 7 紙盤 6 和 7 1.1.2 (Optional) 選擇【紙盤 6 和 7】。 Select Paper [Tray 6 and 7] 選擇原稿尺寸。 Select Original Document Size. Page 5 of 28... - Page 8 選擇手送紙盤紙張類型。 Select Bypass Paper Type. 若已加裝【紙盤 6 和 7】,紙盤 5(手送)只能放置 Load paper of 253gsm or less in Tray 5 (Bypass) 253gsm 或以下的紙張。如要使用 253-350gsm 的紙 if [Tray 6 and 7] is installed. 張,請放置於【紙盤 6 和 7】。 Load paper of 253-350gsm in [Tray 6 and 7]. Page 6 of 28...
-
Page 9: Sided Print 雙面列印
雙面列印 1.2 2 S IDED RINT 【單面列印】:僅在紙張的單面上列印 [1 Sided Print]: Print on single page 【雙面列印】:雙面列印時會以紙張的長邊來對正 [2 Sided Print]: 2-sided print as head to head 【雙面列印,短邊釘裝】: 雙面列印時會以紙張的 [2 Sided, Flip on Short Edge]: 2-sided print as 短邊來對正。 head to toe Page 7 of 28... -
Page 10: Staple/Hole Punch 裝訂/打孔
裝訂/打孔 1.3 S TAPLE UNCH 按 選擇【裝訂/ 打孔/ Z 型摺疊(額外配置)】。 Click button to select [Staple/Hole Punch/Z Fold Half Sheet(Optional)]. Page 8 of 28... -
Page 11: Image Options 影像選項
影像選項 MAGE PTIONS 影像畫質 1.1 I MAGE UALITY 指定列印的畫質。 You can specify the print quality of the document. 【標準】: 稍微降低解析度及色階的色溫。需要加速列印 [Standard]: Slightly lowers the resolution and the 時適用此選項。 gradation tone. Suitable when you need a quicker 【高畫質】:以最高解析度列印。 適用於 printing. 複製精細文字或細線條。 [High Resolution]: Prints with the highest resolution. - Page 12 1.1.1 Image Settings 影像設定 可根據您的需要,在 【畫質調整】中,手動調整 【度 According to your needs, under [Image Settings], you / 對比度】 。 can adjust [Lightness / Contrast] manually. Page 10 of 28...
-
Page 13: Image Shift Summary 列印位置摘要
列印位置摘要 MAGE HIFT UMMARY 可根據您的需要,在 【列印位置摘要】中,手動位移調 According to your needs, under [Image Shift 整。 Summary], you can adjust [Image Shift] manually. Page 11 of 28... -
Page 14: Layout/Watermark 排版/浮水印
排版/浮水印 AYOUT ATERMARK 多張合一 –U ULTIPLE 將多頁列印在一張紙上。 Prints multiple pages onto one sheet of paper 【2】、【4】、【8】、【16】、【32】 ... 可在一張上 [2], [4], [8], [16], [32] ... Prints the number of 列印所選頁數。將自動使用旋轉及縮小功能來處理面, selected pages on one sheet of paper. Pages are 以便均勻分佈在紙張上。 automatically processed with rotation and reduction so that they fit in evenly divided areas on the sheet of paper. -
Page 15: Booklet Layout 小冊子排版
小冊子排版 OOKLET AYOUT 執行雙面列印及頁面配置,以按照正確的頁面順序列印小冊 You can set the layout of a booklet when folding 子。 printed paper in half or staple it. 選擇【小冊子排版】並點選【小冊子作成... 】按鈕即可示 Select [Booklet Layout] and click the [Booklet 【小冊子作成】對話方塊。 Creation...] button to display the [Booklet Creation] dialog box. Page 13 of 28... -
Page 16: 1.2.1 Booklet Creation 小冊子作成
1.2.1 Booklet Creation 小冊子作成 選擇【左邊裝訂/上邊裝訂】 或【右邊裝訂/下邊】, 然後從 Select [Left Bind] or [Right Bind], and then Choose 【與紙張尺寸相同】選擇所需列印的紙張,按【OK】。 desired paper size from [Fit to New Paper Size], press [OK] to print. Page 14 of 28... -
Page 17: Fold & Staple
Fold & Staple…對摺/裝訂… 1.2.2 在【對摺/裝訂】中,選擇【對摺/裝訂】 。可摺疊和 After selecting [Booklet Creation], go to [Booklet 裝訂的紙張數為 2 至 30(使用 90 磅紙張時)。 Finishing] and choose [Booklet Fold and Staple]. number of copies that can be folded and stapled is 2 to 30 (when 90 gsm paper is used.) Page 15 of 28... -
Page 18: Covers 附加封面
Covers 附加封面 1.2.3 Select [Special Pages], and then choose [Add 選擇【特殊頁面】, 然後選擇【附加封面】。 Covers]. 附加預先列印好的彩色封面,操作步驟如下: Add pre-printed color cover: 1. 選擇【紙盤 T1(襯紙/封面紙盤) 】。 1. Select [Tray T1 (Inserter)] Page 16 of 28... - Page 19 2. 選擇【種類】。 2. Select [Type]. 將文件列印至封面,操作步驟如下: Add and print on cover: 1. 將要列印的紙張(空白面)朝上放於【紙盤 5 (手送紙 1. Load paper print side down in [Tray 5 (Bypass)]. 盤)】。請確認紙張尺寸與紙張類型符合裝入紙盤內的 Make sure the paper size and paper type match 紙 with 張。 the paper loaded in the tray. Page 17 of 28...
- Page 20 2. 選擇【更改設定】。 2. Select [Change Settings]. 選擇【紙張尺寸】及【紙張種類】。 Choose [Paper Type] and [Paper Size]. Page 18 of 28...
- Page 21 3. 在驅動程式上選擇【種類】。 3. On print driver, select [Type] Page 19 of 28...
-
Page 22: Trimming/Pressing
1.2.4 Trimming/Pressing…裁切/書冊壓邊 (Optional) 當安裝壓痕/上下裁切器 D2 時,若選擇【小冊子作成-對 When the Crease/Two-sided Trimmer D2 is 摺 installed, [Trimming] and [Book Pressing] become /裝訂】畫面中的【對摺】或【對摺+裝訂】,便可使用 available if you select [Fold Only] or [Fold & Staple] 【裁切】和【書冊壓邊】。 on the [Booklet Creation - Fold & staple] screen. Page 20 of 28... -
Page 23: Annotation 註解
註解 NNOTATION 在此對話方塊中,您可從【列印項目】中選擇【頁碼】列印 In this dialog box, you can select [Page Number] 在指定位置中。 from [Print Items] to print at a specified position. Page 21 of 28... -
Page 24: Watermark 浮水印
浮水印 ATER 在列印的文件上加入自定義浮水印。 Configures settings for printing a logo watermark over a file. 選擇【浮水印】並點選【新增 】即可顯示【浮水印設 Select [Watermark] and choose [new] to display the 定】對話方塊。 [Watermark Editor] dialog box. Page 22 of 28... - Page 25 Select Text or Bitmap in [Options] 在【選項】中選擇文字或點陣。 根據需要調整【縮放】,【濃度】和【位置】。 [Scale], [Density] and [Position] can be adjusted. Page 23 of 28...
-
Page 26: Job Type 工作類型
工作類型 Select Job Type 選擇工作類型 選擇工作類型。 Select Job Type. Page 24 of 28... -
Page 27: Secure Print 機密列印
Secure Print 機密列印 此功能可供您將列印資料暫時儲存在本機,並從本機適 This feature allows you to temporarily store print 用列印指令進行列印。此功能亦可供您設定密碼,有助 data in the machine to print it with the print 於列印機密文件。 command from the machine. The feature also enables you to set a passcode, which is helpful print confidential documents. -
Page 28: Retrieve Secure Print 列印機密文件
Retrieve Secure Print 列印機密文件 1. 按操作面板上的< Job Status >鍵。 1. Press the <Job Status> button on the Control Panel. 2. 選擇 【儲存文件】 ,按 【機密列印】。 2. Select [Secure Print Jobs & More] and Choose [Secure Print]. Page 26 of 28... - Page 29 3. Select your User ID and press [Job List] 3. 選擇你的使用者資料夾,然後按 【文件確認 / 列印】。 button. 4. 輸入密碼後,選擇 【確定】。 4. Enter the passcode, and select [ Confirm ]. 5. 選擇要列印或刪除的文件。 5. Select the job to be printed or deleted. Page 27 of 28...
- Page 30 7. Specify how to process the job after printing. 7.列印後不刪除文件或列印後即刪除文件。 Page 28 of 28...
- Page 31 2513-2513 This document includes Fuji Xerox product(s), licensed from Xerox Corporation. The distributor of the product(s) is FUJIFILM Business Innovation Corp. Xerox, Xerox and Design, as well as Fuji Xerox and Design are registered trademarks or trademarks of Xerox Corporation in Japan and/or other countries.