Table of Contents
Advertisement
Advertisement
Table of Contents
Troubleshooting

Related Manuals for FujiFilm 3000


Summary of Contents for FujiFilm 3000
- Page 1 USER’S GUIDE Third Edition 053DC514C...
- Page 2 INTRODUCTION In order to get the most from your PosterPrinter 3000, it is recommended that you read the instruction manual thoroughly before usage, and follow all instructions carefully. Keep the manual close at hand for future reference. NOTE: This equipment has been tested and found to comply with the limits for a Class A digital device, pursuant to part 15 of the FCC Rules.
-
Page 3: Table Of Contents
CONTENTS ... 1 1. BEFORE USING YOUR POSTERPRINTER 3000 ... 2 CHECKLIST OF ITEMS INCLUDED IN PACKAGE ... 2 UNPACKING THE PRINTER ... 2 INSTALLATION SPACE ... 3 CONNECTING THE POWER CORD ... 3 SAFETY PRECAUTIONS ... 4 INSTRUCTIONS FOR PROPER USE OF THE PRINTER ... 6 MAIN FEATURES OF THE POSTERPRINTER 3000 ... -
Page 4: Before Using Your Posterprinter 3000
Main unit Power cord (1) UNPACKING THE PRINTER Caution • Before switching the printer on, be sure to remove the cardboard protecting the shuttle unit and the platen rubber protector. • When transporting the printer, be sure to insert these packing materials. -
Page 5: Installation Space
INSTALLATION SPACE To ensure the proper functioning of your PosterPrinter 3000, it is important to allow adequate space around the main unit. Install as indicated in the following diagrams (unit: inch/mm). 8/200 8/200 Caution Be sure to place the printer on a sturdy, flat surface. -
Page 6: Safety Precautions
SAFETY PRECAUTIONS Important In order to ensure the proper use of the PosterPrinter 3000, the instructions in this manual have been provided with the following markings to indicate those items designed to prevent damage to property or injury to users of the printer or persons in the vicinity of the printer. - Page 7 If water or metal objects find their way inside the unit, it may result in fire or electrical shock. If any such problems occur, contact the dealer from whom you purchased your PosterPrinter 3000 for instructions on what to do.
-
Page 8: Instructions For Proper Use Of The Printer
• When the printer is in use, the blade of the cutter is designed so as not to protrude from the body of the machine. However, when the printer cover is open, pressing down on the cutter lever will cause the blade to protrude. -
Page 9: Main Features Of The Posterprinter 3000
MAIN FEATURES OF THE POSTERPRINTER 3000 The PosterPrinter 3000 is designed to allow even first time users to quickly and easily print high quality enlargements of letter sized documents. input document normal mode Both horizontal and vertical signs and banners can be easily created from long input documents. -
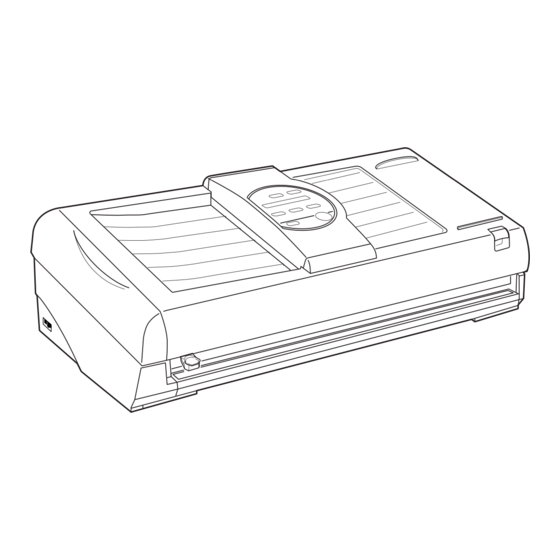
Page 10: Individual Part Names
INDIVIDUAL PART NAMES FRONT VIEW control panel document bay paper guide scanner cover document tray open/close knob print outlet printer cover power switch cutter base cutter unit REAR VIEW AC inlet power supply interface board (optional) -
Page 11: Scanner
SCANNER platen glass document feed roller PRINTER cutter unit paper bracket (left) (adjustable according to paper roll width) scanner cover document eject roller platen roller cogged belt thermal heads cogged belt paper feed roller platen rubber paper sensor cutter base... -
Page 12: Control Panel
The clear key is mainly used when printing in online mode. (Refer to the Interface Kit User's Guide.) The printer is in online mode with a computer when this lamp is lit. The printer is ready to use when this lamp is lit. -
Page 13: Message Display
Note that if a color is selected on the display differing to the output color of the paper installed in the printer, the output color will not change to the specified color. press for... -
Page 14: Before Printing
Check that both ends are closed properly. click guide mark If the printer is turned on, about 1.8”/45mm of paper will automatically advance. Refer to ‘Setting the left paper bracket’,p13. paper bracket (left) paper bracket (right) -
Page 15: Proper Use Of The Cutter
Cut the paper. Move the cutter in a downward horizontal sliding motion while holding the paper out from the printer. PROPER USE OF THE CUTTER Lightly press down on the cutter lever while holding the edge of the paper underneath it. -
Page 16: Basic Functions
Turn the power switch on. power switch Caution Do not turn the power switch off when the printer is initializing or printing. Press the mode key to set the printer in normal mode. 'NORMAL' is shown here. input document Press the paper type key to select the type of paper being used. - Page 17 When the printing process is complete, cut the print with the paper cutter. Move the cutter in a downward horizontal sliding motion while holding the paper out from the printer. 1. Open the scanner cover to remove the original. 2. Reinsert the original until it stops, and press the start/stop key.
-
Page 18: Printing In Photo Mode
Place the original into the document bay face down. Press the start/stop key to begin printing. photo mode Press the mode key to set the printer in photo mode. Select the desired output size and level of contrast. 'PHOTO' is shown here. -
Page 19: Printing In Reverse Mode
'REVERSE' is shown here. Points to note when using reverse mode • The printer is designed to monitor the temperature of the thermal heads and to control printing speed so as to prevent them from overheating. -
Page 20: Printing Different Poster Sizes
PRINTING DIFFERENT POSTER SIZES DIVISION PRINTING Printing two halves of a larger poster from one input document is called division printing. Using A1(23”) paper to produce a 44”x58” size poster input document Place the original into the document bay face down. Press the start/stop key to begin printing. - Page 21 Insert the original once more into the document bay, making sure it faces the same direction. Press the start/ stop key to begin printing the right side of the original. Note that the two halves will not be aligned properly if the original is not placed correctly into the document bay.
-
Page 22: Printing Posters Smaller Than The Paper Size
Move the cutter in a downward horizontal sliding motion while holding the paper out from the printer. Place the original into the document bay face down. Press the start/stop key to begin printing. -
Page 23: Printing Banners From Long Input Documents
PRINTING BANNERS FROM LONG INPUT DOCUMENTS Both horizontal and vertical signs and banners can be easily created from long input documents. Press the paper type key to select the type of paper being used. Points to note in printing banners •... -
Page 24: Additional Functions
ADDITIONAL FUNCTIONS FUNCTION MODE The following parameters can be input into the printer, to adjust printing functions and quality. Function Description and Messages Function / Description The direction of the image can be changed to create a mirror image of the original. -
Page 25: Setting Functions
Checking Current Setting Pressing the output size key for at least 3 seconds when the printer is in normal mode displays the first setting screen. Pressing the output size key for a further 3 seconds displays the second setting screen. -
Page 26: Remaining Paper Mode
REMAINING PAPER MODE Use the remaining paper mode to check how much paper remains on the roll in use. In addition, if the paper roll is changed midway, the amount of remaining paper can be printed on the roll for future reference. Setting the Amount of Remaining Paper Press the clear key for at least 3 seconds. - Page 27 Checking the Amount of Remaining Paper Press the clear key for at least 3 seconds. paper mode will be displayed. The amount of remaining paper is displayed in feet. press for at least 3 seconds Printing the Amount of Remaining Paper Press the clear key for at least 3 seconds.
-
Page 28: Scanning/Printing Areas
SCANNING/PRINTING AREAS SCANNING AREA (for letter-sized originals) 8.50/216 (0.20/5) 8.11/206 scanning area PRINTING AREA If printing posters smaller than the paper size, cutting marks are automatically printed on the paper. Note, however, that if “no page gap” is selected, cutting marks will not be printed. qpaper length wprinted length eprinted width rupper margin tlower margin yleft margin ucutting mark position paper size output size... -
Page 29: Supplies
SUPPLIES DESCRIPTION There are 3 types of paper for use in printing with the PosterPrinter 3000. Direct Thermal Paper (DTP), Thermal Transfer Paper (TTP) and Heavy Duty Poly Paper (HDP). Direct Thermal Paper (DTP) • Direct Thermal Paper is used to easily create posters, banners, and materials to be displayed indoors. -
Page 30: Points To Note When Using Posterprinter Supplies
Failing to do so may cause the paper to expand or shrink, which may make installation in the printer impossible. • Never store paper in a place where it will be subjected to direct sunlight, as doing so may result in discoloration. -
Page 31: Troubleshooting
TROUBLESHOOTING ERROR MESSAGES AND RESPONSES If an error message appears on the display, follow the responses outlined below. If the printer fails to function properly even after corrective action has been taken, contact the dealer from whom you purchased your PosterPrinter 3000. -
Page 32: Troubleshooting
TROUBLESHOOTING If a problem occurs during the printing process, follow the remedies outlined below. If the printer fails to function properly even after corrective action has been taken, contact the dealer from whom you purchased your PosterPrinter 3000. Problem Description and Remedies... - Page 33 • Check that the type of paper indicated on the message display matches the type actually being used. • Open the cover of the printer and check to see if the paper is caught in the paper feed rollers. • Check that the printer cover is closed properly.
-
Page 34: Cleaning The Printer
CLEANING THE PRINTER If one of the following problems occurs, clean the printer parts outlined below. Problem The paper does not feed properly The printer makes a rattling or grating noise during printing Horizontal lines appear periodically on the printed image... -
Page 35: Scanner
Wipe again with a soft, dry cloth. platen glass document feed roller Caution Always remove the printer power plug from the wall socket before cleaning the printer. • Do not use organic solvents such as benzine, alcohol, thinners or cleaners in cleaning the printer. -
Page 36: Specifications
300 dpi Paper size A1(23”), A2(17”) wide paper rolls Paper types FUJI FILM Poster Printer paper Direct Thermal Paper (DTP), Thermal Transfer Paper (TTP), Heavy Duty Poly Paper (HDP) Output sizes 8"x11", 10"x14", 12"x16", 14"x19", 17"x22", 20"x27", 23"x31" (33"x44" and 44"x58" are printed in two pieces) -
Page 37: Index
AC inlet banner cleaning printer clear key cogged belt contrast key control panel cutter cutter base cutter unit cutter, using the cutting marks direct thermal paper (DTP) division printing document bay document eject roller document feed roller document jam document tray... - Page 38 FUJI PHOTO FILM CO., LTD. 26-30, Nishiazabu 2-chome, Minato-ku, Tokyo 106-8620, Japan. 053DC514C-305106-AA•0001-7q Printed in Japan...