
Related Manuals for Spirit 16007602850


Summary of Contents for Spirit 16007602850
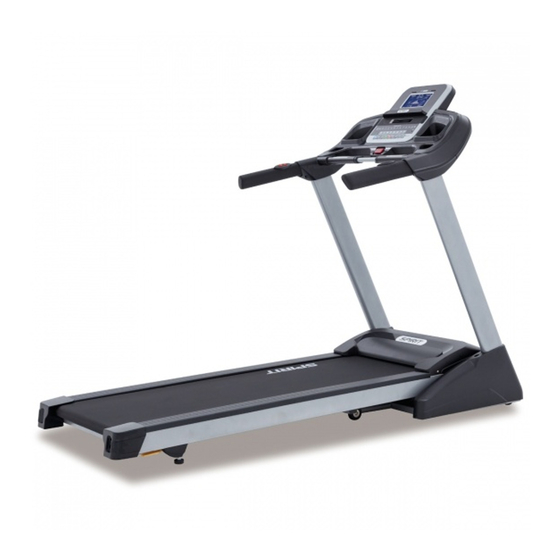
- Page 1 Owner’s Manual Model No. 16007602850 XT285 - Assembly - Operation - Adjustments - Parts - Warranty CAUTION: Read and understand this Retain For Future Reference manual before operating unit...
-
Page 2: Table Of Contents
Product Registration…………………………………………………………… 3 Important Safety Instructions…………………………………………………. 4 Important Electrical Instructions……………………………………………… .6 Assembly Instructions…………………………………………………………..9 Folding Instructions……………………………………………………………14 Operation of Your New Treadmill…………………………………………….15 Using the Spirit Fit App………………………………………………………..19 Programmable Features……………………………………………………..20 Target Heart Rate………………………………………………………………23 Exploded View Diagram …..…………………………………………………..27 Parts List……………………………………………………………………….. 28 General Maintenance…………………………………………………………..32 Manufacturer’s Limited Warranty……………………………………………..37 Customer Service 1-888-707-1880 Dyaco Canada Inc. -
Page 3: Product Registration
CONGRATULATIONS ON YOUR NEW TREADMILL Thank you for your purchase of this quality treadmill from Dyaco Canada Inc. Your new treadmill was manufactured by one of the leading fitness manufacturers in the world and is backed by one of the most comprehensive warranties available. Through you dealer, Dyaco Canada Inc., will do all we can to make your ownership experience as pleasant as possible for many years to come. -
Page 4: Important Safety Instructions
Important Safety Instructions THIS UNIT IS INTENDED FOR HOUSEHOLD USE ONLY READ ALL INSTRUCTIONS BEFORE USING THIS TREADMILL CAUTION: Before starting any exercise program, it is recommended that you consult your physician. WARNING: Connect this unit to a properly grounded outlet only. DANGER: To reduce the risk of electric shock, always unplug the treadmill from the electrical outlet immediately after using and before cleaning. - Page 5 Keep the treadmill indoors, away from moisture and dust. Do not put the treadmill in a garage, covered patio or near water. Do not operate the treadmill where aerosol products are used or where oxygen is being administered. 10. Read, understand and test the emergency stop procedure before using the treadmill 11.
-
Page 6: Important Electrical Instructions
●NEVER mount or dismount the treadmill while the belt is moving. Spirit treadmills start with at a very low speed and it is unnecessary to straddle the belt during start up. Simply standing on the belt during slow acceleration is proper after you have learned to operate the unit. - Page 7 Safety Tether Cord A safety tether cord is provided with this unit. It is a simple magnetic design that should be used at all times. It is for your safety should you fall or move too far back on the tread-belt. Pulling this safety tether cord will stop tread-belt movement.
- Page 8 ASSEMBLY PACK CHECKLIST #82. Ø10 × 2.0T #88. Ø5 × 16m/m Split Washer (4 pcs) Tapping Screw (6 pcs) #90. 3/8" × 1-3/4" Button Head Socket Bolt (4 pcs) #93. 5/16" × 15m/m #132. M5 #142. Ø3.5 × 16m/m Button Head Socket Bolt (8 pcs) Speed Nut Clip (6 pcs) Sheet Metal Screw (8 pcs) #58.
-
Page 9: Assembly Instructions
ASSEMBLY INSTRUCTIONS !!ATTENTION: IMPORTANT UNPACKING INSTRUCTIONS. PLEASE READ BEFORE UNPACKING YOUR FOLDING TREADMILL!! Serious injury could occur if this folding treadmill is not unpacked properly. There is a Velcro strap installed around the treadmill base that prevents the treadmill from unfolding accidentally during shipping. - Page 10 STEP 1 Take out the treadmill from the carton and lay it aside on the smooth ground. STEP 2 Install 6 pcs of M5 Speed Nut Clips (132), which are included in the hardware kit, at the front and each side of the unit as shown below and guide Right and Left Uprights (4 & 5) to go through Frame Base Covers (L, R), (42 &...
- Page 11 STEP 3 Insert Right and Left Uprights (4 & 5) into the Frame Base (2) and use Combination M5 Allen Wrench & Phillips Head Screwdriver (96) to tighten 8 pcs of 5/16" × 15m/m_ Button Head Socket Bolts (93). STEP 4 Install Frame Base Covers (L) and (R), (42 &...
- Page 12 STEP 5 Connect the Speed Adjustment Switch W/Cable (126) and Speed Adjustment Switch W/Cable (Upper) (128). Connect the Incline Adjustment Switch W/Cable (127) and Incline Adjustment Switch W/Cable (Upper) (129). Connect the Computer Cable (Middle) (38) and Computer Cable (Upper) (37). STEP 6 Insert Console Assembly (40) into right and left Uprights (4 &...
- Page 13 STEP 7 Install Console Mast Cover (L) (99) and Console Mast Cover (R) (100) on Right and Left Uprights (4 & 5). Then secure with 8 pcs of Ø3.5×16m/m Sheet Metal Screws (142) by using Phillips Head Screwdriver (122). NOTE: Please tighten all screws after all components have been assembled.
-
Page 14: Folding Instructions
Folding Instructions Do not attempt to move the unit unless it is in the folded and locked position. Be sure the power cord is secured to avoid possible damage. Use both handrails to maneuver the unit to the desired position. ... -
Page 15: Operation Of Your New Treadmill
OPERATION OF YOUR TREADMILL GETTING FAMILIAR WITH THE CONTROL PANEL CONSOLE HANDRAIL ADJUSTMENTS The treadmill allows you to make speed and incline changes on the side handrails. You can also choose to turn these off if you frequently hold on to these rails. This is achieved by pressing the Disable button on the right side of the lower portion of the console. - Page 16 CONSOLE The console will display Pace, Calories Burned, Time (elapsed or countdown), Distance travelled, Pulse, Speed, Incline, Program Name, Number of Laps Completed, and Segment Time. There is also a Speed & Incline profile graph that lets you see how hard you have worked and how challenging the upcoming segments will be.
- Page 17 INCLINE 1. Incline may be adjusted any time after belt movement. 2. Press and hold the Incline Up/Down keys to achieve desired gradient. You may also choose a more rapid increase / decrease by selecting the Quick Incline key, then 0 through 9. •...
- Page 18 PROGRAM KEYS The program keys are used to preview each program. When you first turn the console on you may press each program key to preview what the program profile looks like. If you decide that you want to try a program, press the corresponding program key and then press the Enter key to select the program and enter into the data-setting mode.
-
Page 19: Using The Spirit Fit App
2. Open the App on your device (phone or tablet) and make sure Bluetooth® is enabled on your device (phone or tablet). 3. In the App click the icon in the top left corner to search for your Spirit equipment (shown right). -
Page 20: Programmable Features
PROGRAMMABLE FEATURES SELECT A PRESET PROGRAM 1. Press the desired program (Hill, Fat Burn, Cardio, Strength, or Interval) key. Press Enter to select the program. The display will prompt you through the programming or you can just press Start to begin the program with default values. 2. - Page 21 PRESET PROGRAMS The treadmill has five different programs that have been designed for a variety of workouts. These five programs have factory preset work level profiles for achieving different goals. HILL This program follows a triangle or pyramid type of gradual progression from approximately 10% of maximum effort (the level that you chose before starting this program) up to a maximum effort which lasts for 10% of the total workout time, then a gradual regression of resistance back to approximately 10% of maximum effort Incline: The deck elevation is a more gradual and...
- Page 22 STRENGTH This program has a gradual progression of resistance up to 100% of maximum effort that is sustained for 25% of workout duration. This will help build strength and muscular endurance in the lower body and glutes. A brief cool down follows. Incline: There is a quick climb to a moderate, sustained elevation that lasts the majority of the workout length.
-
Page 23: Target Heart Rate
HEART RATE PROGRAMS Before we get started, a word about Heart Rate: The old motto, “no pain, no gain”, is a myth that has been overpowered by the benefits of exercising comfortably. A great deal of this success has been promoted by the use of heart rate monitors. - Page 24 RATE OF PERCEIVED EXERTION Heart rate is important but listening to your body also has a lot of advantages. There are more variables involved in how hard you should workout than just heart rate. Your stress level, physical health, emotional health, temperature, humidity, the time of day, the last time you ate and what you ate, all contribute to the intensity at which you should workout.
- Page 25 USING HEART RATE TRANSMITTER How to wear your wireless chest strap transmitter: 1. Attach the transmitter to the elastic strap using the locking parts. 2. Adjust the strap as tightly as possible as long as the strap is not too tight to remain comfortable. Position the transmitter with the logo centered in the middle of your body facing away from your chest (some people must position the transmitter slightly left of center).
- Page 26 HEART RATE PROGRAM OPERATION Note: You must wear the heart rate transmitter strap for these programs Both programs operate the same, the only difference is that HR1 is set to 60% and HR2 is set to 80% of the maximum heart rate. They both are programmed the same way. To start an HR program follow the instructions below or just select the HR1 or HR2 program, then the Enter key and follow the directions in the Message Center.
-
Page 27: Exploded View Diagram
EXPLODED VIEW DIAGRAM Customer Service 1-888-707-1880 Dyaco Canada Inc. 2016 Email: customerservice@dyaco.ca... -
Page 28: Parts List
PARTS LIST Part Part Description Q’ty 6028501 Main Frame 6028502 Frame Base 6028503 Incline Bracket 6028504 Right Upright 6028505 Left Upright 6028506 Console Support 6028508 Outer Slide 6028509 Inner Slide 6028510 Motor Bottom Cover 6028511 Link 6028512 Link Shaft 6028513 Shaft Bushing 6028514 Fastening Bracket... - Page 29 Part Part Description Q’ty 6028541 Handgrip End Cap 6028542 Frame Base Cover (L) 6028543 Frame Base Cover (R) 6028544 Transportation Wheel(A) 6028545 Transportation Wheel(B) 6028546 30 × 80m/m_Square End Cap 6028547 Motor Cover Anchor(D) 6028548 Motor Top Cover 6028549 Foot Rail 6028550 M8 ×...
- Page 30 Part Part Description Q’ty 6028588 5 × 16m/m_Tapping Screw 6028589 3.5 × 12m/m_Sheet Metal Screw 6028590 3/8" × 1-3/4"_Button Head Socket Bolt 6028591 3.5 × 16m/m_Tapping Screw 6028592 Ø5 × 1.5T_Split Washer 6028593 5/16" × UNC18 × 15L_Button Head Socket Bolt 6028595 M5 ×...
- Page 31 Part Part Description Q’ty 60285137 1000m/m_Ground Wire 60285138 Handpulse Top End Cap 60285139 Handpulse Bottom End Cap 60285140 Ø8 × 1.5T_Split Washer 60285141 M8 × 12m/m_Hex Head Bolt 60285142 Ø3.5 × 16L_Sheet Metal Screw 60285152 Ø5 × 19L_Tapping Screw Customer Service 1-888-707-1880 Dyaco Canada Inc.
-
Page 32: General Maintenance
GENERAL MAINTENANCE BELT & DECK Your treadmill uses a very high-efficient low-friction deck. Performance is maximized when the deck is kept as clean as possible. Use a soft, damp cloth, or paper towel, wipe the edge of the belt and the area between the belt edge and the frame. Also reach as far as practical directly under the belt edge. - Page 33 TREAD-BELT TRACKING ADJUSTMENT The treadmill is designed so that the tread-belt remains reasonably centered while in use. It is normal for some belts to drift near one side while in use, depending on a user’s gait and if they favor one leg. But if during use the belt continues to move toward one side, adjustments are necessary.
- Page 34 Do not lubricate with anything other than Spirit Fitness approved lubricant. Your treadmill comes with one tube of “Lube” and extra tubes can be ordered directly from Spirit Fitness or your authorized Spirit Fitness dealer. You may also use a Lube-n-Walk kit that can be purchased through both aforementioned sellers.
- Page 35 SERVICE CHECKLIST - DIAGNOSIS GUIDE Before contacting your dealer for aid, please review the following information. It may save you both time and expense. This list includes common problems that may not be covered under the treadmill’s warranty. PROBLEM SOLUTION/CAUSE Display does not light 1.
- Page 36 CALIBRATION PROCEDURE 1. Remove the Safety Key. 2. Press and hold Start and Speed + buttons and at the same time replace the Safety Key. Continue to hold Start and Speed + keys until the window displays “Factory settings”, then press the Enter key.
-
Page 37: Manufacturer's Limited Warranty
All of the parts for the Spirit Treadmill, shown in figure can be ordered from: Dyaco Canada Inc., 5955 Don Murie Street, Niagara Falls, Ontario L2G 0A9. When ordering parts, the parts will be sent and billed at the current prices. - Page 38 Please visit us online for information about our other brands and products manufactured and distributed by Dyaco Canada Inc. spiritfitness.ca solefitness.ca xterrafitness.ca dyaco.ca/products/everlast.html dyaco.ca/UFC/UFC-home.html spiritfitness.ca/johnnyg.html trainorsports.ca For more information, please contact Dyaco Canada Inc. T: 1-888-707-1880 ⏐ 5955 Don Murie St., Niagara Falls, Ontario L2G 0A9 ⏐ sales@dyaco.ca Customer Service 1-888-707-1880 Dyaco Canada Inc.