
Related Manuals for VeriFone V200c+


Summary of Contents for VeriFone V200c+
- Page 1 Public | External V200c+ User Manual | Version 1.3 | August 14th, 2019 V200c+ External User Manual Verifone (U.K.) Ltd. 3 Roundwood Avenue, Stockley Park, Uxbridge, UB11 1AF...
- Page 2 In no event shall Verifone be liable for any indirect, special, incidental, or consequential damages including damages for loss of business, profits, or the like, even if Verifone or its representatives have been advised of the possibility of such damages.
-
Page 3: Revision History
Public | External V200c+ User Manual | Version 1.3 | August 14th, 2019 REVISION HISTORY Version Author Date Changes 29/05/18 First Release 26/03/19 Updated for latest software release 28/05/19 Updated for latest software release 14/08/19 Added in some transaction flows V200c+ External User Manual... -
Page 4: Table Of Contents
Public | External V200c+ User Manual | Version 1.3 | August 14th, 2019 CONTENTS REVISION HISTORY ................3 CONTENTS ..................... 4 INTRODUCTION ..............6 GET TO KNOW THE V200C DEVICE ........7 TERMINAL FRONT ..................7 TERMINAL BACK ..................8 UNDERSTANDING THE KEYPAD .............. - Page 5 Public | External V200c+ User Manual | Version 1.3 | August 14th, 2019 CONTACT DETAILS ............. 84 V200c+ External User Manual...
-
Page 6: Introduction
1 INTRODUCTION This guide is the primary source of the information for setting up, installing and screen messages that will be seen during transaction processing the Verifone V200c payment device, when used in conjunction with the PAYWare Ocius Gateway. V200c+ External User Manual... -
Page 7: Get To Know The V200C Device
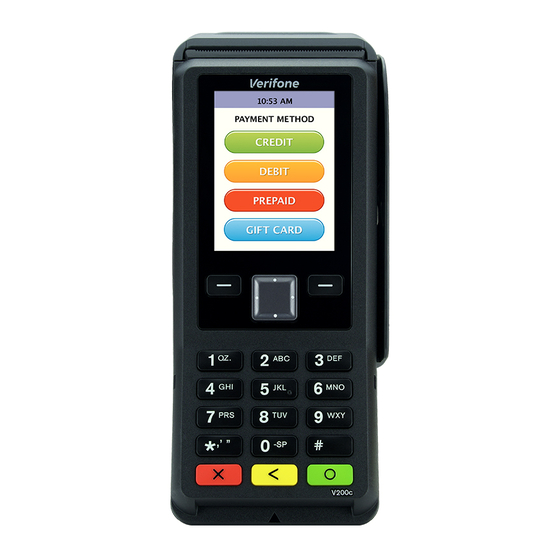
Public | External V200c+ User Manual | Version 1.3 | August 14th, 2019 2 GET TO KNOW THE V200C DEVICE This section will allow the operator to understand various aspects of V200c. 2.1 TERMINAL FRONT The front panel includes the following features: - •... -
Page 8: Terminal Back
Public | External V200c+ User Manual | Version 1.3 | August 14th, 2019 • A magnetic card reader, built into the right side. The icon shows the proper swipe direction, with the stripe down and facing inward, toward the keypad. •... -
Page 9: Understanding The Keypad
Public | External V200c+ User Manual | Version 1.3 | August 14th, 2019 2.3 UNDERSTANDING THE KEYPAD This section will explain which buttons will allow the operator to key in particular characters. Additionally, the buttons shown below can be used for scrolling through the menu items. Characters 1 Q Z . -
Page 10: Environmental Factors
Public | External V200c+ User Manual | Version 1.3 | August 14th, 2019 2.4 ENVIRONMENTAL FACTORS The following are the temperature and humidity specifications of the V200c: • Operating temperature: 0° to 50° C (32° to 122° F) • Storage temperature: -20° to 70° C (-4° to 158° F) •... - Page 11 Public | External V200c+ User Manual | Version 1.3 | August 14th, 2019 2.7 HOW TO INSERT A CARD 1) Position the smart card with the gold contacts facing upward. 2) Insert the card into the smart card reader slot in a smooth, continuous motion until it seats firmly.
- Page 12 Public | External V200c+ User Manual | Version 1.3 | August 14th, 2019 2.9 HOW TO PROCESS A CONTACTLESS CARD 1) Gently tap the card onto or hold the card (within 4 cm) against the surface of the display where the contactless logo appears. V200c+ External User Manual...
-
Page 13: How To Connect Your Device
Public | External V200c+ User Manual | Version 1.3 | August 14th, 2019 3 HOW TO CONNECT YOUR DEVICE Please note that most option numbers do not have numbers assigned, however, the menu options will respond to the numbers in the guide. To navigate up and down the menus use the navigation buttons shown above. - Page 14 Public | External V200c+ User Manual | Version 1.3 | August 14th, 2019 Step Instruction Screen Information Turn on the device, by plugging the device in. At the Please log in user screen press the red cross. Select option 3, Supervisor. Enter the Supervisor Pin, Default 12345 V200c+ External User Manual...
- Page 15 Public | External V200c+ User Manual | Version 1.3 | August 14th, 2019 Step Instruction Screen Information Select option 2, Communication Select option 3, Configuration The option will be off the main screen and will require the use of the navigation buttons to be used or press Select option 1, Network Interface V200c+ External User Manual...
- Page 16 Public | External V200c+ User Manual | Version 1.3 | August 14th, 2019 Step Instruction Screen Information Select option 1, LAN Select Option 1, Autostart Select Option 1, Yes V200c+ External User Manual...
- Page 17 Public | External V200c+ User Manual | Version 1.3 | August 14th, 2019 Step Instruction Screen Information Select Option 2, IPv4 The default is DHCP, if you require static IPs then follow steps 12-18 if not, skip to step 18 Select Option 2, DHCP Select option 1, No Note –...
- Page 18 Public | External V200c+ User Manual | Version 1.3 | August 14th, 2019 Step Instruction Screen Information Select Option 3, IP Address Enter the required IP address. Note, if a field is not 3 digits long then you must enter the leading zeros.
- Page 19 Public | External V200c+ User Manual | Version 1.3 | August 14th, 2019 Step Instruction Screen Information Press Save using the top right hand button. When “Saved” is displayed press the green circle button. Select Yes to “Apply settings on interface?” V200c+ External User Manual...
- Page 20 Public | External V200c+ User Manual | Version 1.3 | August 14th, 2019 Step Instruction Screen Information Select Yes to “Interface started” Press the red cross button. Press the red cross button. V200c+ External User Manual...
- Page 21 Public | External V200c+ User Manual | Version 1.3 | August 14th, 2019 Step Instruction Screen Information Select Option 1, Status Select option 1, IP Addresses Select option 1, LAN V200c+ External User Manual...
- Page 22 Public | External V200c+ User Manual | Version 1.3 | August 14th, 2019 Step Instruction Screen Information Check that the status is Up. Note – If the status is not Up, repeat the network setup steps. Press the red cross button until you are back at the Login screen.
-
Page 23: Wi-Fi
Public | External V200c+ User Manual | Version 1.3 | August 14th, 2019 3.2 WI-FI This section will cover setting up the Wi-Fi connection when both the network is visible and hidden. Note the Wi-Fi connection type can only be used on the V200c+ model, the V200c doesn’t contain the ability to connect to a Wi-Fi connection. - Page 24 Public | External V200c+ User Manual | Version 1.3 | August 14th, 2019 Step Instruction Screen Information Enter the Supervisor Pin, Default 12345 Select option 2, Communication Select option 3, Configuration The option will be off the main screen and will require the use of the navigation buttons to be used or press V200c+ External User Manual...
- Page 25 Public | External V200c+ User Manual | Version 1.3 | August 14th, 2019 Step Instruction Screen Information Select option 1, Network Interface Select option 2, WiFi Select option 1, WiFi Scan (assuming the network is visible) If the network is hidden please refer to section 3.2.2 V200c+ External User Manual...
- Page 26 Public | External V200c+ User Manual | Version 1.3 | August 14th, 2019 Step Instruction Screen Information Select your chosen network, * button scrolls up, # button scrolls down, green circle button selects the highlighted option. Press Enter to add the network. Select option 2, Pre-Shared-Key (PSK) V200c+ External User Manual...
- Page 27 Public | External V200c+ User Manual | Version 1.3 | August 14th, 2019 Step Instruction Screen Information Update the Pre-Shared-Key (network key) with the one for the chosen network. Multiple presses will result in upper and lower-case letters and numerics. Once inserted press the green circle key.
- Page 28 Public | External V200c+ User Manual | Version 1.3 | August 14th, 2019 Step Instruction Screen Information Select no through the left-hand navigation key, and press the green circle key. Press the red cross button when the results of the scan are returned.
- Page 29 Public | External V200c+ User Manual | Version 1.3 | August 14th, 2019 Step Instruction Screen Information Ensure that the chosen network is now highlighted. Press the green circle key. Ensure that View / Edit is highlighted and press the green circle key.
- Page 30 Public | External V200c+ User Manual | Version 1.3 | August 14th, 2019 Step Instruction Screen Information Select Option 1, IPv4 Select Option 2, DHCP Select option 1, No Note – By selecting No, it will then enable 5 additional menu options.
- Page 31 Public | External V200c+ User Manual | Version 1.3 | August 14th, 2019 Step Instruction Screen Information Select Option 3, IP Address Enter the required IP address. Note, if a field is not 3 digits long then you must enter the leading zeros.
- Page 32 Public | External V200c+ User Manual | Version 1.3 | August 14th, 2019 Step Instruction Screen Information Press the red cross button. Press Save, using the top right-hand navigation button. When “Network Saved” is displayed press the green circle button. V200c+ External User Manual...
- Page 33 Public | External V200c+ User Manual | Version 1.3 | August 14th, 2019 Step Instruction Screen Information Select Yes to “Apply settings on interface?” Select Yes to “Interface Started” Press the red cross button. V200c+ External User Manual...
- Page 34 Public | External V200c+ User Manual | Version 1.3 | August 14th, 2019 Step Instruction Screen Information Press the red cross button. Press the red cross button. Select Option 1, Status V200c+ External User Manual...
- Page 35 Public | External V200c+ User Manual | Version 1.3 | August 14th, 2019 Step Instruction Screen Information Select option 1, IP Addresses Select option 3, WiFi Check that the status is Up. Note – If the status is not Up, repeat the network setup steps.
- Page 36 Public | External V200c+ User Manual | Version 1.3 | August 14th, 2019 Step Instruction Screen Information Press the red cross button until you are back at the Login screen. V200c+ External User Manual...
-
Page 37: Hidden Wi-Fi Networks
Public | External V200c+ User Manual | Version 1.3 | August 14th, 2019 3.2.2 Hidden Wi-Fi Networks This section will cover setting up the terminal on a hidden Wi-Fi network using WPA2-PSK as the network configuration. This will not cover the other options that are supported by the terminal. - Page 38 Public | External V200c+ User Manual | Version 1.3 | August 14th, 2019 Step Instruction Screen Information Enter the Supervisor Pin, Default 12345 Select option 2, Communication Select option 3, Configuration The option will be off the main screen and will require the use of the navigation buttons to be used or press V200c+ External User Manual...
- Page 39 Public | External V200c+ User Manual | Version 1.3 | August 14th, 2019 Step Instruction Screen Information Select option 1, Network Interface Select option 2, WiFi Select New, Using the top left navigation button. V200c+ External User Manual...
- Page 40 Public | External V200c+ User Manual | Version 1.3 | August 14th, 2019 Step Instruction Screen Information Select Option 1, SSID Enter the SSID. The possible characters can be found in section 2.3 Press the right-hand navigation key to save. Select Option 2, Autostart.
- Page 41 Public | External V200c+ User Manual | Version 1.3 | August 14th, 2019 Step Instruction Screen Information Select the required autostart setting for the chosen Wi-Fi network. Default - Yes Select Option 3, Authentication Select Option 1, Authentication V200c+ External User Manual...
- Page 42 Public | External V200c+ User Manual | Version 1.3 | August 14th, 2019 Step Instruction Screen Information Select Option 3, Authentication. Select the required authentication for the chosen Wi-Fi network. Select Option 2, Pairwise cipher Select the chosen cipher for the chosen Wi-Fi Network.
- Page 43 Public | External V200c+ User Manual | Version 1.3 | August 14th, 2019 Step Instruction Screen Information Select Option 3, Group cipher Select Option 5, Group Cipher Select the chosen cipher for the chosen Wi-Fi Network. Select Option 3, Pre-Shared-Key (PSK) V200c+ External User Manual...
- Page 44 Public | External V200c+ User Manual | Version 1.3 | August 14th, 2019 Step Instruction Screen Information Enter the SSID. The possible characters can be found in section 2.3 Multiple presses will result in upper and lower-case letters and numerics. Once inserted select Save and press the green circle button.
- Page 45 Public | External V200c+ User Manual | Version 1.3 | August 14th, 2019 Step Instruction Screen Information Select Option 1, IPv4 The default is DHCP, if you require static IPs then follow steps 26-30 if not, skip to step 31 Select Option 2, DHCP Select option 1, No Note –...
- Page 46 Public | External V200c+ User Manual | Version 1.3 | August 14th, 2019 Step Instruction Screen Information Select Option 3, IP Address Enter the required IP address. Note, if a field is not 3 digits long then you must enter the leading zeros.
- Page 47 Public | External V200c+ User Manual | Version 1.3 | August 14th, 2019 Step Instruction Screen Information Press the red cross button. Press Save, using the top right-hand navigation button. When “Network Saved” is displayed press the green circle button. V200c+ External User Manual...
- Page 48 Public | External V200c+ User Manual | Version 1.3 | August 14th, 2019 Step Instruction Screen Information Select Yes to “Apply settings on interface?” Select Yes to “Settings applied to interface” Press the red cross button V200c+ External User Manual...
- Page 49 Public | External V200c+ User Manual | Version 1.3 | August 14th, 2019 Step Instruction Screen Information Press the red cross button. Select Option 1, Status Select option 1, IP Addresses V200c+ External User Manual...
- Page 50 Public | External V200c+ User Manual | Version 1.3 | August 14th, 2019 Step Instruction Screen Information Select option 2, WiFi Check that the status is Up. Note – If the status is not Up, repeat the network setup steps. Press the red cross button until you are back at the Login screen.
-
Page 51: Transaction Processing
Public | External V200c+ User Manual | Version 1.3 | August 14th, 2019 4 TRANSACTION PROCESSING This section will cover the on-screen messages that you will see on the terminal. Please note messaging will be dependent on the settings enabled on the account and level of integration performed by your POS provider. - Page 52 Public | External V200c+ User Manual | Version 1.3 | August 14th, 2019 Step Instruction Screen Information On this screen, the user can choose the card payment method, i.e. Tap for contactless, Swipe for MSR or Insert for ICC transaction. In this example, we have chosen ICC transaction. Register for account on file if required Enter the PIN only if the card was inserted.
- Page 53 Public | External V200c+ User Manual | Version 1.3 | August 14th, 2019 Step Instruction Screen Information The terminal attempts to connect to the PAYWare Ocius gateway, following a successful response a Transaction Approved message appears The terminal will then prompt of removal of card followed by printing the receipts.
-
Page 54: Sale Swipe
Public | External V200c+ User Manual | Version 1.3 | August 14th, 2019 4.2 SALE SWIPE Step Instruction Screen Information To initiate the Sale payment, just enter the required amount. After amount entered, press the “Green” button or “Green Circle” button to start the transaction. Option to add the gratuity, Press “Green”... - Page 55 Public | External V200c+ User Manual | Version 1.3 | August 14th, 2019 On this screen, the user can choose the card payment method, i.e. Tap for contactless, Swipe for MSR or Insert for ICC transaction. In this example, we are showing a swipe transaction.
- Page 56 Public | External V200c+ User Manual | Version 1.3 | August 14th, 2019 After the transaction have been approved, the terminal will display a confirmation message as shown. Either press “Green Bar” at the bottom of the screen” or press “Green Circle” or “Enter”...
-
Page 57: Sale Ctls
Public | External V200c+ User Manual | Version 1.3 | August 14th, 2019 4.3 SALE CTLS Step Instruction Screen Information To initiate the Sale payment, just enter the required amount. After amount entered, press the “Green” button or “Green Circle” button to start the transaction. Option to add the gratuity, Press “Green”... - Page 58 Public | External V200c+ User Manual | Version 1.3 | August 14th, 2019 On this screen, the user can choose the card payment method, i.e. Tap for contactless, Swipe for MSR or Insert for ICC transaction. In this example, we are showing a CTLS transaction.
-
Page 59: Customer Present - Refund
Public | External V200c+ User Manual | Version 1.3 | August 14th, 2019 When complete the terminal will return to the main menu. 4.4 CUSTOMER PRESENT - REFUND Step Instruction Screen Information Plug the device in using the supplied power supply and log in using the login credentials Select Refund or type 2 from the Main menu (select * to get to the main menu) and enter the amount to be refunded when the... - Page 60 Public | External V200c+ User Manual | Version 1.3 | August 14th, 2019 Step Instruction Screen Information Register for account on file if required The V200c is connecting to the Verifone PAYWare Ocius Gateway and seeking authorisation. A prompt to remove the card V200c+ External User Manual...
-
Page 61: Customer Not Present - Sale Mail Order
Public | External V200c+ User Manual | Version 1.3 | August 14th, 2019 Step Instruction Screen Information A prompt to check that the customer’s signature is valid If all ok the terminal will connect to the gateway and approve the refund transaction A receipt will be printed, one for the customer and one for your records The terminal will return to the main idle screen once completed. - Page 62 Public | External V200c+ User Manual | Version 1.3 | August 14th, 2019 Step Instruction Screen Information Go to the Main Menu and scroll to the next screen and select Card Not Present or enter 4. At the next screen select Sale Mail Order.
- Page 63 Public | External V200c+ User Manual | Version 1.3 | August 14th, 2019 Step Instruction Screen Information Enter the 3-digit security code (CSC) from the back of the card and press the green enter button Enter the house number and press the green enter key Enter the just the numbers from the Postcode and press the green enter key Register for account on file if required...
- Page 64 Public | External V200c+ User Manual | Version 1.3 | August 14th, 2019 Step Instruction Screen Information At this stage, the terminal will contact the PayWare Ocius gateway and will provide a result of either Approved or Declined A receipt will then be printed for the merchant and a second copy for the customer The terminal will return to the main menu once completed.
-
Page 65: Customer Not Present - Sale Telephone Order
4.6 CUSTOMER NOT PRESENT – SALE TELEPHONE ORDER Step Instruction Screen Information Tap the “Verifone” logo to access the Main menu. Tap “Grey Bar” at the bottom of the screen” to view more options below. Press “4” for “Card Not Present” option. V200c+ External User Manual... - Page 66 Public | External V200c+ User Manual | Version 1.3 | August 14th, 2019 Step Instruction Screen Information In the “Card Not Present” Menu, there are options of CNP Transaction. Choose one appropriately. In this example, the “Sale Telephone Order” was selected. To initiate the Sale payment, just enter the required amount.
- Page 67 Public | External V200c+ User Manual | Version 1.3 | August 14th, 2019 Step Instruction Screen Information Enter “Expiry Date” and press “Enter” to continue. Enter “CSC” and press “Enter” to continue. Enter “Address Number” and press “Enter” to continue. V200c+ External User Manual...
- Page 68 Public | External V200c+ User Manual | Version 1.3 | August 14th, 2019 Step Instruction Screen Information Enter “Postcode” and press “Enter” to continue. The device is showing transaction’s processing status. The device is showing transaction’s authorising message. V200c+ External User Manual...
- Page 69 Public | External V200c+ User Manual | Version 1.3 | August 14th, 2019 Step Instruction Screen Information The device is showing transaction’s authorising message. Press the “Green” button or “Green Circle” button to proceed or “Red” button or “Red Cross” button to cancel the transaction.
- Page 70 Public | External V200c+ User Manual | Version 1.3 | August 14th, 2019 Step Instruction Screen Information After the transaction have been approved, the terminal will display a confirmation message as shown. Either press “Green Bar” at the bottom of the screen” or press “Green Circle”...
-
Page 71: Customer Not Present - Refund Telephone Order
Public | External V200c+ User Manual | Version 1.3 | August 14th, 2019 Step Instruction Screen Information When complete the terminal will return to the main menu. 4.7 CUSTOMER NOT PRESENT – REFUND TELEPHONE ORDER Step Instruction Screen Information Tap the “Verifone” logo to access the Main menu. V200c+ External User Manual... - Page 72 Public | External V200c+ User Manual | Version 1.3 | August 14th, 2019 Step Instruction Screen Information Tap “Grey Bar” at the bottom of the screen” to view more options below. Press “4” for “Card Not Present” option. In the “Card Not Present” Menu, there are options of CNP Transaction.
- Page 73 Public | External V200c+ User Manual | Version 1.3 | August 14th, 2019 Step Instruction Screen Information To initiate the refund, enter the required amount. After amount entered, press the “Green” button or “Green Circle” button to start the transaction. Use the keypad to enter the Card Number and press “Enter”...
- Page 74 Public | External V200c+ User Manual | Version 1.3 | August 14th, 2019 Step Instruction Screen Information The device is now connecting the server. The device is showing transaction’s authorising message. The device is now connecting the server. V200c+ External User Manual...
- Page 75 Public | External V200c+ User Manual | Version 1.3 | August 14th, 2019 Step Instruction Screen Information After the transaction have been approved, the terminal will display a confirmation message as shown. Either press “Green Bar” at the bottom of the screen” or press “Green Circle”...
-
Page 76: Customer Not Present - Refund Mail Order
Public | External V200c+ User Manual | Version 1.3 | August 14th, 2019 4.8 CUSTOMER NOT PRESENT – REFUND MAIL ORDER Step Instruction Screen Information Plug the device in using the supplied power supply and log in using the login credentials Navigate to the Main Menu and scroll to the next screen and select Card Not Present or enter 4. - Page 77 Public | External V200c+ User Manual | Version 1.3 | August 14th, 2019 Step Instruction Screen Information Enter the 3-digit security code (CSC) from the back of the card and press the green enter button Register for account on file if required The terminal will connect to the PayWare Ocius gateway and authorise the transaction V200c+ External User Manual...
- Page 78 Public | External V200c+ User Manual | Version 1.3 | August 14th, 2019 Step Instruction Screen Information If all ok the terminal will connect to the gateway and approve or decline the refund transaction A receipt will be printed, one for the customer and the other for the merchant The terminal will return to the main menu once completed.
-
Page 79: Account Verification
Public | External V200c+ User Manual | Version 1.3 | August 14th, 2019 4.9 ACCOUNT VERIFICATION Step Instruction Screen Information Access the main menu via the * key, you should see the option of account verification if enabled. Terminal will prompt for the user to insert, swipe or tap the card. - Page 80 Public | External V200c+ User Manual | Version 1.3 | August 14th, 2019 Step Instruction Screen Information Account verification should be authorised and will show an auth code on screen A merchant receipt will be printed with a space for signature You will be prompted to validate the signature The customer receipt will then be printed and the terminal will return back to the idle screen...
-
Page 81: Reports
Public | External V200c+ User Manual | Version 1.3 | August 14th, 2019 5 REPORTS Step Instruction Screen Information Plug the device in using the supplied power supply and log in using the login credentials Go to the Main Menu (select *) and enter 3 Enter the supervisor password Select X or Z Report or enter 1 or 2 as required Connecting to the Ocius gateway... - Page 82 Public | External V200c+ User Manual | Version 1.3 | August 14th, 2019 A receipt will be printed with the details of the X or Z report V200c+ External User Manual...
-
Page 83: Frequently Asked Questions
A, The V200c/V200c+ is a PTS 5. Q, What is the Micro SD Slot for? A, This is for internal Verifone use only, do not insert anything in to this slot. Q, Can I have multiple networks setup on the device at once? A, Yes, if you have a V200c+ device and the relevant cables, then you can make use of the Wi- Fi and the Ethernet adapter at the same time. - Page 84 Public | External V200c+ User Manual | Version 1.3 | August 14th, 2019 7 CONTACT DETAILS VERIFONE SERVICES UK & IRELAND 100 Eureka Park Ashford Kent TN25 4AZ PAYWARE OCIUS MERCHANT HELPDESK T: 0333 323 6677 UK.Helpdesk@verifone.com Monday – Saturday – 08:00 – 20:00 Sunday –...