Table of Contents
Advertisement
Quick Links
Advertisement
Table of Contents

Related Manuals for NEFF B2ACG7A.0


Summary of Contents for NEFF B2ACG7A.0
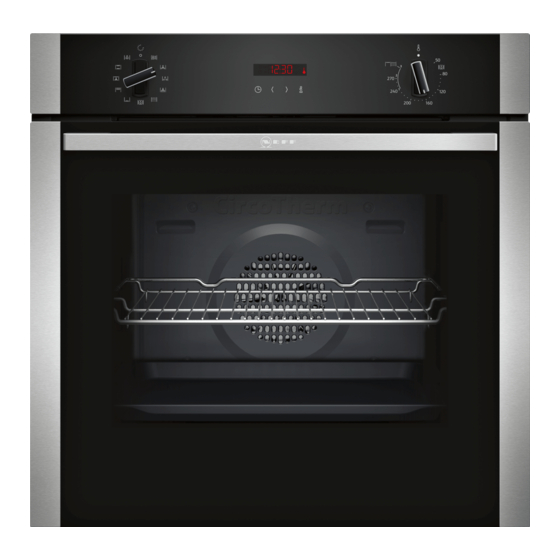
- Page 1 Oven [en] User manual and installation instructions B2ACG7A.0...
-
Page 2: Table Of Contents
en Safety 1.2 Intended use Table of contents This appliance is designed only to be built into kitchen units. Read the special installation instructions. USER MANUAL Only a licensed professional may connect ap- Safety .............. 2 pliances without plugs. Damage caused by in- correct connection is not covered under the Preventing material damage ....... -
Page 3: Safety
Safety en ▶ Keep your hands away from the hinges. Opening the appliance door creates a Components inside the appliance door may draught. Greaseproof paper may come into have sharp edges. contact with the heating element and catch ▶ Wear protective gloves. fire. -
Page 4: Preventing Material Damage
en Preventing material damage ▶ Do not let children play with packaging ma- ▶ Keep children at a safe distance. terial. If the door seal is damaged, a large amount Children may breathe in or swallow small of heat is generated around the door. parts, causing them to suffocate. -
Page 5: Environmental Protection And Saving En- Ergy
Environmental protection and saving energy en Do not store food in the cooking compartment. Never use oven cleaner in the cooking compartment ▶ ▶ when it is still warm. Leaving the appliance to cool down with the door open Remove all food remnants from the cooking com- will damage the front of neighbouring kitchen units over ▶... - Page 6 en Familiarising yourself with your appliance 4 Familiarising yourself with your appliance 4.1 Controls Buttons → "Buttons", Page 6 You can use the control panel to configure all functions Function selector of your appliance and to obtain information about the You can turn the function selector clockwise or operating status.
-
Page 7: Familiarising Yourself With Your Appliance
Familiarising yourself with your appliance en Symbol Type of heating What it's used for/how it works CircoTherm hot air Bake and roast on one or more levels. The fan distributes the heat from the ring-shaped heating element in the back wall evenly around the cooking compartment. CircoTherm gentle Cook selected dishes gently on one level without preheating. -
Page 8: Accessories
en Accessories Heat-up indicator You can remove the rails, e. g. for cleaning. → "Shelf supports", Page 17 The appliance indicates when it is heating up. When the appliance is heating, the symbol lights up on the display. When you are preheating the appliance, the optimal time to place your food in the cooking compartment is when the symbol first goes out. - Page 9 You will find a comprehensive range of products for your appliance in our brochures and online: www.neff-international.com Accessories vary from one appliance to another. When Baking tray Slide the tray, e.g. the universal pan, purchasing accessories, always quote the exact E.g.
-
Page 10: Basic Operation
en Basic operation Keep the room ventilated while the appliance is Switch off the appliance after the specified cooking heating. time. Set the type of heating and temperature. Wait until the cooking compartment has cooled → "Basic operation", Page 10 down. Clean the smooth surfaces with soapy water and a Type of heat- CircoTherm hot air ... -
Page 11: Time-Setting Options
Time-setting options en 9 Time-setting options Your appliance has different time-setting options, with Use the button to reset the timer duration to zero. ▶ which you can control its operation. a After a few seconds, the appliance applies the change and goes out. -
Page 12: Childproof Lock
en Childproof lock Cancelling the end time Requirements ¡ The type of heating and temperature or setting are You can delete the set end at any time. set. is highlighted on the display. Requirement: ¡ A cooking time is set. Reset the end time to the current time plus the set ▶... -
Page 13: Basic Settings
Basic settings en 11 Basic settings You can configure the appliance to meet your needs. 11.1 Overview of the basic settings Here you can find an overview of the basic settings and factory settings. The basic settings depend on the features of your appliance. Display Basic setting Selection... -
Page 14: Cleaning And Servicing
en Cleaning and servicing 12 Cleaning and servicing Do not use harsh or abrasive cleaning products. To keep your appliance working efficiently for a long ▶ Do not use cleaning products with a high alcohol time, it is important to clean and maintain it carefully. ▶... - Page 15 Cleaning function en Cooking compartment Area Suitable cleaning agents Notes Enamel surfaces ¡ Hot soapy water Soak any heavily soiled areas and use a brush or steel wool. Leave the appliance door open to dry the cooking compartment ¡ Vinegar water after cleaning it.
-
Page 16: Cleaning Function
en Cleaning function Leave the front of the appliance clear. ▶ Select a higher cleaning setting for very heavy or Keep children at a safe distance. ▶ older soiling. If the door seal is damaged, a large amount of heat is The duration cannot be changed. - Page 17 Shelf supports en Use the function selector and the temperature se- Clean the smooth surfaces in the cooking compart- lector to set the cleaning aid . ment with a dish cloth or a soft brush. Stubborn residues can be removed using a stainless steel a The length of time appears in the display.
- Page 18 en Appliance door 15 Appliance door To ensure that your appliance retains its appearance Close the appliance door fully . Grab hold of the and remains fully functioning for a long time, you can appliance door with both hands (on the left and detach the appliance door and clean it.
-
Page 19: Appliance Door
Appliance door en Close the locking levers on the left- and right-hand Set the front pane down on a level surface with the hinges. door handle facing down. Press the intermediate pane against the appliance with one hand while pushing the left- and right-hand retainers upwards. -
Page 20: Troubleshooting
en Troubleshooting Push the left- and right-hand retainer downwards Push the front pane in at the bottom until you until the intermediate pane is clamped . hear it click into place. Open the appliance door slightly and remove the tea towel. Screw both screws back in on the left and right of the appliance door. -
Page 21: Customer Service
Troubleshooting en Fault Cause and troubleshooting The time flashes in the display. There has been a power cut. Reset the time. ▶ → "Setting the time on the clock", Page 12 The time does not appear in the The basic setting has been changed. display when the appliance is Change the basic setting for the time display. - Page 22 en Disposal 17 Disposal Find out here how to dispose of old appliances cor- This appliance is labelled in accord- rectly. ance with European Directive 2012/19/EU concerning used elec- 17.1 Disposing of old appliance trical and electronic appliances (waste electrical and electronic equip- Valuable raw materials can be reused by recycling.
-
Page 23: How It Works
How it works en Roasting in cookware 19.3 Notes on roasting and grilling When preparing food in cookware with a lid, the cook- The setting values are based on the assumption that ing compartment remains cleaner. unstuffed, chilled, ready-to-roast poultry, meat or fish is Follow the manufacturer's instructions for your roasting placed into a cold cooking compartment. - Page 24 en How it works Food Accessories/cookware Shelf pos- Type of Temperature Cooking ition heating in °C/grill set- time in mins ting Bread, 1000 g (in a loaf tin or free- Universal pan 200-220 35-50 form) Loaf tin Pizza, fresh Baking tray 190-210 20-30 Pizza, fresh, thin-crust Round pizza tray...
- Page 25 Installation instructions en ¡ Baking tins/dishes on the wire rack Position baking tins/dishes either next to one another or offset on different shelves so that they are not dir- First wire rack: Level 3 ectly one above the other in the cooking compartment. Second wire rack: Level 1 Shelf positions for baking on three levels: ¡...
-
Page 26: General Installation Instructions
en Installation instructions ¡ Wear protective gloves so that you do not cut yourself. Parts that are accessible dur- ing installation may have sharp edges. ¡ Dimensions of the figures in mm. 20.2 Appliance dimensions 20.1 General installation instructions You will find the dimensions of the appliance here Follow these instructions before you start with the installation of the appliance. - Page 27 Installation instructions en ¡ The power cable must be plugged in at the rear of 20.4 Installation in a tall unit the appliance until you hear a clicking sound. A 3 m Observe the installation dimensions and the installation power cable can be obtained from the after-sales instructions when installing in a tall unit.
- Page 28 en Installation instructions Screw the appliance into place. Note: The gap between the worktop and the appliance must not be closed by additional battens. Thermal insulation strips must not be fitted to the side panels of the surround unit. 20.8 Removing the appliance Disconnect the appliance from the power supply.
- Page 32 *9001580661* 9001580661 Constructa-Neff Vertriebs-GmbH Carl-Wery-Straße 34 001118 81739 München GERMANY...