Table of Contents
Advertisement
Quick Links
Advertisement
Table of Contents

Related Manuals for NEFF B27CR22N1


Summary of Contents for NEFF B27CR22N1
- Page 1 Oven [en] User manual and installation instructions B27CR22N1...
-
Page 2: Table Of Contents
en Safety 1.2 Intended use Table of contents This appliance is designed only to be built into kitchen units. Read the special installation instructions. USER MANUAL Only a licensed professional may connect ap- Safety .............. 2 pliances without plugs. Damage caused by in- correct connection is not covered under the Preventing material damage ....... -
Page 3: Safety
Safety en contact with the heating element and catch Components inside the appliance door may fire. have sharp edges. ▶ Never place greaseproof paper loosely ▶ Wear protective gloves. over accessories when preheating the ap- WARNING ‒ Risk of electric shock! pliance and while cooking. Incorrect repairs are dangerous. -
Page 4: Preventing Material Damage
en Preventing material damage Children may breathe in or swallow small If the door seal is damaged, a large amount parts, causing them to suffocate. of heat is generated around the door. ▶ Keep small parts away from children. ▶ Do not scrub or remove the seal. ▶... -
Page 5: Environmental Protection And Saving En- Ergy
Environmental protection and saving energy en Remove all food remnants from the cooking com- Leaving the appliance to cool down with the door open ▶ partment and the appliance door before you next will damage the front of neighbouring kitchen units over heat up the appliance. -
Page 6: Familiarising Yourself With Your Appliance
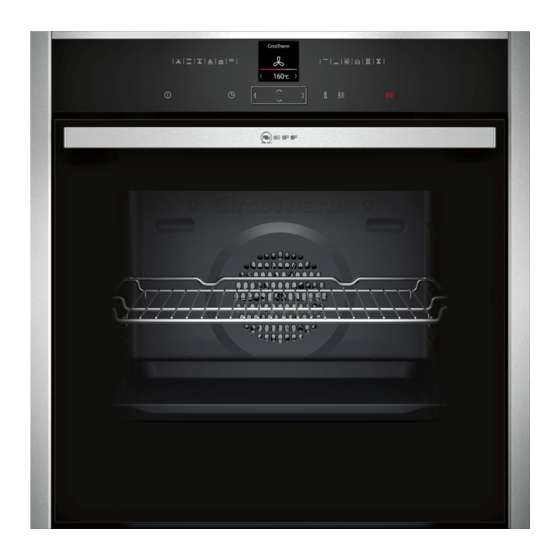
en Familiarising yourself with your appliance 4 Familiarising yourself with your appliance 4.1 Control panel You can use the control panel to configure all functions of your appliance and to obtain information about the operat- ing status. Display Buttons Control element 4.2 Buttons The buttons are touch-sensitive areas. - Page 7 Familiarising yourself with your appliance en Button Name Right Navigate to the right on the display Navigate upwards on the display Down Navigate downwards on the display 4.4 Main menu The main menu provides an overview of your appliance's functions. Press the button to open the main menu.
- Page 8 en Accessories Symbol Heating function Temperature Top/bottom heating 50 - 275 °C For gently cooking selected types of food. Heat is emitted from above and below. This heating function is most effective between 150 and 250 °C. This heating function is used to measure the energy consump- tion in the standard mode.
- Page 9 Accessories en Accessories Wire rack ¡ Cake tins ¡ Ovenproof dishes ¡ Cookware ¡ Meat, e.g. roasting joints or steak ¡ Frozen meals Universal pan ¡ Moist cakes ¡ Baked items ¡ Bread ¡ Large roasts ¡ Frozen meals ¡ Catch dripping liquids, e.g. fat when grilling food on the wire rack.
- Page 10 You will find a comprehensive range of products for your appliance in our brochures and online: www.neff-international.com Accessories vary from one appliance to another. When purchasing accessories, always quote the exact product number (E no.) of your appliance.
- Page 11 Basic operation en ¡ If you do not perform any actions on the appliance Use the or button to select the required temperat- for an extended period, it will automatically switch it- ure. self off. a The temperature will now be changed. 7.2 Switching off the appliance 7.6 Changing the type of heating Press...
- Page 12 en Time-setting options 8 Time-setting options Your appliance has different time-setting options, with Press . which you can control its operation. Select the default value. Button Default value 8.1 Overview of the time-setting options 10 minutes When you are setting a time, the time values will in- 30 minutes crease by greater increments as you scroll through the Use the or button to select the required cooking...
- Page 13 Childproof lock en Use the or button to change the end time. Use the button to reset the end time. a The setting will then be applied. a The end time corresponds to the current time plus the set cooking time. Cancelling the Ready at time for delayed starts a The appliance will start heating using the set cook- Press...
-
Page 14: Sabbath Mode
en Rapid heat-up 10 Rapid heat-up You can use the "Rapid heat-up" and "PowerBoost" functions to reduce the heat-up time. Whether the appliance is preheated with the "Rapid heat-up" function or the "PowerBoost" function depends on the heating function that has been set. -
Page 15: Basic Settings
Basic settings en 12 Basic settings You can configure the appliance to meet your needs. 12.2 Changing basic settings Press to switch the appliance on. 12.1 Overview of the basic settings Press . Use the or button to select "Settings" . Here you can find an overview of the basic settings Use the button to navigate to the next row. - Page 16 en Cleaning and servicing 13 Cleaning and servicing Do not use cleaning products with a high alcohol To keep your appliance working efficiently for a long ▶ content. time, it is important to clean and maintain it carefully. Do not use hard scouring pads or cleaning ▶...
-
Page 17: Cleaning Functions
Cleaning functions en Cooking compartment Area Suitable cleaning agents Information Enamel surfaces ¡ Hot soapy water Soak any heavily soiled areas and use a brush or steel wool. Leave the appliance door open to dry the cooking compartment ¡ Vinegar water after cleaning it. - Page 18 en Cleaning functions Leave the front of the appliance clear. ▶ WARNING ‒ Risk of burns! Keep children at a safe distance. ▶ The cooking compartment gets very hot when the If the door seal is damaged, a large amount of heat is cleaning function is in progress.
- Page 19 Rails en Note: White residues on the enamel surfaces may Press to switch the appliance on. be caused by heavy soiling. These food residues Press . are harmless. The deposits do not compromise the Use the or button to select "EasyClean" . functionality of the appliance.
-
Page 20: Appliance Door
en Appliance door Push the rail into the front socket until the rail 15.2 Attaching the rails also rests against the cooking compartment wall, Notes and then press this downwards . ¡ The rails only fit on the right or left. ¡... - Page 21 Appliance door en Close the appliance door fully . Grab hold of the Using both hands, press down on the left and right appliance door with both hands (on the left and of the door cover from above to check whether the right) and pull it upwards and out ...
- Page 22 en Appliance door Clean the door cover. Turn the intermediate pane until the arrow is in → "Suitable cleaning agents", Page 16 the top right. Undo and remove the left- and right-hand screws on the appliance door . Place a folded-up tea towel in the appliance door. Pull the front pane up and out ...
-
Page 23: Troubleshooting
Troubleshooting en Put the door cover in position and push down on it Close the appliance door. until you hear it click into place. Note: Do not use the cooking compartment again until the door panes have been correctly fitted. 17 Troubleshooting You can rectify minor faults on your appliance yourself. - Page 24 Next time, set lower or higher values. ▶ Tip: A lot of information about the food preparation and corresponding setting values can be found on our website www.neff-international.com. 17.2 Replacing the oven light bulb WARNING ‒ Risk of electric shock! When changing the bulb, the bulb socket contacts are If the light in the cooking compartment fails, change live.
- Page 25 Disposal en Pull out the halogen bulb without turning it . Insert the new halogen lamp and press it firmly into the socket. Make sure the pins are positioned correctly. Depending on the appliance model, the glass cover may have a sealing ring. Put the sealing ring in posi- tion.
-
Page 26: How It Works
en How it works 20 How it works Here, you can find the ideal settings for various types Baking on two or more levels Shelf position of food as well as the best accessories and cookware. 3 levels We have perfectly tailored these recommendations to ¡... - Page 27 How it works en ¡ To catch any liquids that drip down, place the uni- Roasting in covered cookware versal pan into the cooking compartment at least ¡ Use a suitable lid that seals well. one level below the wire rack. ¡...
- Page 28 en How it works Food Accessory/cookware Shelf pos- Heating Temperature in Cooking time in ition function °C mins → Page 7 Biscuits, 3 levels 1 pcs 4+3+1 140–160 15–30 Universal pan 2 pcs Baking tray Bread, without a tin, 750 g Universal pan 1.
- Page 29 How it works en Heat 1 litre of whole milk (3.5% fat) to 90 °C on the Place the containers on the cooking compartment hob and then leave it to cool down to 40 °C. floor. It is sufficient to heat UHT milk to 40 °C. Use the recommended settings when configuring Mix 150 g of chilled yoghurt into the milk.
- Page 30 en How it works ¡ Once the food has defrosted, switch off the appli- ¡ To prevent the food from drying out, you can cover ance and leave the food in the appliance for another 10 to 30 minutes to allow the temperature to equal- ¡...
-
Page 31: Installation Instructions
Installation instructions en Food Accessory/cookware Shelf pos- Heating Temperature in Cooking time in ition function °C mins → Page 7 Hot water sponge cake Springform cake tin, 160 - 170 25 - 35 diameter 26 cm Hot water sponge cake Springform cake tin, 160 - 170 30 - 40 diameter 26 cm... - Page 32 en Installation instructions 21.2 Appliance dimensions WARNING ‒ Danger: Magnetism! Permanent magnets are used in the control You will find the dimensions of the appliance here panel or in the controls. They may affect elec- tronic implants, e.g. pacemakers or insulin pumps. ▶ Wearers of electronic implants must stay at least 10 cm away from the control panel or controls during the installation.
- Page 33 Installation instructions en Hob type a raised in mm a flush in mm b in mm Induction hob Full-surface induction hob Gas hob Electric hob ¡ The fuse protection must correspond to the power 21.5 Installation in a tall unit rating specified on the appliance's rating plate and Observe the installation dimensions and the installation to local regulations.
- Page 34 en Installation instructions Centre the appliance. If required, the gap between the appliance door and the side panels can be adjusted using the screws at the top left and right. There must be an air gap of at least 4 mm between the appliance and adjacent unit fronts.
- Page 36 Valid within Great Britain: Imported to Great Britain by BSH Home Appliances Ltd. Grand Union House Old Wolverton Road Wolverton, Milton Keynes MK12 5PT United Kingdom *9001637649* 9001637649 Constructa-Neff Vertriebs-GmbH Carl-Wery-Straße 34 010507 81739 München GERMANY...