Table of Contents
Advertisement
Quick Links
Advertisement
Chapters
Table of Contents

Related Manuals for NEFF B2ACH7H 0 Series


Summary of Contents for NEFF B2ACH7H 0 Series
- Page 1 Oven [en] User manual and installation in- structions B2ACH7H.0...
-
Page 2: Table Of Contents
en Safety Futher information and explanations are available online: ¡ Keep the instruction manual and the Table of contents product information safe for future refer- ence or for the next owner. ¡ Do not connect the appliance if it has been INFORMATION FOR USE damaged in transit. - Page 3 Safety en Hot steam may escape when you open the 1.4 Safe use appliance door. Steam may not be visible, de- Always place accessories in the cooking com- pending on the temperature. partment the right way round. ▶ Open the appliance door carefully. → "Accessories", Page 9 ▶...
-
Page 4: Safety
en Safety If the insulation of the power cord is dam- 1.6 Cleaning function aged, this is dangerous. WARNING ‒ Risk of fire! ▶ Never let the power cord come into contact Loose food remnants, fat and meat juices with hot appliance parts or heat sources. may catch fire when the cleaning function is in ▶... -
Page 5: Preventing Material Damage
Preventing material damage en 2 Preventing material damage Fruit juice dripping from the baking tray leaves stains 2.1 General that cannot be removed. ATTENTION! When baking very juicy fruit flans, do not pack too ▶ Objects on the cooking compartment floor at over much on the baking tray. -
Page 6: Familiarising Yourself With Your Appliance
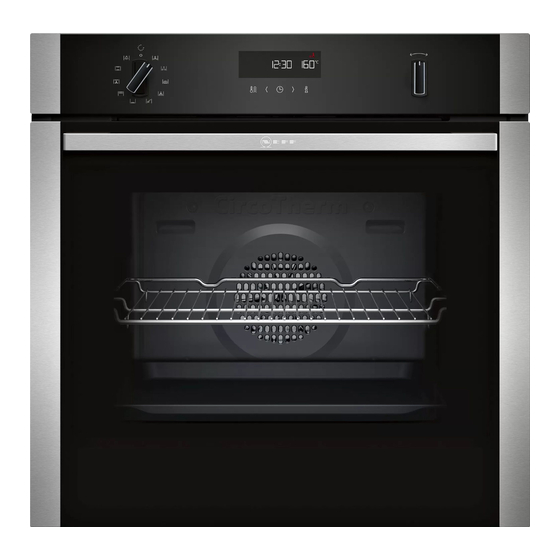
en Familiarising yourself with your appliance Note: Allow frozen food to defrost before cooking. The appliance requires: ¡ This saves the energy that would otherwise be re- ¡ A maximum of 1 W when the appliance is in opera- quired to defrost it. tion with the display switched on ¡... -
Page 7: Sabbath Mode
Familiarising yourself with your appliance en Symbol Name Sabbath mode Sabbath mode activated → "Sabbath mode", Page 13 Childproof lock activ- The childproof lock is activated ated → "Childproof lock", Page 13 Door lock Appliance door is locked → "Childproof lock", Page 13 → "Pyrolytic self-cleaning ", Page 17 Temperature display... - Page 8 en Familiarising yourself with your appliance Symbol Name EasyClean EasyClean removes light dirt from the cooking compartment. → "Cleaning aid EasyClean ", Page 18 Pyrolytic self-cleaning Set the cleaning function, which cleans the cooking compartment virtually inde- pendently. → "Pyrolytic self-cleaning ", Page 17 4.6 Temperature and setting levels 4.7 Cooking compartment There are different settings for the types of heating and...
-
Page 9: Baking Tray
Accessories en 5 Accessories Use original accessories. These have been made espe- The accessories supplied may differ depending on the cially for your appliance. appliance model. Note: Accessories may become deformed if they get hot. Deformation has no effect on function. As the ac- cessory cools down, it will regain its original shape. - Page 10 Note: Take any accessories that you will not be using your appliance in our brochures and online: out of the cooking compartment while the appliance is www.neff-international.com in operation. Accessories vary from one appliance to another. When purchasing accessories, always quote the exact Combining accessories product number (E no.) of your appliance.
- Page 11 Basic operation en 7 Basic operation When your food is ready, switch off the appliance. 7.1 Switching on the appliance Tips Turn the function selector to any position other than ▶ ¡ The most suitable type of heating for your food can the "Off"...
- Page 12 en Time-setting options Press the button repeatedly until is highlighted 8.3 Setting the cooking time in the display. You can set a cooking time for operation of up to 23 Press the or button. hours 59 minutes.
- Page 13 Childproof lock en 9 Childproof lock You can secure your appliance to prevent children Pausing the automatic childproof lock from accidentally switching it on or changing the set- Requirement: The automatic childproof lock is activ- tings. ated in the basic settings. Note: You can go to the basic settings → Page 14 to → "Basic settings", Page 14 specify whether you want the option to set the child- Press and hold the...
- Page 14 en Basic settings 12 Basic settings You can configure the basic settings for your appliance to meet your needs. 12.1 Overview of the basic settings Here you can find an overview of the basic settings and factory settings. The basic settings depend on the features of your appliance.
-
Page 15: Appliance Door
Cleaning and servicing en 13 Cleaning and servicing To keep your appliance working efficiently for a long ATTENTION! time, it is important to clean and maintain it carefully. Unsuitable cleaning products may damage the sur- faces of the appliance. 13.1 Cleaning products Do not use harsh or abrasive cleaning products. - Page 16 en Cleaning and servicing Cooking compartment Area Suitable cleaning agents Information Enamel surfaces ¡ Hot soapy water Soak any heavily soiled areas and use a brush or steel wool. ¡ Vinegar water Leave the appliance door open to dry the cooking compartment after cleaning it.
- Page 17 Cleaning function en 14 Cleaning function You can use the cleaning function to clean the appli- WARNING ‒ Risk of harm to health! ance. The cleaning function heats up the cooking compart- ment to a very high temperature so that food left over 14.1 Pyrolytic self-cleaning from roasting, grilling and baking will burn off.
- Page 18 en Shelf supports Remove white residues with lemon juice. Use the function selector to set the cleaning functions . Note: White residues on the enamel surfaces may a The symbol and the cleaning functions appear in be caused by heavy soiling. These food residues the display.
- Page 19 Shelf supports en Pull the whole rail to the front and remove it. Push on the tab marked PUSH behind the rail, and push the rail to the rear. Keep the PUSH tab pushed back and swing the 15.2 Attaching the shelf supports rail outwards ...
- Page 20 en Appliance door Keep the PUSH tab pushed in and swing the pull- 15.4 Attaching the pull-out rail out rail inwards until the front retainer is located Note: The pull-out rails only fit on the right or left. Make between the two bars ...
- Page 21 Appliance door en Note: Ensure that the appliance door slides onto the WARNING ‒ Risk of injury! hinges without any resistance. If you feel any resist- When the hinges are not secured, they can snap ance, check whether you are sliding it in at the cor- shut with great force.
- Page 22 en Appliance door Open the appliance door slightly. Dry the door panes and refit them. Push on the left- and right-hand side of the door → "Fitting the door panes", Page 22 cover from the outside until it is released. Remove the door cover . 16.4 Fitting the door panes WARNING ‒ Risk of injury! The hinges on the appliance door move when the door...
-
Page 23: Troubleshooting
Troubleshooting en Open the appliance door slightly and remove the Put the door cover in position and push down on it tea towel. until you hear it click into place. Screw both screws back in on the left and right of the appliance door. -
Page 24: Customer Service
en Troubleshooting Fault Cause and troubleshooting The time does not ap- The basic setting has been changed. pear in the display Change the basic setting for the time display. ▶ when the appliance is → "Basic settings", Page 14 switched off. Childproof lock is activated. ... -
Page 25: Baking Tray
Disposal en 18 Disposal 18.1 Disposing of old appliance This appliance is labelled in accord- ance with European Directive Valuable raw materials can be reused by recycling. 2012/19/EU concerning used elec- Unplug the appliance from the mains. trical and electronic appliances Cut through the power cord. (waste electrical and electronic equip- Dispose of the appliance in an environmentally ment - WEEE). -
Page 26: Springform Cake Tin
en How it works ¡ Place the food to be grilled on the wire rack. In ad- 20.3 Notes on roasting and grilling dition, slide the universal pan in at least one shelf The setting values are based on the assumption that position lower, with the slanted edge facing the ap- unstuffed, chilled, ready-to-roast poultry, meat or fish is pliance door. -
Page 27: How It Works
How it works en Food Accessories/cookware Shelf pos- Type of Temperature Cooking ition heating in °C/grill time in mins setting Biscuits, 2 or 3 levels Universal pan 140-160 15-25 Baking tray 4+3+1 Bread, 1000 g (in a loaf tin or free- Universal pan ... -
Page 28: Baking Tray Universal Pan
en Installation instructions Note: Items that are placed in the oven on baking trays Position baking tins/dishes either next to one another or in baking tins/dishes at the same time will not ne- or offset on different shelves so that they are not dir- cessarily be ready at the same time. -
Page 29: Installation Instructions
Installation instructions en ¡ Wear protective gloves so that you do not cut yourself. Parts that are accessible dur- ing installation may have sharp edges. ¡ Dimensions of the figures in mm. WARNING ‒ Risk of fire! It is dangerous to use an extended power 21.1 General installation instructions cord and non-approved adapters. - Page 30 en Installation instructions ¡ To ventilate the appliance, the intermediate floor ¡ Ensure that air exchange is guaranteed in accord- must have a ventilation cut-out. ance with the diagram. ¡ In combination with induction hobs, the gap between the worktop and appliance must not be sealed using additional strips.
- Page 31 Installation instructions en ¡ Contact protection must be guaranteed by the in- Screw the appliance into place. stallation. Electrically connect the appliance with the protective contact plug Note: The appliance must only be connected to a pro- tective contact socket that has been correctly installed. Insert the plug into the protective contact socket.
- Page 32 Valid within Great Britain: Imported to Great Britain by BSH Home Appliances Ltd. Grand Union House Old Wolverton Road Wolverton, Milton Keynes MK12 5PT United Kingdom *9001747023* 9001747023 BSH Hausgeräte GmbH Carl-Wery-Straße 34 020427 81739 München, GERMANY...