
Related Manuals for HYOSUNG MONiSAFE500S


Summary of Contents for HYOSUNG MONiSAFE500S
- Page 1 Installation Manual MONiSAFE500S System V01.00.00 (2019.06.21) © Hyosung TNS Inc. All Rights Reserved.
- Page 2 Revision History Installation Manual – MONiSAFE500S (MS500S) System Version Date Description of Change Chapter V01.00.00 2019/06/21 New Publication © Hyosung TNS All Rights Reserved. The content of this specification is protected by copyright laws. 2019. 06. 21. 1st Release © Hyosung TNS Inc. All Rights Reserved.
-
Page 3: Table Of Contents
Installation Condition and Space ........................3-1 Exterior ................................3-2 Service Area ..............................3-6 Chapter4. System Installation ....................... 4-1 Unpacking the ATM ............................4-1 Installation Frame............................4-2 Power Requirements ............................ 4-5 Notes ............................Notes-1 © Hyosung TNS Inc. All Rights Reserved. -
Page 4: Chapter1. Preface
Hyosung TNS. It Is the policy of Hyosung TNS to improve products as new technology, components, software, and firmware become available. Therefore Hyosung TNS reserves the right to change specifications without notice. -
Page 5: Terminologies
Transit Cassette C Tr Center Transport F Tr Front Transport M Tr Middle Transport O Tr. Option Transport 5-10 Recycling Cassette 5-11 Reject Cassette 5-12 R Tr. Rear Transport 5-13 BATT S/W Battery Switch © Hyosung TNS Inc. All Rights Reserved. - Page 6 Liquid Crystal Display Operation Panel for Customers to Operate OSD board On Screen Display Board Power Supply Panel Control Board Switch Sensor and Indications Unit Service Provider Text Terminal Unit (OPL or SPL) © Hyosung TNS Inc. All Rights Reserved.
-
Page 7: Safety Precautions
4. The equipment is to be secured to the building structure before operation 5. A security container shall be permitted to optionally be provided with a secondary lock, but improper use of the secondary lock feature will reduce the security level of the ATM. © Hyosung TNS Inc. All Rights Reserved. - Page 8 ▪ If the above-mentioned abnormalities occur, immediately turn off the power, unplug the equipment and contact the service center. ▪ If you ignore these symptoms, the equipment may catch on fire or cause electric shock. © Hyosung TNS Inc. All Rights Reserved.
-
Page 9: Précautions Pour La Sécurité (French)
• Ne pas retirer le couvercle. Seul le technicien d'entretien est autorisé à ouvrirle couvercle. • Ne pas toucher. Vous pouvez avoir un choc électrique. • Assurez-vous d'éteindre l'appareil lors de l'entretien de l'équipement. © Hyosung TNS Inc. All Rights Reserved. - Page 10 1. POUR RÉ DUIRE LES RISQUES D'INCENDIE, UTILISEZ UNIQUEMENT AWG n ° 26 OU LA LIGNES DE TELECOMMUNICATION PLUS GROSSE 2. RISQUE D'EXPLOSION SI LA BATTERIE EST REMPLACEE PAR UN TYPE INCORRECT. DISPOSER POUR UTILISATION DES BATTRIES SELON LES INSTRUCTIONS © Hyosung TNS Inc. All Rights Reserved.
- Page 11 Chapter1.Preface Installation Manual 3. POUR LES APPAREILS RACCORDES, LA PRISE DOIT ETRE INSTALLEE PRES D’EQUIPEMENT POUR ÊTRE FACILEMENT ACCESSIBLE 4. L’EQUIPEMENT DOIT ETRE SECURISE A LA STRUCTURE DU BATIMENT AVANT D'UTILISER © Hyosung TNS Inc. All Rights Reserved.
-
Page 12: Related Document
▶ The related documents are listed as follows. If needed, please contact staffs of our technical support team and maintenance team. ▪ Operator Manual ▪ Service Manual For the contact of maintenance staffs of Hyosung TNS, see the E-mail addresses and telephone numbers provided separately. © Hyosung TNS Inc. All Rights Reserved. -
Page 13: Chapter2. Introduction
Allows tellers to calculate and close amount on hand faster than the existing manual calculation. A bank customer and a teller can easily interact on a touch screen, just like talking, through Hyosung TNS’s intuitive and easy UI. Allows easy and quick installation and maintenance. © Hyosung TNS Inc. All Rights Reserved. -
Page 14: System Identification Label
Chapter2.Introduction Installation Manual System Identification Label ► The System Label below shows the layout of the product identification label which is fixed inside the ATM. © Hyosung TNS Inc. All Rights Reserved. -
Page 15: Chapter3. Installation Information
3. The ATM should be mounted on concrete or other nonflammable surface only. 4. The floor must allow easy wheelchair access from the front or the side. 5. Space required for servicing the machine should be considered before installation. © Hyosung TNS Inc. All Rights Reserved. -
Page 16: Exterior
Chapter3.Installation Information Installation Manual Exterior ► Front Elevation © Hyosung TNS Inc. All Rights Reserved. - Page 17 Installation Manual Chapter3.Installation Information ► Side Elevation © Hyosung TNS Inc. All Rights Reserved.
- Page 18 Chapter3.Installation Information Installation Manual ► Plan View © Hyosung TNS Inc. All Rights Reserved.
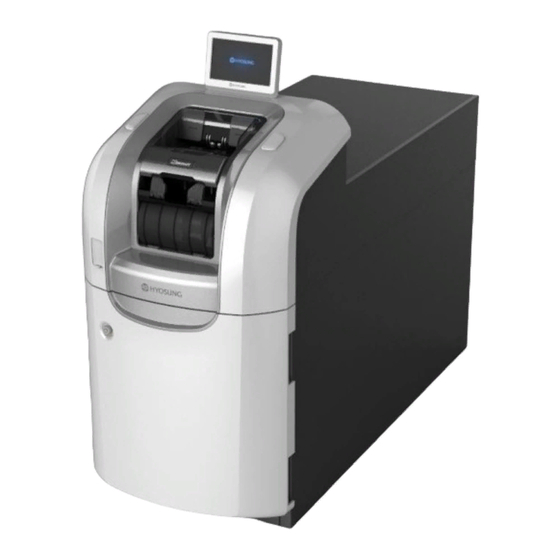
- Page 19 Installation Manual Chapter3.Installation Information ► ISO View © Hyosung TNS Inc. All Rights Reserved.
-
Page 20: Service Area
Chapter3.Installation Information Installation Manual Service Area ► Minimum Installation © Hyosung TNS Inc. All Rights Reserved. - Page 21 Installation Manual Chapter3.Installation Information ► Recommended Installation <Note!> Hyosung TNS recommends it is more convenient for your service personnel to have enough maintenance space to service this ATM machine © Hyosung TNS Inc. All Rights Reserved.
- Page 22 Chapter3.Installation Information Installation Manual ► Side Elevation © Hyosung TNS Inc. All Rights Reserved.
-
Page 23: Chapter4. System Installation
▪ Firmly close the vault door and lock the door by turning the handle completely. ▪ Only experienced staff members should move the heavy machine. ▪ Do not tilt the ATM when moving. © Hyosung TNS Inc. All Rights Reserved. -
Page 24: Installation Frame
Chapter4. System Installation Installation Manual Installation Frame ► Bottom of ATM © Hyosung TNS Inc. All Rights Reserved. - Page 25 Installation Manual Chapter4. System Installation ► Anchor Point © Hyosung TNS Inc. All Rights Reserved.
- Page 26 Chapter4. System Installation Installation Manual ► Anchor Detail © Hyosung TNS Inc. All Rights Reserved.
-
Page 27: Power Requirements
Installation Manual Chapter4. System Installation Power Requirements © Hyosung TNS Inc. All Rights Reserved. -
Page 28: Notes
Installation Manual Notes Notes © Hyosung TNS Inc. All Rights Reserved. Notes-1...