Advertisement
Quick Links
User Manual
f
j.
\ __^^^^
\
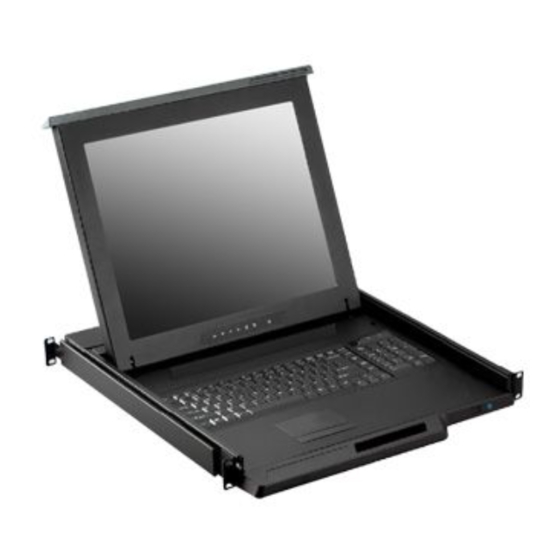
Dedicated KVM switch and rackmount screen technology
17" / 19" LCD
N V P 1 1 7 / N V P 1 1 9
1U LCD Console Drawer
^
+0+^
^ 1 ^ ^
® m c«
c
i-Tech Company LLC
TOLL FREE: (888) 483-2418 • EMAIL:
Options :
-AV / DVI-D / HDMI / Audio
- Full Range KVM
- DC power
R E A C H
RoHS
info@iTechLCD.com
• WEB:
www.iTechLCD.com
\
J
Advertisement

Related Manuals for I-Tech NVP117


Summary of Contents for I-Tech NVP117
- Page 1 -AV / DVI-D / HDMI / Audio - Full Range KVM \ __^^^^ +0+^ ^ 1 ^ ^ - DC power ® m c« R E A C H RoHS i-Tech Company LLC TOLL FREE: (888) 483-2418 • EMAIL: info@iTechLCD.com • WEB: www.iTechLCD.com...
- Page 2 Legal Information First English printing, October 2002 Information in this document has been carefully checked for accuracy; however, no guarantee is given to the correctness of the contents. The information in this document is subject to change without notice. We are not liable for any injury or loss that results from the use of this equipment.
-
Page 3: Table Of Contents
Contents < Part. 1 > NVP117 / NVP119 Package Content P. 1 Structure Diagram & Dimension P.1 - 2 Installation P.3 - 5 Connection P. 6 < Part. 2 > Specifications / OSD Product Specifications P.7 - 8 Keyboard / Mouse Specifications On-screen Display Operation ( OSD ) P.10 - 11... - Page 4 Contents < Part. 4 > KVM Integration 32-port Local Remote 8-port 16-port MC1116 MC1132 MC2116 MC2132 Matrix CAT6 KVM Matrix CAT6 KVM Matrix CAT6 KVM Matrix CAT6 KVM Matrix CAT6 KVM Matrix CAT6 KVM MC0116 MC0132 MC0216 - MC0232 MC0316 MC0332 Local Remote...
- Page 5 Before Installation ■ It is very important to mount the equipment in a suitable cabinet or on a stable surface. ■ Make sure the place has a good ventilation, is out of direct sunlight, away from sources of excessive dust, dirt, heat, water, moisture and vibration. Unpacking The equipment comes with the standard parts shown in package content.
-
Page 6: Package Content
< Part 1 > < 1.1 > Package Content NVP117orNVP119unit X 1 NE-6 6ft Combo KVM cable Power cord X 1 M6 screw, cage nut & washer X 8 The above package content is only for the single console models. It varies with options such as KVM, HDMI, DVI-D, AV, audio &... - Page 7 ( W x D x H ) Weight 441.6 x 460 x 44 mm 590 x 808 x 140 mm 12 kg 16.6 kg NVP117 series 17.4 x 18.1 X1.73" 23.2x31.8x5.5" 26 Ib 36.5 Ib 173 kg 590 x 808 x 140 mm 12.7 kg...
-
Page 8: Installation
nstall Installation Slides Step Insert the left and right rear mounting brackets into the LCD console drawer. Step O Measure the depth of the front and rear mounting rails. Align each rear mounting bracket to a suitable length. Step O Complete the installation ■... - Page 9 < 1.3 > Installation - How to install 2 post rack brackets Step Release front mounting ears before applying 2 post rack brackets. Insert rear mounting brackets into the LCD console drawer. Step ■ Align each rear mounting bracket to a suitable length. Rear mounting Front mounting Step...
- Page 10 < 1.3 > Installation- How t o use the drawer " 1 Hold the handle and slide out the drawer. ■^'■i':':'-:V: Flip up the LCD to a suitable angle. ; : : : • ; • ; ; : • : • : : : : : • : • ■ • : : • : !:!:•:;:•:•*;::*: Operate the LCD console drawer.
-
Page 11: Connection
< 1.4 > Connection to PS/2 or USB Server LCD console drawer LCD console drawer KVM <■$> K V M QH) NE-6 Combo NE-6 Combo KVM cable KVM cable PS/2 server USB server I ! - < 1.4 > Connection to external KVM LCD console drawer LCD console drawer K V M -'»■■■•... -
Page 12: Product Specifications
< Part 2 > < 2.1 > Product Specifications NVP119 NVP117 Panel Panel Panel Panel Panel Panel Manufacturer ALK) 19-inch TFT color LCD Panel Size ( diagonal) 17-inch TFT color LCD Display pixel ( dots x lines ) 1280x1024 1280x1024 Brightness (typ. - Page 13 Storage Storage Temperature -5 to 60°C degree 5-90%, non-condensing Humidity Shock 10G acceleration (11ms duration) Vibration 5-500HZ 1G RMS random NVP119 NVP117 Physical Physical Physical Physical Physical Specification Specification Specification Specification Specification Product ( W x D x H ) 441.6 x 460 x 44 mm...
-
Page 14: Keyboard / Mouse Specifications
< 2.2 > Keyboard Mouse Specifications G keyboard integrated with touchpad G keyboard integrated with trackball Key force 55±5g Travelling distance 3 ± 0.3mm Switch life > 10 million life cycle time Software support MS Windows 7 / 2008 / 2003 / 2000 / XP / ME / 98 / DOC Linux / Mac Supporting layouts America... -
Page 15: On-Screen Display Operation ( Osd )
< 2.3 > On-screen Display Operation ( OSD ) ^^^^^^^^ Membrane Switch Function Turn the monitor on or off OCZI Display the OSD menu Act as an Enter key to select screen setting options Scroll through menu options and adjust A V <... - Page 16 < 2.3 > On-screen Display Operation ( OSD ) Ver: G56SN20SSTD701 1024x768 59.8Hz Image Brightness Contrast Color Temp User I ^ ^ M Green I^^^^M Blue I ^ ^ M Adjust: < E»it:t Select:** Set: « / i i OSD Configuration Page Image: for the brightness, contrast, color temp, red, green, and blue t±3...
-
Page 17: Part. 3 > Options
( 1 ) Either HDMI or DVI-D can be selected. ( 2 ) For the above options, NVP117 depth will be extended from 460mm ( 1 8 . 1 " ) to 530mm ( 20.9" ) and NVP119 depth will be extended from 500mm ( 1 9 . 7 " ) to 570mm ( 22.4" ) - Page 18 ( 1 ) Option excludes 1 x power cord and 1 x AC power adapter. ( 2 ) NVP117 depth will be extended from 460mm (18.1" ) to 530mm ( 20.9" ) ( 3 ) NVP119 depth will be extended from 500mm (19.7" ) to 570mm ( 22.4" )
- Page 19 Company LLC TOLL FREE: (888) 483-2418 • EMAIL: info@iTechLCD.com • WEB: www.iTechLCD.com...