Table of Contents
Advertisement
Quick Links
Advertisement
Table of Contents

Related Manuals for Crestron STX-1600C


Summary of Contents for Crestron STX-1600C
-
Page 3: Table Of Contents
SIMPL Program ... 25 Conclusion: How the Example Works ... 26 Software License Agreement... 27 Return and Warranty Policies... 29 Merchandise Returns / Repair Service ... 29 CRESTRON Limited Warranty ... 29 Operations Guide - DOC. 5716A CRESTRON Contents • i... -
Page 5: Series Stx Touchpanels
Up to 15 Spectrum touchpanels can communicate with one CNRFGWX. Crestron’s exclusive RF engineering permits transmission over extended ranges and utilizes spread spectrum technology. Signals can travel up to 1000 feet to and from the transceiver, even through walls. Spread spectrum eliminates the risk of signal ‘drop-out’... - Page 6 CRESTRON Position Lock Button The position lock button is centrally located at the front of the STX touchpanel base. These touchpanels permit incremental angle positions indicated by audible clicks. Range of motion is adjustable for user comfort and can vary depending on the STX configuration.
-
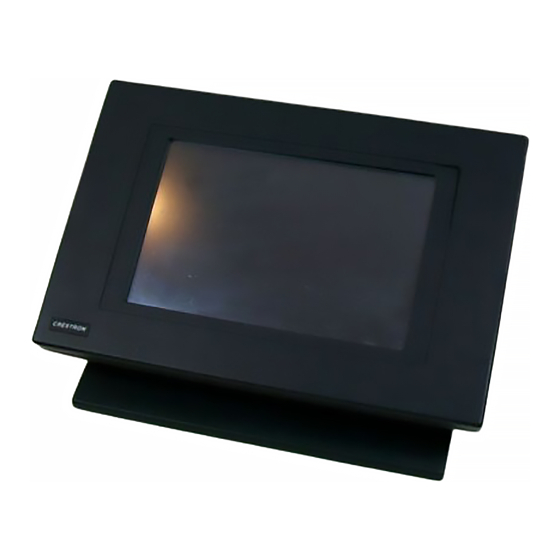
Page 7: Physical Description
(angle depends on STX configuration). Depress the position lock button located at the front of the base when pivoting the touchpanel to the horizontal position. The size of the base, shown below, is exactly the same for all STX configurations;... -
Page 8: Configuration Differences
Two membrane buttons, OFF and ON, can be used to deactivate and activate the touchpanel when needed. The ON button has a LED behind the membrane. It illuminates when the touchpanel is active. Three other LEDs are positioned to the right of the membrane buttons: RF SIG, BATTERY LOW, and BATTERY CHG. -
Page 9: Leading Specifications
Leading Specifications The table below and on the next page provides a summary of leading specifications for the STX touchpanels. Dimensions and weight are rounded to the nearest hundredth unit. Operations Guide - DOC. 5716A CRESTRON Series STX Touchpanels • 5... - Page 10 6.20 in (15.75 cm) x 8.30 in (21.08 cm) The latest software versions can be obtained from the Software Downloads page of Crestron’s website (www.crestron.com). New users are required to register in order to obtain access to the FTP site.
-
Page 11: Setup
Setup WARNING: To avoid shock hazard and possible damage to the unit, do not use touchpanel in rain or expose it to unnecessary moisture. Recommended Touchpanel Cleaning Keep the surface of the touchscreen free of dirt, dust, or other materials that could degrade optical properties. -
Page 12: Battery Usage
It takes approximately 20 hours to slow charge a fully discharged ST-BP. There is no danger of over charging the ST-BP, so the power packs can be installed at all times. It only takes 2 hours to charge the ST-BP in Crestron’s battery charger, ST-BC (sold separately). -
Page 13: Identity Codes
SIMPL Windows. Hardware Hookup The extent of hooking up a STX touchpanel only involves connecting the unit to the network when uploading a project to the touchpanel. Depending on the control system, the hookup may implement the CN-RJ11 (supplied); refer to the hardware hookup diagrams below for proper connections when uploading the project. -
Page 14: Configuring The Touchpanel
NOTE: The firmware (required for configuring the touchpanels) is identical for the STX-3000 and STX-3500C. Therefore, all screens, except for one (contrast adjustment on the Setup Menu), are identical. Firmware for the STX-1600C differs completely, except for the Main and Calibration Menus. In this guide, differing screens are shown side-by-side with STX-1600C screens on the left and the STX-3000 and STX-3500C screens on the right. -
Page 15: Diagnostics Menu
Calibration Menu If you proceed to calibrate the touchpanel, the screen prompts you with the message “Touch Screen Calibration Menu” nearly centered on the display. Another message, “Touch Upper Left Corner”, appears in the upper left corner. Touch the corner of the screen to initiate calibration. - Page 16 CRESTRON Setup Menu NOTE: Since the same Setup Menu used for the STX-3000 and STX-3500C is used for Crestron’s wired panels as well, the RS-232 button - although shown, is not functional when configuring STX touchpanels. Interface The touchpanel communicates with a CRESNET system to activate other controls or to display feedback from components within the system.
- Page 17 CRESNET II for normal CRESENT communication mode. Text within the selected button changes color from black to red (for STX-1600C) or light gray (for STX- 3000 and STX-3500C). Communication mode is factory set to CRESNET II. Two side-by-side buttons on the Interface Menu (for STX-3000 and STX-3500C), RS-232 ON and RS-232 OFF, located just above the RETURN button.
- Page 18 Screen contrast may need to be altered because of ambient light conditions, panel temperature, or personal preference. Two contrast buttons, Contrast << and Contrast >> (Cont << and Cont >> for the STX-1600C), on the Setup Menu may be held down for continuous and smooth adjustment of the screen.
- Page 19 A two minute BACKLIGHT TIMEOUT is shown in the illustration. Minutes can vary from 0 to 120, where 0 disables the timeout. Down and up arrow buttons (worded buttons, DOWN and UP, appear on the STX-1600C configuration) decrease and increase the timeout, respectively.
-
Page 20: Programming With Simpl™ Windows
STX3500C.SMW). How the Program Works A basic STX-1600C SIMPL program is shown on the next page in block diagram form. For this example, the STX-1600C in a simple volume control application where UP and DOWN ramp a bargraph to an ST-VC, volume/tone control module, with a time interval of five seconds. -
Page 21: How To Create The Program
NOTE: SIMPL Windows v1.21.04 or later is required to program the control system containing a STX-1600C touchpanel. If using an earlier version of SIMPL Windows, Crestron recommends a SIMPL Windows and operating system upgrade. - Page 22 CRESTRON Network System View of ST-VC in SIMPL Windows’ Configuration Manager Next, add the STX-1600C to the system. Click once on the CNRGWX icon in the Network System View to add the “RFX Address” window to the Detail System View.
- Page 23 CRESTRON Detail View of Analog Signals for the STX-1600C in SIMPL Windows’ Programming Manager Detail View of Serial Signals for the STX-1600C in SIMPL Windows’ Programming Manager From the expanded Network Modules folder double click on the ST-VC (alternatively CTRL+D or drag and drop into Detail View). Assign signals as shown after this paragraph.
-
Page 24: Reserved Join Numbers
Detail View of Serial Send (S-3 and S-4) in SIMPL Windows’ Programming Manager Reserved Join Numbers A reserved join number is a feature of the touchpanel that enables a designer to create a button on a touchpanel page that either calls up the Setup Menu, ramps brightness, etc. -
Page 25: Problem Solving
Problem Solving Troubleshooting The table below and on subsequent pages provides corrective action for possible trouble situations. If further assistance is required, please contact a Crestron technical support representative. STX Touchpanel Troubleshooting TROUBLE Project can not be uploaded to touchpanel. - Page 26 Confirm that power pack is attached, batteries touchpanel. are installed, or network power is supplied. Verify that the LED behind the ON membrane button located on the touchpanel base is illuminated. Touchpanel is Select Perform Calibration button from incorrectly calibrated.
-
Page 27: Further Inquiries
Further Inquiries If after reviewing this Operations Guide for the Series STX touchpanels, you cannot locate specific information or have questions, please take advantage of Crestron's award winning technical support team by calling: For local support from exclusive Crestron factory-trained personnel in New Zealand call Amber Technologies at +649-410-8382. -
Page 28: Appendix
Appendix The purpose of this Appendix is to provide a programming solution for those that prefer the last screen to be displayed when the touchpanel turns on after encountering a POWER DOWN TIMEOUT. Stated simply, an INTERLOCK symbol needs to be incorporated so that the control system flips to the last page rather than the page marked as first. -
Page 29: Simpl Program
TV-FLIP and Join # 9 has the signal name of VCR-FLIP. Refer to the block diagram shown below. SIMPL Block Diagram for the Example Operations Guide - DOC. 5716A CRESTRON DEVICE PAGE NAME PROJECTOR STTW... -
Page 30: Conclusion: How The Example Works
These three signal names should drive an INTERLOCK symbol so that the system can “remember” which page was shown last on the touchpanel. The outputs of the INTERLOCK are assigned unique names: TV-FLIP-F, VCR-FLIP-F, and PROJ- FLIP-F. Finally, the corresponding feedback signals from the INTERLOCK must match the appropriate page join number. -
Page 31: Software License Agreement
Agreement, which shall remain valid and enforceable according to its terms. This Agreement may only be modified by a writing signed by an authorized officer of Crestron. Updates may be licensed to You by Crestron with additional or different terms. This is the entire agreement between Crestron and You relating to the Software and it supersedes any prior representations, discussions, undertakings, communications or advertising relating to the Software. - Page 32 “applets” incorporated into the Software), the accompanying media and printed materials, and any copies of the Software are owned by Crestron or its suppliers. The Software is protected by copyright laws and international treaty provisions. Therefore, you must treat the Software like any other copyrighted material, subject to the provisions of this Agreement.
-
Page 33: Return And Warranty Policies
CRESTRON shall not be liable to honor the terms of this warranty if the product has been used in any application other than that for which it was intended, or if it has been subjected to misuse, accidental damage, modification, or improper installation procedures. - Page 34 CRESTRON This page intentionally left blank. 30 • Series STX Touchpanels Operations Guide - DOC. 5716A...
- Page 35 CRESTRON This page intentionally left blank. Series STX Touchpanels • 31 Operations Guide - DOC. 5716A...