Singer Futura CE-250 Instruction Manual
Hide thumbs
Also See for Futura CE-250:
- Instruction manual (124 pages) ,
- Features and benefits (5 pages) ,
- Manual (124 pages)
Advertisement
Quick Links
Advertisement

Related Manuals for Singer Futura CE-250


Summary of Contents for Singer Futura CE-250
- Page 1 CE-250/CE-350 INSTRUCTION MANUAL MANUEL D’INSTRUCTION MANUAL DE INSTRUCCIONES...
- Page 2 Please note that on disposal, this product must be safely recycled in accordance with relevant National legislation relating to electrical/ electronic products. If in doubt please contact your retailer for guidance. SINGER is a registered trademark of The Singer Company Limited or its affiliates. ©2010 The Singer Company Limited or its affiliates. All rights reserved.
- Page 3 électriques/électroniques. En cas de doute, veuillez contacter votre distributeur agréé. SINGER est une marque enregistrée de The Singer Company Limited ou de ses sociétés affiliées. ©2010 The Singer Company Limited ou ses sociétés affiliées. Tous droits réservés.
- Page 4 Si tiene alguna duda al respecto, por favor contacte con el distribuidor. SINGER es una marca registrada de The Singer Company Limited o sus filiales. ©2010 The Singer Company Limited o sus filiales. Reservados todos los derechos.
- Page 5 TABLE OF CONTENTS 1. GETTING TO KNOW MACHINE Machine identification ------------------------------------------------6 - 7 Sewing on a button ----------------------------------------------- 60 - 61 Accessories -------------------------------------------------------------8 - 9 Buttonhole making ------------------------------------------------ 62 - 67 Using buttonhole foot, Procedure, Corded buttonholes 2. GETTING STARTED SEWING Manual buttonhole ------------------------------------------------ 68 - 69 Leveling Machine --------------------------------------------------10 - 11 Setting up machine ------------------------------------------------10 - 11...
- Page 6 TABLE DES MATIERES 1. VOTRE MACHINE À COUDRE Description de la machine -------------------------------------------6 - 7 Pose de boutons --------------------------------------------------- 60 - 61 Accessoires -------------------------------------------------------------8 - 9 Confection des boutonnières ----------------------------------- 62 - 67 Utilisation du pied boutonnière, procédure, 2. DÉBUT DE LA COUTURE Boutonnières avec ganse (renforcees) Équilibrer la machine ----------------------------------------------10 - 11 Boutonnière manuelle -------------------------------------------- 68 - 69...
- Page 7 CONTENIDO 1. PRINCIPALES PARTES DE LA MAQUINA Identificación de la máquina ---------------------------------------6 - 7 Cosido de botones ------------------------------------------------ 60 - 61 Accesorios --------------------------------------------------------------8 - 9 Confección de ojales --------------------------------------------- 62 - 67 Uso del pie de ojaladora, Procedimiento, Ojales con cordón 2.
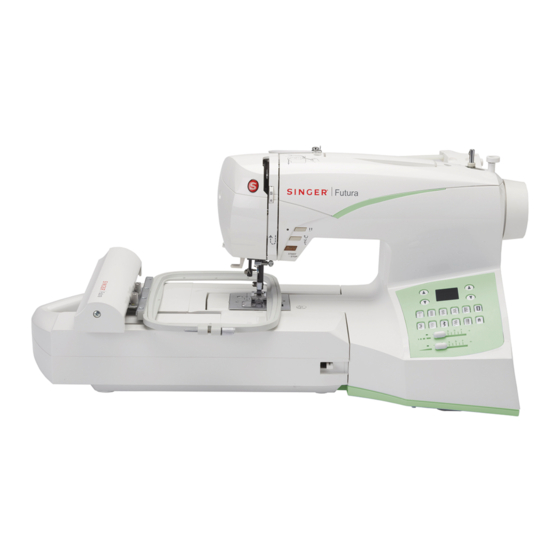
- Page 8 1. GETTING TO KNOW MACHINE MACHINE IDENTIFICATION 1. Thread guide 2. Thread take-up 3. Thread tension control 4. Face cover 5. Thread cutter 6. Extension table (Accessory box) 7. Feed dog control 8. Bobbin winder shaft 9. Bobbin winder stop 10.
- Page 9 1. VOTRE MACHINE À COUDRE 1. PRINCIPALES PARTES DE LA MAQUINA DESCRIPTION DE LA MACHINE IDENTIFICACION DE LA MAQUINA 1. Guide-fil 1. Guía hilo 2. Releveur de fil 2. Guía- hilos 3. Réglage tension du fil supérieur 3. Control tensión hilo 4.
- Page 10 ACCESSORIES FOR SEWING MACHINE 1. Needles 2. Bobbins 3. Spool pin cap (small) 4. Spool pin cap (large) 5. Buttonhole opener/Brush 6. Screwdriver for needle plate (large) 7. Screwdriver (large) 8. Screwdriver (small) 9. Zipper foot 10. Button sewing foot 11.
- Page 11 ACCESSOIRES ACCESORIOS POUR LA MACHINE À COURE PARA MAQUINA DE COSER 1. Aiguilles 1. Agujas 2. Canettes 2. Canillas 3. Chapeau pour petite bobine 3. Tapa del pasador carrete (pequeño) 4. Chapeau pour grande bobine 4. Tapa del pasador carrete (grande) 5.
- Page 12 2. GETTING STARTED SEWING LEVELING MACHINE CHECKING Put the machine on a flat table. Check the balance of the machine. ADJUSTMENT Lay machine on its back gently and carefully with both hands. Be careful not to make scratches on both machine and table. Be careful not to drop the machine and not to have your fingers be caught between the machine and table.
- Page 13 2. DÉBUT DE LA COUTURE 2. COMENZAR A COSER ÉQUILIBRER LA MACHINE AJUSTE DE ALTURA DEL PIE VERIFICATION VERIFICACION Placez la machine sur une table plate. Ponga la máquina sobre una mesa plana. Assurez-vous que l’équilibre de la machine soit parfait. Verifique que la máquina está...
- Page 14 SPOOL PINS Spool Spool pin Bobine HORIZONTAL SPOOL PIN for normal Porte-bobine Carrete thread spool Portacarrete Spool pin cap Place thread spool on the pin and secure with a spool cap to Couvre-fil ensure smooth flow of thread. Tapa del pasador carrete VERTICAL SPOOL PIN for large thread spool Removable thread guide Guide-fil amovible...
- Page 15 PORTE-BOBINE PORTA CARRETES PORTE-BOBINE HORIZONTAL pour la PASADOR DE CARRETE HORIZONTAL bobine standard para carrete de hilo normal Placez la bobine sur la tige et retenez-la avec l’aide d’un Coloque el carrete de hilo en el pasador y asegúrelo con una couvre-fil ceci assurera un débit de fil régulier.
- Page 16 WINDING BOBBIN Be sure to use Class 15 J bobbins. 1. Place a spool of thread on the spool pin, and secure it with the spool pin cap. Pull the thread out from the spool through thread guide. 2. Pull end of thread through hole in bobbin as shown. 3.
- Page 17 PRÉPARATION DE LA CANETTE DEVANADO DE LA CANILLA Utilisez que la canette 15 J. Este seguro de usar clase 15 J bobinas. 1. Placez une bobine de fil sur le porte-bobine, et fixez-la à l’ 1. Coloque un carrete de hilo en el pasador de carrete, y aide du couvre-fil (petit).
- Page 18 INSERTING THE BOBBIN 1. Raise the needle to its highest position by rotating the hand wheel toward you. 2. Remove the bobbin cover plate by pushing the release button to the right while pushing the left corner of plate. 3. Insert the bobbin making sure the bobbin rotates counter- clockwise.
- Page 19 ENFILAGE DU FIL DE CANETTE ENHEBRADO DEL HILO DE LA CANILLA 1. R e l e v e z l ’ a i g u i l l e e n p o s i t i o n h a u t e e n t o u r n a n t 1.
- Page 20 SETTING THE TOP THREAD A. Raise the presser foot lifter. Always be sure to raise the presser foot lifter before threading the top thread. (If the presser foot lifter is not raised, correct thread tension cannot be obtained.) B. Turn the hand wheel toward you until the needle is in its highest position and the thread take-up is visible.