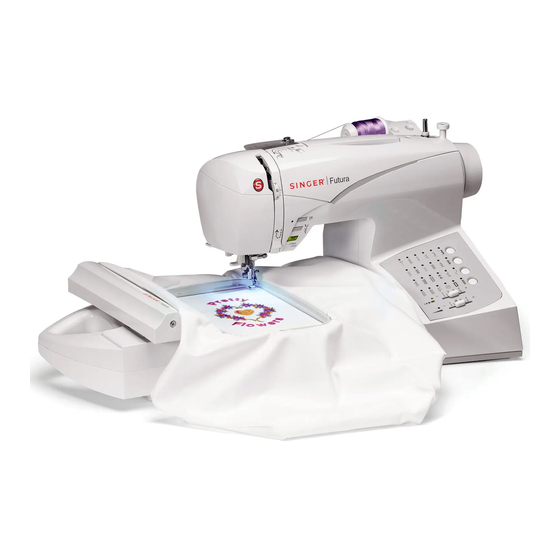
Singer FUTURA CE-150 Instruction Manual
Singer sewing machine user manual
Hide thumbs
Also See for FUTURA CE-150:
- Features and benefits (4 pages) ,
- Instruction manual (112 pages) ,
- Service manual (42 pages)
Table of Contents
Advertisement
Quick Links
Advertisement
Table of Contents

Related Manuals for Singer FUTURA CE-150


Summary of Contents for Singer FUTURA CE-150
- Page 1 CE-150 INSTRUCTION MANUAL...
-
Page 3: Important Safety Instructions
3. “Never operate this sewing machine if it has a damaged cord or plug, if it is not working properly, if it has been dropped or damaged, or dropped into water. Return the sewing machine to the nearest authorized dealer or service center for examination, repair, electrical or mechanical adjustment.”... - Page 4 «MESURES DE SÉCURITÉ IMPORTANTES» «Lorsqu’un appareil électrique est en usage, il faut toujours observer certaines mesures élémentaires de sécurité y compris les suivantes.» «Lire les instructions en entier avant d’utiliser cette machine à coudre.» «DAN G ER- Pour réduire le risque de décharge électrique:» 1.
- Page 5 IMPORTANTES INSTRUCCIONES DE SEGURIDAD Cuando se usa un aparato eléctrico, debe seguirse unas precauciones básicas y que vienen incluidas a continuación. "Leer las instrucciones antes de usar la máquina de coser." PE LIG RO - Para reducir el riesgo de una descarga eléctrica. 1.
-
Page 6: Table Of Contents
Continuous patterns ----------------------------------------------- 50 - 51 Sewing on a button ------------------------------------------------ 50 - 51 Buttonhole making ------------------------------------------------- 52 - 57 Using buttonhole foot, Procedure, Corded buttonholes Sewing machine Dimensions: 428 mm × 307 mm × 294 mm Mass of the equipment: 10 kg Embroidery unit TABLE OF CONTENTS 3. - Page 7 1. VOTRE MACHINE À COUDRE Description de la machine -------------------------------------------6 - 7 Accessoires ----------------------------------------------------------------8-9 2. DÉBUT DE LA COUTURE Équilibrer la machine --------------------------------------------- 10 - 11 Préparation de la machine -------------------------------------- 10 - 11 Porte-bobine --------------------------------------------------------- 12- 13 Préparation de la canette --------------------------------------- 14 - 15 Enfilage du fil de canette ---------------------------------------- 16- 17 Enfilage du fil supérieur ----------------------------------------- 18 - 19 Utilisation de l’enfileur de chas d’aiguille ------------------- 20 - 21...
- Page 8 1. PRINCIPALES PARTES DE LA MAQUINA Identificación de la máquina ---------------------------------------- 6 - 7 Accesorios --------------------------------------------------------------- 8 - 9 2. COMENZAR A COSER Ajuste de altura del pie ---------------------------------------------10- 11 Preparación de la máquina --------------------------------------10 - 11 Porta carretes ------------------------------------------------------- 12 - 13 Devanado de la canilla --------------------------------------------- 14-15 Enhebrado del hilo de la canilla ------------------------------- 16 - 17 Enhebrado del hilo superior ------------------------------------ 18 - 19...
-
Page 10: Getting To Know Machine
1. GETTING TO KNOW MACHINE MACHINE IDENTIFICATION 1. Thread guide 2. Thread take-up 3. Thread tension control 4. Face cover 5. Thread cutter 6. Extension table (Accessory box) 7. Feed dog control 8. Bobbin winder shaft Bobbin winder stop 10. Operation switches 11. -
Page 11: Votre Machine À Coudre Description De La Machine
1. VOTRE MACHINE À COUDRE DESCRIPTION DE LA MACHINE 1.Guide-fil 2.Releveur de fil 3.Réglage tension du fil supérieur 4.Plaque frontale 5.Coupe-fil 6.Boîte à accessoires/Table de rallonge 7.Abaisse-griffes d’entraînement 8.Axe du bobineur 9.Butée d’arrêt du bobinage 10.Touches de fonctionnement 11.Guide de référence des messages d'aide 12.Porte-bobine horizontal 13.Poignée 14.Volant... -
Page 12: Accessories
ACCESSORIES FOR SEWING MACHINE Needles Bobbins Spool pin cap (small) Spool pin cap (large) Buttonhole opener/Brush Screwdriver for needle plate (large) 7. Screwdriver (large) 8. Screwdriver (small) Zipper foot 10. Button sewing foot 11. Blind stitch foot 12. Buttonhole foot 13. -
Page 13: Accessoires
ACCESSOIRES POUR LA MACHINE À COURE Aiguilles Canettes 3.Chapeau pour petite bobine 4.Chapeau pour grande bobine 5.Découseur/Brosse 6.Tournevis pour plaque aiguille 7.Tournevis grand 8.Tournevis petit 9.Pied fermeture glissière 10.Pied pour boutons 11.Pied point invisible 12.Pied boutonnière 13.Pied pour point bourdon 14.Filet de bobine (long) 15.Filet de bobine (court) 16.Guide-fil amovible... -
Page 14: Getting Started Sewing
Connect the plug of the power line cord into the cord socket (1) and your wall outlet (2) as illustrated. Connect the foot control plug into the machine socket (3), when using sewing machine only. NOTE: When foot control is disconnected, the machine will not operate. -
Page 15: Début De La Couture Équilibrer La Machine
2. DÉBUT DE LA COUTURE ÉQUILIBRER LA MACHINE VERIFICATION Placez la machine sur une table plate. Assurez-vous que l’équilibre de la machine soit parfait. RÉGLAGE Posez la machine doucement et soigneusement sur son dos avec les deux mains. Veillez à ne pas rayer la machine et la table. -
Page 16: Spool Pins
SPOOL PINS HORIZONTAL SPOOL PIN for normal thread spool Place thread spool on the pin and secure with a spool cap to ensure smooth flow of thread. VERTICAL SPOOL PIN for large thread spool 1. Place removable thread guide on the horizontal spool pin as illustrated. -
Page 17: Porte-Bobine
PORTE-BOBINE PORTE-BOBINE HORIZONTAL pour la bobine standard Placez la bobine sur la tige et retenez-la avec l’aide d’un couvre-fil ceci assurera un débit de fil régulier. PORTE-BOBINE VERTICAL pour grande bobine Placez le guide de fil amovible sur la tige du porte- bobine horizontal tel qu’illustré. -
Page 18: Winding Bobbin
WINDING BOBBIN 1. Place a spool of thread on the spool pin, and secure it with the spool pin cap. Pull the thread out from the spool through thread guide. 2. Pull end of thread through hole in bobbin as shown. 3. -
Page 19: Préparation De La Canette
PRÉPARATION DE LA CANETTE 1. Placez une bobine de fil sur le porte-bobine, et fixez-la à l’ aide du couvre-fil (petit). Tirez le fil hors de la bobine par le guide-fil. 2. lntroduire le fil dans un des trous de la canette. 3. -
Page 20: Inserting The Bobbin
INSERTING THE BOBBIN 1. Raise the needle to its highest position by rotating the hand wheel toward you. 3. Remove the bobbin cover plate by pushing the release button to the right while pushing the left corner of plate. 5. Insert the bobbin making sure the bobbin rotates counter- clockwise. -
Page 21: Enfilage Du Fil De Canette
ENFILAGE DU FIL DE CANETTE 1. Relevez l’aiguille en position haute en tournant manuellement le volant vers vous. 2. Retirez la plaque de canette en poussant le bouton de libération vers la droite tout en appuyant sur le coin gauche de la plaque. -
Page 22: Setting The Top Thread
SETTING THE TOP THREAD A. Raise the presser foot lifter. Always be sure to raise the presser foot lifter before threading the top thread. (If the presser foot lifter is not raised, correct thread tension cannot be obtained.) C. Turn the hand wheel toward you until the needle is in its highest position and the thread take-up is visible. -
Page 23: Enfilage Du Fil Supérieur
ENFILAGE DU FIL SUPÉRIEUR A. Elevez le pied presseur. Veillez à toujours élever le releveur de pied presseur avant d’enfiler le fil supérieur. (Si le releveur de pied presseur n’est pas élevé, vous ne pourrez pas obtenir une tension de fil correcte.) B. -
Page 24: Using Automatic Needle Threader
USING AUTOMATIC NEEDLE THREADER Raise the needle to its highest position by rotating the hand wheel towards you. 1. Hook thread to thread guide as illustrated. 2. Pull down threader lever until the hooked end passes through the needle eye. Guide thread into hooked end and pull it upward. -
Page 25: Utilisation De L'enfileur De Chas D'aiguille
UTILISATION DE L’ENFILEUR DE CHAS D’AIGUILLE Elever l'aiguille en position haute en toumant le volant vers vous. 1. Passer le fil dans le crochet de l’enfileur. 2. Pousser le levier complètement vers le bas et le crochet passera dans le chas de l’aiguille. Passer le fil devant l’aiguille et sous le crochet. -
Page 26: Picking Up Bobbin Thread
PICKING UP BOBBIN THREAD 1. Raise the presser foot lifter. 2. Holding needle thread loosely with your left hand, turn hand wheel toward you with your right hand first lowering the needle and continuing until the needle comes to its highest position. -
Page 27: Rappel Du Fil Inférieur
RAPPEL DU FIL INFÉRIEUR 1. Relever le pied presseur. 2. Tenir le fil de l’aiguille et tourner le volant vers vous en faisant remonter l’aiguille à sa position la plus haute. 3. Faire remonter le fil inférieur en tirant légèrement sur le fil supérieur. -
Page 28: Control Panel Function
LED indicator Témoin a diode Indicador LED *NOTE: The provided scales and numbers on the length and width controls are for reference only and do not represent actual sewing parameters of length and width. *REMARQUE: les échelles et les nombres sur les commandes de longueur et de largeur ne sont fournis que pour référence et ne représentent pas les paramètres réels de longueur et de largeur. -
Page 29: Fonctions Du Panneau De Commande
FONCTIONS DU PANNEAU DE COMMANDE Touches de sélection des motifs Mettez l’interrupteur d’alimentation sous tension pour allumer le témoin à diode au-dessus du motif de point droit. A ce point, vous pouvez coudre des points droits. Pour sélectionner d’autres motifs, appuyez sur la touche de sélection des motifs à... - Page 30 Stitch length and width/needle position controls *Auto/Default settings Your sewing machine will produce most of your stitching requirements at an Auto/Default Stitch Length and Width. When a pattern is selected, it will automatically sew at default settings of stitch length, width and needle position for straight stitch.
- Page 31 Commandes de longueur et de largeur de point/ position de l’aiguille *Réglages Auto/Par défaut Votre machine à coudre exécute la plupart de vos nécessités de couture à une longueur et une largeur de point automatique/ par défaut. Lorsqu’un motif a été sélectionné, la couture est automatiquement exécutée aux réglages par défaut de longueur et de largeur de point, de position d’aiguille pour un point droit.
-
Page 32: Quick Reference Table Of Stitch Length And Width
QUICK REFERENCE TABLE OF STITCH LENGTH AND WIDTH STITCH POINT SYMBOLE S I M B O L PUNTADA STRAIGHT DROIT RECTA STRAIGHT STRETCH DROIT EXTENSIBLE RECTA TRIPLE HAND-LOOK QUILT EXCUTION DU POINT DE REMBOURRAGE PUNTADA DE ACOLCHADO CONTINUA STITCH POINT SYMBOLE PUNTADA S I M B O L... -
Page 33: Cuadro De Referencia Rápida De Largo Y Ancho De Puntada
STITCH POINT SYMBOLE PUNTADA SIMBOLO H O N E Y C O M B D'ABEILLE PANAL ENTREDEUX ENTREDEUX ENTREDOS PYRAMID PYRAMIDE PIRAM IDE FEATHER PLUME PLUMA ÉPINGLE BROCHE LADDER ÉCHELLE ESCALERA STAR POINT EN ÉTOILE BRILLO ESTELAR VINE VIGNE SERPENTINE SERPENTIN SERPIENTE BLANKET... -
Page 34: Straight Stitching
STRAIGHT STITCHING The straight stitch is the stitch most frequently used. Let’s set the machine for the basic straight stitch. 1. SETTINGS Presser foot - General Purpose Foot Thread tension control A. Thread tension control B. Needle stop position selector switch C. -
Page 35: Point Droit
POINT DROIT C’est le point le plus utilisé pour toute genre de couture. Apprenez à vous servir correctement de votre machine, en suivant les étapes ci-dessous. 1. RÉGLAGES Pied de biche - Pied universel Réglage tension du fil supérieur - S A. -
Page 36: Turning A Square Corner
TURNING A SQUARE CORNER 1. To turn a square corner 5/8" (16 mm) from the fabric edge, push the needle stop position selector switch to stop the needle to its lowest position. Start and stop the machine when reaching the cornering guide as shown. Raise the presser foot and turn fabric. - Page 37 RÉALISATION D’UN ANGLE DROIT 1. Pour coudre un coin au 16 mm du bord du tissu, toucher la touche de position d’arrêt de l’aiguille pour ce que l’aiguille est à la position basse. Cousez et arrêter quand vous arrivez au guide d’angle comme illustrer. Lever le pied de biche et pivoter le tissu.
-
Page 38: Hand-Look Quilt Stitch
INSERTING ZIPPERS AND PIPING Use the zipper foot to sew to the right or left of the zipper or to sew close to a cord. INSERTING ZIPPERS To sew down the right side, attach left side of zipper foot to presser foot holder so that the needle passes through the opening on the left side of the foot. -
Page 39: Insérer Une Fermeture Àglissière Ou Un Biais (Galonner)
INSÉRER UNE FERMETURE À GLISSIÈRE OU UN BIAIS (GALONNER) Utilisez le pied fermeture glissière, au moyen duquel vous pouvez piquer aussi bien à gauche qu' à droite, ou aussi au plus près du cordonnet. INSERTION DE FERMETURES À GLISSIÈRE ORDINAIRES Pour piquer le côté... -
Page 40: Zigzag Stitching
ZIGZAG STITCHING SETTINGS :Presser foot - General Purpose Foot :Thread tension control - S - E The top thread may appear on the bottom depending on the thread, fabric, type of stitch and sewing speed, but the bobbin thread must never appear on the top of the fabric. ADJUSTING STITCH WIDTH AND LENGTH is values set automatically when pattern (No. -
Page 41: Point Zigzag
POINT ZIGZAG RÉGLAGES :Pied presseur - Pied universel :Réglage tension du fil supérieur - S - E Le fil supérieur peut paraître sur l’envers, en fonction du fil, du tissu et de la vitesse de couture, mais le fil de la canette ne doit jamais paraître sur l’endroit. -
Page 42: Blind Stitch
BLIND STITCH SETTINGS :Presser foot - Blind Hem Foot :Thread tension control - S - E − Regular blind stitch for normal fabrics − Elastic blind stitch for soft, stretchable fabrics 1. First finish the raw edge. Do this by turning it under on fine fabrics or overcasting it on medium to heavyweight fabrics. -
Page 43: Point Invisible
POINT INVISIBLE RÉGLAGES :Pied presseur - Pied point invisible :Réglage tension du fil supérieur - S - E − Point invisible pour les tissus tissés − Point invisible pour les tissus extensibles 1. D’abord surfiler les bords avec un zigzag, ensuite plier l’ ourlet sur la largeur désirée et repasser. -
Page 44: Multi-Stitch Zigzag
MULTI-STITCH ZIGZAG SETTINGS :Presser foot - General Purpose Foot :Thread tension control - S - E This is a strong stitch because as its name implies, it makes three short stitches where the normal zig-zag makes only one. For this reason it is highly recommended for overcasting all types of fabrics. -
Page 45: Zigzag Multi-Point
ZIGZAG MULTI-POINT RÉGLAGES :Pied presseur - Pied universel :Réglage tension du fil supérieur - S - E Pour réparer des déchirures droites ou en angle placez le tissu avec le début de l’accroc sous la partie centrale du pied. Lorsque vous avez un accroc en deux parties, reprisez à partir de chaque extrèmité... -
Page 46: Stretch Stitches
STRETCH STITCHES SETTINGS :Presser foot - General Purpose Foot :Thread tension control - S - E Stretch stitches are mainly for use on knit, or stretchable fabrics, but can also be used on ordinary woven materials. STRAIGHT STRETCH STITCH Straight stretch stitch is far stronger than an ordinary straight stitch because it locks three times - forwards, backwards and forwards. -
Page 47: Points Extensible
POINTS EXTENSIBLE RÉGLAGES :Pied presseur - Pied universel :Réglage tension du fil supérieur - S - E Les points extensibles sont généralement utilisés pour les tissus élastiques, mais peuvent ètres utilisès sur tissus tissés. POINT DROIT EXTENSIBLE Ce point est beaucoup plus solide que le point ordinaire, vu qu’il s’exécute en trois fois, une fois en avant, une fois en arrière et ecore une fois en avant. -
Page 48: Ladder Stitch
PIN STITCH The Pin stitch is a traditional stitch pattern used for picot like edges and for appliqué work. LADDER STITCH The Ladder stitch is primarily used for drawn thread hemstitching. It can also be used for sewing over thin tape in an opposite or same color. - Page 49 POINT ÉPINGLE Le point épingle est un motif de couture traditionnel utilisé pour le bords de style picot et pour la finition d’appliqué. POINT D’ÉCHELLE Le point d’échelle est principalement utilisé pour la couture d’ ourlets à fil tiré. Il peut également être utilisé pour effectuer la couture par dessus une mince bande d’une couleur opposée ou semblable.
-
Page 50: Slant Overedge Stitch
SLANT PIN STITCH Excellent for hemstitching table and bed covers with an elegant touch. Sew along the raw edge of fabric and trim close to the outside of the stitching. SLANT OVEREDGE STITCH Seams and overcasts in one operation to produce a narrow, supple seam, particularly suited to swimwear, sportswear, T-shirts, babywear in stretch nylon, stretch towelling, jersey and cotton jersey. - Page 51 POINT EPINGLE OBLIQUE Très pratique pour faire les ourlets de table et couvre-lit avec une touche élégante. Le point ressemblant à un point picot (ourlet cocotte) peut être effectué sur les tissus fragiles. Cousez le long de la bordure du tissu et coupez près de l’ extérieur de la couture. SURJET OBLIQUE Le surjet sert à...
-
Page 52: Decorative Stitching
DECORATIVE STITCHING SETTINGS :Presser foot - Satin foot :Thread tension control - S - E ∗ You should carry out a test sewing on a cut-off strip of the fabric being sewn to check the pattern to be used. ∗ Before starting to sew, check that there is enough thread wound onto the bobbin to make sure that the thread will not run out during sewing. -
Page 53: Motifs Décoratifs
MOTIFS DÉCORATIFS RÉGLAGES :Pied presseur - Pied pour point bourdon :Réglage tension du fil supérieur - S - E ∗ Effectuez une couture d’essai sur une bande découpée du tissu que vous utilisez pour la couture pour vérifier le motif à utiliser. ∗... -
Page 54: Continuous Patterns
CONTINUOUS DECORATIVE PATTERNS SETTINGS :Presser foot - Satin foot :Thread tension control - S - E The patterns illustrated on the right are continuous patterns. Use whichever pattern suit your needs. SEWING ON A BUTTON SETTINGS :Presser foot - Button sewing foot :Feed dog control - Position your fabric and button under the presser foot. -
Page 55: Motifs Continuels
MOTIFS CONTINUELS RÉGLAGES :Pied presseur - Pied pour point bourdon :Réglage tension du fil supérieur - S - E Ces motifs conviennent parfaitement à la couture des motifs continuels. Utilisez les motifs que vous préférez. POSE DE BOUTONS RÉGLAGES :Pied presseur - Pied Pied pour boutons :Abaisse-griffes d’entraînement Positionner le tissu et le bouton sous le pied presseur. -
Page 56: Buttonhole Making
BUTTONHOLE MAKING USING BUTTONHOLE FOOT 1. Insert a button in between tab A and tab B. 3. Buttonholes can be sewn to match the size of the button. It is helpful to remove the extension table when sewing a buttonhole, to avoid hearing the foot make noise when moving across the table. -
Page 57: Confection Des Boutonnières
CONFECTION DES BOUTONNIÈRES UTILISATION DU PIED BOUTONNIÈRE 1. Introduisez un bouton entre les butées A et B. 2. Les boutonnières peuvent être cousues de manière à correspondre à la taille du bouton. Pour éviter un bruit sourd pendant la couture d’un bouton, retirez le plateau de rallonge. - Page 58 5. Carefully mark the position of buttonhole on your garment. 6. Place the fabric under the foot. Pull out the bobbin thread underneath the fabric to a length of about 4 inches to the rear. 8. Align the buttonhole mark on the fabric with the mark on the buttonhole foot, and then lower the buttonhole foot.
- Page 59 5. Marquez soigneusement la position de la boutonnière sur le vêtement. 6. Placez le tissu sous le pied. Tirez le fil de la bobine sous le tissu sur une longueur d’environ 10 centimètres vers l’arrière. 7. Alignez la marque de la boutonnière du tissu sur la marque du pied presseur, puis abaissez le pied boutonnière.
-
Page 60: Corded Buttonholes
CORDED BUTTONHOLES Hook filler cord (crochet thread or buttonhole twist) over the spur and pull both ends of the cord forward under the foot and tie off the cord as shown in the illustration. Sew buttonhole so that zigzag stitches cover the cord. When completed, release the cord from foot and snip off extra length. - Page 61 BOUTONNIÈRES GANSEES (RENFORCEES) Accrocher le cordonnet (fil de passe ou fil de soie) sur la tige du pied pour boutonnière et tirer les deux extrémitès sous le pied vers le devant. Coudre la boutonnière de manière à ce que la zig-zag recouvre le cordonnet.
-
Page 62: Before Attaching Embroidery Unit
3. PREPARATION FOR EMBROIDERY SEWING BEFORE ATTACHING EMBROIDERY UNIT ATTACHING EMBROIDERY FOOT Always be sure to turn off power to machine before changing presser foot. CAUTION ∗ Raise presser foot lifter. ∗ Turn hand wheel toward you until needle is in its highest position. -
Page 63: Préparatifs Pour La Broderie
3. PRÉPARATIFS POUR LA BRODERIE AVANT DE FIXER L’UNITÉ DE BRODERIE FIXATION DU PIED BRODERIE Veillez à toujours couper l’alimentation électrique de la machine avant de changer le pied presseur. ATTENTION ∗ Élevez le releveur de pied presseur. ∗ Tournez le volant vers vous jusqu’à ce que l’aiguille soit à... -
Page 64: Extension Table
SETTING TOP THREAD Refer to page 18 - 21. NOTE: It is recommended to do the threading before data transferring. PICKING UP BOBBIN THREAD Refer to page 22 - 23. EXTENSION TABLE 1. Turn off power to machine. 2. Slide the extension table to left to remove it from machine. (Refer to page 90 - 91.) FEED DOG CONTROL Lower feed dogs by moving feed dog control toward the... - Page 65 ENFILAGE DU FIL SUPÉRIEUR Reportez-vous aux pages 18 - 21. REMARQUE: Il est recommandé d’effectuer l’enfilage avant le transfert des donnée. RAPPEL DU FIL INFÉRIEUR Reportez-vous aux pages 22 - 23. PLATEAU DE RALLONGE 1. Eteindre la machine. 2. Faites glisser la table de rallonge vers la gauche pour la retirer de la machine.
-
Page 66: Attaching Embroidery Unit
ATTACHING EMBROIDERY UNIT Always be sure to turn off power to machine before installing embroidery unit. CAUTION 1 . T u r n o f f p o we r t o m a c h i n e . Remove connector cap from machine. -
Page 67: Fixation De L'unité De Broderie
FIXATION DE L’UNITÉ DE BRODERIE Veillez toujours à mettre la machine hors tension avant d’installer l’unité de broderie. ATTENTION 1. Eteindre la machine. Retirez le couvercle de connecteur de la machine. * Remettez en place le couvercle de connecteur avant d’ utiliser la machine pour la couture générale. -
Page 68: Securing Material In Embroidery Hoop
SECURING MATERIAL IN EMBROIDERY HOOP 1. Loosen hoop adjusting screw on outer frame and remove inner frame. Place material between inner and outer frame. 2. Slightly tighten the hoop adjusting screw and pull material edges to remove slack. Fit the two frames together by pressing down on the inner frame. -
Page 69: Fixation Du Tissu Dans Le Cerceau De Broderie
FIXATION DU TISSU DANS LE CERCEAU DE BRODERIE 1. Desserrez la vis de réglage du cerceau sur le cadre extérieur et retirez le cadre intérieur. Placez le tissu entre le cadre intérieur et le cadre extérieur. 2. Serrez légèrement la vis de réglage du cerceau et tirez les bords du tissu pour bien le tendre. -
Page 70: Using The Material And Stabilizer
USING THE MATERIAL AND STABILIZER MATERIAL Use stabilizer to produce best results when embroidering on the following fabrics. Materials which lack firmness or stability such as ligthweight cotton. Thin, soft materials such as hankerchief linens. Because materials such as this lack firmness or stability, embroidery stitches may pull in, which can result in problems such as shrinkage and puckering of the material around the embroidery area. -
Page 71: Utilisation Du Tissu Et De L'entoilage
UTILISATION DU TISSU ET DE L’ENTOILAGE TISSU Utilisez l’entoilage pour produire des finitions de broderie plus attrayantes lorsque vous utilisez des tissus tels que les suivants. ∗ Tissus trop mous, tels que les cotton léger ∗ Tissus fins et souples tels que les toilles de lins ∗... - Page 72 If embroidering onto material which is smaller than the hoop size, or when embroidering close to the edge of material, attach the stabilizer as illustrated. WHEN EMBROIDERING ALONG THE EDGE OF MATERIAL SUCH AS A HANDKERCHIEF WHEN EMBROIDERING A NARROW PIECE OF FABRIC SUCH AS RIBBON TAPE Use two layers of interfacing if required by the material.
- Page 73 Si vous effectuez la broderie sur un tissu de taille plus petite que celle du cerceau, ou si vous brodez à proximité du bord du tissu, fixez le stabilisateur comme indiqué sur l’illustration. BRODERIE LE LONG DU BORD D’UN TISSU TEL QU’UN MOUCHOIR Si se está...
-
Page 74: Preparing The Machine Before Installing The Hoop
PREPARING THE MACHINE BEFORE INSTALLING THE HOOP 1. Turn hand wheel toward you until needle comes to its highest position. ATTACHING AND REMOVING EMBROIDERY HOOP 1. Raise presser foot and needle, and push up lever (A) of embroidery foot with your finger and pass embroidery hoop under it. -
Page 75: Préparation De La Machine Avant D'installer Le Cerceau
PRÉPARATION DE LA MACHINE AVANT D’INSTALLER LE CERCEAU 1. Tournez le volant jusqu’à ce que l’aiguille soit à sa position la plus haute. FIXATION ET RETRAIT DU CERCEAU DE BRODERIE 1. Élevez le pied presseur et l’aiguille et poussez le levier (A) du pied broderie vers le haut avec le doigt, et passez le cerceau de broderie sous le pied. -
Page 76: Installation Of Software
INSTALLATION OF SOFTWARE In order to start using the software on your PC you would have to first install the contents of the CD to your PC. This procedure is refered to as “installation procedure”. Please follow the below listed instructions in order to successfully install FUTURA on your personal computer. -
Page 77: Installation Du Logiciel
INSTALLATION DU LOGICIEL Afin d’utiliser le logiciel sur votre PC, vous devez d’abord installer les contenus du CD sur votre PC. Il est fait référence à cette procédure par le terme de «procédure d’installation ». Veuillez suivre les instructions reprises dans la liste OLuesHous, aVLI u ’LLIs uler aQVO sDOOèHU YDYHA VurFQF ordinateur personnel. - Page 78 USB cable between your computer and sewing machine. 1. Turn on your sewing machine. Make sure the needle has been moved to the highest position by turning the Hand 4. Double click on the Futura Icon on your desktop to open up the Futura Software.
- Page 79 Vous êtes, à présent, invité à sélectionner le Dossier de Programmes où le raccourci du logiciel sera mis en mémoire. Cliquez simplement sur «Suivant» pour continuer. Il vous est enfin demandé de confirmer toutes les sélections qui ont été effectuées lors de la préparation de l’installation. Enfoncer le bouton «Suivant»...
-
Page 80: Operation Switches When Embroidery Unit Is Attached
OPERATION SWITCHES WHEN EMBROIDERY UNIT IS ATTACHED OPERATION SWITCHES START/STOP SWITCH When start/stop switch is pushed, machine starts slowly, and when the switch is pushed once more, the needle moves and stops at its highest position. FORWARD STITCH SWITCH Embroidering can be advanced one stitch at a time (The hoop moves.), after the embroidery data has been transferred. -
Page 81: Touches De Fonctionnement Lorsque L'unité De Broderie Est Fixée
TOUCHES DE FONCTIONNEMENT LORSQUE L’UNITÉ DE BRODERIE EST FIXÉE TOUCHES DE FONCTIONNEMENT DÉMARRAGE/ARRÊT DE LA MACHINE Lorsque vous appuyez sur la touche de marche/arrêt, la machine démarre progressivement, et lorsque vous appuyez à nouveau sur la touche, l’aiguille se déplace et s’arrête à sa position la plus haute. -
Page 82: Troubleshooting
TROUBLESHOOTING SKIPPED STITCHES AND THREAD BREAKAGES OCCUR Needle tip is broken. Replace needle. Needle is bent. Replace needle. Needle is not installed correctly. Install the needle correctly. Refer to pages 96 - 97. Upper thread tension is too tight. Adjust the thread tension. Refer to pages 92 - 93. -
Page 83: Dépannage
DÉPAN NAGE DES POINTS SAUTÉS ET LE FIL SE CASSE Le fil est enfilé La pointe de l’aiguille incorrectement. est épointée Remplacez Reportez-vous l’aiguille. aux pages 18 - 21. L’aiguille est tordue. Le fil est emmêlé dans le porte-bobine. Remplacez l’ aiguille. - Page 84 EMBROIDERY PATTERN IS MIS-ALIGNED MACHINE SIDE HOOP SIDE Embroidering is No stabilizer attached continuing when when using light or thread is tangled. stretch material. Attach interfacing to If the thread remains the material. tangled, the fabric may Refer to pages 66 - 69. pucker and ruin the finished embroidery.
- Page 85 LE MOTIF DE BRODERIE EST MAL ALIGNÉ CÔTÉ CERCEAU CÔTÉ MACHINE Aucun entoilage n’ est fixé quand vous La broderie continue utilisez un tissu léger l o r s q u e l e f i l e s t ou extensible.
-
Page 86: Helpful Information For Embroidering With Futura
HELPFUL INFORMATION FOR EMBROIDERING WITH FUTURA 1. If stitches are missing If the embroidery machine detects that the thread has broken, it may continue to embroider up to about eight stitches without any thread (blank stitches) before it automatically stops. In such cases, use the following procedure to step back through the embroidering data to the point for continuing. - Page 87 RENSEIGNEMENTS D'AIDE 1. S’il manque des points Si la machine à broder détecte une rupture du fil, elle pourra continuer à broder environ huit points au maximum sans utiliser de fil (points vides) avant de s’ arrêter automatiquement. Dans ces cas, procédez comme suit pour reculer dans les données de broderie jusqu’au point à...
- Page 88 4. When resizing a design it is not dense enough. The Futura software will recalculate the stitch of an imported design when sizing, but only when using the DESIGN>CHANGE SIZE option. It does have a limitation of re-sizing up to 199% and down sizing to 51% and while still being able to re-calculate the stitches correctly.
- Page 89 4. En redimensionnant un motif, la couture n’est pas suffisamment serrée Le programme Futura recalcule le point d’un motif importé pendant la prise de dimensions, mais seulement si l’option DESIGN>CHANGE SIZE (motif>changement de dimension) est sélectionnée. La limite maximum est de 199 % et la limite minimum est de 51 %, limites permettant encore de recalculer les points correctement.
-
Page 90: Resizing Individual Letters
6. Will the density of a design be adjusted when resizing design ? When sizing designs in the Futura software you can resize designs from the Library in the hoop on screen and keep the design integrity. All other formats should be changed in the DESIGN/CHANGE SIZE menu in order to change the stitch count. - Page 91 6. Est-il possible de régler la densité d’un motif quand celui-ci est redimensionné ? En réglant les dimensions des motifs dans le programme Futura, vous pouvez redimensionner les motifs à partir de la bibliothèque dans le cerceau sur l‘écran et garder l’intégrité...
- Page 92 10. When sending the whole design at once through the option “Send design” in the machine navigator, 1. Block numbers are indicated with the LED indicators lit above patterns on the control panel as illustrated. 2. If you want to select a block, push the pattern selector button to the right of the row that contains your desired block, while the machine is not running.
- Page 93 10. Pour envoyer un motif complet en une seule fois avec l’option « Send design » (envoi de motif) dans le navigateur : 1. Les numéros de bloc sont signalés par des témoins au-dessus des points sur le panneau de contrôle, comme indiqué.
-
Page 94: Other Things You Should Know
4. OTHER THINGS YOU SHOULD KNOW PRESSER FOOT LIFTER There are three positions for your presser foot. 1. Lower the presser foot to sew. 2. Raise the lifter to the middle position to insert or remove fabric. 3. Lift it to its highest position to change the presser foot or to remove thick fabric. -
Page 95: D'autres Choses Que Vous Devriez Savoir
4. D'AUTRES CHOSES QUE VOUS DEVRIEZ SAVOIR LEVIER DU PIED PRESSEUR Il y a 3 positions pour votre Pied Presseur : 1. Abaisser le levier pour coudre. 2. Soulevez le levier en position médiane pour insérer ou enlever le tissu. 3. -
Page 96: Bobbin Tension
ADJUSTING TOP THREAD TENSION STRAIGHT STITCHING The correct appearance of your stitching is largely determined by the balanced tension of both top and bobbin threads. The tension is well balanced when these two threads ‘lock’ in the middle of layers of fabric you are sewing. If, when you start to sew, you find that the stitching is irregular, you will need to adjust the tension control. -
Page 97: Réglage De La Tension Du Fil Supérieur
RÉGLAGE DE LA TENSION DU FIL SUPÉRIEUR POINT DROIT L’aspect de votre point droit dépend surtout du bon équilibre entre la tension supérieure et la tension inférieure. Elle est parfaite lorsque les deux fils se nouent entre les deux épaisseurs de tissu. Vous pouvez régler la tension supérieure avec le cadran de réglage de tension. -
Page 98: Operation Switches
∗ Tacking stitch function for tie-off of other stitches ( ) The sewing machine makes 4 tiny tacking stitches to tie off the sewing on all patterns except straight and zigzag stitches. The position of the tacking stitches will be at the exact spot in the pattern where the reverse/tacking stitch button is pushed. -
Page 99: Touches De Fonctionnement
TOUCHES DE FONCTIONNEMENT T OUC HE D E PO SIT IO N D’ARRÊT D’AIGUILLE ( Quand vous toucher cette touche et la lumière LED est rouge, l’aiguille s’arrête à la position basse quand vous arrêtez de coudre. Toucher encore une fois pour arrêter l’aiguille en position haute. TOUCHE COUTURE ARRIÈRE * Fonction couture arrière pour les points droits et zigzags (... -
Page 100: Changing The Needle
P o l y e s t e r Nylon Tricot * Do not use on stretch fabrics. * For best sewing results, always use a Singer Branded Needle. Always disconnect the machine from power supply by removing the plug from the wall-outlet. Flat side Côté... -
Page 101: Tableau Des Aiguilles, Fiils Et Tissus
∗ Pour obtenir les meilleurs résultats de couture, utilisez toujours une aiguille de marque Singer. D é b r a n c h e z t o u j o u r s . L a m a c h i n e d e l ’... -
Page 102: Performance Checklist
PERFORMANCE CHECKLIST GENERAL PROBLEMS Machine does not sew. * Power switch is turned off.- Turn on the switch (see page 10 - 11). * Buttonhole lever is not raised when sewing stitch patterns. – Raise buttonhole lever (see page 52 - 55). * Buttonhole lever is not lowered when sewing buttonhole. -
Page 103: Vérification Des Petits Problèmes De Couture
VÉRIFICATION DES PETITS PROBLÈMES DE COUTURE PROBLÈMES GENERAUX La machine ne coud pas: * L’interrupteur est hors fonction. L’activé (voir page 10 - 11) * Le levier pour boutonnière n’est pas relevé lorsque vous cousez des motifs de points. - Relevez le levier pour boutonnière (voir page 52 - 55). -
Page 104: Cleaning Hook Area And Feed Dogs
5. Remove the bobbin case (2). 7. Clean the feed dogs and hook area with the lint brush. Put one drop of sewing machine oil on the hook race as indicated by the arrows. (A, B) 5. Replace the bobbin case with the projection (3) positioned... -
Page 105: Nettoyage Des Griffes Et Du Crochet
NETTOYAGE DES GRIFFES ET DU CROCHET Débranchez toujours la machine de l’alimentation électrique en retirant la fiche de la prise murale. Pour assurer les meilleures conditions de “travail” à votre machine, il est nécessaire de garder les pièces essentielles toujours propres. Toujours débrancher la machine de la prise. -
Page 106: Oiling Inside The Face Cover
CAUTION: Always remove the dust and lint before oiling. For best results always use SINGER Brand Sewing Machine Oil. Use of oil other than Sewing Machine Oil will cause damage to your machine. F a c e c o v e r... -
Page 107: Graissage Dans La Plaque Frontale
Debe aceitarse antes de usarse. PRECAUCION Quitar siempre el polvo y pelusa antes de aceitarla. Para mejores resultados usar siempre Aceite para Máquinas de Coser marca SINGER. Usar aceite que no sea especial para máquina de coser dañará su máquina. -
Page 108: Special Accessories
Doing so will result in broken needles and possible damage to your machine. Use of a Singer Brand twin needle (Style 2025) is strongly recommended. The twin needle is an optional purchase. -
Page 109: Accessoires Spéciales
à plat et des effets décoratifs. L’utilisation d’une aiguille jumelée de 3 mm de la marque Singer (Style 2025) est fortement recommandée. L’aiguille double est un accessoire en option ENFILAGE DE L’AIGUILLE JUMELÉE 1. Placer une bobine de fil sur chaque porte bobine. Procèder à... -
Page 110: Helpful Messages
HELPFUL MESSAGES Messages are displayed with LED lamps above stitch pattern numbers on the control panel and/or PC screen. When a message is displayed, fix the problem following the instruction in the message. The message will disappear, once the problem has been fixed. On control panel On PC screen Sur le panneau de commande... -
Page 111: Messages D'aide
Helpful message reference guide Guide de référence des messages d'aide Guía de referencia de mensajes de ayuda... - Page 112 Connect your PC to the sewing machine with USB cable. eign particle is inserted into cord socket for foot control plug. broidery unit is installed with small hoop attached. and on power switch. Don’t touch the plug while sewing. Check threading.
-
Page 113: Mensajes De Ayuda
MESSAGES D’AIDE Les messages apparaissent sur l’écran numéraire de l’écran de contrôle et/ou l’écran de PC.Lorsqu’un message apparaît, résolvez le problème en suivant les instructions du message. Le message disparaît une fois que le problème a été résolu. Le câble USB est déconnecté. →... - Page 114 On Control Panel Sur Le Panneau de commande En el Panel de control 1 1 4 On PC screen Sur l’écran de PC En el Panel de la PC Presser foot is not lowered. → Lower presser foot by lowering presser foot lifter.
- Page 115 SAFTY DEVICE ACTIVATED Machine is locked up due to thread entangled with bobbin case or rotation interrupted forcibly. Turn off power switch and eliminate the problem that caused the machine to stop. Bobbin winder is moved to right (operating position) during sewing.
- Page 117 1 1 7...
- Page 118 Le pied presseur est levé. Baisser le pied presseur en abaissant le releveur. El prensatelas no está abajo. Bajar la palanca del prensatelas para bajar el pie prensatelas.
- Page 119 1 1 9...
- Page 120 La tige à boutonnière n’est pas levée ou baissée. Baisser la tige pour réaliser une boutonnière. Lever la tige pour coudre. La palanca del ojalador no se ha bajado o levantado. Bajar la palanca del ojalador al coser ojales. Levantar la palanca del ojalador al coser patrones (puntadas) de costura.
- Page 121 1 2 1...
- Page 122 La machine est bloquée parcequ’il y a du fil autour du boitier à canettes qui empêche la rotation. Eteindre la machine et éliminer le problème qui cause l’ arrêt de la machine. La máquina se encuentra trabada debido a que el hilo se enredó...
- Page 123 1 2 3...
- Page 124 L’axe de bobinoir est en fonction de bobinage pendant la couture. Pousser l’axe du bobinoir vers la gauche. Le petit cadre à broder est installé alors que c’est un motif pour le grand cadre qui est transmis. Eteindre la machine et mettre le grand cadre. El bastidor pequeño está...
- Page 125 1 2 5...
- Page 126 Vérifiez le câble et l’interrupteur d’alimentation. Verifique que el cable USB está conectado y el interruptor Vérifiez si le câble USB est bien branché et si l’interrupteur principal está conectado. d’alimentation est bien allumé. Verifique el cable e interruptor de alimentación. Le bobineur est en train de fonctionner.
- Page 127 ENGLISH / FRANÇAIS / ESPAÑOL © Part No. 82076 4/07...