Garmin G5 Maintenance Manual
Electronic flight instrument
Hide thumbs
Also See for G5:
- Installation manual (285 pages) ,
- Install manual & pilot's manual (238 pages) ,
- User manual (168 pages)

Related Manuals for Garmin G5


Summary of Contents for Garmin G5
- Page 1 Garmin G5 Electronic Flight Instrument Part 23 AML STC Maintenance Manual Including Instructions for Continued Airworthiness 190-01112-11 May 2020 Revision 7...
- Page 2 Garmin. Garmin hereby grants permission to download a single copy of this manual and of any revision to this manual onto a hard drive or other electronic storage medium to be viewed...
- Page 3 03/14/17 Revised to add G5 DG/HSI, supporting equipment and associated functions. 10/18/17 Revised to cover changes associated with the addition of the G5/GAD 29B third party autopilot interfaces. 12/15/17 Revised to cover changes associated with Software 5.00, support for GFC500...
- Page 4 California's Proposition 65. If you have any questions or would like additional information, please refer to our web site at www.garmin.com/prop65. WARNING Perchlorate Material – special handling may apply, See www.dtsc.ca.gov./hazardouswaste/ perchlorate. Garmin G5 Electronic Flight Instrument Part 23 AML STC Maintenance Manual 190-01112-11 Rev. 7 Page i...
- Page 5 The G5 has an operating temperature range of -4˚F to 140˚F (-20˚C to +60˚C). The G5 will prevent operation from the battery when the battery is outside of this temperature range.
-
Page 6: Table Of Contents
7.4 G5 Configuration Mode ........................37 7.5 G5 Calibration Procedures ......................38 7.6 Compass Rose Swing ........................42 7.7 Altimeter System Test ........................43 Garmin G5 Electronic Flight Instrument Part 23 AML STC Maintenance Manual 190-01112-11 Rev. 7 Page iii... - Page 7 Figure 6-7 Method B G5 Resistor Preparation................31 Figure 6-8 Method B Placement of G5 CAN Bus Resistors (G5 not CAN bus terminator) ... 32 Figure 6-9 Method B Placement of CAN Bus Components (G5 as CAN bus terminator) ..... 33 Figure 6-10 G5 Power Diode Buildup (Both Wire Types) ..............
- Page 8 Table 7-1: Calibration Procedure Summary ................... 38 Table 7-2: Heading Verification ...................... 42 Garmin G5 Electronic Flight Instrument Part 23 AML STC Maintenance Manual 190-01112-11 Rev. 7 Page v...
-
Page 9: Introduction
The following outline briefly describes the organization of this manual: Section 2: System Description Provides a complete description of the type design change associated with installing the G5. An overview of the system interface is also provided. Section 3: Control & Operation Presents basic control and operation information specifically tailored to maintenance practices. -
Page 10: Revision And Distribution
The G5 can align itself both while taxiing and during level flight. The G5 will also use GPS and airspeed data to provide the most accurate attitude information. If none of these additional sources of information are available, attitude calculations will still be valid but accuracy may be slightly affected. - Page 11 • Roll The G5 has a Turn Rate Indicator located at the bottom of the PFD Page. Tick marks to the left and right of the displayed heading denote standard turn rates (3 deg/sec). A magenta Turn Rate Trend Vector shows the current turn rate.
-
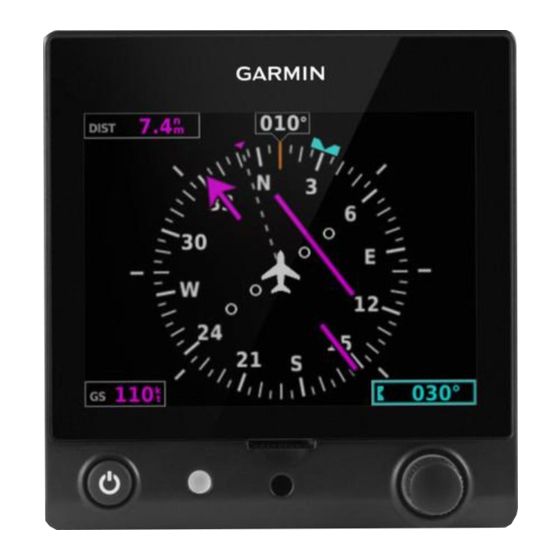
Page 12: Figure 2-2 G5 Electronic Flight Instrument (Dg/Hsi)
The G5 has an external lithium-ion battery that provides up to 4 hours of emergency power. The battery is required for the G5 used as an attitude display, but optional for the G5 used in the DG and HSI position. -
Page 13: Gmu 11 Magnetometer
The GMU 11 installation location is determined at the time of installation as defined by the AML STC installation data and recorded in APPENDIX B of this document and maintained with the aircraft records. Installation is optional for the G5 as an attitude indicator and required for the G5 as a DG/HSI. 2.3 GAD 29/29B The GAD 29/29B is a remote-mount unit that allows interface to IFR navigators such as the GNS and GTN series. -
Page 14: Gad 13
• GTP 59 • Davtron C307PS OAT analog information from the GAD 13 is converted to digital information, and passed to other G5 system LRUs using CAN communication. Connection to GAD 13 enables the G5 to display TAS, OAT, and crosswind information. -
Page 15: Gtp 59 Temperature Probe
Figure 2-7 GTP 59 (Temperature Probe) 2.6 Glareshield Mounted antenna The optional glareshield-mounted GPS antenna (Garmin part number 011-04036-10 or 011-04036-00) feeds a GPS receiver inside the G5 which provides position, velocity, and time data to support various instrument information. NOTE If GPS antenna 011-04036-00 is installed, which has a TNC connector, a TNC/BNC Adapter (p/n 330-01754-00) is required to connect the GPS antenna to the G5. -
Page 16: Basic Control & Operation
BASIC CONTROL & OPERATION The G5 unit will turn on automatically when power is applied to the avionics bus. The unit will turn off automatically 45 seconds after power is removed. Alternatively, holding the button on the left lower corner of the unit for three seconds will turn the unit off. -
Page 18: Table 4-1, Maintenance Intervals
On Condition 4.2.8 Battery Capacity Check 1. Without power applied to the aircraft, turn on the G5 by pressing the power button in the lower left corner of the unit. 2. Note the remaining battery capacity (%) at the top left corner of the display. -
Page 19: Electrical Bonding Test
• If the measured resistance is greater 10 milliohms, bonding must be improved to meet applicable requirements for a new installation in accordance with Section 4 of Garmin G5 Electronic Flight Instrument Part 23 AML STC Installation Manual (190-01112-10). Table 4-2 – Electrical Bonding Procedure... -
Page 20: Special Inspection Requirements
Garmin G5 Electronic Flight Instrument Part 23 AML STC Installation Manual (190-01112-10). Lightning Protection Module (LPM) The LPM shall be replaced. Reference Garmin G5 Electronic Flight Instrument Part 23 AML STC Installation Manual, 190-01112-10 section 4 and 5 for connector assembly and wiring requirements of LPM. -
Page 21: Troubleshooting
If a Red-X appears on the display or anywhere in the configuration mode menus, the following troubleshooting steps may be used to help identify the cause. 1. Review the airframe logbook to verify if any G5 or other avionics or electrical maintenance has been performed recently that may have contributed to the failure. - Page 22 3) If the problem persists, replace the GAD 13 with a known good unit. 5.1.4 Heading Information (Installations with a GMU 11 Installed) If a Red-X (steady or intermittent) is displayed in the heading field on the G5, check the following while the aircraft is on the ground: 1) When taxiing, heading performance is susceptible to the presence of magnetic anomalies (metal buildings, underground steel culverts, steel grates in the ramp, rebar).
- Page 23 If the VHF navigation information is removed from the G5 HSI display: 1) On the G5 in configuration mode, select the RS-232 configuration page, verify there is a Green Check by ‘Input Format, Garmin VHF NAV Radio’ and ‘Output Format, Garmin VHF NAV Radio’.
-
Page 24: Table 5-1, Gad 29/29B Status Led Indications
GAD 29/29B circuit breaker and GAD 29/29B. If proper power is available to the GAD 29/29B, replace the GAD 29/29B with a known good unit. 5) If the LED indication is ‘Steady Green’, inspect and verify the CAN Bus wiring between the G5 and GAD 29/29B. -
Page 25: Table 5-2, Gad 29/29B Status Led Indications
GAD 29/29B circuit breaker and GAD 29/29B. If proper power is available to the GAD 29/29B replace the GAD 29/29B with a known good unit. 5) If the LED indication is Steady Green Inspect and verify the CAN Bus wiring between the G5 and GAD 29/29B a. - Page 26 6) If the problem persists, replace the GAD 29B with a known good unit. 5.1.9 GFC 500 Failure Messages During operation of the GFC 500 AFCS, the G5 may annunciate a failure or fault that is specific to the GFC 500 AFCS. Refer to the GFC 500 AFCS Maintenance Manual/ICA, 190-02291-01, for assistance in troubleshooting the problem.
-
Page 27: Figure 5-1 Incorrect Can Wiring Example
Data logging on the G5 may be used to help troubleshoot issues. Operational data is gathered from the G5 during flight or on ground and is stored in *.csv log files on the microSD™ card (if installed). 5.1.13 CAN Bus Troubleshooting If problems are occurring within the CAN bus network, the following steps can help to identify the issue. -
Page 28: Figure 5-2 Correct Can Bus Terminator Example
Network Error Rate is a steady 0%. 7) Power up the #1 G5 unit and one other CAN device at a time and verify the connection quality for each device. Sometimes a device will communicate only when it is the only powered device on the CAN bus if one or more of the above issues is present. -
Page 29: Outline And Installation Drawings
5.2 Outline and Installation Drawings Figure 5-3 G5 Outline Drawing (side view) Figure 5-4 G5 Outline Drawing (back view) Garmin G5 Electronic Flight Instrument Part 23 AML STC Maintenance Manual 190-01112-11 Rev. 7 Page 21 of 54... -
Page 30: G5 Interconnect Drawings
For G5 system interconnect drawings reference Garmin Document 190-01112-10. 5.3.1 Connector Layout For G5 system connector layout reference Garmin Document 190-01112-10. This area intentionally blank Garmin G5 Electronic Flight Instrument Part 23 AML STC Maintenance Manual 190-01112-11 Rev. 7 Page 22 of 54... -
Page 31: Equipment Removal & Installation
Removal and reinstallation procedure for a standard G5 installation or a G5 recessed into the panel is identical. 1. Insert a hex drive tool through the access hole in the front cover of the G5 as shown in Figure 6-1 loosen the unit from the mounting ring. -
Page 32: Figure 6-2 G5 Captive Mounting Screw
5. Insert a hex drive tool through the access hole in the front cover of the G5 as shown in Figure 6-1 and tighten the unit to the instrument panel using 10-12 in-lbs torque. -
Page 33: G5 Battery
6.2 G5 Battery Removal 1. Loosen the G5 unit per Section 6.1. Do not remove the pitot and static lines or the electrical and GPS coaxial cable connectors from the G5 unit if access to the battery can be gained while these items remain connected. -
Page 34: Gps Antenna
Refer to the data which installed the GPS antenna for removal and installation of the GPS antenna. If a glareshield antenna is installed, refer to the Garmin G5 Electronic Flight Instrument Part 23 AML STC Installation Manual, 190-01112-10 section 4. -
Page 35: Gad 29/29B
3. Inspect the electrical connectors and pins for signs of damage. Repair any damage. 4. Connect the wiring harness to the GAD 29/29B. 5. Conduct the system return to service procedure in Section 8. Garmin G5 Electronic Flight Instrument Part 23 AML STC Maintenance Manual 190-01112-11 Rev. 7... -
Page 36: Gad 13
4. Conduct the system return to service procedure in Section 8. 6.9 Lightning Protection Component Installation This section applies to G5 system installations that were installed under MDL revision 14 or later (STC IM revision 16 or later). Garmin G5 Electronic Flight Instrument Part 23 AML STC Maintenance Manual 190-01112-11 Rev. - Page 37 3. Conduct the system return to service procedure in Section 8. 6.9.2 G5 Resistor and Diode maintenance If during the course of troubleshooting it is determined that a discrete component connected to the G5 is faulty, there are two choices for repair: 1.
-
Page 38: Figure 6-5 G5 Resistor Method A Buildup
NOTE: THE "-Y" CHARACTER IN THE CABLE TIE P/N IS FOR COLOR, COLOR OF CABLE TIE IS THE INSTALLERS CHOICE. Figure 6-5 G5 Resistor Method A Buildup Garmin G5 Electronic Flight Instrument Part 23 AML STC Maintenance Manual 190-01112-11 Rev. 7... -
Page 39: Figure 6-6 Method A Placement Of G5 Can Bus Resistors
Figure 6-7 shows the preparation procedure for the components into the wiring harness. Figure 6-8 shows the placement requirements of the resistors on the CAN bus wiring if the G5 is in the middle of the CAN bus. Figure 6-9 shows the placement requirements of the resistors on the CAN bus wiring if the G5 is used as a CAN bus terminator. -
Page 40: Figure 6-8 Method B Placement Of G5 Can Bus Resistors (G5 Not Can Bus Terminator)
78 PIN CONNECTOR IS SHOWN AS REFERENCE ONLY 4" MAX Figure 6-8 Method B Placement of G5 CAN Bus Resistors (G5 not CAN bus terminator) Garmin G5 Electronic Flight Instrument Part 23 AML STC Maintenance Manual 190-01112-11 Rev. 7 Page 32 of 54... -
Page 41: Figure 6-9 Method B Placement Of Can Bus Components (G5 As Can Bus Terminator)
NOTE: THE "-Y" CHARACTER IN THE CABLE TIE P/N IS FOR COLOR, COLOR OF CABLE TIE IS THE INSTALLERS CHOICE. Figure 6-9 Method B Placement of CAN Bus Components (G5 as CAN bus terminator) Garmin G5 Electronic Flight Instrument Part 23 AML STC Maintenance Manual 190-01112-11 Rev. -
Page 42: Figure 6-10 G5 Power Diode Buildup (Both Wire Types)
6.9.4 G5 Diode Installation (Both Wire types) Figure 6-10 shows the installation procedure for the diode into the wiring harness. Figure 6-11 shows the placement of the diode on the power input for the G5. POWER DIODE BUILD UP DIODE 0.5"... -
Page 43: Figure 6-11 Placement Of G5 Power Diode (Both Wire Types)
INSTALLED WITHIN 6 INCHES OF THE G5 CONNECTOR Figure 6-11 Placement of G5 Power Diode (Both Wire Types) This area intentionally blank Garmin G5 Electronic Flight Instrument Part 23 AML STC Maintenance Manual 190-01112-11 Rev. 7 Page 35 of 54... -
Page 44: Equipment Configuration & Testing
All test equipment must have current calibration records. 7.2 Pitot Static System Leak Check If the pitot and/or static system lines were removed from any G5 unit, perform a pitot static system leak check in accordance with the aircraft manufacturer’s approved data. -
Page 45: G5 Configuration Mode
7.3.2 Software Loading Procedure NOTE If the G5 is installed as part of the G3X STC, the software for the G5 is included with the G3X software. Refer to the G3X STC for procedures to install the latest G5 software. -
Page 46: G5 Calibration Procedures
RS-232 – used to configure the RS-232 input and output ports used of the G5. • ARINC 429 - used to configure the ARINC 429 input and output ports used of the G5. • Exit Configuration Mode – used to exit configuration mode. - Page 47 G5 is mounted in the pilot’s panel, which has an 8° forward tilt. After completing the Calibration Procedure in Step 7, the value in the Pitch Calibration field on the G5 is 2.8° and -1.4° in the Roll Garmin G5 Electronic Flight Instrument Part 23 AML STC Maintenance Manual 190-01112-11 Rev.
-
Page 48: Figure 7-1, Attitude Calibration Example
All selections made in configuration mode in this section are made on the G5 ID strapped as #1. In a single G5 installation, Unit ID #1 is always the single G5 unit. In a Dual G5 installation, Unit ID #1 is the G5 in the Attitude or Turn Coordinator position. - Page 49 All selections made in configuration mode in this section are made on the G5 ID strapped as #1. In a single G5 installation, Unit ID #1 is always the single G5 unit. In a Dual G5 installation, Unit ID #1 is the G5 in the Attitude or Turn Coordinator position.
-
Page 50: Compass Rose Swing
G5 #2) is within ±10° of the actual heading no further adjustments are necessary. 1. With the G5(or G5 #1 and G5 #2 for a dual G5 installation) in normal mode, all of the aircraft and avionics systems powered and operating normally, position the aircraft on a known compass rose at a heading 360°... -
Page 51: Altimeter System Test
7.5.3 and this section. 7.7 Altimeter System Test If the G5 unit is replaced, in aircraft that are IFR certified, perform an altimeter system test of the G5 in accordance with 14 CFR Part 43 Appendix E. 7.8 GMU 11 If the GMU 11 is removed and reinstalled or removed and replaced, the procedure in 7.5.3 must be... - Page 52 7. When the test sequence is completed, wait approximately five seconds and then select “Done” to complete the test. The G5 informs the operator if the installation has passed or failed the magnetometer interference test. The results displayed indicate the worst case percentage of limit and the time at which it occurred. If the test passes, no further action is required.
-
Page 53: Gmu 11
SYSTEM RETURN TO SERVICE PROCEDURE After all G5 configuration and testing is completed per Section 7, complete the following steps: 1. Position the aircraft to allow a GPS signal to be received. 2. Apply power to the aircraft and aircraft systems and allow the aircraft systems to initialize. - Page 54 DOCUMENTATION Appendix A contains the following: • A G5 configuration recording sheet (A1), in the case of a dual G5 installation a configuration sheet should be completed for each G5 installed. • A section to record the manually calculated Pitch and Roll Calibration settings (A2).
- Page 55 If the method to manually calculate the adjusted “Roll Calibration” and “Pitch Calibration” values was used, record the values here. Axis Value Pitch Roll Garmin G5 Electronic Flight Instrument Part 23 AML STC Maintenance Manual 190-01112-11 Rev. 7 Page 47 of 54...
- Page 56 CRS FOR VLOC?” Menu will display “ALLOW SEL COURSE FOR VLOC?” when set properly. VOR/LOC/GS ARINC 429 CONFIG Page SPEED RX = TX = Garmin G5 Electronic Flight Instrument Part 23 AML STC Maintenance Manual 190-01112-11 Rev. 7 Page 48 of 54...
- Page 57 Format = Interfaced Equipment - RS-232 Port (x) (x represents interfaced RS-232 Port ) Main System Composite CDI Main Indicator (Analog) Selected Course Garmin G5 Electronic Flight Instrument Part 23 AML STC Maintenance Manual 190-01112-11 Rev. 7 Page 49 of 54...
- Page 58 Input = CHANNEL 1 OUT Output = ARINC 429 Configuration ARINC 429 In 1 Input = ARINC 429 Out 1 Output = Garmin G5 Electronic Flight Instrument Part 23 AML STC Maintenance Manual 190-01112-11 Rev. 7 Page 50 of 54...
- Page 59 LRU included in this Description of Location installation? G5 #1 G5 #2 GMU 11 GAD 29/29B GAD 13 Glareshield GPS Antenna This area intentionally blank Garmin G5 Electronic Flight Instrument Part 23 AML STC Maintenance Manual 190-01112-11 Rev. 7 Page 51 of 54...
- Page 60 Appendix C contains a generic aircraft drawing to be used for documenting the wire routing for the installation of the G5, GMU 11, GAD 29/29B, GAD 13, and glareshield GPS antenna. The drawing will be completed during the initial installation and maintained with the aircraft records.
- Page 61 Wire Routing Twin Engine Garmin G5 Electronic Flight Instrument Part 23 AML STC Maintenance Manual 190-01112-11 Rev. 7 Page 53 of 54...
- Page 62 Autopilot engaged in a pitch and roll made (to engage servo clutches) 6:40 Autopilot disengaged 6:50 Pitot heat on 7:00 Pitot heat off 7:10 End of test Garmin G5 Electronic Flight Instrument Part 23 AML STC Maintenance Manual 190-01112-11 Rev. 7 Page 54 of 54...