AudioCodes RXV80 Deployment Manual
Standalone video collaboration bar
Hide thumbs
Also See for RXV80:
- User manual (68 pages) ,
- Installation manual (9 pages) ,
- Deployment manual (10 pages)
Advertisement
Quick Links
AudioCodes RXV80 Standalone Video Collaboration Bar
1. Before Deployment
Congratulations on purchasing the AudioCodes RXV80 Standalone Video Collaboration Bar! Before you
deploy the product, make sure you received the following items in the shipped box:
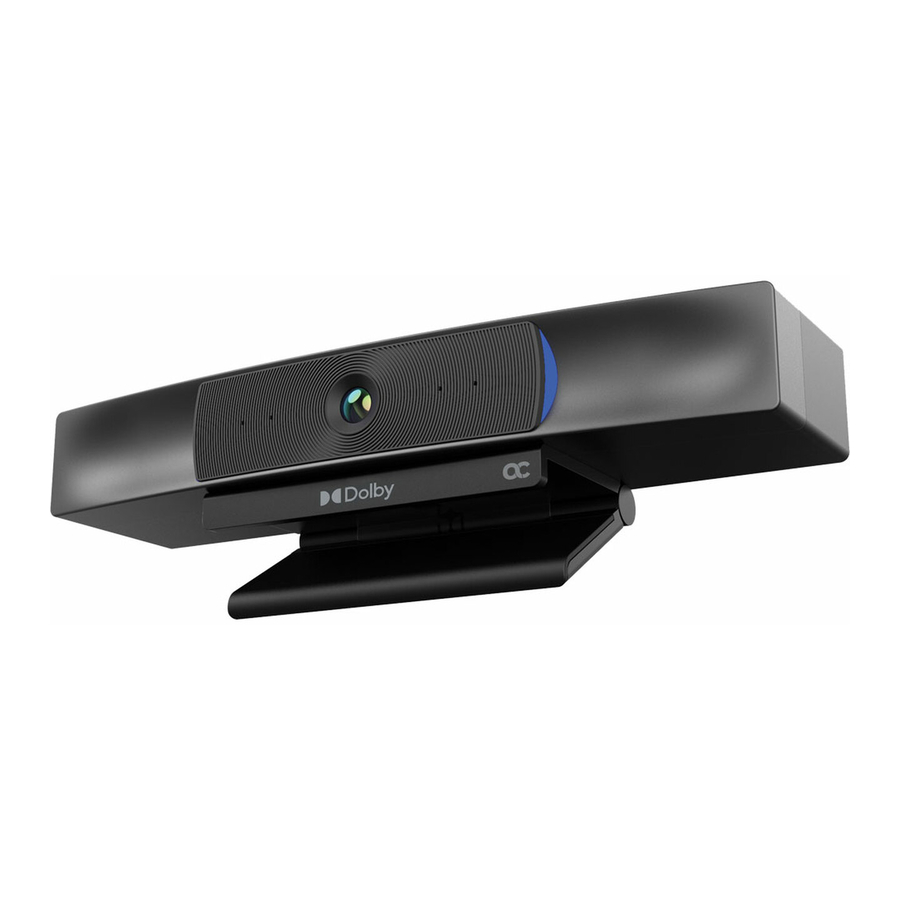
2. Physical Description
The figure below shows the video camera. The connector ports are at the camera's rear (see Cabling).
Deployment Guide
P a g e
Clip to clasp onto the upper
rim of the TV/PC screen
| 1
Camera lens
Advertisement

Related Manuals for AudioCodes RXV80


Summary of Contents for AudioCodes RXV80
- Page 1 AudioCodes RXV80 Standalone Video Collaboration Bar Deployment Guide 1. Before Deployment Congratulations on purchasing the AudioCodes RXV80 Standalone Video Collaboration Bar! Before you deploy the product, make sure you received the following items in the shipped box: 2. Physical Description The figure below shows the video camera.
- Page 2 3. Positioning For the best viewing angle, position the device at a height of 178 cm | 70 inches (as shown below left) and position the viewers within a radius of a 110 degree angle (as shown below right). 4. Mounting the Camera on Top of a TV To mount the camera on top of a TV (with the cleanest cable management), use this figure as reference: ...
- Page 3 5. Mounting on the Wall Above the TV To mount the camera on the wall above the TV, use this figure as reference: To mount the camera on the wall above the TV: Secure wall mount to wall using a screw driver, level and fasteners (see figure below left). Plug in the required cables (see below one from left).
- Page 4 6. Cabling Use the following figure as reference. The cables and connectors you’ll use are shown under Before Deployment. P a g e...
-
Page 5: Getting Started
7. Getting Started To get started: After connecting the cables, remove the controller (remote control) from its packaging and insert the batteries supplied into it. View on the display the message Remote is not connected. Hold below buttons while holding the remote near the box. - Page 6 View the Teams Phone is starting message on the display. View the Microsoft Teams Sign in prompt that then appears. Use the controller to navigate to and select the Sign in button; the Company Portal opens displaying the Microsoft Teams sign-in screen. P a g e...
- Page 7 8. Signing in To sign in: In the Company Portal’s ‘Sign in’ screen, use the controller to navigate to the ‘Email or phone’ field. Use the controller to enter your email or phone number and then select Next. Follow the instructions presented in the screen; make a note of the code displayed in the Microsoft Teams app and then on your pc, point your browser to the URL https://microsoft.com/devicelogin.
- Page 8 Use the controller to enter the code and select Next. P a g e...
- Page 9 View the Microsoft Teams application Got it prompt on the display. Use the controller to select Got it; the RXV80 home page is displayed. P a g e...
- Page 10 Website: https://www.audiocodes.com/ ©2020 AudioCodes Ltd. All rights reserved. AudioCodes, AC, HD VoIP, HD VoIP Sounds Better, IPmedia, Mediant, MediaPack, What’s Inside Matters, OSN, SmartTAP, User Management Pack, VMAS, VoIPerfect, VoIPerfectHD, Your Gateway To VoIP, 3GX, VocaNom, AudioCodes One Voice, AudioCodes Meeting Insights, AudioCodes Room Experience and CloudBond are trademarks or registered trademarks of AudioCodes Limited.