Avaya Partner 18 Programming And Use Manual
Avaya partner 18: user guide
Hide thumbs
Also See for Partner 18:
- Connection manual (318 pages) ,
- Quick reference (18 pages) ,
- Reference manual (6 pages)
Table of Contents
Advertisement
Quick Links
Download this manual
See also:
Reference Manual
Advertisement
Chapters
Table of Contents

Related Manuals for Avaya Partner 18


Summary of Contents for Avaya Partner 18
- Page 1 AT&T ® PARTNER Plus Communications System Release 3.1 Programming and Use...
- Page 2 Copyright © 1993 AT&T All Rights Reserved Printed in U.S.A. Notice Every effort was made to ensure that the information in this book was complete and accurate at the time of printing. However, information is subject to change. Federal Communications Commission (FCC) Interference Notice This equipment has been tested and found to comply with the limits of a Class A digital device, pursuant to Part 15 of FCC rules.
-
Page 3: Table Of Contents
Contents About This Guide Overview Important Safety Instructions Features and Capabilities System Components Auxiliary Equipment Programming Overview Hardware Considerations Initial System Setup Changing Settings After Installation Changing Settings to Support PBX or Centrex Services System Programming Options Using System Programming Telephone Programming Options Using Telephone Programming Learning About Telephones... - Page 4 Contents Using Auxiliary Equipment Overview Answering Machines Call Reporting Devices (SMDR) Credit Card Scanners Fax Machines Modems Night Service with Auxiliary Equipment PARTNER Attendant Voice Messaging Systems Feature Reference Troubleshooting When You Need Help Power Failure Operation Problems with System Phones Problems with Standard Phones Problems with Combination Extensions Other Problems with Phones...
- Page 5 Contents FCC Information Speed Dial Form Glossary Index Programming Quick References GL-1 IN-1 Inside back cover...
-
Page 6: About This Guide
About This Guide Purpose This guide is intended for the system manager. It explains what the PARTNER® Plus Communications System can do, provides instructions for programming and using the system, and tells how to get the most out of its many features and capabilities. - Page 7 Using Auxiliary Equipment. The system supports a wide variety of auxiliary equipment, including fax machines, modems, voice messaging systems, and call reporting devices. Chapter 4 provides advice on setting up these devices to work effectively with the system. Daily Operation. Depending on how your system is set up, you may need to oversee some of the system’s daily operations.
-
Page 8: Overview
Overview Contents Important Safety Instructions Features and Capabilities System Components Control Unit System Modules System Capacity Telephones System Telephones Intercom Autodialers Standard Telephones Auxiliary Equipment Requirements Connecting Standard Devices... -
Page 9: Important Safety Instructions
Important Safety Instructions WARNING: The following list provides basic safety precautions that should always be followed when using your telephone equipment: Read and understand all instructions. Follow all warnings and instructions marked on the product. Unplug all telephone connections before cleaning. DO NOT use liquid cleaners or aerosol cleaners. -
Page 10: Features And Capabilities
Overview Features and Capabilities The following list provides an overview of the system’s features: Full line of system phones, providing access to multiple lines from a single phone at each extension. Programmable buttons on system phones, providing one-touch access to system features simply by pressing the button. -
Page 11: System Components
Special hospitality features that let Bed and Breakfast proprietors, for example, regulate phone use in guest rooms and schedule wake up calls for guests. Easy-to-use programming procedures, making it simple for you to manage your system and telephones. System display phones provide feedback during programming. -
Page 12: Control Unit
CONTROL UNIT 206 Modules Cover Processor Module Outside Line Jacks Power Indicators (LEDs) Extension Jacks (206 modules only) MUSIC ON HOLD Volume Adjustment Screw MUSIC ON HOLD Jack (for RCA phono plug) SYSTEM PHONES (with optional MLS-CA24 Intercom Autodialer) MLS-18D® Phone MLS-6®... -
Page 13: System Modules
System Modules The following system modules can be installed in your system: Processor Module provides the software intelligence that controls the system’s features. It has jacks for a music-on-hold audio source, a loudspeaker paging system, and a call reporting (SMDR) device, such as a printer. -
Page 14: Telephones
Telephones System Telephones This guide refers to AT&T telephones specifically designed to work with the system as system phones. These include the MLS-34D, MLS-18D, MLS-12D, MLS-12, MLS-6, and MLC-6 telephones. System phones have several buttons in common: volume control buttons, and Feature Conf programmable buttons that can be used for outside lines, extension numbers,... -
Page 15: Auxiliary Equipment
Standard Telephones You can also use industry-standard single-line rotary or touch-tone telephones, including feature phones with built-in feature buttons and lights, with the system. This guide refers to such telephones as standard phones. AT&T-certified standard phones, such as the 8110 Analog Telephone, are recommended. The following standard phones with message waiting lights are compatible with the system: Single-Line Telephone with Message Waiting Light and Recall Button... -
Page 16: Requirements
Requirements An industry-standard device must meet the following conditions: It must be non-proprietary. That is, it cannot be made specifically for use on a particular telephone system. (For example, you cannot connect an AT&T MERLIN® phone because it is specifically designed for use on a MERLIN system.) Its Ringer Equivalence Number (REN*) cannot be greater than 2.0. -
Page 17: Programming
Programming Contents Overview Hardware Considerations Initial System Setup Setting the System Clock Assigning Lines Customizing Extensions Copy Settings Changing Settings after Installation Changing the System Clock Adding New Lines Adding New Extensions Swapping Extensions Changing Settings to Support PBX or Centrex Services Recall Setting Dialing Restrictions... -
Page 18: Using Telephones
Contents Using System Programming The Programming Overlays Programming Mode Changing Programming Type Telephone Programming Options Automatic Line Selection Extension Name on Display Line Ringing Personal Speed Dialing Programming Telephone Buttons Programming a Receptionist’s Extension Call Handling Options Button Programming Using Telephone Programming Telephone Models Using Centralized Telephone Programming Changing Programming Type... -
Page 19: Overview
Programming Overview After the system hardware is installed, you can customize the system and individual telephones. This chapter explains how to use programming to accomplish that. There are two types of programming: System Programming allows you to customize the system to meet the needs of your business. -
Page 20: Hardware Considerations
Hardware Considerations Programming procedures use line and extension numbers. The line number represents the line jack on a 206 or 400 module to which the outside line is connected. Similarly, the extension number represents the extension jack on a 206 module to which the system phone or standard device is connected. For each 206 module, the system assigns two lines and six extensions;... -
Page 21: Initial System Setup
Initial System Setup After the control unit is installed, you set up the system using a combination of system and telephone programming procedures. In this guide, System Programming procedures are identified by a code (# and three digits); Telephone Programming procedures are identified by the feature name only. Use the System Planner as a guide when programming. - Page 22 Customizing Extensions In addition to line assignments, the following procedures can be used to customize an extension: Display Language (#303) to specify the language (English, French, or Spanish) for messages that appear on a system display phone. Automatic Extension Privacy (#304) to prevent other extensions with the same line from joining a call at the extension.
-
Page 23: Changing Settings After Installation
Changing Settings after Installation As your business grows or changes, you will probably need to change the way your system was originally programmed. This section provides some examples and lists the procedures you would use to change settings after installation. For specific details on a procedure, refer to the procedure name in Chapter 5. -
Page 24: Changing Settings To Support Pbx Or
Changing Settings to Support PBX or Centrex Services This section applies only if you use PBX or Centrex services with your system. If it does not apply, go to the next section, “System Programming Options.” PBX services are provided by a private telephone switch. Centrex services are provided by your local telephone company from a Central Office (CO) outside your premises. -
Page 25: System Programming Options
System Programming Options This section discusses programming options that involve multiple procedures (such as dialing restrictions and auxiliary equipment settings), as well as features that can be used throughout your system (such as Speed Dialing). You can use a combination of programming procedures to set up your system to operate most efficiently, taking into account your company’s telephone service, personnel, and equipment, as well as the special needs of particular departments. - Page 26 Controlling Calls on Outside Lines When an extension is allowed access to an outside line, you can use the following procedures to control calling: Outgoing Call Restriction (#401) defines the type of calls (inside only, local only, or inside, local, and long-distance) that users can make from all lines available on an extension.
- Page 27 Summary Tables 2-1 and 2-2 summarize the available dialing restrictions and permissions, showing how they can be combined in a variety of ways to customize an extension’s dialing privileges. Table 2-1. Settings that Restrict an Extension’s Access to a Specific Line Setting for Type of Restrictions or Permissions for the...
-
Page 28: Setting Up Groups Of Extensions
Setting Up Groups of Extensions You can set up four types of extension groups: Pickup Group Extensions (#501) assigns extensions to one of four Pickup Groups. A Pickup Group lets any user in the system answer outside calls for any extension in that group. Calling Group Extensions (#502) assigns extensions to one of four Calling Groups. - Page 29 SMDR Record Type (#608) specifies the type of calls that you want to record for call reporting—either all calls or outgoing calls only. Account Code Entry lets users specify account codes for outside telephone calls; if used, the account codes are included on the call report. SMDR Top of Page (#609) notifies the system that the printer has been aligned to the top of a new page.
-
Page 30: Using System Programming
Using System Programming System Programming changes settings for the system as a whole, or for individual lines or extensions. You can also use System Programming to set up dialing restrictions, define groups, or set up auxiliary equipment. Refer to the filled-out System Planner when you are changing system settings, and be sure that any changes in programming are recorded there. - Page 31 MLS–34D MLS-18D/MLS-12D Figure 2-3. Programming Overlays for System Display Phones 2-13 Programming...
-
Page 32: Programming Mode
Programming Mode Place the Programming Overlay over the dial pad of the system display phone at extension 10 or 11—see “The Programming Overlays” earlier in this chapter for more information. To enter programming mode, press PROGRAM EXT 10 If you are programming from extension 11, “11” displays instead of “10.” Press System Program 10 Enter name... -
Page 33: Telephone Programming Options
Telephone Programming Options System telephones are ready to use when they are installed, but they can be customized to meet the needs of your business and individual users. This customization is accomplished through Telephone Programming. Automatic Line Selection When a user lifts the telephone’s handset or presses an idle line automatically. -
Page 34: Programming A Receptionist's Extension
Programming a Receptionist’s Extension Call Handling Options If you set up a centralized telephone answering position at extension 10, use the following settings to customize it: Immediate Call Answering. If the receptionist should answer all calls, use Line Assignment (#301) to assign all lines to extension 10. Set Line Ringing for all lines at extension 10 to Immediate Ring;... -
Page 35: Using Telephone Programming
MLS-34D Phone Line/ Programmable Buttons Any unused line button is programmable Figure 2-4. Button Programming for Receptionist’s Phone Using Telephone Programming There are two ways to program a telephone: Centralized Telephone Programming from extension 10 or 11 (see below) and Extension Programming from a user’s own extension (see page 2-20). - Page 36 During Centralized Telephone Programming, the display phone at extension 10 or 11 takes on the characteristics of the telephone being programmed, including any System Programming settings and lines assigned to the phone. Make sure the programming phone is as large as the largest phone in the system, because an MLS-18D phone cannot program an MLS-34D phone and an MLS-12D phone cannot program an MLS-18D phone or an MLS-34D phone.
- Page 37 MLS-34D Phone Line/ Programmable Buttons Any unused line button is programmable MLS-18D Phone Line/ Programmable Buttons Any unused line button is programmable MLS-12D/MLS-12 Phone (display on MLS-12D only) Programmable Buttons (without lights) Line/ Programmable Buttons Any unused line button is programmable MLS-6 Phone Line/...
-
Page 38: Changing Programming Type
Program Personal Speed Dial Numbers, Auto Dial numbers, or system features as described in Chapter 5. To erase the current programming from a button, press the button, then press To change the settings for another extension, press dial the new extension number. To exit programming mode, you can press off-hook, then place it back in the cradle. -
Page 39: Learning About Telephones
Learning About Telephones Contents System Telephones Buttons and Indicators Lights Ringing Patterns Dial Tones Using the Handset, Speaker, and Microphone Hands-Free Answer on Intercom (HFAI) Voice Interrupt on Busy Calls Speakerphone Performance Tips Standard Telephones Ringing Patterns Dial Tones Using the Switchhook Limitations Feature Phones Combination Extensions... -
Page 40: Learning About Telephones
Learning About Telephones This chapter explains how system and standard phones work with the system, as well as combination extensions where more than one phone or standard device is installed. System phones are described first, followed by standard phones on page 3-7 and combination extensions on page 3-10. In addition, call handling features are listed on page 3-11. -
Page 41: Buttons And Indicators
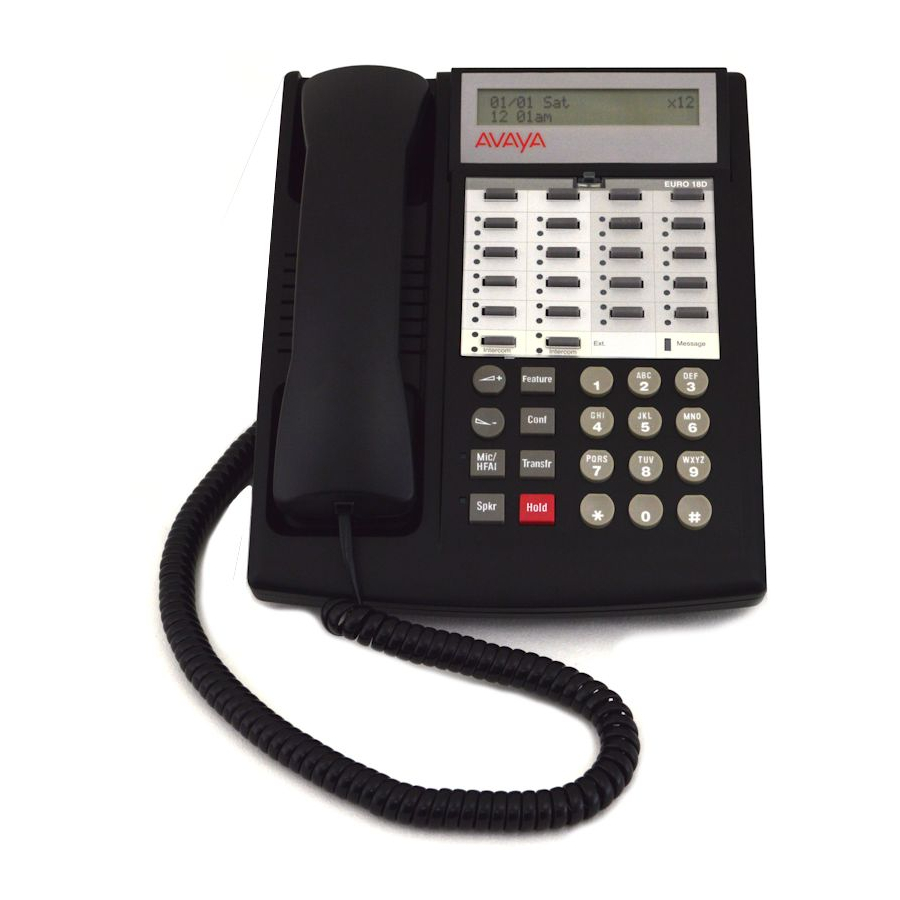
Buttons and Indicators MLS-18D The following buttons and indicators appear on system phones: Display. (MLS-34D, MLS-18D, and MLS-12D only) Shows date, day, and time when phone is idle, number dialed when placing a call, extension number (and name if programmed) calling you or transferring a call to you, and duration while a call is in progress. - Page 42 Spkr (all models except the MLC-6). Press to turn on and off speaker and microphone (if available), so you can dial and have a conversation without lifting the handset. The light next to this button shows when the speaker is turned on. Mic (MLS-34D, MLS-18D, MLS-12D, and MLS-12 only).
-
Page 43: Lights
Lights Each line button has a green light and a red light. The meaning of these lights varies, depending on whether a button is used to access an outside line, is programmed with a system feature, or is programmed for Auto Dialing an extension number (Intercom Auto Dial button). -
Page 44: Ringing Patterns
Ringing Patterns System phones have these ringing patterns: An outside call will ring . . . ring . . . ring. An intercom call will ring BEEP. . . ring BEEP. . . ring BEEP. If you have a system display phone, the caller’s extension number (and name if programmed) will show on the display. -
Page 45: Hands-Free Answer On Intercom (Hfai)
If you prefer to dial and conduct calls without lifting the handset, you can use the speaker and the microphone instead. Use these techniques to make calls with the speaker and the microphone (if you have one): To make a call without lifting the handset, press then dial the number and you will hear the call ringing. -
Page 46: Standard Telephones
Voice Interrupt on Busy Calls A voice interrupt on busy call is a special intercom call that lets you interrupt and speak to another user who is busy on a call and who has the Voice Interrupt On Busy feature (#312) activated for that user’s phone. When you use Voice Interrupt on Busy to interrupt another user on a call, the interrupted user hears two beeps before hearing your voice. -
Page 47: Ringing Patterns
Standard phones can do many of the things that system phones can do, and you can save money by using them in certain situations when a system telephone is not needed. Follow these guidelines when using standard phones: Use standard phones as power failure backups. In the event of a power failure, standard phones at extensions 10, 16, 22, and 28 connect to lines 1, 3, 5, and 7, respectively, for continued operation;... -
Page 48: Dial Tones
Dial Tones Standard phones have two different dial tones: Outside dial tone is generated by your local telephone company to indicate that you are connected with an outside line. Intercom dial tone is generated by the system to indicate that you are connected with an inside line. -
Page 49: Combination Extensions
Users cannot access the following system features: Account Code Entry, Background Music, Do Not Disturb, Exclusive Hold, Privacy, Save Number Redial, VMS Cover, Voice Interrupt on Busy, Voice Interrupt on Busy Talk-Back, and Voice Mailbox Transfer. Do not use Forced Account Code Entry with a standard phone, because the phone will bot be able to get dial tone and make calls. -
Page 50: Using Telephones
The lights on the system phone show what the standard telephone is doing as well as what the system phone is doing. For an explanation of light patterns, see “Lights” at the beginning of this chapter. If Privacy is active at a combination extension, no other extension can join a call in progress at either a system phone or a standard device. -
Page 51: Dial-Code Features
Dial-Code Features Dial-code features are features that you access by dialing a feature code at the telephone keypad. From a system phone, you can dial followed by the two-digit code (or press a programmed Auto Dial button); from a standard phone, you typically dial have intercom dial tone. - Page 52 Using Auxiliary Equipment Contents Overview If a Device Has Trouble Answering Machines Single Answering Machine Multiple Answering Machines Personal Answering Machine Call Reporting Devices (SMDR) Programming Call Reports Considerations Output Format Serial Printers Call Accounting Devices Credit Card Scanners Fax Machines Using Fax Machines Fax Management Feature Transferring a Call to the Fax Machine...
- Page 53 Contents Night Service with Auxiliary Equipment PARTNER Attendant Backup for Receptionist Voice Messaging Systems Delayed Call Handling 4-ii 4-21 4-23 4-23 4-24 4-24...
-
Page 54: Overview
Using Auxiliary Equipment Overview There are many ways to set up auxiliary equipment—the setup you choose depends upon your needs and the number of devices you have. This chapter presents some common setups. (It does not cover how to physically connect the equipment, or how to program the features. - Page 55 In addition, you can connect the following devices to your system: Doorphones allow visitors to signal extensions by pressing a button on the doorphone; the person who answers a doorphone call can then speak with the visitor at the doorphone. A doorphone is especially useful for providing access to offices or departments after hours.
-
Page 56: If A Device Has Trouble
Specialty Handsets are designed for those individuals who need greater functionality than that provided by the handsets on system phones and standard phones. For example, an amplified handset is available for certain system phones for hard-of-hearing users. In-Range Out-of-Building (IROB) protectors are required to prevent electrical surges from damaging your system when phones are installed in another building, but on the same continuous property. -
Page 57: Answering Machines
Answering Machines You can use an answering machine to answer calls at night when no one is around, or during business hours when no one can get to the phone. If you have an AT&T answering machine with the Call Intercept feature, you can pick up a call that has been answered by the answering machine by joining the call from any system phone. -
Page 58: Single Answering Machine
Single Answering Machine The single answering machine setup (Figure 4-1) serves the entire system. The answering machine is connected to its own extension, and can cover all the lines in the system, or as many lines as you assign to it. You can install the answering machine on an extension by itself, or combine it with a system phone or a standard phone on the same extension (see “Combination Extensions”... -
Page 59: Multiple Answering Machines
Multiple Answering Machines If a single answering machine cannot handle all your calls, you can set up two or more machines at different extensions (Figure 4-2) so that a call does not go unanswered. If one answering machine is busy, a second call will be answered by the second machine. -
Page 60: Personal Answering Machine
Personal Answering Machine A personal answering machine is used to answer all the calls that ring at a certain extension (Figure 4-3). It is useful for the following situations: When you do not want to dedicate an extension to an answering machine When the extension receives a lot of intercom calls When outside calls come through a receptionist and are transferred to the extension... -
Page 61: Call Reporting Devices (Smdr)
Call Reporting Devices (SMDR) SMDR (Station Message Detail Recording) is a call reporting feature that provides records of call activity. Call reporting information provides you with the ability to: Detect any unauthorized calls Bill clients or projects Bill back by departments Reduce telephone costs by identifying the need to change telecommunications services (like adding a WATS line for calls to a particular area code) -
Page 62: Call Reports
Call Reports A call report is a page of information that begins with a header. The header includes field names that describe the information in each call record. The call record is a line of information that includes the fields shown in Figure 4-4. DATE TIME CALLED NUMBER... -
Page 63: Considerations
Considerations The System Date (#101) and System Time (#103) must be set correctly to ensure accurate call reports. If a report cannot print because the printer is jammed or out of paper, the system will store up to 45 records in its memory until they can be printed. Additional calls will not be recorded. -
Page 64: Credit Card Scanners
Credit Card Scanners Many retail businesses and restaurants use credit card scanners to get instant approval of credit card purchases. The system allows your credit card scanners to share the lines in your system (as shown in Figure 4-5). You can install the credit card scanner on an extension by itself, or combine it with a system phone or a standard phone on the same extension (see “Combination Extensions”... -
Page 65: Fax Machines
Fax Machines This section suggests several ways you can set up fax machines to work with your system. It includes instructions for programming and using a Fax Management button on a system phone (in order to monitor the status of a fax machine and transfer calls to it with a single touch), transferring calls to the fax machine extension, and using an AT&T fax machine’s Notify feature. -
Page 66: Transferring A Call To The Fax Machine
Transferring a Call to the Fax Machine There are two situations in which you would want to transfer a call to your fax machine: You answer an outside call and hear a fax machine signaling. (A fax signal is a single beep sequence— beep ..beep ..beep). If you hear this, you should transfer the call immediately to the fax machine extension. -
Page 67: Setting Up Fax Machines
For all of these examples, program the fax machine extension’s Automatic Line Selection to select intercom first, followed by whatever outside lines you want to assign to it. (If you set the fax extension to select intercom first and the machine has an auto dial feature, program a 9 and a few pauses before each Auto Dial number. -
Page 68: Single Fax Machine
Single Fax Machine The single fax machine setup (shown in Figure 4-6) is good for moderate traffic. The fax machine has its own line (Line A), the number of which is published as the fax number. (The fax line can be used by other phones when all other lines are busy.) The fax machine is connected to its own extension (extension X). -
Page 69: Fax Line Saver
Fax Line Saver If you do not use your fax machine enough to justify paying for its own outside line, you can put the machine on its own extension. With this setup, you must transfer calls to it manually. If you have programmed a Fax Management button, you can transfer a call to the fax machine with a single touch, as well as monitor the status of the fax machine (see “Fax Management Feature”... -
Page 70: Send And Receive Fax Machines
Send and Receive Fax Machines If your business has high-volume fax traffic, you can set up two fax machines, one that only sends and the other that only receives. For example, in Figure 4-8, fax 1 is the send machine, fax 2 is the receive machine. Line A is the fax line, the number of which is published as the fax number. - Page 71 To Program Fax 2 (Receive—Ext. Y) If the fax machine has the Notify feature, set it to select intercom first. If the fax machine does not have the Notify feature and you want it to be able to dial out when fax 1 is unavailable, set Automatic Line Selection for extension Y to select outside lines first (line A selected last).
-
Page 72: Modems
Modems There are several ways to use modems with your system, as described below. NOTE: Modems can connect directly to an extension jack without an adapter. However, if you connect a high-speed modem through the control unit, you may experience some degradation of efficiency and throughput, depending on the quality of the central office lines connected to the system. -
Page 73: Send And Receive Modem
Send and Receive Modem If you need to place and receive calls with the modem, use the setup shown in Figure 4-10. This setup makes line A the primary modem line, but keeps the line available for users at other extensions when all other lines are busy. Figure 4-10. -
Page 74: Night Service With Auxiliary Equipment
Night Service with Auxiliary Equipment You can set up modems, fax machines, and answering machines to receive calls automatically after hours. When Night Service is on, calls ring immediately at the appropriate extensions, so that no human intervention is required to transfer calls to the fax, modem, or answering machine. - Page 75 NOTE: If answering machines are connected to Night Service extensions, you can join a call that was already answered by an answering machine from any system phone. If you have an AT&T answering machine with the Call Intercept feature, the answering machine drops off the call when you join it. To Program Set Line Ringing for line A at extension X and for line B at extension Y to No Ring.
-
Page 76: Partner Attendant
PARTNER Attendant The PARTNER Attendant answers calls and directs them to a specified extension or to a Hunt Group (based on the digits a caller dials after listening to a list of choices in a recorded greeting). For example, the PARTNER Attendant could answer calls and tell callers to press 1 for Sales, 2 for Parts, 3 for Service, and so on. -
Page 77: Voice Messaging Systems
Voice Messaging Systems Two voice messaging systems are compatible with your system. You can install one or the other, depending on your business needs: The PARTNER MAIL VS Voice Messaging System, which physically resembles a 206 module, resides in the control unit and provides voice messaging capabilities for up to 10 subscribers. - Page 78 Lines CONTROL UNIT Figure 4-13. Delayed Call Handling To Use Follow the instructions packaged with the PARTNER MAIL VS system to install it. During the day, the PARTNER MAIL VS system uses delayed call handling; the receptionist picks up all calls at extension 10. If the receptionist cannot answer within four rings, the system routes the call to the PARTNER MAIL VS system where the day menu plays to the caller.
- Page 79 Feature Reference Contents Overview AA Extensions (#607) Abbreviated Ringing (#305) Account Code Entry (F12) Allowed List Assignments (#408) Allowed Phone Number Lists (#407) Answering Calls Auto Dialing Automatic Extension Privacy (#304) Automatic Line Selection Automatic VMS Cover (#310) Background Music (F19) Call Forwarding/Call Follow-Me (F11) Call Pickup (I6XX) Calling Group Extensions (#502)
- Page 80 Contents Distinctive Ring (#308) Do Not Disturb (F01) Doorphone Alert Extensions (#606) Doorphone Extension (#604 and #605) Emergency Phone Number List (#406) Emergency Telephone (#311) Exclusive Hold (F02) Extension Name Display Fax Machine Extensions (#601) Forced Account Code Entry (#307) Forced Account Code List (#409) Group Call Distribution (#206) Group Calling—Ring/Page (I7G/I*7G)
- Page 81 Contents Outgoing Call Restriction Button (#114) Outside Conference Denial (#109) Personal Speed Dial Numbers Pickup Group Extensions (#501) Privacy (F07) Recall (F03) Recall Timer Duration (#107) Rotary Dialing Timeout (#108) Save Number Redial (F04) SMDR Record Type (#608) SMDR Top Of Page (#609) Special Dialing Functions System Date (#101) System Day (#102)
-
Page 82: Overview
Feature Reference Overview This chapter provides reference information for programming and using system features. Features are listed in alphabetical order. System Programming procedures include the procedure code (# and three-digit number) in the heading; dial-code features include the feature code (F for plus a two-digit code). -
Page 83: Aa Extensions (#607)
AA Extensions (#607) Description This System Programming procedure identifies extensions where PARTNER Attendants are connected to the system. Doing so lets the system notify users with display phones when they are receiving a call that has been transferred from the PARTNER Attendant. (This procedure applies only to PARTNER Attendants—do not use it with the Automated Attendant Service of a voice messaging system.) Related Features... -
Page 84: Abbreviated Ringing (#305)
Abbreviated Ringing (#305) Description This System Programming procedure turns Abbreviated Ringing on or off at a specific extension. When a user is on a call and Abbreviated Ringing is on, any incoming call rings only once. The green light next to the line button flashes until the call is answered or the caller hangs up (or for a transferred call, until it returns to the transfer return extension). -
Page 85: Account Code Entry (F12)
Account Code Entry (F12) Description This feature lets a user with a system phone enter an account code (up to 16 digits) for an outside call (incoming or outgoing). An account code is typically used to identify a department, project, or client for charge-back or tracking purposes. - Page 86 If a Forced Account Code List exists, you can check to see if an account code is valid when entering or changing an account code by pressing Feature valid, you will hear a denial tone. The AT&T Call Accounting Terminal uses less than 16 digits for an account code.
- Page 87 To enter or change a forced account code: From a system phone, if a password is programmed for the system, you must enter it before lifting the handset. (See System Password (#403) for more information.) Lift the handset or press Press the programmed Account Code Entry button or press If the Account Code Entry button has lights, the green light turns on.
-
Page 88: Allowed List Assignments (#408)
Allowed List Assignments (#408) Description This System Programming procedure lets you assign up to four Allowed Phone Number Lists to a specific extension. Related Features You must use Allowed Phone Number Lists (#407) to create up to four lists of Allowed Telephone numbers before you use this procedure. -
Page 89: Allowed Phone Number Lists (#407)
Allowed Phone Number Lists (#407) Description This System Programming procedure specifies telephone numbers that users can dial regardless of other dialing restrictions, as long as they have access to an outside line. For example, if you restrict an entire category of calls through Disallowed Phone Number Lists (#404), you can permit calls to a specific number in that category by placing that number on an Allowed Phone Number List. - Page 90 Examples The examples below show how you would enter telephone numbers for an Allowed Phone Number List in Step 4 of “Programming.” When an Allowed List is assigned to an extension, users can dial numbers on that list, even if the numbers would otherwise be restricted.
-
Page 91: Answering Calls
Answering Calls Description This section describes how users can answer calls ringing at their own extensions. Additional features enable users to pick up calls at other extensions—see “Related Features” below. Related Features A user can answer an outside call, an intercom call, or a transferred call that is ringing at a specific extension or at any extension in a group. - Page 92 How to Answer Calls Ringing at Your Extension System Phone You can answer a call on any line that is ringing, or select a specific line if more than one is ringing: When the telephone is ringing, lift the handset. You are connected to the incoming call.
-
Page 93: Auto Dialing
Auto Dialing Description This Telephone Programming procedure lets users dial outside numbers, extension numbers, feature codes, or account codes with a single touch, by pressing a programmed button. An Auto Dial number can be stored on any programmable button (a button with no line assigned) on a system phone. Related Features To set up a Fax Management button, program the fax extension number on an Auto Dial button with lights. - Page 94 Examples The examples below show some possible entries for an Auto Dial number in Step 4 of “Programming.” Outside Phone Number. Enter the phone number (up to 20 digits) exactly as you would dial it. For example, to program 555-2398, press Extension Number.
-
Page 95: Automatic Extension Privacy (#304)
Automatic Extension Privacy (#304) Description This System Programming procedure lets you either allow users to join active calls at an extension or prevent users from joining active calls at the extension. When Automatic Extension Privacy is Assigned for an extension, other users cannot join active calls at that extension. -
Page 96: Automatic Line Selection
Automatic Line Selection Description This Telephone Programming procedure determines the line a user is connected to after lifting the handset to make a call. When the user picks up the handset, the system looks for lines in the order specified by this procedure and selects the first available line. - Page 97 Examples System Phone With Automatic Line Selection at its factory setting, the system first searches to find an idle outside line in numerical order (starting with line 1). Then, if all outside lines are busy, the system searches for an idle intercom line. This order can be changed, however, to accommodate your business needs.
-
Page 98: Automatic Vms Cover (#310)
Automatic VMS Cover (#310) Description This System Programming procedure automatically routes an extension’s unanswered intercom and transferred calls to the Call Answer Service of the voice messaging system after three rings, so callers can leave a message. Related Features To turn VMS Cover on and off, users can program a VMS Cover button with lights. -
Page 99: Background Music (F19)
Background Music (F19) Description This feature provides background music through the speaker of an idle system phone (except the MLC-6) for a user’s work area. Background Music plays the recorded material from the Music On Hold audio source. Related Features Background Music is available only if Music On Hold (#602) is active and an audio source is connected to the processor module. - Page 100 Using To turn Background Music on: From a system phone (except an MLC-6), press the programmed button or press Feature If the system phone is idle, you hear background music. If the Background Music button has lights, the green light turns on. To adjust the volume of Background Music, use the system phone’s volume control buttons while listening to the background music.
-
Page 101: Call Forwarding/Call Follow-Me (F11)
Call Forwarding/Call Follow-Me (F11) Description This feature forwards all intercom, outside, or transferred calls from a user’s extension to another system extension. Users can activate this feature from their own extension (Call Forwarding) or from any other extension in the system (Call Follow-Me). - Page 102 Using System Phone To forward your calls: Press the programmed button or press Dial your extension number. Dial the extension number at which you want the calls to ring. Call Forwarding is activated (on a button with lights, the green light is on). To remove Call Forwarding: Press the programmed button or press Dial your extension number twice.
-
Page 103: Call Pickup (I6Xx)
Call Pickup (I6XX) Description This feature lets users answer any intercom, outside, or transferred call ringing at a specific extension (where XX is an extension number from 10–33). This feature is useful for officemates who agree to answer each other’s calls. Considerations You can program a Call Pickup button on a system phone to pick up a call ringing at another specified extension with one touch. -
Page 104: Calling Group Extensions (#502)
Calling Group Extensions (#502) Description This System Programming procedure identifies the extensions in a Calling Group—a group of extensions that can be called at the same time. Any user in the system can ring or page all extensions in a Calling Group at the same time; the first extension to pick up the call is connected to the caller. -
Page 105: Conference Calls
Conference Calls Description This section explains how to set up conference calls using the system phone or the switchhook on a standard phone. A conference call connects up to five parties (including the conference originator) in a single call. Users can connect both outside and inside parties in a conference call, but the call cannot include more than two outside parties. - Page 106 Using System Phone Set up the call to the first party. (You can call the party, pick up the call from hold, or answer an incoming call.) You are connected with the first party. Press Conf The first party is now on hold. Set up the call to the second party.
-
Page 107: Conference Drop (F06)
Conference Drop (F06) Description This feature drops the last outside party added to a conference call, without disconnecting the other parties. Related Features For instructions on setting up conference calls on system and standard phones, see Conference Calls. You can use Outside Conference Denial (#109) to disallow conference calls with multiple outside parties. -
Page 108: Copy Settings (#399)
Copy Settings (#399) Description This System Programming procedure copies all of the following settings from one extension to another: #301 Line Assignment #302 Line Access Restriction #303 Display Language #304 Automatic Extension Privacy #305 Abbreviated Ringing #307 Forced Account Code Entry #308 Distinctive Ring #309 Intercom Dial Tone #310 Automatic VMS Cover... -
Page 109: Dial Mode (#201)
Dial Mode (#201) Description This System Programming procedure identifies individual lines as touch-tone or rotary. You should check with your local phone company if you are not sure which type of line is being provided to you. Related Features If you are having difficulty using touch-tone phones on rotary lines, you may need to adjust the Rotary Dialing Timeout (#108). -
Page 110: Direct Line Pickup-Active Line (I68Ll)
Direct Line Pickup—Active Line (I68LL) Description This feature allows users to access a ringing or held call, or to join a call in progress on a specific outside line (where LL is a line number from 01–12). This feature is useful for picking up a ringing or held call or joining a call on a line that is not assigned to a phone. - Page 111 Using System Phone If you want, lift the handset. Press a button programmed with Direct Line Pickup—Active Line, then dial the two-digit line number (01–12) of the line you want to pick up or join; or press Intercom If you did not lift the handset, the speaker comes on automatically. Standard Phone Lift the handset.
-
Page 112: Direct Line Pickup-Idle Line (I8Ll)
Direct Line Pickup—Idle Line (I8LL) Description This feature allows users to access a specific outside line (where LL is a line number from 01–12) when the line is not in use. This feature is useful for accessing a line that is not assigned to a phone. Related Features If a line is in use, users cannot access it with this feature. -
Page 113: Disallowed List Assignments (#405)
Disallowed List Assignments (#405) Description This System Programming procedure lets you assign up to four Disallowed Phone Number Lists to specified extensions. Related Features You must use Disallowed Phone Number Lists (#404) to create up to four lists of disallowed telephone numbers before you use this procedure. Considerations When a Disallowed Phone Number List is assigned to an extension, the list applies to all of the lines to which the extension has access. -
Page 114: Disallowed Phone Number Lists (#404)
Disallowed Phone Number Lists (#404) Description This System Programming procedure specifies telephone numbers that users cannot dial. For example, you may want to prevent calls to a specific telephone number or to categories of numbers, such as international numbers. Use this procedure to create up to four lists of up to 10 telephone numbers each. - Page 115 All Telephone Numbers in One Exchange. The following entries prevent calls to the 976 exchange (since area codes have a 0 or 1 as the second digit, entries in the form !0! and !1! prevent toll calls to all area codes): –...
-
Page 116: Display
Display Description System display phones have a 2-line, 16-character (per line) display area on the top-right corner, for calling and programming feedback. Specifically, the display shows: Current date (excluding year), day, and time when the phone is idle Number dialed when making calls Duration of calls (call timer) Number (and name if programmed) of the extension calling when receiving an intercom call or transferred call... - Page 117 Considerations The current date, day, and time is the default display. The call timer records the time a user is active on a call. It begins when the handset is lifted off-hook and ends when either the handset is placed back in the cradle or the call is placed on hold.
-
Page 118: Display Language (#303)
Display Language (#303) Description This System Programming procedure identifies the language in which display messages appear if the extension has a system display phone. The language is set for each extension, so phones in the same system can display different languages. -
Page 119: Distinctive Ring (#308)
Distinctive Ring (#308) Description This System Programming procedure determines whether calls should ring at a standard device using the system’s distinctive ringing patterns—different patterns for outside, intercom, and transferred calls—or whether all calls should ring like outside calls. Considerations Change the setting to Not Active if a standard device such as a modem or answering machine does not pick up intercom or transferred calls. -
Page 120: Do Not Disturb (F01)
Do Not Disturb (F01) Description This feature lets a system phone user press a programmed button to prevent incoming calls for the extension from audibly alerting (lights still flash); but transferred calls that are not answered and return to the extension where Do Not Disturb is active still ring. -
Page 121: Doorphone Alert Extensions (#606)
Doorphone Alert Extensions (#606) Description This System Programming procedure identifies up to 24 extensions to signal when a doorphone button is pressed. When a person uses the doorphone, it signals all alert extensions at the same time. If the alert extension is a system phone, the call signals with a unique ding-dong sound to distinguish it from other calls. -
Page 122: Doorphone Extension (#604 And #605)
Doorphone Extension (#604 and #605) Description These System Programming procedures identify extensions to which doorphones are connected. A doorphone is usually placed near an entrance, to screen visitors. You can connect up to two doorphones to the system—use Doorphone 1 Extension (#604) to identify the extension to which the first doorphone is connected and Doorphone 2 Extension (#605) to identify the extension to which the second doorphone is connected. -
Page 123: Emergency Phone Number List (#406)
Emergency Phone Number List (#406) Description This System Programming procedure creates a list of up to 10 telephone numbers that all users can dial regardless of dialing restrictions provided they have access to an outside line. Typical list entries include fire, police, and emergency services numbers. - Page 124 Programming To create an Emergency Phone Number List: Press Feature display reads: EmergencyList Entry: Select a list entry (01–10). For example, to select the third entry, press The display reads: EmergencyList 03 Data------------ Enter the telephone number. To save the telephone number in memory, you must press At this point: To enter other phone numbers, press entry and repeat Steps 3 and 4.
-
Page 125: Emergency Telephone (#311)
Emergency Telephone (#311) Description This System Programming procedure identifies an emergency telephone extension. When a user lifts the handset of an emergency phone, a predetermined outside number is dialed automatically. The emergency phone number might be, for example, the fire department, police, or a poison control center. - Page 126 Programming To identify an emergency phone extension: Press Feature At the Extension: prompt, enter the emergency phone extension number— see “Valid Entries” on the previous page. For example, to program extension 30 as the emergency phone, press To assign or unassign the extension, press value displays.
-
Page 127: Exclusive Hold (F02)
Exclusive Hold (F02) Description This feature prevents other extensions from picking up outside calls placed on hold at a specific extension with a system phone. Related Features You can use the fixed Hold button to put calls on regular hold (any extension can pick up the held call). -
Page 128: Extension Name Display
Extension Name Display Description Users can assign a name, up to 12 characters long, to their extension. Then, when that extension is used to make an intercom call, group call, or transferred call, the name appears on the system display phone receiving the call. Similarly, users receiving a transfer return call see the name of the person assigned to the extension that did not answer the transferred call. - Page 129 Programming To assign a name to an extension: Press Feature Enter the number of the extension to be programmed. For example, to program extension 12, press Press left Intercom 12 Enter Name If a name was previously assigned to this extension, it displays instead. Enter the two-digit code for each character you want to enter.
-
Page 130: Fax Machine Extensions (#601)
Fax Machine Extensions (#601) Description This System Programming procedure identifies extensions to which fax machines are connected. Related Features If you want to monitor fax machine status and make one-touch transfers to the fax machine, see Auto Dialing to program a Fax Management button and “Fax Management Feature”... -
Page 131: Forced Account Code Entry (#307)
Forced Account Code Entry (#307) Description This System Programming procedure identifies specific extensions at which users must enter an account code prior to making outside calls. The account code can be used to charge telephone calls to a department or client; it prints on call reports if you are using SMDR (Station Message Detail Recording) or a call accounting package. - Page 132 Programming To program an extension for Forced Account Code Entry: Press Feature At the Extension: prompt, enter the number of the extension to be programmed. For example, to program extension 15, press To assign or unassign Forced Account Code Entry, press until the appropriate value displays.
-
Page 133: Forced Account Code List (#409)
Forced Account Code List (#409) Description This System Programming procedure lets you identify a list of up to 99 account code verification entries for extensions that are forced to enter account codes. Once a list is created, any user at an extension programmed for Forced Account Code Entry must enter a valid account code—one that matches a list entry—... - Page 134 Wildcard Characters. You can use wildcard characters in list entries. For example, your company has a three digit account code—the first digit represents the department and the second and third digits represent the individuals in the department. You enter 4!! as the list entry. –...
-
Page 135: Group Call Distribution (#206)
Group Call Distribution (#206) Description This System Programming procedure assigns outside lines to Hunt Groups. Doing so allows outside calls to ring directly into a Hunt Group instead of being answered and transferred by the receptionist. You can assign lines to Hunt Groups 1–7. - Page 136 Valid Entries 1 = Assigned (for hunting to groups 1–6, or to group 7 for the voice messaging system’s Automated Attendant Service) 2 = Not Assigned 3 = VMS Line Cover (available only for Hunt Group 7) Programming To set up lines for Group Call Distribution: Press Feature At the Group: prompt, enter a group number (1–6;...
-
Page 137: Group Calling-Ring/Page (I7G/I*7G)
Group Calling—Ring/Page (I7G/I*7G) Description This feature lets users ring or page simultaneously all the extensions in any one of four Calling Groups (G is a Calling Group number from 1–4). When paging, the caller hears a beep and begins speaking; the caller’s voice is then heard on the speakers of all idle system phones in the selected Calling Group. - Page 138 Programming To program a Calling Group button: Press Feature Enter the number of the extension to be programmed with this feature. Press a programmable button. If you want calls to ring the group, press left If you want calls to page the group, press left Dial a Calling Group number (1–4).
-
Page 139: Group Hunting-Ring/Voice Signal (I77G/I*77G)
Group Hunting—Ring/Voice Signal (I77G/I*77G) Description This feature lets you distribute call volume among extensions in a group, to offload call activity from a single user. When an intercom or transferred call is placed to a Hunt Group (where G is a Hunt Group number from 1–7), the system rings or voice signals the first available (non-busy) extension in the group, passing over busy extensions (or those with Do Not Disturb active) in a circular hunt. - Page 140 If you have a voice messaging system, you can program Hunt Group 7 Intercom Examples Here are some useful applications for a Hunt Group: Place the extensions of employees who work in a department sharing calls, such as a customer service group, in a Hunt Group so that when a call comes in to the receptionist it may be transferred to the next available extension.
- Page 141 To ring or voice signal a Hunt Group manually: Lift the handset and press You hear intercom dial tone. To make a ringing call, dial The next available extension in the Hunt Group rings. If no one answers within three rings, the call hunts to the next available extension. To make a voice-signaled call, press After the beep, start talking.
-
Page 142: Group Pickup (I66G)
Group Pickup (I66G) Description This feature allows users at any extension in the system to answer any outside call ringing at an extension in a Pickup Group (where G is a Pickup Group number from 1–4). In other words, when an outside call rings at an extension that is in a Pickup Group, users at any extension in the system can answer the call, without knowing which extension or line is ringing and without being in the same Pickup Group. - Page 143 Using System Phone To use Group Pickup when programmed on a button, press the programmed button. To use manually: Lift the handset and press You hear intercom dial tone. Dial and a group number (1–4) to pick up an outside call ringing at any extension in the group.
-
Page 144: Hold
Hold Description This section explains how to place and retrieve calls on hold, using either the button on a system phone or the switchhook on a standard phone. (Users Hold can make and receive other calls on another line while a call is on hold.) Related Features System phone users can use Exclusive Hold to put calls on hold that can be retrieved only from their own extension. - Page 145 Standard Phone To put a call on hold, press the switchhook down once rapidly. You hear intercom dial tone. The call is on hold. (Do not hang up the handset while the call is on hold. If you hang up the handset, the phone rings. Lifting the handset reconnects you with the held call.) To retrieve a call that you put on hold: Hang up.
-
Page 146: Hold Disconnect Time (#203)
Hold Disconnect Time (#203) Description This System Programming procedure lets you change the hold disconnect time for an outside line. When a caller on hold hangs up, the local telephone company may send a special signal to the system to free the line. There are two possible signals: a long signal (450 milliseconds) used by most telephone companies, or a short signal (50 milliseconds) used by a few telephone companies. -
Page 147: Hotline (#603)
Hotline (#603) Description This System Programming procedure identifies a hotline extension and its alert extension. When a user lifts the handset of the hotline phone, the alert extension rings. You can set up several hotline and alert extension arrangements. The alert extension can be the same or different for one or more hotline extensions. - Page 148 Programming To identify a hotline extension and its alert extension: Press Feature At the Extension: prompt, enter the hotline extension—see “Valid Entries” on the previous page. For example, to program extension 33 as the hotline, press At the Data -- prompt, enter the alert extension—see “Valid Entries” on the previous page.
-
Page 149: Hunt Group Extensions (#505)
Hunt Group Extensions (#505) Description This System Programming procedure lets you assign any number of extensions to a Hunt Group. The system supports up to seven Hunt Groups; however, Hunt Group 7 is used exclusively for the voice messaging system. Related Features for Hunt Groups 1–6 For instructions on ringing or paging extensions in a Hunt Group or transferring calls to a Hunt Group, see Group Hunting. - Page 150 Valid Entries 1 = Assigned to group 2 = Not Assigned to group Programming To assign extensions to a Hunt Group: Press Feature At the Group: prompt, enter a group number (1–7). For example, to select group 1, press Hunt Group 1 Extension: Enter the number of the extension to be programmed.
-
Page 151: Intercom Dial Tone (#309)
Intercom Dial Tone (#309) This System Programming procedure determines the type of dial tone that the system provides at an extension. It may be necessary to change this setting to Machine (outside line) dial tone for an autodialing device, such as a fax or modem, that has trouble making calls. -
Page 152: Joining Calls
Joining Calls Description Joining is adding yourself to a call in progress, the same way you do on a home telephone by picking up an extension. (This is different from conferencing, in which the originator “pulls you into” the call.) Up to three system extensions can join a call on an outside line (for a total of one outside and four inside parties). - Page 153 How to Join a Call System Phone A steady red light at a line button indicates a call is in progress at another extension. To join a call: Press the line button next to the steady red light and lift the handset, or Lift the handset and press number.
-
Page 154: Last Number Redial (F05)
Last Number Redial (F05) Description This feature redials the last outside number dialed (maximum 20 digits per phone number). This feature is useful for immediately redialing a busy number. Related Features You can use Save Number Redial if you want to temporarily save the last number dialed. -
Page 155: Line Access Restriction (#302)
Line Access Restriction (#302) Description This System Programming procedure restricts an extension from receiving and/or making outside calls on a specific line. For example, you may want a secretary to answer calls on a manager’s line, but not to make any outgoing calls on the line;... - Page 156 Programming To restrict an extension from making calls on a specific line: Press Feature At the Extension: prompt, enter the extension number to be programmed. For example, to program extension 23, press At the Line: prompt, enter the line number to be restricted at this extension. For example, to restrict line 2, press displays.
-
Page 157: Line Assignment (#301)
Line Assignment (#301) Description This System Programming procedure assigns the outside lines that are available at an extension. The default order of line assignment to the buttons on a system phone is from left to right, starting with the bottom row of line buttons. To put the lines in a different order, first use this procedure to remove all assigned lines;... - Page 158 Valid Entries 1 = Assigned 2 = Not Assigned 3 = Select Button (then press a line button to assign the line to that button) Programming To assign lines to a specific extension: Press Feature display reads: LineAssign Extension: Enter the extension number to be programmed (10–33). For example, to program extension 15, press A red light appears next to each line button that has a line assigned.
-
Page 159: Line Ringing
Line Ringing Description This Telephone Programming procedure determines how each outside line assigned to an extension rings. A line can ring immediately, ring with a 20 second delay, or not ring at all. Delayed Ring is useful for backup coverage on shared lines, such as for secretaries who cover other users’... - Page 160 Programming To change the way outside lines ring at an extension: Press Feature Enter the number of the extension to be programmed for Line Ringing. The green lights next to the line buttons on the phone show the current Line Ringing settings for all lines assigned to the extension. (If a line is not assigned to a button, the green light next to that button is off.) The following ringing options can be shown by the line button lights: Immediate Ring.
-
Page 161: Loudspeaker Paging (I70)
Loudspeaker Paging (I70) Description This feature accesses the loudspeaker paging system, if you have one connected to the system through the PAGE jack on the processor module. Related Features You can specify the loudspeaker paging system as a hotline alert extension so that the hotline phone can be used to make announcements over the loudspeaker. - Page 162 Standard Phone To make an announcement over the loudspeaker paging system: Lift the handset. You hear intercom dial tone. Dial Speak into the handset. Your voice is heard through the loudspeaker system. For touch-tone phones only, if your paging system supports announcements to zoned areas, refer to the instructions packaged with the device to make zoned announcements.
-
Page 163: Making Calls
Making Calls Description A user can make a call by dialing an outside phone number or an extension number. There are also several ways to speed dial a number—see “Related Features” below. Related Features You can store an outside number, an intercom number, or a feature code on a telephone button, so users can dial the number with a single touch. - Page 164 Considerations The following instructions assume that system phones are set (using Automatic Line Selection) to automatically select outside lines first, and standard phones are set to select intercom first. This means that when a user with a system phone lifts the handset, the user hears outside dial tone (if an outside line is available);...
- Page 165 To make an outside call on a specific line: Lift the handset. You hear intercom dial tone Dial plus the two-digit line number. Dial the phone number. How to Make an Intercom Call An intercom call, or inside call, is a call between two extensions without using an outside line.
- Page 166 Standard Phone Lift the handset. You hear intercom dial tone. To ring the extension, dial the two-digit extension number, or To voice-signal a system phone at the extension, press two-digit extension number and listen for one of the following responses: If you hear one beep, you have reached an idle system phone.
-
Page 167: Message Light Off (F10)
Message Light Off (F10) Description This feature turns off the message light at a specified extension. Related Features For instructions on turning on the message light, see Message Light On. Considerations This feature turns off the message light on system phones and standard phones that have message lights. - Page 168 Using System Phone To turn off the message light: Press the programmed button or press Dial the two-digit extension number of the phone whose message light you want to turn off, or use an Auto Dial button. Standard Phone To turn off the message light: Lift the handset.
-
Page 169: Message Light On (F09)
Message Light On (F09) Description This feature turns on the message light at a specified extension. Related Features For instructions on turning off the message light, see Message Light Off. Considerations This feature turns on the message light on system phones and standard phones that have message lights. - Page 170 Using System Phone To turn on the message light: Press the programmed button or press Dial the two-digit extension number of the phone whose message light you want to turn on, or use an Auto Dial button. Standard Phone To turn on the message light: Lift the handset.
-
Page 171: Music On Hold (#602)
Music On Hold (#602) Description This System Programming procedure activates or deactivates the MUSIC ON HOLD jack on the processor module. To provide recorded music or messages to callers on hold, the jack must be active and an audio source must be connected to the jack. - Page 172 Programming To change the setting of the MUSIC ON HOLD jack: Press Feature To activate or deactivate the MUSIC ON HOLD jack, press appropriate value displays. Select another procedure or exit programming mode. System Program System Program Music On Hold (#602) until the Next Data 5-91...
-
Page 173: Night Service Button (#503)
Night Service Button (#503) Description This System Programming procedure identifies a button on the system phone at extension 10 to be used to turn Night Service on and off. When Night Service is on, all lines assigned to the phones of the users in the Night Service Group ring immediately, regardless of their normal Line Ringing settings. - Page 174 Programming To program a Night Service Button at extension 10: Press Feature At this point: If you want to assign Night Service to the first available button on the system phone, press Night Service 1 Assigned-Ext10 If you want to remove the Night Service button assignment, press until the display reads: Next Data Night Service...
-
Page 175: Night Service Group Extensions (#504)
Night Service Group Extensions (#504) Description This System Programming procedure assigns extensions to the Night Service Group. When Night Service is on and a call comes in, all extensions in the Night Service Group ring immediately, regardless of normal Line Ringing settings. Related Features You must use Night Service Button (#503) to program the button that is used to turn Night Service on and off. -
Page 176: Number Of Lines (#104)
Number of Lines (#104) Description This System Programming procedure determines the number of outside lines that are automatically assigned to all system extensions. (This number does not have to match the actual number of lines connected at the control unit.) This feature should be used only for initial system setup. -
Page 177: Outgoing Call Restriction (#401)
Outgoing Call Restriction (#401) Description This System Programming procedure identifies the types of outgoing calls that can be made on all lines at an extension. See “Dialing Restrictions and Permissions” in Chapter 2 for a summary of calling restrictions. Related Features You can program a button on the system phone at extension 10 to be used to quickly change an extension’s Outgoing Call Restriction setting. - Page 178 Programming To identify the types of outgoing calls that can be made on all lines at an extension: Press Feature At the Extension: prompt, enter the number of the extension to be programmed. For example, to select extension 30, press To change the type of call restriction, press value displays.
-
Page 179: Outgoing Call Restriction Button (#114)
Outgoing Call Restriction Button (#114) Description This System Programming procedure identifies a button on the system phone at extension 10 to be used to change the current Outgoing Call Restriction setting for a specific extension. This button is useful for quickly changing an extension’s restriction. - Page 180 Programming To program an Outgoing Call Restriction button at extension 10: Press Feature At this point: If you want to assign Outgoing Call Restriction to the first available button on the system phone, press CallRstr Button 1 Assigned-Ext10 If you want to remove the Outgoing Call Restriction button assignment, press Next Data CallRstr Button...
-
Page 181: Outside Conference Denial (#109)
Outside Conference Denial (#109) Description This System Programming procedure determines whether users can include more than one outside party in a conference call. Related Features For instructions on making conference calls, see Conference Calls. Use Conference Drop to drop the last outside party added to the conference. -
Page 182: Personal Speed Dial Numbers
Personal Speed Dial Numbers Description This Telephone Programming procedure lets you store up to 20 frequently- dialed numbers for each extension. Personal Speed Dial numbers can be dialed quickly by pressing phone) and the two-digit code from 80 through 99. The Personal Speed Dial numbers programmed for a particular extension are for use only at that extension. - Page 183 Programming To program Personal Speed Dial numbers: Press Feature Dial the number of the extension to be programmed with this feature. Assign a two-digit code to the number by pressing between 80 and 99. For example, to assign code 81, press If a number is already assigned to the code, it appears on the display.
-
Page 184: Pickup Group Extensions (#501)
Pickup Group Extensions (#501) Description This System Programming procedure lets you assign extensions to a Pickup Group. When an outside call (not an intercom or transferred call) rings at an extension in a Pickup Group, a user at any other extension in the system can answer it by dialing the Pickup Group code. -
Page 185: Privacy (F07)
Privacy (F07) Description This feature lets system phone users press a programmed button to turn Privacy on and off, preventing or allowing other users to join calls at the user’s extension as needed. Related Procedures If Automatic Extension Privacy (#304) is Assigned for an extension, that extension normally is private. -
Page 186: Recall (F03)
Recall (F03) Description This feature causes the system to send a timed switchhook flash over the telephone line to “recall” a new dial tone or to access a PBX, central office, or Centrex feature, such as Call Waiting. Related Features If users have trouble with Recall, use Recall Timer Duration (#107) to adjust the length of the Recall signal. - Page 187 Using To access a PBX, central office, or Centrex feature (such as Call Waiting) while active on an outside line: System Phone Press the programmed button or press Enter the access code for the feature (if required). To return to your original call, press the programmed button or press again.
-
Page 188: Recall Timer Duration (#107)
Recall Timer Duration (#107) Description This System Programming procedure lets you change the length of the timed signal, or switchhook flash, generated by the system Recall feature (as well as by the Recall option used in Auto Dial and Speed Dial numbers). Recall sends this timed signal over the phone line to the local telephone company or PBX to which the system is connected. -
Page 189: Rotary Dialing Timeout (#108)
Rotary Dialing Timeout (#108) Description This System Programming procedure changes the length of the Rotary Dialing Timeout. You may need to change the length of the timeout if you have any rotary lines and are having trouble calling out on standard touch-tone phones. For example, if users dial slowly and calls are not completed or are connected to wrong numbers, lengthen the timeout. -
Page 190: Save Number Redial (F04)
Save Number Redial (F04) Description This feature saves the last outside number dialed from an extension with a system phone into temporary memory. Users can use this feature to save a number before they hang up on a busy or unanswered call. Once saved, the number can be redialed at any time. -
Page 191: Smdr Record Type (#608)
SMDR Record Type (#608) Description This System Programming procedure allows you to specify whether all calls or outgoing calls only are to be included on call reports. Call Reporting (often referred to as Station Message Detail Recording or SMDR) provides detailed tracking of telephone usage in a printed report. -
Page 192: Smdr Top Of Page (#609)
SMDR Top Of Page (#609) Description This System Programming procedure notifies the system that the printer has been aligned to the top of a new page. Use this feature after inserting paper or clearing a jam. When this feature is used, the system prints a new call report header. -
Page 193: Special Dialing Functions
Special Dialing Functions Description This feature lets you add special characters for System Speed Dial numbers, Personal Speed Dial numbers, and Auto Dial numbers, as follows: Function Button Pause Hold Recall Spkr Stop Touch-Tone Transfer Enable Considerations Special characters cannot be used when dialing a number manually. Examples Pause. - Page 194 Stop: Your local bank-by-phone service requires that you enter a password before the account number. To program a Personal Speed Dial number or an Auto Dial button to call the bank at 555-7898, include a stop for manually entering the password, and continue with the account number (679 88), enter Touch-Tone Enable: Your system is connected to rotary lines but you want to call an answering machine at 555-3454 to retrieve messages.
-
Page 195: System Date (#101)
System Date (#101) Description This System Programming procedure sets the month, day, and year. The system displays only the month and day on display phones when the phone is idle; the month, day, and year print on SMDR call reports. Considerations Include leading zeros for single-digit months or days. -
Page 196: System Day (#102)
System Day (#102) Description This System Programming procedure sets the day of the week that appears on system display phones. Valid Entries 1 = Sunday 2 = Monday 3 = Tuesday 4 = Wednesday 5 = Thursday 6 = Friday 7 = Saturday Programming To change the System Day:... -
Page 197: System Password (#403)
System Password (#403) Description This System Programming procedure defines a four-digit password that users can enter from system phones other than the MLC-6. The password has two possible functions: To turn Night Service on and off (if Night Service is programmed). To override dialing restrictions (if the extension has access to an outside line). -
Page 198: System Reset-Programming Saved (#728)
System Reset—Programming Saved (#728) Description This System Programming procedure resets the system while retaining the currently programmed settings. Reset the system only when it fails to function correctly after a power failure or down period. Considerations This procedure is skipped in the sequence of programming procedures when cycling. -
Page 199: System Speed Dial Numbers
System Speed Dial Numbers Description This feature lets you program a list of up to 60 frequently-dialed numbers for the system. Anyone on the system can then dial a System Speed Dial number by pressing Feature two-digit code from 20 through 79. You can mark System Speed Dial numbers to override dialing restrictions. - Page 200 Valid Entries Any phone number—up to 20 characters consisting of the digits 0–9, and special dialing functions that you can access by pressing (Stop), (Recall), and Spkr codes 20 through 79 No number assigned to any code Programming To program System Speed Dial numbers: Press Feature Program Ext 10...
- Page 201 Using System Phone You can lift the handset or press If you want to call on a specific line, press the line button (or press and the two-digit line number). Press Feature Dial the two-digit System Speed Dial code (20–79). If you did not specify an outside line, the system automatically selects one, turns on the speaker if the handset is in the cradle, and dials the number.
-
Page 202: System Time (#103)
System Time (#103) Description This System Programming procedure sets the time that appears on system display phones. Considerations Enter the time in 24-hour notation. In this scheme, the hours of the day are 0000 (12 midnight) to 2359 (11:59 p.m.). Since each time must have four digits, use Ieading zeros when necessary. -
Page 203: Toll Call Prefix (#402)
Toll Call Prefix (#402) Description This System Programming procedure indicates whether users must dial a 0 or 1 before the area code to make a long-distance call, or just the area code and number. This feature should be set to reflect the dialing patterns of your local telephone company. -
Page 204: Touch-Tone Enable (F08)
Touch-Tone Enable (F08) Description This feature lets a system phone user send touch-tone signals on an outside call over a rotary line. For example, a user may need to dial touch-tone digits while on a call to a bank-by-phone service. Related Procedures You must use Dial Mode (#201) to identify rotary lines to the system. -
Page 205: Transferring Calls
Transferring Calls Description This section explains how to transfer calls using the phone or the switchhook on a standard phone. Transferring a call lets users “pass” a call from one extension to another. Users can transfer both outside calls and intercom calls to other system extensions. Related Features To transfer calls to an extension with a single touch, you can program the extension number onto an Auto Dial button—see Auto Dialing. - Page 206 How to Transfer a Call System Phone To pass a call to another extension: 1. While active on the call, press The call is put on hold and you hear intercom dial tone. Dial the extension number (or you want the call transferred. When someone answers, announce the call, then hang up.
- Page 207 Standard Phone To pass a call to another extension: While on a call, press the switchhook down once rapidly. You hear intercom dial tone. Dial the extension number (or you want the call transferred. When someone answers, announce the call, then hang up. If no one answers or the call is refused, press the switchhook again to reconnect to the caller.
-
Page 208: Transfer Return Extension (#306)
Transfer Return Extension (#306) Description By default, transferred calls return to the originating extension if they are not answered. This System Programming procedure can be used to identify a different return extension for the extension that transfers a call. Related Features You can use Transfer Return Rings (#105) to define the number of times all system extensions should ring with transferred calls before they return to their transfer return extensions. -
Page 209: Transfer Return Rings (#105)
Transfer Return Rings (#105) Description This System Programming procedure, which applies to all system extensions, defines the number of times a transferred call rings before it goes to the transfer return extension. Related Features If you program Hunt Group Extensions (#505), make sure this setting is four or more rings. -
Page 210: Vms Cover (F15)
VMS Cover (F15) Description This feature lets system phone users press a programmed button to turn VMS Cover on and off, routing unanswered intercom and transferred calls for their extension to the Call Answer Service of the voice messaging system after three rings. - Page 211 Using From a system phone, press the programmed button to turn VMS Cover on; press it again to turn it off. Use the button like a switch—when the light is on, VMS Cover is on and your unanswered transferred and intercom calls receive coverage after three rings.
-
Page 212: Vms Hunt Delay (#506)
VMS Hunt Delay (#506) Description This System Programming procedure determines when outside calls should be answered by the Automated Attendant Service of the voice messaging system. You can set the system for either immediate call handling (after the second ring) or delayed call handling (after the fourth ring). -
Page 213: Vms Hunt Schedule (#507)
VMS Hunt Schedule (#507) Description This System Programming procedure determines whether the outside lines assigned to Hunt Group 7 hunt through the VMS Hunt Group all the time, only during Day operation (Night Service is off), or only during Night operation (Night Service is on). -
Page 214: Voice Interrupt On Busy (#312)
Voice Interrupt On Busy (#312) Description This System Programming procedure identifies extensions that can receive voice interrupt on busy calls. A voice interrupt on busy call is a special intercom call that lets a user (the originator) interrupt and speak to another user (the recipient) who is busy on an intercom or outside call with one other party. - Page 215 Valid Entries 1 = Assigned 2 = Not Assigned Programming To change the Voice Interrupt On Busy setting for an extension: Press Feature Enter the number of the extension to be programmed with this feature. To assign or unassign Voice Interrupt On Busy, press appropriate value displays.
-
Page 216: Voice Interrupt On Busy Talk-Back (F18)
Voice Interrupt On Busy Talk-Back (F18) Description This feature lets you program a button that is used to respond to a voice interrupt on busy call while you are active on another call. Related Procedures You must use Voice Interrupt On Busy (#312) to identify extensions that can receive an intercom call while busy on another call. -
Page 217: Voice Mailbox Transfer (F14)
Voice Mailbox Transfer (F14) Description This feature lets a system phone user transfer a caller directly to a specific extension’s voice messaging system mailbox, in order for the caller to leave a message without first ringing the extension. This feature is useful when a user knows that a co-worker is away from his or her desk. -
Page 218: Wake Up Service Button (#115)
Wake Up Service Button (#115) Description This System Programming procedure identifies a button on the system phone at extension 10 to be used for scheduling wake up (or reminder) calls for system extensions. When a wake up call is scheduled for an extension, the system makes an intercom call to the target extension at the scheduled time. - Page 219 Programming To program a Wake Up Service button at extension 10: Press Feature At this point: If you want to assign Wake Up Service to the first available button on the system phone, press Wake Up Button 1 Assigned-Ext10 If you want to remove the Wake Up Service button assignment, press until the display reads: Next Data Wake Up Button...
- Page 220 To review a scheduled wake up time for a specific extension: Press the Wake Up Service button on extension 10. Dial the two-digit target extension number (or use an Auto Dial button). Review the displayed wake up time and target extension number. Press the Wake Up Service button to exit.
- Page 221 Troubleshooting Contents When You Need Help Power Failure Operation Problems with System Phones System Phone Does Not Ring System Phone Display Does Not Work System Phone Does Not Work Problems with Standard Phones Standard Phone Does Not Ring Standard Phone Rings Back After Intercom Call with No One at Other End Standard Phone’s Message Waiting Light Does Not Light Problems with Combination Extensions...
-
Page 222: When You Need Help
Troubleshooting When You Need Help If you have a problem with your system, you may be able to solve it by following the appropriate troubleshooting procedures described in this chapter. If not, you can call for help: in the continental U.S., call the Helpline at 1800 628-2888;... -
Page 223: Problems With System Phones
The following sections describe various difficulties that might occur, possible causes for the difficulty, and procedures you can follow to try to solve the problem. Programming procedure names are shown in boldface type; for more information on a specific procedure, refer to the procedure name in Chapter 5. Problems with System Phones System Phone Does Not Ring Possible Cause 1: Ringer volume control is set too low. -
Page 224: System Phone Display Does Not Work
System Phone Display Does Not Work Possible Cause: Date, day, and time are not set properly. What to do: Re-enter the date, day, and time using System Date (#101), System Day (#102), and System Time (#103). If the display is correct, the problem is solved. If the display is still not correct, see “System Phone Does Not Work.”... -
Page 225: Problems With Standard Phones
Problems with Standard Phones Standard Phone Does Not Ring Possible Cause 1: Ringer is turned off. What to do: Turn on the ringer If the phone rings, the problem is solved. If the phone still does not ring, go to Possible Cause 2. Possible Cause 2: Call Forwarding is turned on. -
Page 226: Standard Phone Rings Back After Intercom Call With No One At Other End
Standard Phone Rings Back After Intercom Call with No One at Other End Possible Cause 1: The switchhook on the standard phone is accidentally pressed and released, causing a call to ring back. What to do: Always replace the handset carefully. If the problem is not solved, go to Possible Cause 2. -
Page 227: Problems With Combination Extensions
Problems with Combination Extensions Phone Does Not Work Properly Possible Cause 1: Ringer equivalents are too high for the extension. What to do: Be sure the total of the two devices’ Ringer Equivalence Numbers (REN) does not exceed 2.0. If it does, unplug one of the devices. If the phone works properly, the problem is the REN was too high. -
Page 228: Other Problems With Phones
Other Problems with Phones Trouble Making Outside Calls Trouble making outside calls could be one of the following: You hear a dial tone, but the dial tone continues as you try to dial. You hear a dial tone, and the dial tone cuts off when you dial, but the line does not ring. -
Page 229: Calls Are Answered Automatically
Possible Cause 5: Too many standard devices are trying to dial simultaneously. (If the problem is on a system phone, go to Possible Cause 6.) What to do: Stay on the line and wait for dial tone, or try your call later. If you can make a call, you may want to increase the number of touch-tone receivers by adding 206 (1 receiver) or 400 (2 receivers) modules to avoid future problems. -
Page 230: Trouble Hearing Called Party Answer
Trouble Hearing Called Party Answer Possible Cause 1: If you are using a speakerphone, there may be environmental factors that affect the performance of the speaker or microphone (for example, too much background noise). What to do: See “Speakerphone Performance Tips” in Chapter 3 for suggestions on the proper use of the speakerphone. -
Page 231: Problems With Standard Devices
Problems with Standard Devices Standard Device Does Not Answer Possible Cause: A standard device (such as a fax machine or answering machine) does not answer intercom calls or transferred calls because it does not recognize the distinctive ringing pattern used by the system. What to do: Change the extension’s setting for Distinctive Ring (#308) to Not Active, so that the extension uses the same ringing for intercom and transferred calls as it does for outside calls. -
Page 232: Calls On Hold Are Disconnected
Calls on Hold Are Disconnected Possible Cause: Hold Disconnect Time setting is too short. What to do: Change Hold Disconnect Time (#203) from Short to Long. If calls on hold no longer disconnect, the problem is solved. If calls on hold still get disconnected, or the Hold Disconnect Time was already set to Long, call the AT&T Helpline.* All Phones Dead: No Dial Tone or Lights Possible Cause 1: Control unit is not receiving power. -
Page 233: Poor Transmission Quality On Modem
Poor Transmission Quality on Modem Possible Cause: A high-speed modem is connected through an extension jack on the control unit to a standard central office telephone line; but the line quality is not sufficient to generate a clear signal when the modem transmits through the system interface. What to do: Either connect the modem directly to the network interface jack for a line, or contact your local telephone company for information about upgrading line quality. -
Page 234: Specifications
Specifications Capacities System 12 outside lines via line jacks on two 206 plus two 400 modules 24 extensions via extension jacks on four 206 modules 1 loudspeaker paging system via PAGE jack on processor module 1 audio source via MUSIC ON HOLD jack on processor module (RCA phono plug required) 1 call reporting device via SMDR... - Page 235 Electrical 10 Watts (35 BTUs/hour) per 400 module, normal and maximum power consumption Specifications 65 Watts (225 BTUs/hour) per 206 module during normal operation 100 Watts (350 BTUs/hour) per 206 module during maximum power consumption 4 Amps maximum current at full system capacity (processor module and four 206 modules) On a PARTNER Plus 220V System: 2.2 Amps maximum current 4-day memory backup (96 hours) Processor Module...
- Page 236 Wiring System phones: AT&T SYSTIMAX Plenum (HALAR/HALAR) cable, or at least 2-pair (4-wire) star (“home run” not “loop”) Other standard telecommunications equipment (single-line phones, fax machines, answering machines, etc.): 1-pair (2-wire) mounting cords (AT&T D2R mounting cords recommended) Bridging adapter: AT&T 267F2 Range: 1,000 feet (305 meters) for system phones;...
-
Page 237: Repair Information
Maintenance, Repair, and Ordering Information Maintenance Your system is designed to provide trouble-free performance without any special maintenance procedures. To reduce the risk of accidental damage: Keep the system modules in an area free of dust, smoke, and moisture, and do not block the air vents by placing objects on top of the control unit. Do not place telephones near a heating duct, radiator, or other heat source, and do not drop or expose them to excessive shock or vibration. - Page 238 In-Warranty Repairs If you purchased or leased your system directly from AT&T, AT&T will repair it free of charge during the one-year warranty period.Simply call the Helpline and ask for service. Business-Day service is standard during the warranty period for both the control unit and system phones.
- Page 239 If you purchased your system directly from AT&T, AT&T will perform warranty repair in accordance with the terms and conditions of the specific type of AT&T maintenance coverage you selected. A written explanation of AT&T’s types of maintenance coverage may be obtained from AT&T by calling 1 800 247-7000 (in the continental U.S.
-
Page 240: Product Ordering Information
Product Ordering Information Reference Materials In addition to this guide, the following materials are available (the order numbers are in parentheses): System Planner (518-455-219) provides the forms needed to plan and record how your system and telephones are to be programmed. lnstallation (518-455-218) provides instructions for installing the system. - Page 241 Hardware Components Ordering additional telephones and modules, accessories, and replacement parts for your system is convenient. Table B-1 (on the next page) shows where you can buy system components in the continental United States. To take full advantage of your system, the sources shown below can also provide you with the optional equipment you might want for your system, such as AT&T fax machines, answering machines, standard phones, voice messaging systems, modems, paging systems, doorphones, headsets, bells,...
- Page 242 To use Table B-1, first locate the item you want. A triangle ( System Modules and Wiring: Processor module Line/Extension module (206E) Includes module, two 7-ft. line cords, and instructions Line module (400E) Includes module, four 7-ft. line cords, and instructions Backplane System cover AC power cord...
- Page 243 FCC Information Federal Communications Commission (FCC) Interference Information This equipment has been tested and found to comply with the limits for a Class A digital device, pursuant to Part 15 of FCC rules. These limits are designed to provide reasonable protection against harmful interference when the equipment is operated in a commercial environment.
- Page 244 FCC Notification and Repair Information This equipment is registered with the FCC in accordance with Part 68 of its rules. In compliance with those rules, you are advised of the following: Means of Connection: Connection to the telephone network shall be through a standard network interface jack USOC RJ11C.
-
Page 245: Doc Notification And Repair Information
DOC Notification and Repair Information The Canadian Department of Communications (DOC) label identifies certified equipment. This certification means that the equipment meets certain telecommunications network protective, operational, and safety requirements. The DOC does not guarantee the equipment will operate to the user’s satisfaction. - Page 246 Renseignements sur la notification du ministére des Communications du Canada et la réparation L’étiquette du ministére des Communications du Canada identifie le matériel homologué. Cette étiquette certifie que le matériel est conforme à certaines normes de protection, d’exploitation et de sécurité des réseaux de télécommunications.
-
Page 247: Speed Dial Form
Speed Dial Form Speed Dial Form This appendix contains a Speed Dial Form to be photocopied and handed out to system users. It provides space on which to write System and Personal Speed Dial numbers. For instructions on programming and using System and Personal Speed Dial numbers, see Chapter 5. - Page 248 AT&T To Dial On a system phone, press + Code Feature System Speed Dial Numbers Name/Company Telephone Number Code You can dial System Speed Dial codes with a ( ) at any time, regardless of dialing restrictions placed on your extension. System Speed Dial numbers are programmed by the System Manager (report problems and suggested revisions to your System Manager).
- Page 249 Glossary Account code A code of up to 16 digits that is associated with incoming or outgoing telephone calls. Entry of an account code may be optional or forced. If entered, an account code appears on the call record for a call.
- Page 250 Combination extension An extension that has two devices connected to it. Combination extensions can connect two standard devices or a standard device and a system phone, but not two system phones. Control unit Molded plastic housing, made up of a backplane and cover.
- Page 251 Hotline phone A standard phone at an extension set to ring another extension automatically when the handset is lifted. Hunt Group A group of extensions that takes incoming or transferred calls in round-robin fashion. Calls to the hunt group are directed to the first available extension in the group, with the extension that answered most recently being the last one in the hunt order.
- Page 252 One-touch Intercom Calling button See Intercom Auto Dial button. Outside line See Line. PARTNER Attendant An optional device that answers calls and routes them to the appropriate extension based on caller responses to a recorded announcement. Password A four-digit code assigned by the system manager that users can enter from system phones (except the MLC-6) to override dialing restrictions and to turn Night Service on and off.
- Page 253 System Programming Procedures that allow you to customize system settings for your business. System Programming requires a system display phone and must be done from extension 10 or 11. Talk-Back See Voice Interrupt On Busy Talk-Back. Telephone Programming Customizes extensions to meet the needs of individual users, including the assignment of features to programmable buttons.
- Page 254 Index AA Extensions (#607), 5-2 Abbreviated Ringing (#305), 5-3 Accessories, B-6 Account Code Entry, 5-4 - 5-6 Adding lines and extensions, 2-3, 2-5 Allowed List Assignments (#408), 5-7 Allowed Phone Number Lists (#407), 5-8 - 5-9 Amplified handset, 4-3, B-6 Answering a call at your extension, 5-10 - 5-11 ringing at another extension, 5-22, 5-61 - 5-62...
- Page 255 Dialing restrictions and permissions for fax machine, 4-14 overriding, 2-8 programming, 2-7 summary of, 2-9 with PBX/Centrex services, 2-6 Direct Line Pickup—Active Line, 5-29 - 5-30 Direct Line Pickup—Idle Line, 5-31 Direct programming method, 2-14 Direct Station Select (DSS) feature (see Auto Dial buttons and Intercom Autodialers) Disallowed List Assignments (#405), 5-32 Disallowed Phone Number Lists (#404), 5-33 - 5-34...
- Page 256 Hold button, 3-2, 5-63 - 5-64 Hold Disconnect Time (#203), 5-65 Hold, Exclusive, 5-46 Holding a call, 5-46, 5-63 - 5-64 Hospitality features description, 2-11 Outgoing Call Restriction Button (#114), 5-98 - 5-99 Wake Up Service Button (#115), 5-137 - 5-140 Hotel/Motel features (see Hospitality features) Hotline (#603), 5-66 - 5-67 Hunt Group Extensions (#505), 5-68 - 5-69...
- Page 257 Night Service auxiliary equipment with, 4-21 dialing restrictions with, 2-8 programming, 5-93 - 5-94 using, 5-93 Night Service Button (#503), 5-92 - 5-93 Night Service Group Extensions (#504), 5-94 No ring, 5-78 Notify feature, 4-13 Number of Lines (#104), 5-95 Numbering of lines and extensions, 2-2 One-touch transfer (see Auto Dial numbers) Optional equipment, 1-6, 2-10, 4-1...
- Page 258 Restrictions, dialing for fax machine, 4-14 overriding, 2-8 PBX/Centrex operation, 2-6 programming, 2-7 summary, 2-9 Retrieving a held call, 5-63 - 5-64 Ringer Equivalence Number (REN), 1-7, A-1, A-3 Ringer volume controls, 3-3 Ringing patterns standard phones, 3-8 system phones, 3-5 Ringing, Abbreviated (#305), 5-3 Ringing, Line, 5-78 - 5-79 Rings, Transfer Return (#105), 5-128...
- Page 259 Technical specifications, A-1 Telephone company notification, A-2 Telephone Programming at extension, 2-20 Auto Dial buttons, 2-15, 5-12 - 5-13 centrally (at extension 10 or 11), 2-17 dial-code features, 2-15 individual procedures, 5-1 lines, 2-4, 2-15 methods, 2-17 options, 2-4 - 2-5, 2-15 overview, 2-15 receptionist extension, 2-16 speed dialing, 2-15...
- Page 260 Centralized Telephone Programming Quick Reference Place the Programming Overlay on the dial pad of the system display phone at extension 10 or 11 TO ENTER PROGRAM MODE PRESS Feature PRESS System Program System Program Central Tel Program DIAL the extension number to be programmed Buttons on which lines are assigned for the extension light up to show the current Line Ringing setting;...
- Page 261 Place the Programming Overlay on the dial pad of the system display phone at extension 10 or 11 TO START SYSTEM PROGRAMMING TO END SYSTEM PROGRAMMING PRESS PRESS Feature PRESS System Program TO USE A SPECIFIC PROCEDURE PRESS System Program DIAL Example: System...
- Page 262 Dialing Restrictions and Permissions OUTGOING CALL RESTRlCTI0N (p. 5-96) EMERGENCY PHONE NUMBER DIAL #401 LIST DIAL an extension number DIAL #406 DIAL 1 = No Restriction 2 = Inside (intercom) Only DIAL a list entry (01–10) 3 = Local (intercom and To add entry: local) Only DIAL...
- Page 263 Graphics © AT&T 1988 October 1993 518-455-217 Issue 1...