Table of Contents
Advertisement
Quick Links
Rack-Mounting
Attaching the rack-mount angles
By attaching the included rack-mount angles to this unit, you can
mount it in a rack.
1.
Remove the screws from the side panels.
2.
Using the screws that you removed, attach the rack-
mount angles as shown in the illustration.
NOTE
5 Install in a well-ventilated location.
5 Do not block the cooling vents located on the unit's side
panels.
5 Avoid mounting the unit in a sealed-type rack. Warm
air within the rack cannot escape and is sucked into the
unit, making efficient cooling impossible.
5 If the back of the rack cannot be opened, install an exhaust port
or ventilation fan at the top back surface of the rack, where warm
air collects.
5 When using the unit while mounted in a movable case
(portable rack), remove the front and rear rack covers so that the
front and back of the unit are not obstructed.
5 Take care not to pinch your fingers etc. while mounting the unit
in a rack.
Before using the unit, ensure that its system program is at the most recent version. For information on available upgrades for the system
program, see the Roland website (https://proav.roland.com/).
You can check the system program version by pressing the [SETUP] button to access the Setup Menu screen0"Root "System"0
"Information."
Before using this unit, carefully read "USING THE UNIT SAFELY" and "IMPORTANT NOTES" (the leaflet "USING THE UNIT SAFELY" and the Startup Guide (p. 8)).
After reading, keep the document(s) where it will be available for immediate reference.
Free-Standing Use
Attaching the rubber feet
If you will be placing this unit on a desk or shelf for use, attach the
included rubber feet (4 pcs.). This prevents the unit from slipping or
from scratching the surface on which it is placed.
1.
Remove the rubber feet from the sheet.
2.
Peel the double-sided tape off the rubber feet, and
affix the feet so that they cover the four guide holes on
the bottom of the unit.
PDF Manual
(download from the Web)
Details on operations and menu lists are provided in "Reference
Manual" (PDF).
Downloading
1.
Access the Roland website.
https://proav.roland.com/
Move to the product page 0 click "Support" 0
2.
download the applicable PDF file.
Startup Guide
© 2020 Roland Corporation
Advertisement
Table of Contents

Related Manuals for Roland VC-100UHD


Summary of Contents for Roland VC-100UHD
- Page 1 Before using the unit, ensure that its system program is at the most recent version. For information on available upgrades for the system program, see the Roland website (https://proav.roland.com/). You can check the system program version by pressing the [SETUP] button to access the Setup Menu screen0“Root “System”0 “Information.”...
-
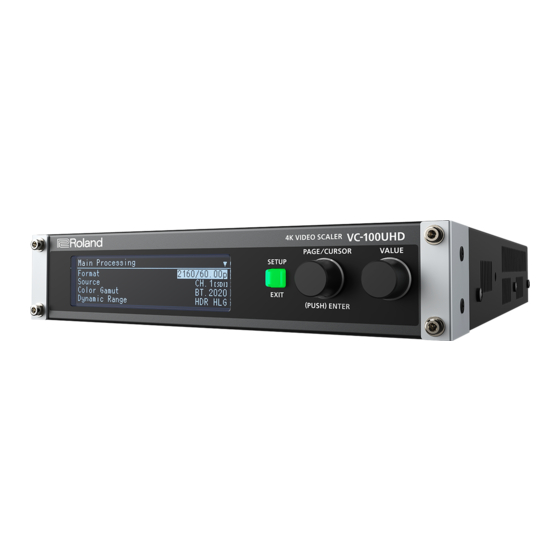
Page 2: Panel Descriptions
Front Panel Name Explanation This shows various information about the VC-100UHD. Display 5 If you press this when it is unlit, the setup menu screen appears. 5 If you press this when it is lit green, you move from the setup menu screen to the status screen, and the button goes dark. -
Page 3: Rear Panel
This unit does not have a power switch. We recommend that you use a commercially available power supply control device to control the AC power of this unit. Turn on the power in the order of VC-100UHD 0 source devices 0 output devices. When powering up Turn off the power in the order of output devices 0 source devices 0 VC-100UHD. -
Page 4: Basic Operations
Basic Operations Video Processing in the VC-100UHD (Overview) This unit is a scaler equipped with SDI and HDMI inputs and outputs. It can convert between SDI and HDMI, and perform format conversion. It has three processing systems, MAIN, SUB, and USB, and you can individually specify scaling and output format for each of these. - Page 5 Basic Operations Operations in the Status/Setup Menu Screens Status screen On this unit you’ll use the “status screen” or the “setup menu screen” to make various settings. Here you can check the status of this unit’s signals. This also provides shortcuts to frequently-used parameters.
- Page 6 Basic Operations Zooming the Video In/Out Here we explain basic use of this unit. Specifying the Video Input Connector In this example, we explain how, starting with the settings following factory reset, we can scale the SDI input to 1080p and output it from Here we specify the video input as SDI for channel 1.
- Page 7 Basic Operations Scaling In the Root menu screen, turn the [PAGE/CURSOR] knob to select “Channel,” and then press the [PAGE/CURSOR] knob. The currently selected channel is shown with square brackets [ ]. Turn the [PAGE/CURSOR] knob to select “CH. 1,” and then press the [PAGE/CURSOR] knob.
-
Page 8: Using The Unit Safely
Co., Ltd. in Japan. product at the time that the document was issued. • This Product uses the Source Code of μT-Kernel under For the latest information, refer to the Roland website. T-License 2.0 granted by the T-Engine Forum (www. tron.org).