
Related Manuals for Sony DNW-A220


Summary of Contents for Sony DNW-A220
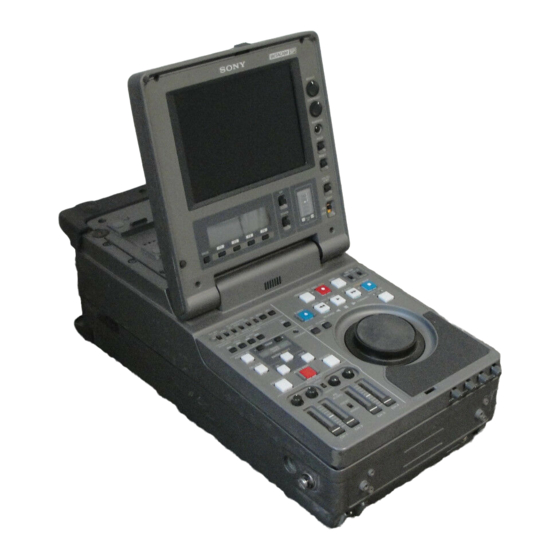
- Page 1 DIGITAL VIDEOCASSETTE RECORDER DNW-A220 DNW-A220P MAINTENANCE MANUAL Part 1 2nd Edition (Revised 4) Serial No. 31001 and Higher Serial No. 51001 and Higher...
- Page 2 ! WARNING This manual is intended for qualified service personnel only. To reduce the risk of electric shock, fire or injury, do not perform any servicing other than that contained in the operating instructions unless you are qualified to do so. Refer all servicing to qualified service personnel.
-
Page 3: Table Of Contents
1-15-2. Equipment for Adjustment ............1-45 1-16. Settings for External Editors ..............1-46 1-16-1. Time Code Settings for Recorder ..........1-46 1-16-2. VTR Constant Settings for External Editors ......1-46 1-16-3. System Phase Adjustment ............1-47 1-16-4. Setup Menu Setting of ITEM-701..........1-47 DNW-A220 DNW-A220P... - Page 4 INT AUDIO SG LEVEL (M37) ..........3-53 3-4-7. MEMORY CARD UTILITY Menu ......... 3-54 3-5. Setup Maintenance Mode (M4) ..............3-61 3-5-1. Outline ..................3-61 3-5-2. EXTENDED MENU Display Selection Menu (M40) ..... 3-61 3-5-3. RESET ALL SETUP Executing Menu (M49) ......3-62 DNW-A220 DNW-A220P...
- Page 5 Notes on Repair Parts .................. 5-1 5-2. Exploded Views ..................5-2 5-3. Pulg-in Boards ..................... 5-3 5-4. Optional Accessories List ................5-4 5-5. Fixtures List ....................5-5 6. Overall Block Diagram and Circuit Description Appendix A Setting Check Sheet DNW-A220 DNW-A220P...
-
Page 7: Manual Structure
Purpose of this manual This manual is the maintenance manual part1 of digital videocassette recorder DNW-A220/A220P. This manual is intended for use by trained system and service engineers, and provides the setting and maintenance information necessary at the time of primary service. -
Page 8: Related Manuals
DNW-A220/A220P. • Operation Manual (Supplied with the DNW-A220/A220P.) This manual is necessary for application and operation of the DNW-A220/A220P. • Maintenance Manual Part 2 (available on request ) This manual describes the information that premises the parts level service (adjustments, board layouts, schematic diagrams, detailed parts list, etc.) for this... -
Page 9: Service Overview
Connection example Ni-cd battery BP-90A AC adaptor Lithium-ion battery Battery adaptor AC-DN2/DN2A BP-L90/L60 DC-L90 DC OUT Battery terminal DNW-A220/A220P Rear View DC IN AC adaptor AC-550/550CE (DC cable) Ni-cd battery BP-90A Battery adaptor DC-210 DNW-A220 DNW-A220P... -
Page 10: Connection Connectors/Cables
VIDEO OUTPUT TC IN TC OUT SDI IN Plug, BNC (1-564-742-11) BNC coaxial cable SDI OUT (1-783-090-11:supplied with DNW-A220/A220P) or BELDEN 8281 cable (Maximum cable length: 200m) AUDIO INPUT XLR 3P, MALE (1-508-084-00) ––––––– AUDIO OUTPUT XLR 3P, FEMALE (1-508-083-00) –––––––... -
Page 11: Connector Input/Output Signals
Component digital (270 Mbit/s) SMPTE 259M/ITU-R BT.656 TC IN BNC x1 Time code 0.5 to 18.0 Vp-p, 10 kZ, unbalanced DC IN XLR 4-pin x1 DC +11 to 17 V BATTERY IN 5-pin terminal x1 (on battery sub panel) Lithium-ion battery interface DNW-A220 DNW-A220P... - Page 12 Time code 1.0 Vp-p ± 3 dB (75 Z load), unbalanced DC OUT 4-pin connector x1 (for BVR-3) DC +12 V (+11 to 17 V), 0.5 A (max) HEADPHONES JM-60 stereo phone jack (at the front) Analog audio up to _20 dBu adjustable (8 Z load), unbalanced DNW-A220 DNW-A220P...
- Page 13 7 DC OUT (4P Female) Pin No. Signal UNREG GND (External View) UNREG +12 V 1 AUDIO INPUT (3P Female) 9 AUDIO OUTPUT (3P Male) !- MONITOR OUTPUT (3P Male) Male Female Pin No. Signal (External View) (External View) DNW-A220 DNW-A220P...
- Page 14 1-3. Connector Input/Output signals ![ AUX (6P Female) Pin No. Signal COM RX COM TX REG GND (External View) BATTERY IN (5P) Pin No. Signal BATT (_) BATT ID DET (External View) BATT REM LIGHT CONT BATT (+) DNW-A220 DNW-A220P...
-
Page 15: Location Of Main Parts And Circuit Function
The following outline the differences in the appearance and functions of the recorder and player. Player side Appearance . Identification label and serial number L (left) indication DNW-A220 MODEL Identification label DIGITAL VIDEOCASSETTE RECORDER DC 12V 60W Serial number: 50000 range... -
Page 16: Function And Location Of Printed Circuit Boards
1-4. Location of Main Parts and Circuit Function 1-4-2. Function and Location of Printed Circuit Boards !. ** !, * !] * : only for player ** : only for recorder DNW-A220 DNW-A220P... - Page 17 Video processing VPR-34 Video signal processor Video process D-A, Composite encoder DEC-97 Analog composite decoder Analog Betacam DM-114 (for DNW-A220) RF demodulator for analog Betacam PB, TBC video PB processing DM-114P (for DNW-A220P) (only for player) Audio processing APR-27 Audio signal processor...
-
Page 18: Location Of Main Mechanical Parts
1-4. Location of Main Parts and Circuit Function 1-4-3. Location of Main Mechanical Parts 1-10 DNW-A220 DNW-A220P... - Page 19 Tension regulator band Timing belt (reel) T reel table T soft brake Gear S reel motor S reel table Brake solenoid S main brake S tension regulator arm S slider Full erase head Tape cleaner CTL head 1-11 DNW-A220 DNW-A220P...
-
Page 20: Function And Location Of Sensors
1-4. Location of Main Parts and Circuit Function 1-4-4. Function and Location of Sensors 1-12 DNW-A220 DNW-A220P... - Page 21 Detects the state of the REC inhibit plug of a cassette. Tape end sensor Detects the end of the tape running in the forward direction. Condensation sensor Detects whether the dew condensation occurs in the unit or not. 1-13 DNW-A220 DNW-A220P...
-
Page 22: System Of Cassette
Cassette for Betacam or Betacam SP Small cassette (S cassette) S cassette REC inhibit tab (for oxide tape) Tape thickness detection tab Metal tape detection tab Reel hub diameter detection tab S cassette REC inhibit plug (for metal particle tape) 1-14 DNW-A220 DNW-A220P... - Page 23 * : For the metal particle tape, digital recording can be performed using a Betacam SX format. Cassette classification detection tabs : with tab (closed), : without tab (opened) State of tabs Cassette class Remarks Betacam or Betacam SP ——— Betacam SX ——— Digital Betacam Unusable Except the above class Unusable 1-15 DNW-A220 DNW-A220P...
-
Page 24: Removing/Installing The Cabinet
..The screws securing the connection plates should be torqued as specified. 1.4 N..m (14 kgf..cm) Tightening torque: DNW-A220 (SY) S/N 31331 and higher Screw 51331 and higher... -
Page 25: Battery Sub Panel
Screw Battery sub panel Harness (B) CN-1662 board Screws CN-1662 board Portion B Harness (A) Board lever Screw Battery sub panel Fan motor Shielding spring Portion A 1-17 DNW-A220 DNW-A220P... -
Page 26: Upper Frame
Do not apply excessive force in this case. 6. Insert the SY-259/259A, SY-260, DPR-87, and VPR-34 boards. (Refer to Section 1-8-1.) 7. Install the battery sub-panel. 8. Confirm that the four screws on the connector panel are not loosened. If so, tighten them again. 1-18 DNW-A220 DNW-A220P... - Page 27 SY-259/259A board Screw Connector panel Screw SY guard Main frame Blind panel of the cassette comparttment DNW-A220 (SY) DNW-A220P (SY) DNW-A220 (SY) DNW-A220P (SY) S/N 31231 and higher S/N 31271 and higher S/N 31001 through 31230 S/N 31001 through 31270...
-
Page 28: Connector Panel
When installing, route as the following figure so that the harness (B) does not touch the blade of the fan motor. Harnesses (A) Board holders Harnesses (A) CP-317 board Shielding spring Harness (B) Screws Installation Harness (B) Conector panel Shielding spring Screws 1-20 DNW-A220 DNW-A220P... -
Page 29: Bottom Plate
6. After the bottom plate is installed, confirm that the four screws on the connector panel are not loosened. Screw Screw Display panel Screw Connector panel Screw Screw VR control Screw Bottom plate Screw (A) POWER switch Screw 1-21 DNW-A220 DNW-A220P... -
Page 30: Removing/Installing The Cassette Compartment
Positioning Alignment PSW2 x 5 Reference hole Cassette compartment (Function cam) Release lever Release lever Mecanical deck assembly Eject link assembly Release lever Harness of the AT head Manual eject knob Eject link assembly Ejevt link assembly 1-22 DNW-A220 DNW-A220P... -
Page 31: Disconnecting/Connecting The Printed Circuit Board
. When extending AU-249 board using an extension board (EX-617), remove the upper frame and unclamp the above-mentioned harness before extending. (Refer to Section 1-6-3.) [Applicable serial No. for DNW-A220 (SY) : 31001 thru 31230, 51001 thru 51230] [Applicable serial No. for DNW-A220P (SY) : 31001 thru 31270, 51001 thru 51270] . - Page 32 [Applicable serial No. for DNW-A220 (SY) : 31001 thru 31230, 51001 thru 51230] [Applicable serial No. for DNW-A220P (SY) : 31001 thru 31270, 51001 thru 51270] 3.
-
Page 33: Dm-114/114P Board
PWH2.6 x 5 PWH2.6 x 5 PWH2.6 x 5 Harness arrangement RV503 Harness RV504 Harness DNW-A220 (SY) DNW-A220P (SY) DNW-A220 (SY) DNW-A220P (SY) S/N 31001 through 31090 S/N 31001 through 31080 S/N 31091 and higher S/N 31081 and higher 51001 through 51080... -
Page 34: Settings For Internal Switches/Slit Lands
Output headroom ( ) : Factory setting Channel Ref.No.(Indication) (20 dB) 18 dB 16 dB CH1/CH3 SL301 (18 dB) Open Short Open SL302 (16 dB) Open Open Short CH2/CH4 SL401 (18 dB) Open Short Open SL402 (16 dB) Open Open Short 1-26 DNW-A220 DNW-A220P... - Page 35 SL601 (18 dB) Open Short Open SL602 (16 dB) Open Open Short Switches Do not change settings of the factory-use switches. Ref.No. Description Factory setting S1-1 Factory use S1-2 Factory use S1-3 Factory use S1-4 Factory use 1-27 DNW-A220 DNW-A220P...
- Page 36 OFF: Normal mode ON: Adjustment/Test mode S901-2 Factory use S901-3 AGC OFF Turns on and off the AGC function during RF EQ adjustment OFF: Normal mode (AGC is turned on) ON: AGC is turned off S901-4 Factory use 1-28 DNW-A220 DNW-A220P...
- Page 37 B-Y and R-Y signals (if present) is corrected by the digital clamp function Turn on only to turn off the digital clamp for test OFF: Normal mode (Digital clamp is turned on) ON: Digital clamp is turned off S1801-2 Factory use S1803-3 Factory use S1803-4 Factory use 1-29 DNW-A220 DNW-A220P...
- Page 38 Selects how the power is derived when the battery and external power supply Open are used simultaneously Open: Always derived from the external power supply Short: Normally derived from the external power supply When an input voltage is 10.5 V or below, automatically selects the battery 1-30 DNW-A220 DNW-A220P...
- Page 39 ON: Inhibits the auto-tracking (Tracking VR becomes active) OFF: Normal mode S100-5 Factory use S100-6 Factory use S101 INITIAL When powered on while pressing this switch, the servo ––– adjustment data is returned to its default value 1-31 DNW-A220 DNW-A220P...
- Page 40 S202-7 J/UC OFF: for Japan ON: except Japan S202-8 525/625 OFF:525/60 model OFF (for DNW-A220) ON:625/50 model ON (for DNW-A220P) SY-260 Board S201 (address: D1) on the SY-260 board is for factory use only. → ON Factory setting : S201-1 S201-2 to 8 →...
-
Page 41: Description On Internal Indicators
Lit when the SDI format signal is normally received at SDI IN connector D801 VCO ADJ OF Green Lit when EVR (electronic volume) data comes near its ––– MAINTENANCE proper value during VCO free-run adjustment in the maintenance mode 1-33 DNW-A220 DNW-A220P... - Page 42 Unlit when the above communication is under abnormal conditions D204 SY2 ERR Lit when the SYS2 CPU does not normally operate. Dark Blinks when communication between SYS2 CPU and other CPU (SYS1, or SV) is under abnormal conditions 1-34 DNW-A220 DNW-A220P...
- Page 43 Orange (board suffix -11) Normally blinks for some ten milliseconds Blinking Green (board suffix -12) at intervals of about 1 sec In adjustment mode (with S901-1 turned on), the blink is inverted D1802 Green Blinks once a second during TBC micro- Blinking computer operation 1-35 DNW-A220 DNW-A220P...
- Page 44 1. NV-RAM check sum error 2. NV-RAM verifying error 3. INNER ECC status error 4. REC data parity error 5. When conditions necessary for automatic adjustment are not ready 6. When communication with system control is not started 1-36 DNW-A220 DNW-A220P...
- Page 45 1.1 to 1.5 s 1.1 to 1.5 s RAM error Unlit some 10 milliseconds 0.1 s 0.5 s 0.5 s Repeated System control dual port RAM error Unlit some 10 0.1 s milliseconds Repeated 0.5 s 0.5 s 0.5 s 1-37 DNW-A220 DNW-A220P...
-
Page 46: How To Take Out The Cassette Whose Tape Is Slacked
Manual eject Manual eject knob (white) knob (red) Capstan cap Capstan cap portion portion DNW-A220 (SY) DNW-A220P (SY) DNW-A220 (SY) DNW-A220P (SY) S/N 31001 through 31090 S/N 31001 through 31080 S/N 31091 and higher S/N 31081 and higher 51001 through 51090... -
Page 47: Cleaning Clogged Video Heads
To clean using a cleaning tape: 4-2-1. Using Cleaning Tape To clean using a cleaning cloth: 4-2-2. General Information for the Use of Cleaning Cloth 4-2-3. Cleaning of Video Heads and Tape Running Surface of Upper Drum Specified Cleaning Tape BCT-5CLN 1-39 DNW-A220 DNW-A220P... -
Page 48: Power Protection
The IC links are critical for safe operation. Be sure to replace them with the specified parts to avoid the danger of a fire or electric shock. Board Ref.No. Description Part No. FL-251 IC LINK 0.4 A ! 1-576-122-21 CP-317 PS600 IC LINK 2 A ! 1-533-282-21 1-40 DNW-A220 DNW-A220P... -
Page 49: Battery For Memory Backup
3. Carefully install a new battery, ensuring that the mark's on the BT112 and IC112 are aligned. 4. Reset the current menu and menu banks. (Refer to the operation manual.) BT112 Mark IC112 Mark SY-259/259A board Driver 1-41 DNW-A220 DNW-A220P... -
Page 50: Fixtures And Adjustment Equipment List
Parallel pin (d = 2.0 mm) Fixing position of threading gear/drawing arm when installing 18 7-432-114-11 Screw locking compound (200g) Inhibits loosening of screws 19 7-651-000-10 Sony grease SGL-601 (50 g) 7-651-000-11 Sony grease SGL-801 (50 g) P1/P2 7-651-001-59 Grease PG-662 (20 g) 20 7-661-018-18... - Page 51 IC memory card (4 MB, MB98A81273) P1= Used in the maintenance manual Part 1./P2= Used in the maintenance manual Part 2. Refer to “1-4. Alignment tape” of the maintenance manual Part 2 for details of the alignment tapes. 1-43 DNW-A220 DNW-A220P...
- Page 52 1-15. Fixtures and Adjustment Equipment List 1-44 DNW-A220 DNW-A220P...
-
Page 53: Equipment For Adjustment
625/50 system Terminator 75 Z BNC type Recording tape Sony Betacam SX tape (BCT-60SX etc.) *1: P2= Used in the maintenance manual Part 2. *2: Use the composite video monitor that is applicable to the places in the world... -
Page 54: Settings For External Editors
ROM version 1.08 or lower . BVE-600 ROM version 1.01 or lower 2. If the unit is controlled by the editor, be sure to set ITEM-401 on the setup menu as follows; . ITEM-401: FUNCTION MODE AFTER CUE-UP 8 0: stop 1-46 DNW-A220 DNW-A220P... -
Page 55: System Phase Adjustment
. ITEM-701: SELECTION OF VIDEO/SYNC DELAY 1: VIDEO DELAY To prevent the picture shift in switching between when editing from VTR to VTR Be sure to set the data No. of ITEM-701 for a recorder to "0: SYNC DELAY". 1-47 DNW-A220 DNW-A220P... -
Page 56: Setup Menu
ENTRY PREVIW AUTO EDIT REVIEW AUDIO INPUT AUDIO INPUT CH-1 CH-2 CH-1 CH-2 PRESET PRESET VARIABLE VARIABLE AUDIO AUDIO PRESET PRESET VARIABLE VARIABLE CH-1 CH-2 CH-3 CH-4 CH-1 CH-2 CH-3 CH-4 〈 Player 〉 〈 Recorder 〉 1-48 DNW-A220 DNW-A220P... -
Page 57: F-Series Items
9-pin remote connector or the setup menu "006: LOCAL FUNCTION ENABLE" is set to "all disable" Settings of PROCESS CONTROL VR and sub LCD menu are disabled Settings of PROCESS CONTROL VR and sub LCD menu are enabled 1-49 DNW-A220 DNW-A220P... -
Page 58: Memory Card
3. Connect the CN-1936 board to the connector (CN1) on the SY-259A board. 4. Connect the Memory card box (CDS-20 assembly) to the CN-1936 board. CN-1936 board SY-259A board Memory card box (CDS-20 assembly) 5. Turn the power on. 1-50 DNW-A220 DNW-A220P... - Page 59 “SY1/SY2/SV : ver. 4.00 and higher, KY : ver. 1.22 and higher, SW : ver. 1.04 and higher” A memory card with the new version software is required for updating software. Please contact your local Sony Sales Office/Service Center to memorize the updating software to the memory card.
-
Page 61: Error Message
. The messages on the sub LCD differ from the messages which are superimposed on the LCD monitor (video monitor) in some items. LCD monitor WARNING indicator Sub LCD error message display area Error Message/Code Display Area and WARNING Indicator DNW-A220 DNW-A220P... - Page 62 Also, if multiple errors occur in error group, the priority level of each group display are as follows: VTR: 97, 02, 03, 04, 07, 06, 01, 09, 08, 10, 12, 13 OTHERS: 92, 96, 98, 99, 93, 40, 43 DNW-A220 DNW-A220P...
-
Page 63: Details Of Error Messages
The messages on the sub LCD differ from the messages which are superimposed on the LCD monitor in some items. In this section, each message indicates as following example. Ex. : ERROR-09 TH/UNTH MOTOR TIME OUT (TH/UNTH MOTOR) Message on sub LCD Message superimposed on LCD monitor DNW-A220 DNW-A220P... -
Page 64: Reel Trouble
. Take-up reel table height adjustment defect Protecting operation: Enters the protection mode. Be sure to take out the cassette manually (refer to Section 1-11). Do not turn the power on again without taking out the cassette. This may damage the tape. DNW-A220 DNW-A220P... -
Page 65: Reel Trouble
Be sure to take out the cassette manually (refer to Section 1-11). Do not turn on the power again without taking out the cassette. This may damage the tape. DNW-A220 DNW-A220P... -
Page 66: Reel Trouble
Stop the tape transport and enters the rest state. Be sure to take out the cassette manually (refer to Section 1-11). Do not turn on the power again without taking out the cassette. This may damage the tape. DNW-A220 DNW-A220P... -
Page 67: Reel Trouble
. Servo adjustment defect on supply reel and supply tension sensor . Supply reel brake trouble . Supply reel brake solenoid drive circuit (SV-194 board) trouble . Harness disconnection Protecting operation: Stops the tape transport and enters the rest state. DNW-A220 DNW-A220P... -
Page 68: Capstan Trouble
. Drum microcomputer (IC212 on SV-194 board) trouble . Drum motor drive circuit (SV-194 board) trouble . Drum FG/PG waveform shaper circuit (SV-194 board) trouble . Assembly defect during upper drum replacement Protecting operation: Stops the tape transport and enters the rest state. DNW-A220 DNW-A220P... -
Page 69: Th/Unth Motor
PLAY and REC mode. Prohibits the tape threading. When this sensor detects due condensation once, the error message will be displayed for about 40 minutes even if a dry state is detected later. DNW-A220 DNW-A220P... -
Page 70: Tape Top Sensor
. Tape end input port (IC116 on SV-194 board) trouble . Harness disconnection . The tape cannot move at the tape end due to troubles other than the tape sensor. Protecting operations: Stops the tape transport and enters the rest state during tape transport. 2-10 DNW-A220 DNW-A220P... -
Page 71: Fan Motor
F-CONT DIGI FIL SX ENC SX MEP ECC ENC OUTER SX DEC For diagnostic of DPR-87 board, refer to section 1-8 (menu number:C24) of maintenance manual part 2 volume 1. Protecting operation : Displays only this error. 2-11 DNW-A220 DNW-A220P... - Page 72 . MPU control interface circuit (IC209, IC307 and IC308 on SY-259/ 259A board) trouble . KY-400/406 board’s MPU (IC8) trouble Protecting operations: When the sub error message is “SY2”, enters the protection mode. When it is except above, displays only this error. 2-12 DNW-A220 DNW-A220P...
-
Page 73: Sy Nv-Ram Error
When the error occurs in ID data, resets the data to 00 00 00 00. When the error occurs at the calendar/clock function, resets the date and time data to ’96 11 01 00 00 00 (Year, Month, Day, Hour, Minute, Second). 2-13 DNW-A220 DNW-A220P... -
Page 74: Nv-Ram
TBC: When the error occurs in an NV-RAM (IC1812 on DM-114/114P board) during the data write or read. Possible causes: Trouble of an NV-RAM indicated by sub error message Protecting operation: None 2-14 DNW-A220 DNW-A220P... - Page 75 SDI: . MPU control interface circuit (IC402, 459 and 460 on SY-260 board) trouble . SDI-23 board’s MPU (IC455) trouble Protecting operations: When the sub error message is “SV”, enters the protection mode. When it is except above, displays only this error. 2-15 DNW-A220 DNW-A220P...
-
Page 77: Maintenance Mode
M4 : SETUP MAINTENANCE ... (Section 3-5) SETUP MAINTENANCE MODE This mode is used for the setup menu. The display on the left is M40 : EXTENDED MENU M49 : RESET ALL SETUP one of the displayed examples. DNW-A220 DNW-A220P... - Page 78 (“JOG DIAL” is displayed on the LCD monitor.) The data value or setting can be changed when the JOG dial or shuttle dial (depend on search mode) is turned while pressing the 7 search button. DNW-A220 DNW-A220P...
- Page 79 SY-259/259A board Location of Switches on SY-259/259A Board Remove the SY-259/259A board referring to Section 1-6-1 when operating the switches on the SY-259/ 259A board. Change the setting of DIP switch S201 with the power switch set to OFF. DNW-A220 DNW-A220P...
- Page 80 (1) Push the 2 MENU button several times to display the mode screen on the video monitor. The selected mode No. and title are displayed in a time counter. (2) Push the 2 MENU button again to terminate the maintenance mode. DNW-A220 DNW-A220P...
- Page 81 (menu) in the same row. Display the mode (menu) which you wish C0 -SER V O CHECK C1 -RF C HECK to open and press the SET button. The mode (menu) is then opened. Turn JOG dial Example in sub LCD DNW-A220 DNW-A220P...
-
Page 82: Tape Maintenance Mode (M0)
C0 : SERVO CHECK C1 : CHECK C2 : AUDIO/VIDEO CHECK C3 : BETACAM PB CHECK A0 : SERVO ADJUST A1 : ADJUST A2 : AUDIO/VIDEO ADJUST A3 : BETACAM PB ADJUST A4 : MECHANISM ADJUST TAPE Maintenance Mode DNW-A220 DNW-A220P... - Page 83 C02 : PLUNGER SOL. CHECK — Check menu of solenoids C020 : S REEL BRAKE 3-24 Checks the S reel brake solenoid. C03 : REEL/CAPSTAN MOTOR & 3-25 Continuous check menu of reel and capstan motors FG CHECK DNW-A220 DNW-A220P...
- Page 84 C23 : AUDIO TEST SG 3-40 Sets the audio test signal generator incorporated into this unit. C24 : DPR-87 DIAG INFO — Displays the result of self diagnostic in DPR-87 board. (Refer to maintenance manual part 2 volume 1.) DNW-A220 DNW-A220P...
- Page 85 This menu is displayed only for player. For more details, refer to Section 3-2-5. BETACAM PB CHECK MODE C30:CHANNEL CONDITION Title Page Description C30 : CHANNEL CONDITION 3-41 Checks the RF level condition for each video channel (Y and C) to be played back. DNW-A220 DNW-A220P...
- Page 86 A004 : CAPSTAN FREE SPEED — Automatically adjusts the capstan free speed. A005 : RF SWITCHING POS. — Automatically adjusts the RF switching position. A006 : NV-RAM CONTROL — Saves the adjustment data in a servo system. 3-10 DNW-A220 DNW-A220P...
- Page 87 Automatically adjusts the gain when a PB RF signal is converted from analog to digital. A17 : A11-A16 ALL ADJUST — Continuously executes the above automatic adjustment menus A11 to A16. A1F : NV-RAM CONTROL — Saves the adjustment data in an RF system. 3-11 DNW-A220 DNW-A220P...
- Page 88 — Adjusts the composite video input (in the multi-loop state). A27 : VIDEO METER — Calibration of video meter on the sub LCD. A2F : NV-RAM CONTROL — Saves the adjustment data in audio and video systems. 3-12 DNW-A220 DNW-A220P...
- Page 89 This submode is used to adjust the mechanism part. For more details, refer to maintenance manual part 2 volume 1. MECHANISM ADJUST A40:PATH MODE SEL Title Page Description A40 : PATH MODE SEL Sets the tape PB mode (Used for transport adjustment). 3-13 DNW-A220 DNW-A220P...
-
Page 90: Servo Check Mode (C0)
C03 : REEL/CAPSTAN MOTOR & FG CHECK Menu Tree of Servo System Check Mode A cassette tape is automatically ejected if it has been inserted into this unit when the C00-03 : SERVO CHECK screen is shifted to the lower-level menu. 3-14 DNW-A220 DNW-A220P... -
Page 91: C000 : Cassette Sw
. Check the sensor input port of CPU (IC401 on the SV-194 board). Cassette tab sensors 1 Reel hub sensor 2 Metal/oxide tape sensor 3 Tape thickness sensor 4 Spare sensor 2 5 Spare sensor 1 6 Degital/analog tape sensor INHIBIT SENSOR Locations of Sensors (Switches) 3-15 DNW-A220 DNW-A220P... -
Page 92: C001 : Cassette Comp
. Check the cassette compartment down sensor on the SV-194 board. INPUT CHECK . Check the sensor input port of CPU (IC304 on the SV-194 board). C001:CASSETTE COMP. SW Cassette compartment down sensor Cassette compartment down sensor 3-16 DNW-A220 DNW-A220P... -
Page 93: C002 : Top/End Sensor
. Check the oscillator and detection circuit (IC405 on the SV-194 board) for sensors. . Check the sensor input port of CPU (IC116 on the SV-194 board). Tape end sensor Tape top sensor Locations of Tape Top and Tape End Sensors 3-17 DNW-A220 DNW-A220P... -
Page 94: C003 : Dew Sensor
DEW SENSOR : WET! . Check the sensor itself. . Check the detection circuit (on the SV-194 board). . Check the sensor input port of CPU (IC401 on the SV-194 board). Dew condensation sensor Location of Dew Condensation Sensor 3-18 DNW-A220 DNW-A220P... -
Page 95: C010 : S Reel Motor
. Check the reel FG shaping circuit (on the SV-194 board). When the brake solenoid operation is defective . Check the S brake solenoid. (C021) S reel motor FG sensor for T reel table Locations of Reel Table FG Sensors 3-19 DNW-A220 DNW-A220P... -
Page 96: C011 : Function Cam Motor
. Check the function cam sensor (on the SV-194 board). . Check the function cam sensor circuit (on the SV-194 board). . Check the function cam motor drive circuit (on the SV-194 board). . Check the function cam motor. 3-20 DNW-A220 DNW-A220P... - Page 97 (TP304) (TP303) (TP302) (TP301) UNTHREAD END THEADING UNTHREADING THREAD END Threading link PH303 PH302 Function cam PH304 TP301 TP302 sensors TP303 PH301 TP304 Function cam SV-194 Board (A Side) Locations of Threading End and Unthreading End Sensors 3-21 DNW-A220 DNW-A220P...
-
Page 98: C012 : Capstan Motor
C012:CAPSTAN MOTOR . Check the capstan FG shaping circuit (on the SV-194 board). FORWARD..OK . Check each circuit that processes the capstan FG on the SV-194 board. . Check the capstan motor. Capstan motor Location of Capstan Shaft 3-22 DNW-A220 DNW-A220P... -
Page 99: C013 : Drum Motor
. Check the FG and PG outputs from a drum motor. . Check each circuit that processes the drum FG/PG on the SV-194 board. After about 3 sec. 3 MOTOR CHECK C013:DRUM MOTOR SPEED : PHASE : LOCK EXIST 3-23 DNW-A220 DNW-A220P... -
Page 100: C020 : S Reel Brake
. Confirm that no mechanical abnormality exists. . Check the drive circuit of the reel brake solenoid (on the SV-194 board). . Check the reel brake solenoid itself. Brake solenoid S reel table Locations of Reel Brake Solenoids 3-24 DNW-A220 DNW-A220P... - Page 101 FG duty adjustment (A003). [MENU] C00:INPUT CHECK C01:MOTOR CHECK C02:PLUNGER SOL. CHECK C03:REEL/CAPSTAN MOTOR & FG CHECK (Ex. of NG) REEL/CAPSTAN MOTOR & FG CHECK S REEL FG/MOTOR CHECK # CHECK INCOMPLETE # 3-25 DNW-A220 DNW-A220P...
-
Page 102: Rf Check Mode (C1)
The C1 : RF CHECK mode is used to check the PB RF system based on an Betacam SX format. C1 : RF CHECK C11 : PB CH CONDITION C12 : REC CH CONDITION Menu Tree of RF System Check Mode 3-26 DNW-A220 DNW-A220P... - Page 103 After the check for all channels is completed, “GRN” is also displayed on the right of ALL if the condition for all channels is GRN. If there is at least one channel whose condition is YEL or RED, the worst condition is displayed on the right of ALL. 3-27 DNW-A220 DNW-A220P...
- Page 104 To change the playback tape, push the SET button while pressing the EJECT button. The tape is then ejected without influencing the check result. Insert another tape and push the PLAY button. The check is then initiated. This operation does not coincide with the message on the LCD monitor. 3-28 DNW-A220 DNW-A220P...
- Page 105 [MENU] Select [SET] C11:PB CH CONDITION Auto Tracking ... RSLT RSLT C11:PB CH CONDITION Auto Checking ... RSLT RSLT C11:PB CH CONDITION Auto Check Complete RSLT RSLT C11:PB CH CONDITION Auto Tracking ... RSLT RSLT (omitted) (continue) 3-29 DNW-A220 DNW-A220P...
- Page 106 . Adjustment defect in tape transport system or component part installation defect. 8 Readjust the tape transport system or reinstall the parts (Refer to the maintenance manual part 2, volume-1.) . EQ-72 board defect . Drum assembly defect 3-30 DNW-A220 DNW-A220P...
- Page 107 8 Replace or reinstall the brush/slip ring assembly. (Refer to the maintenance manual part 2, vol- ume-1.) . Harness (between EQ-72 board and drum assembly) connection defect . RF system adjustment defect 8 Readjust the RF system. (A1 : RF ADJUST) . EQ-72 board defect . Drum assembly defect 3-31 DNW-A220 DNW-A220P...
- Page 108 After the check for all channels is completed, “GRN” is also displayed on the right of ALL if the condition for all channels is GRN. If there is at least one channel whose condition is YEL or RED, the worst condition is displayed on the right of ALL. 3-32 DNW-A220 DNW-A220P...
- Page 109 To change the playback tape, push the SET button while pressing the EJECT button. The tape is then ejected without influencing the check result. Insert another tape and push the PLAY button. The check is then initiated. This operation does not coincide with the message on the LCD monitor. 3-33 DNW-A220 DNW-A220P...
- Page 110 Select [MENU] [SET] C12:REC CH CONDITION Auto Tracking ... RSLT RSLT C12:REC CH CONDITION Auto Checking ... RSLT RSLT C12:REC CH CONDITION Auto Check Complete RSLT RSLT C12:REC CH CONDITION Auto Tracking ... RSLT RSLT (omitted) (continue) 3-34 DNW-A220 DNW-A220P...
- Page 111 . Adjustment defect in tape transport system or component part installation defect. 8 Readjust the tape transport system or reinstall the parts (Refer to the maintenance manual part 2, volume-1.) . EQ-72 board defect . Drum assembly defect 3-35 DNW-A220 DNW-A220P...
- Page 112 . Brush/slip ring assembly defect or its part installation/connection defect 8 Replace or reinstall the brush/slip ring assembly. (Refer to the maintenance manual part 2, vol- ume-1.) . Harness (between EQ-72 board and drum assembly) connection defect . EQ-72 board defect . Drum assembly defect 3-36 DNW-A220 DNW-A220P...
-
Page 113: Audio/Video Check Mode (C2)
The specified setting is maintained until the maintenance mode is terminated or the setting is changed. . This menu is set to OFF when the maintenance mode is activated. . Be sure to perform under the next state when selecting the system E-E to enable: Eject a cassette tape 3-37 DNW-A220 DNW-A220P... - Page 114 . The output signal of a test signal generator can also be recorded on the tape. In this case, push the SET button and perform the recording operation with the white square is displayed in the upper-right position of the LCD monitor. 3-38 DNW-A220 DNW-A220P...
- Page 115 . The output signal during multi-loop operation can also be recorded on the tape or hard disk. In this case, push the SET button and perform the recording operation with the white square is displayed in the upper-right position of the LCD monitor. 3-39 DNW-A220 DNW-A220P...
- Page 116 LCD monitor. C24 : DPR-87 DIAG INFO AUDIO/VIDEO CHECK MODE C24:DPR-87 DIAG INFO DPR-87 DIAG. OK! Displays the result of self diagnostic in DPR-87 board. (For more details, refer to maintenance manual part 2 volume 1.) 3-40 DNW-A220 DNW-A220P...
-
Page 117: Betacam Pb Check Mode (C3)
C30 : CHANNEL CONDITION Menu Tree of BETACAM PB Check Mode Betacam/Betacam SP PB function of DNW-A220 is for NTSC (525/60) system. Betacam/Betacam SP PB function of DNW-A220P is for PAL (625/50) system. But the PB picture of the other video system is easily played back by selecting the setup menu. - Page 118 . Worn PB head 8 After confirming the hours meter (H2 : DRUM RUNNING HOURS), replace the upper drum assembly as required. (Refer to the maintenance manual part 2, volume-1.) . Drum assembly defect . EQ-72 board defect 3-42 DNW-A220 DNW-A220P...
-
Page 119: Error Logger Display Mode (M2)
. VIDEO PB CONDITION RED This message is recorded when the channel condition becomes red during video PB operation. . AUDIO PB CONDITION RED This message is recorded when the channel condition becomes red during audio PB operation. 3-43 DNW-A220 DNW-A220P... -
Page 120: Display Mode
There may be some error logs that are useful for confirmation of the progress when a 0 [RESET] trouble occurs or that are important in preventing a trouble from occurrence. ERROR LOGGER (001/000) '96 07 03 09:23:30 3-44 DNW-A220 DNW-A220P... - Page 121 002 TAPE TENSION ERROR 003 INTERNAL I/F ERROR 003 INTERNAL I/F ERROR 003 INTERNAL I/F ERROR 004 REFERENCE MISSING '96 07 03 09:23:15 '96 07 03 09:23:15 '96 07 03 09:23:10 Ordinary Screen Only Warning Turned Off (No limited-display) 3-45 DNW-A220 DNW-A220P...
-
Page 122: Setting Mode
------------------------ TAPE ERROR while pressing the search button. WARNING CONDITION (3) To change the setting of other categories, repeat steps (1) and (2). '96 07 03 09:23:24 (4) Push the MENU button to terminate the setting mode. 3-46 DNW-A220 DNW-A220P... - Page 123 15:00:25 0 DIAL (2) CONDITION Push SET button '96 08 01 15:00:25 0 [Search] + DIAL (3) CONDITION Push SET button '96 08 01 15:00:00 0 [SET] CONDITION '96 08 01 15:00:00 CONDITION '96 08 01 15:00:01 3-47 DNW-A220 DNW-A220P...
-
Page 124: Others Check Mode (M3)
Sets the head room of an audio level meter. M3F : MEMORY CARD UTILITY — Uploads and downloads the software using the memory card box. M3F : MEMORY CARD UTILITY M3F : MEMORY CARD UTILITY is not used currently. 3-48 DNW-A220 DNW-A220P... -
Page 125: Rom Version Display Menu (M30)
3-4-2. ROM VERSION Display Menu (M30) This menu displayw the model name of this unit, the destination, and the information of the ROM version. M3:OTHERS M30:ROM VERSION DNW-A220(SY) SY1 V1.00 SY2 V1.00 SV1 V1.00 The display on the left is one of the displayed examples. -
Page 126: Serial Number Display Menu (M31)
(3) Repeat steps (1) and (2) for each digit. (4) Push the SET button to save the set serial number. . Message “Saving...” is displayed on only the LCD monitor. If no abnormality is found, the display changes to “Save Complete” after a few seconds. 3-50 DNW-A220 DNW-A220P... -
Page 127: Memory Check Display Menu (M35)
0000 0018: FC FF 60 AC 0000 001C: 1F 80 0D 3C 0000 0020: 00 FF AD 35 This menu is used for inspection at the factory. For more details, refer to maintenance manual part 2 volume 1. 3-51 DNW-A220 DNW-A220P... -
Page 128: Hour Meter Reset Menu (M36)
(4) Push the SET button to save the reset data. . Message “Saving ...” is displayed on only the LCD monitor. If no abnormality is found, the display changes to “Save Complete” after a few seconds. To turn off “Save Complete”, turn the JOG dial. 3-52 DNW-A220 DNW-A220P... -
Page 129: Int Audio Sg Level (M37)
(2) Push the SET button to save the changed setting. . Message “Saving...” is displayed on only the LCD monitor. If no abnormality is found, the display changes to “Save Complete” after a few seconds. To turn off “Save Complete”, turn the JOG dial. 3-53 DNW-A220 DNW-A220P... -
Page 130: Memory Card Utility Menu
Please contact your local Sony Sales Office/Service Center Refer to Section 1-18 for details on connecting the memory to memorize the updating software to the memory card. - Page 131 . When turning the JOG dial counterclockwise while EXECUTE - OFF pressing it, the display returns to “EXECUTE-OFF”. Download Complete Turn the power off! (9) Press the SET button once to execute download. (10) 0 Check . During download, “Downloading…” is displayed. 3-55 DNW-A220 DNW-A220P...
- Page 132 ROM in the MPU. After that, this unit is again initial- ized by the uploaded software. (14)Activate the maintenance mode. (15)Select M3 : OTHERS → M30 : ROM VERSION. (16)Check that the software version is that of the down- loaded software. 3-56 DNW-A220 DNW-A220P...
- Page 133 If deletion failed, “Failure! Turn the power off!” will be displayed. SY2 V0.91 (9) Exit the maintenance mode. EXECUTE - OFF Erasing... M3F2:ERASE CARD E2:SY2 ERASE SY2 V0.91 EXECUTE - OFF Erase Complete. Turn the power off! (8) 0 Check 3-57 DNW-A220 DNW-A220P...
- Page 134 S1 : MEMORY TO CARD Menu for uploading the data of the setup menu of the unit to the memory card. S2 : ERASE This menu is used to delete the data of the setup menu saved in the memory card. 3-58 DNW-A220 DNW-A220P...
- Page 135 To cancel the deletion of the setup menu data, press the Uploading... MENU button to exit the menu. M3F3:SETUP MENU S1:MEMORY TO CARD SET V0.83<-V0.82 1999/06/11 10:30:00 EXECUTE - OFF Upload Complete. Turn the power off! (9) 0 Check 3-59 DNW-A220 DNW-A220P...
- Page 136 8 Check the contents in the memory card. PC Card Write Error : 8 Use another memory card. Data Verify Error : 8 Use another memory card. Flash Card Erase Error : 8 Use another memory card. 3-60 DNW-A220 DNW-A220P...
-
Page 137: Setup Maintenance Mode (M4)
(1) Turn the JOG dial while pressing the serch button, and the desired setting is SETUP MAITENANCE MODE M40 : EXTENDED MENU then displayed. enable disable: Not display the extended menu Push SET Button enable: Display the extended menu (2) Press the SET button. 0 [SET] 3-61 DNW-A220 DNW-A220P... -
Page 138: Reset All Setup Executing Menu (M49)
------ Caution ------ All the System Setup data will be changed to Factory default. 0 Confirm SETUP MAITENANCE MODE M49 : RESET ALL SETUP Complete Turn off/on POWER!! 0 Turn OFF the power 0 Turn ON the power 3-62 DNW-A220 DNW-A220P... -
Page 139: Periodic Maintenance And Inspection
9 CTL head 4 Drum assembly !] AT head != Capstan motor !\ Tension spring 6 Pinch roller !/ Timing belt (reel) 8 Tension regulator band ![ S reel motor 7 Swing gear !- S main brake shoe DNW-A220 DNW-A220P... -
Page 140: Periodic Replacement And Check Item Table
DC motor SRV11A/J-N !] AT head 8-620-016-91 Audio head EPS244-2103M !\ Tension spring Replace every 20,000 times 3-613-709-01 Tension spring Mode A : Drum rotating hours (hours) Mode B : Tape running hours (hours) Mode C : Threading counter (times) DNW-A220 DNW-A220P... -
Page 141: Hours Meter
(1) Press the MENU button of the control panel to display the menus and their contents. (2) Press the MENU button again to exit the MENU. 3. How to reset Refer to “Section 3 Maintenance Mode” to reset the resettable menus (H12, H13, H14). DNW-A220 DNW-A220P... -
Page 142: Cleaning
• Do not insert a cassette tape before a cleaning fluid completely evaporates after cleaning. 2. Preparation (1) Turn the power off. (2) Remove the upper frame. (Refer to Section 1-6-3.) (3) Remove the cassette compartment. (Refer to Section 1-7.) DNW-A220 DNW-A220P... -
Page 143: Cleaning Of Video Heads And Tape Running Surface Of Upper Drum
This may damage the brush and slip ring or the video heads. 3. After cleaning, wipe it with a dry cleaning cloth two or three times. Tape running surface of upper drum Cleaning cloth Video heads Cleaning of Video Heads and Tape Running Surface of Upper Drum DNW-A220 DNW-A220P... -
Page 144: Cleaning Of Lead Surface And Tape Running Surface Of Lower Drum
3. After cleaning, wipe it with a dry cleaning cloth two or three times. Cleaning cloth Skewer Tape running surface Lead Lead of lower drum Cleaning of Lead Surface and Tape Running Surface of Lower Drum DNW-A220 DNW-A220P... -
Page 145: Stationary Heads And Tape Cleaner Cleaning
2. After cleaning, wipe them with a dry cleaning cloth two or three times. Tape cleaner CTL head Full-erase head DNW-A220 (SY) S/N 31001 through 31320 51001 through 51320 DNW-A220P (SY) S/N 31001 through 31549 51001 through 51549 Tape cleaner... -
Page 146: Tape Running System Cleaning
2. After cleaning, clean them with a dry cleaning cloth two or three times. T3 tape guide T4 tape guide Capstan S4 tape guide T5 tape guide S3(S drawer) tape guide T7 tape guide Pinch roller T6 (T drawer) tape guide S1/S2 tape guide T1/T2 tape guide Tape Running System Cleaning DNW-A220 DNW-A220P... -
Page 147: Cares After Outdoor Use
6. Carry out the common operation check (REC, PLAY etc.) and check that the unit has not an abnor- mal sound or action. If the unit has an abnormal condition, please consult your local Sony’s sales/service office. Movements of the display panel... -
Page 148: Video Head Tip Protrusion Check
2. Clean the probe, positioning flange, and portion contacting the drum of two legs. (Refer to Figure 3.) Do not apply an excessive force to the probe during cleaning. If a deposit of um order exists, measurement cannot be performed accurately. 4-10 DNW-A220 DNW-A220P... - Page 149 Probe If it is loose carelessly, the drum and measurement Figure 3. Setting of Head Tip Protrusion Measurement Gauge gauge will turn and damage the peripheral parts. 4-11 DNW-A220 DNW-A220P...
- Page 150 (Ex, Ha=2) (Ex, Hb=40) Video head A Probe Video head A Probe < A > < B > Hr = Hb _ Ha = 40 _ 2 = 38 (µm) Figure 4. Example of Head Tip Protrus Measurement 4-12 DNW-A220 DNW-A220P...
- Page 151 ADV A1 ADV B1 Dummy (No need for measurement) * : For player section of DNW-A220 and DNW-A25 exclusive use. Removal of Head Tip Protrusion Measurement Gauge 1. Rotate the upper drum manually counterclockwise (3) very slowly to move a video head aside from the probe.
-
Page 153: Spare Parts
2. Standardization of Parts Some repair parts supplied by Sony differ from those used for the unit. These are because of parts commonality and improvement. Parts list has the present standardized repair parts. -
Page 154: Exploded Views
5-2. Exploded Views 5-2. Exploded Views SCREW(M4 x 20) DNW-A220 (SY) S/N 31331 and higher 51331 and higher 3-729-091-31 (S) B3 x 8 DNW-A220P (SY) S/N 31717 and higher B3 x 8 51717 and higher B3 x 8 PLATE, JOINT... -
Page 155: Pulg-In Boards
(Used in RECORDER only) DEC-97 A-8316-704-A MOUNTED CIRCUIT BOARD, DEC-97 Required DM-114 A-8316-714-A MOUNTED CIRCUIT BOARD, DM-114 Required (for DNW-A220, PLAYER only) A-8316-716-A MOUNTED CIRCUIT BOARD, DM-114P Required (for DNW-A220P, PLAYER only) DPR-87 A-8316-710-A MOUNTED CIRCUIT BOARD, DPR-87 Not Required... -
Page 156: Optional Accessories List
SP Description A-6772-374-C s BELT ASSY, SHOULDER 1-783-089-12 s CORD, WITH CONNECTOR (REMOTE CONTROL) 1-783-090-11 s CORD, WITH CONNECTOR (BNC COAXIAL) DNW-A220 (SY) S/N 31001 through 31330 51001 through 51330 DNW-A220P (SY) S/N 31001 through 31716 51001 through 51716 1-791-456-11 s CORD WITH CONNECTOR (BNC COAXIAL) -
Page 157: Fixtures List
3-184-527-01 s CLEANING CLOTH (15 cm x 15 cm) 3-649-266-01 s PARALLEL PIN (d = 1.6 mm) 3-703-358-04 o PARALLEL PIN (d = 2.0 mm) 7-651-000-10 s SONY GREASE SGL-601 (50 g) 7-651-000-11 s SONY GREASE SGL-801 (50 g) 7-651-000-59 o GREASE PG-662 (20 g) 7-661-018-18 s DIAMOND OIL NT-68 (50 ml) 7-700-751-01 s BOX DRIVER (d = 4.5 mm) -
Page 159: Overall Block Diagram And Circuit Description
The digital component video signal sent to the DP-265/265A board is added in characters and scan- converted in the vertical direction. After that, the video signal is performed for contrast adjustment, RGB signal conversion, and gain adjustment. The signal is then sent to the color LCD monitor (VGA 640 x 480). DNW-A220 DNW-A220P... - Page 160 The channel type of the signal to be output to the LINE and MONITOR output connectors can be set using a sub LCD menu. The output audio signal sent to the SDI-23 board is multiplexed with a video signal using an SDI encoder, converted from parallel to serial, and output from the connector panel. DNW-A220 DNW-A220P...
- Page 161 (for NTSC only) and sent to the VPR-34 board. A longitudinal analog Betacam audio signal is processed on the PA-218 board. The PB signal sent from the audio head is waveform- equalized and sent to the AU-249 board. DNW-A220 DNW-A220P...
- Page 162 158 board to the RE-150 board. The voltage is then turned on and off using the power switch on the PSW-63 board and sent to each board as an UNREG +12 V. Moreover, various DC voltages are generat- ed using the DC-DC converter based on a synchronous PWM switching regulator and supplied to each board. DNW-A220 DNW-A220P...
- Page 164 IC110 ANALOG BETACAM DOLBY C AUDIO CH1 NOISE REDUCTION ANALOG BETACAM KY-400(2/2) AUDIO CH2 ANALOG IC106,206 KY-406(2/2) IC801 AUDIO TP101 TP201 CH1 IN AU(1/2)ch LEVEL CONT CH2 IN TP301 TP401 IC703 CH1 OUT CH1/3 LINE(L/R)ch CH2/4 CH2 OUT DNW-A220 DNW-A220P...
- Page 165 CP-317 FAN ALARM BOOST Q7,16 UNREG +12V POWER C2-5 D4,5 IC301,401,501,601 SWITCHING CONVERTERS AUDIO +3.3V-1 PROCESS +2.5V PWM POWER +3.3V-2 CONTROLLERS +5V-1 +5V-2 PSW-63 +48V SHORT CIRCUIT VOLT PROTECTORS RE-150 SIGNAL PROCESSING SYSTEM OVERALL (1/3) DNW-A220 DNW-A220P B-¥DNWA220-OA-S/M-01 DNW-A220 DNW-A220P...
- Page 166 POWER ON L:RESET RESET LCD PANEL CONTROL *1 SY-259 AND/OR SY-260 BOARD SUFFIX X101 40 MHz -12 AND HIGHER:RAMS ON THE SY-259/260 BOARD IC104,105 -11:RAMS ON THE SY-261 BOARD 40 MHz 20 MHz 10, 8, 5, 2.5 MHz DNW-A220 DNW-A220P...
- Page 167 IC304,404 ANALOG BETACAM PB DEMODULATOR HEAD CONT. IC204 FROM GATE SV-194 IC1808 ENCODE (IC212) IC202,203 X1801 TBC CONTROL DRUM ASSEMBLY BLOCK HEAD CONTROL DECODE ANALOG BETACAM PB TBC ROTALY TRANS SERVO/SYSTEM CONTROLSYSTEM (1/2) OVERALL (2/3) DNW-A220 DNW-A220P B-¥DNWA220-OA-S/M-01 DNW-A220 DNW-A220P...
- Page 168 AUDIO/VIDEO IC702 PROCESS CONTROL SDI OUT IC250 TO OVERALL(2/3) DIGITAL AUDIO TIME BASE EXPANSION DEC-97(2/2) FOR SDI RECEIVER IC33 IC34 IC301,601 IC43 ENC/DEC COMPOSITE DECODE IC455 IC352 BUFFER IC457 IC406 VITC IC400 SET UP REMOVE (NTSC ONLY) 6-10 DNW-A220 DNW-A220P...
- Page 169 CAPSTAN MOTOR FG SHAPER Q950-959 FULL ERASE ERASE DRIVE LTC ERASE IC304 IC306 DETECT FUNCTION CAM L;REV/H;FWD PORT H;SV LOCK IC602 THREADING MOTOR THREADING MOTOR DRIVER Q619,620 DRIVER S-MAIN BRAKE SERVO/SYSTEM CONTROLSYSTEM (2/2) OVERALL (3/3) DNW-A220 DNW-A220P B-¥DNWA220-OA-S/M-01 6-11 DNW-A220 DNW-A220P...
- Page 171 Write down readings of hours meter when checking, servicing or maintaining the unit. ITEM Date Hours meter H01: OPERATION HOURS H02: DRUM RUNNING HOURS H03: TAPE RUNNING HOURS H04: THREADING COUNTER H12: DRUM RUNNING HOURS(Resettable) H13: TAPE RUNNING HOURS(Resettable) H14: THREADING COUNTER(Resettable) DNW-A220 DNW-A220P...
- Page 172 SL202 OPEN Audio output headroom CH-1 SL301 OPEN (20 dB) SL302 OPEN CH-2 SL401 OPEN (20 dB) SL402 OPEN Monitor output headroom SL501 OPEN (20 dB) SL502 OPEN SL601 OPEN (20 dB) SL602 OPEN RE-150 Power select OPEN DNW-A220 DNW-A220P...
- Page 173 PLAYER RECORDER ON (CLOSE) OFF (OPEN) OFF (OPEN) ON (CLOSE) : J/UC ON (CLOSE) : 525/625 DNW-A220: OFF (OPEN) DNW-A220P: ON (CLOSE) SY-260 S201 : Factory use OFF (OPEN) *1, *2: Never change setting of the switches S101-1 and S101-2.
- Page 174 AU SG LIMITER AUDIO INPUT IN-1 SDI-1 AUDIO INPUT IN-2 SDI-2 AUDIO INPUT IN-3 SDI-3 AUDIO INPUT IN-4 SDI-4 MIX/SWAP CH-1 IN-1 CH-2 IN-2 CH-3 IN-3 CH-4 IN-4 EMPH DOLBY LINE OUT CH-1/2 MONITOR LEVEL MONITOR CH CH-1 CH-2 DNW-A220 DNW-A220P...
- Page 175 PROCESS CONTROL PANEL (When the above item is set to Y/C DLY 800 PRESET PANEL) SYNC PH SC PH General setting page ITEM Factory setting Setting SUPER BAT-END 10.5 BAT-NE 11.0 BACKLGT NORMAL CAPSTAN LOCK KEY INH DF/NDF DISPLAY DNW-A220 DNW-A220P...
- Page 176 It is unnecessary to write down the setting for this series. Each item of B00 series is set to OFF in the normal state. Set to ON only when executing each item. After execution, each item returns to OFF automatically. DNW-A220 DNW-A220P...
- Page 177 313: ANALOG AUDIO EDIT PRESET REPLACE FOR CH3 NO DEF 314: ANALOG AUDIO EDIT PRESET REPLACE FOR CH4 NO DEF 316: CONFIDENCE PB MODE 317: AUDIO EDIT MODE CROSS 318: EDIT RETRY 320: DIGITAL AUDIO PB PROCESS ON EDIT POINT FADE DNW-A220 DNW-A220P...
- Page 178 ID CODE SW 605: TCG REGEN MODE TC&UB 606: TC OUTPUT SIGNAL IN REGEN MODE TAPE 607: U-BIT BINARY GROUP FLAG 608: PHASE CORRECTION 609: TCG CF FLAG 610: REGEN CONTROL MODE AS&IN *1: ITEM-603 has no relation with Banks. DNW-A220 DNW-A220P...
- Page 179 MSTER 4: OUTPUT LEVEL MSTER 714: VIDEO ADJUST RANGE _3 ~ +3 715: VIDEO GAIN CONTROL 800H 716: CHROMA GAIN CONTROL 800H 717: CHROMA PHASE CONTROL 718: SETUP LEVEL 110H 719: SYSTEM PHASE SYNC 720: SYSTEM PHASE SC DNW-A220 DNW-A220P...
- Page 180 Do not change setting of each item from its factory-set position. ITEM Factory setting Current Bank 1 Bank 2 Bank 3 Bank 4 F01: AUDIO NR IN SP MODE F02: EMERGENCY TAPE PROTECTION F13: TRACKING CONTROL VIA SEARCH DIAL F16: DEVICE TYPE MODIFY F21: PROCESS CONT VR A-10 DNW-A220 DNW-A220P...
- Page 181 LIMITER AUDIO INPUT IN-1 SDI-1 AUDIO INPUT IN-2 SDI-2 AUDIO INPUT IN-3 SDI-3 AUDIO INPUT IN-4 SDI-4 MIX/SWAP CH-1 IN-1 CH-2 IN-2 CH-3 IN-3 CH-4 IN-4 EMPH DOLBY LINE OUT CH-1/2 MONITOR LEVEL MONITOR CH CH-1 CH-2 A-11 DNW-A220 DNW-A220P...
- Page 182 PROCESS CONTROL PANEL (When the above item is set to Y/C DLY 800 PRESET PANEL) SYNC PH SC PH General setting page ITEM Factory setting Setting SUPER BAT-END 10.5 BAT-NE 11.0 BACKLGT NORMAL CAPSTAN LOCK KEY INH DISPLAY A-12 DNW-A220 DNW-A220P...
- Page 183 It is unnecessary to write down the setting for this series. Each item of B00 series is set to OFF in the normal state. Set to ON only when executing each item. After execution, each item returns to OFF automatically. A-13 DNW-A220 DNW-A220P...
- Page 184 313: ANALOG AUDIO EDIT PRESET REPLACE FOR CH3 NO DEF 314: ANALOG AUDIO EDIT PRESET REPLACE FOR CH4 NO DEF 316: CONFIDENCE PB MODE 317: AUDIO EDIT MODE CROSS 318: EDIT RETRY 320: DIGITAL AUDIO PB PROCESS ON EDIT POINT FADE A-14 DNW-A220 DNW-A220P...
- Page 185 605: TCG REGEN MODE TC&UB 606: TC OUTPUT SIGNAL IN REGEN MODE TAPE 607: U-BIT BINARY GROUP FLAG 608: PHASE CORRECTION 609: TCG CF FLAG 610: REGEN CONTROL MODE AS&IN *1: ITEM-603 has no relation with Banks. A-15 DNW-A220 DNW-A220P...
- Page 186 19: 19,332 line B&W 20: 20,333 line B&W 21: 21,334 line B&W 22: 22,335 line B&W 705: EDGE SUBCARRIER REDUCER MODE AUTO 706: VERTICAL BLANKING V SHIFT 707: FORCED VERTICAL INTERPOLATION OFF AUTO 710: INTERNAL VIDEO SIGNAL GENERATOR CB100 A-16 DNW-A220 DNW-A220P...
- Page 187 16: 16,329 line THROU 17: 17,330 line THROU 18: 18,331 line THROU 19: 19,332 line THROU 20: 20,333 line THROU 21: 21,334 line THROU 22: 22,335 line THROU 726: H BLANKING WIDTH WIDE 727: VIDEO EDIT PREVIEW SWITCHER A-17 DNW-A220 DNW-A220P...
- Page 188 Do not change setting of each item from its factory-set position. ITEM Factory setting Current Bank 1 Bank 2 Bank 3 Bank 4 F01: AUDIO NR IN SP MODE F02: EMERGENCY TAPE PROTECTION F13: TRACKING CONTROL VIA SEARCH DIAL F16: DEVICE TYPE MODIFY F21: PROCESS CONT VR A-18 DNW-A220 DNW-A220P...
- Page 189 The material contained in this manual consists of information that is the property of Sony Corporation and is intended solely for use by the purchasers of the equipment described in this manual. Sony Corporation expressly prohibits the duplication of any portion of this manual or the use thereof for any...
- Page 190 DNW-A220 (SY) Printed in Japan Sony Corporation 2001. 9 08 DNW-A220P (SY) E B&P Company ©1997 3-194-203-15...