
Related Manuals for Brother PR1055X


Summary of Contents for Brother PR1055X
- Page 1 Operation Manual Embroidery Machine Product Code: 884-T15 Be sure to read this document before using the machine. We recommend that you keep this document nearby for future reference.
- Page 3 IMPORTANT SAFETY Return the machine to the nearest authorized Brother dealer or service center for examination, INSTRUCTIONS repair, electrical or mechanical adjustment. • To avoid electric shock or fire; do not use a...
- Page 4 • While the machine is in operation, keep your hands the machine yourself. If the problem persists, please away from the needle bar case and all moving parts consult your local authorized Brother dealer. near the needle bar case, otherwise injuries may result.
- Page 5 SAVE THESE • If the available electrical outlet is not suitable for the plug supplied with this equipment, you should INSTRUCTIONS contact your authorized Brother dealer to obtain the correct lead. This machine is intended Federal Communications for household use.
- Page 6 EU (Europe and Turkey Important Changes or modifications not expressly approved by only) Brother Industries, Ltd. could void the user’s authority to operate the equipment. (Applicable to models with radio interfaces) This equipment complies with FCC/IC radiation exposure limits set forth for an uncontrolled We, Brother Industries, Ltd.
- Page 7 This Terms of Use (“Agreement”) is a legal agreement programs; between Brother Industries, Ltd. (“Company”) and you that 2.1.6 to include Company’s copyright notice governs your use of any Software, installed on or made and this Agreement on all entire and available by Company for use with sewing or craft products partial copies of the Software;...
- Page 8 Termination The laws of the state or country where you live (or, if a business, where your principal place of Company shall have the right to terminate this business is located) govern all claims and Agreement at any time by providing a written disputes concerning the Software or this notice to you if you commit a material breach Agreement.
- Page 9 BROTHER retains all rights not expressly granted to CUSTOMER herein. Nothing in this agreement constitutes a waiver of the rights of BROTHER under any law. This agreement shall be governed by the laws of Japan. Please direct all inquiries concerning this Agreement in writing by regular mail, to Brother Industries, Ltd., 1-1-1...
- Page 10 Each company whose software title is mentioned in this manual has a Software License Agreement specific to its proprietary programs. Any trade names and product names of companies appearing on Brother products, related documents and any other materials are all trademarks or registered trademarks of those respective companies.
-
Page 11: Table Of Contents
CONTENTS Chapter 1 GETTING READY PREVIEWING THE IMAGE......... 60 Checking a preview image ........... 60 NAMES OF MACHINE PARTS ......11 PREPARING THE FABRIC ........60 Included accessories ............12 Attaching stabilizer (backing) to fabric........60 Accessories that are included in some countries or Fabric/stabilizer compatibility chart........ - Page 12 Changing the embroidery basting distance ......124 TROUBLESHOOTING ........179 Deselect region setting ............125 Troubleshooting..............179 Starting/ending position settings ......... 126 Error messages ..............185 USING THE MEMORY FUNCTION....130 If the machine does not respond when a key is touched ..189 Saving embroidery patterns ..........
-
Page 13: Chapter 1 Getting Ready
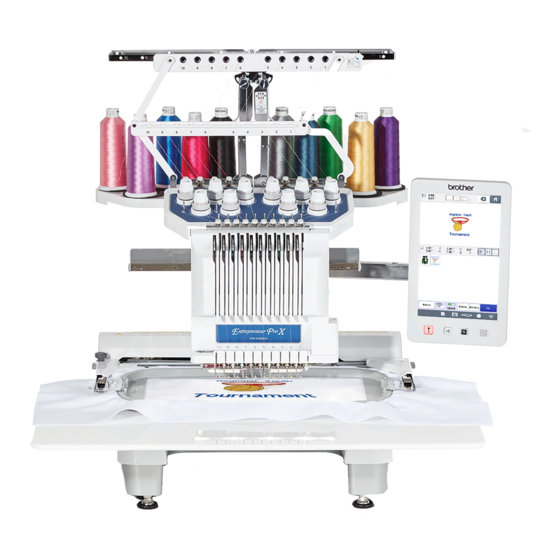
3 Lower thread guide SOFTWARE” on page 192. 4 Carriage http://s.brother/cubah/ Attach the embroidery frame to the carriage. When the machine is turned on or when the machine is embroidering, the carriage moves forward, backward, left and right. -
Page 14: Included Accessories
■ Operation panel Included accessories After opening the box, check that the following accessories are included. If any item is missing or damaged, contact your authorized Brother dealer. Part Name Part Code Accessory case XC6482-051 Needle set × 2 1 “Start/Stop” button Press the “Start/Stop”... - Page 15 This manual Embroidery frame (extra-large) Quick Reference Guide 360 mm (W) × 200 mm (H) (14 inches (W) × 7-7/8 inches (H)) Visit your authorized Brother dealer. PRPH360 (Americas) PRPH360: XG6733-001 (Europe) Embroidery Design Guide PRPH360CN: 115D02E6024 (China) PRPH360: 115D02E7024 (other areas) Embroidery frame (large) Visit your authorized Brother dealer.
-
Page 16: Accessories That Are Included In Some Countries Or Regions
130 mm (W) × 60 mm (H) (5-1/8 inches (W) × 2-3/8 inches (H)) Embroidery Design Guide (additional) PRCFH3 (Americas) PRCFH3: XG6695-001 (Europe) Visit your authorized Brother dealer. PRCFH3: 115D02E7008 (other areas) Advanced cap frame Bobbin winder set 130 mm (W) × 50 mm (H) (Refer to page 142.) - Page 17 GETTING READY Part Name Part Name Part Code Part Code Quilt frame Clamp frame S straight set 200 mm (W) × 200 mm (H) 45 mm (W) × 24 mm (H) (7-7/8 inches (W) × 7-7/8 inches (H)) (1-3/4 inches (W) × 7/8 inches (H)) PRPQF200 (Americas) PRCLP45B (Americas) PRPQF200: XG6727-001 (Europe)
-
Page 18: Setting Up The Machine
EPS2CN: 115Z05E600E (China) EPS2: 115Z05E700E (other areas) Note • Visit your nearest authorized Brother dealer for a complete listing of optional accessories and embroidery cards available for your machine. Memo • Always use accessories recommended for this machine. -
Page 19: Setup Location
GETTING READY • When lubricating the machine, wear protective CAUTION eyeglasses and gloves to prevent the oil or grease from getting into your eyes or on your • In order to prevent malfunctions or damage, skin. Do not put the oil or grease into your do not set up the machine in a location mouth. -
Page 20: Setting Up The Machine
• After removing the fixing plates, be sure to keep included wrench to tighten the nuts. them to be used again. Before transporting the machine, consult your authorized Brother dealer. 1 Lock nut Press down on each corner of the machine to check that it is stable. -
Page 21: Adjusting The Operation Panel Position
GETTING READY Adjust the angle of the operation panel. Adjusting the operation panel position Loosen the 2 thumb screws behind the operation panel, adjust the operation panel to an easy-to-view angle, and then tighten the thumb screws. Loosen 2 thumb screws to bring the operation panel forward. -
Page 22: Preparing The Spool Stand
Grab the grips on the thread guide assembly support Preparing the spool stand and push toward the middle. Loosen the thumb screw two or three turns, and then fold out the spool stand. Rear view After the thread guide assembly support is extended and the thread guide assembly is raised to its highest position, tighten the two thumb screws to secure the 1 Thumb screw... -
Page 23: Attaching The Embroidery Frame Holder
GETTING READY Secure the embroidery frame holder with the two Attaching the embroidery frame holder thumb screws removed in step Use the embroidery frame holder appropriate for the embroidery frame that you are using (page 66 to page 68). Remove the two thumb screws of the embroidery frame holder. -
Page 24: Turning On The Machine
If the power supply cord or its plug is damaged, stop using the machine, and then take the machine to your authorized Brother dealer for repairs before continuing use. - Page 25 GETTING READY The carriage moves to its initial position. Touch to start using your machine. • If the number 1 needle bar is not already at the embroidering position, the needle bar case moves The clock starts from 0 second of the time you set. and the number 1 needle bar moves to the embroidering position.
-
Page 26: Lcd Screen
Display LCD SCREEN Function Page Key Name Touch the LCD screen, or a key, with your finger or the – Shows the available included touch pen to select a machine function. embroidering area for the Embroidering attached embroidery frame. area line CAUTION The embroidery frame indications, the grid lines... -
Page 27: Using The Settings Key
GETTING READY Using the settings key Touch to change the default machine settings (light, volume, speaker volume, opening display etc.). To display the different settings screens, touch for “Embroidery settings”, for “General settings”, or “Wireless LAN settings”. Memo • The machine default setting is highlighted. •... - Page 28 H Shows the internal machine number for this machine. I Shows the version of the software installed on this machine. Note • Install the latest software. Check with your local authorized Brother dealer or at “ http://s.brother/ cubah/ ” for available updates (page 192).
- Page 29 GETTING READY ■ Wireless LAN settings ■ Changing the screen saver image You can select your own personal images for the screen saver of your machine. Before changing the screen saver image, prepare the image on your computer or USB media. For details on compatible image files, refer to “SPECIFICATIONS”...
-
Page 30: Using The Machine Help
2 Tutorial videos or MPEG-4 (MP4) videos from USB media (page 28, page 29) Skip forward 10 seconds 3 Display the link information to Brother support website. 4 Display the introduction to the application. Return to beginning ■ Using the operation guide function... -
Page 31: Wireless Network Connection Functions
GETTING READY ■ Playing MPEG-4 (MP4) videos WIRELESS NETWORK Your MP4 videos can be played from USB media. In addition, the MP4 video can be saved to the machine so CONNECTION FUNCTIONS that a tutorial video on creating a project, for example, can be viewed at any time. -
Page 32: Setting Up The Wireless Network Connection
■ Requirements for a wireless network Touch beside the SSID that was noted. connection The wireless network connection complies with IEEE 802.11 n/g/b standards and uses the 2.4 GHz frequency. Memo • A wireless network cannot be set up with WPA/ WPA2 Enterprise. - Page 33 GETTING READY ■ Using the [Others] menu to set up the wireless When the following message appears, touch network connection The [Others] menu contains the following items. When a connection is established, the following message appears. 1 TCP/IP settings can be manually entered. 2 Shows the MAC address.
-
Page 34: Other Functions
Monitoring App OTHER FUNCTIONS With the monitoring app installed on your smart device and the machine and smart device connected to the same wireless Using a USB mouse network, you can check the operating status of the machine. You can also check when to change the thread spool and A USB mouse, connected to the machine, can be used to what thread spool color to change to. -
Page 35: Chapter 2 Basic Embroidery
BASIC EMBROIDERY BASIC EMBROIDERY Chapter BASIC PROCEDURES INSTALLING THE BOBBIN Basic embroidering procedures are described below. When the machine is purchased, only the bobbin case is Check the overall procedure below, before operating the installed in the hook. Insert a bobbin wound with bobbin machine. -
Page 36: Installing The Bobbin
Pass the thread through the thread slit and under the tension-adjusting spring. CAUTION 1 Thread slit • The thread picker can only be moved within a 2 Tension-adjusting certain range. Do not pull it with extreme spring force. Grab the bobbin case latch, and remove the bobbin case. -
Page 37: Installing The Bobbin Case
BASIC EMBROIDERY Installing the bobbin case SELECTING AN EMBROIDERY PATTERN Insert the bobbin case into the hook. Insert the bobbin case while aligning the tab on the General pattern selection bobbin case with the notch in the hook, as shown in the illustration. -
Page 38: Embroidery Patterns
In the pattern list screen, which appears next, touch Touch the desired pattern to select it. ■ Pattern list screen The pattern editing screen appears. Edit the selected pattern. (page 44) 1 Size of the entire combined pattern 2 Size of the pattern being selected 3 Touch a pattern to display the information of the pattern. -
Page 39: Frame Patterns
BASIC EMBROIDERY Check the embroidering screen and thread the upper Utility embroidery patterns/Large threads. (page 81) buttonhole patterns Touch Select the desired category of the utility embroidery patterns or the large buttonhole patterns. The list of patterns of the selected category appears. Start embroidering. -
Page 40: Monogram And Frame Designs
The selected characters appear in the text preview Monogram and frame designs area and the pattern display area. Monogram designs can be created by combining two or three letters. Touch Touch the button for the desired character style. 1 Text preview area 2 Pattern display area 3 If the wrong character was selected or you wish to select ... -
Page 41: Character Patterns
BASIC EMBROIDERY Touch Character patterns Touch Touch the desired character font. The design selection screen appears. Touch The list of frame patterns appears. • Touch for additional selections. The text input screen appears. Touch the desired pattern. Select the character category and then type in the text. - Page 42 ■ Character pattern input keys Display Function Memo Key Name • If a key display is grayed out, you cannot use that Change the spacing of the character function with the selected pattern. patterns. Character • : Increase the character spacing. spacing key •...
-
Page 43: Decorative Alphabet Patterns
BASIC EMBROIDERY Touch Display The pattern editing screen appears. Function Key Name Follow the procedure from step Apply the character pattern editing to go “Embroidery patterns” on page 36. to the editing screen. Set key ■ Appliqué alphabet Enter a space. Touch Space key Touch... -
Page 44: Combining Patterns
Touch Combining patterns Example: When all editing is finished, touch Note • Combined patterns will be embroidered in the order they were entered. ■ Selecting the pattern to be edited If multiple patterns have been combined, use to select the pattern to be edited. Patterns can also be selected by directly touching the screen with your finger Select a pattern and then touch or touch pen. - Page 45 BASIC EMBROIDERY ■ Grouping multiple selected patterns Select the multiple patterns by dragging your finger in the screen to create a box around the desired patterns. If the multiple patterns selected in “Selecting multiple patterns at the same time” on page 42 are grouped, they can be edited as a single pattern.
-
Page 46: Editing The Embroidery Pattern
Display EDITING THE EMBROIDERY Function Page Key Name PATTERN Shows the size of the pattern being edited. The top value shows the height and the — Understanding the pattern editing screen bottom value shows the Size width. Memo Shows the vertical distance •... - Page 47 BASIC EMBROIDERY Display Display Function Page Function Page Key Name Key Name Display the pattern sizing Arrange multiple patterns on window. a line. Alignment key • : Decrease the pattern Change the pattern being proportionately. edited into an appliqué Embroidery •...
- Page 48 ■ Editing letters Display Function Page Key Name Change the pattern to a Horizontal — horizontal mirror image. mirror image Change thread density for some character and frame patterns. Other patterns' Density key density can be adjusted in the stitch recalculator mode. Duplicate the pattern.
-
Page 49: Changing The Size And The Density Of The Pattern
BASIC EMBROIDERY Changing the size and the density of the Trimming the threads between characters pattern If the machine is set to trim the threads between the characters, the jump stitches between the characters are is selected, you can change the pattern size while reduced and any other necessary procedures after maintaining the thread density. -
Page 50: Combining The Separated Character Patterns
Combining the separated character patterns Changing the thread density Two separated lines of character patterns can be combined. The thread density for some character and frame patterns can The characters can be aligned to the specified order. You be changed. Other patterns' density can be adjusted in the cannot combine the lines of character patterns if the text stitch recalculator mode. -
Page 51: Aligning The Embroidery Patterns
BASIC EMBROIDERY Aligning the embroidery patterns Designing repeated patterns Using the border function, you can create an arrangement Select patterns that you want to align. (page 42) using repeated patterns. Touch Select the direction in which the pattern will be repeated. - Page 52 ■ Repeating one element of a repeated pattern • To tighten spacing, touch By using the Cut function, you can select one element of a repeated pattern and repeat only that single element. This function allows you to design complex repeated patterns. Choose the direction in which the repeated pattern will be cut.
- Page 53 BASIC EMBROIDERY to select the element to repeat. Touch Touch Repeat the selected element. Touch to select the thread mark to be embroidered. After making the desired changes, touch Note • Once you have cut a repeated pattern into separate elements, you cannot return to the original repeated pattern.
- Page 54 ■ Embroidering the pattern repeatedly Rehoop the fabric in the embroidery frame. After creating the repeated pattern, rehoop the embroidery frame and keep embroidering for the next pattern. Note Memo • Adjust the position of the fabric so that the •...
- Page 55 BASIC EMBROIDERY Touch to display the needle drop point. Remove the thread mark. Touch Touch , and then press the “Start/Stop” button to start embroidering. Touch the positioning keys to move the embroidery frame until the thread mark on the fabric is aligned on the needle drop point in the camera view window.
-
Page 56: Editing Colors
The selected thread color image appears. EDITING COLORS Specifying multi-color text The alphabet pattern characters selected on page 39 are set to black. The color of the characters can be changed using the change thread color key; however, to change the color of individual characters, touch the Multi Color key to turn it on, and then specify the color for each character. -
Page 57: Find New Color Schemes With The Color Shuffling Function
BASIC EMBROIDERY In the pattern display area, the color of the selected Select the thread brand for colors and the number of part of the pattern is changed. colors you want to create the pattern with. Memo • Touch to specify a thread color by entering its number. - Page 58 [Manual] setting for [Gradient] Memo You can select one color to be used in the [Gradient] effect. • To temporarily register your favorite schemes, The effect will be created with the color you select. touch (to release your favorite schemes, touch again).
-
Page 59: Switching The Thread Colors On The Screen
BASIC EMBROIDERY ■ To cancel the thread color settings for all SWITCHING THE THREAD COLORS previously stitched design ON THE SCREEN Memo • The color settings will be completely canceled even If a thread color on the spool stand is different than the if the machine is in the middle of the embroidery. -
Page 60: Selecting/Managing Thread Colors For Each Needle Bar [Manual Color Sequence]
Specifying the manual color sequence SELECTING/MANAGING THREAD COLORS FOR EACH NEEDLE BAR [Manual Color Sequence] Note • The [Manual Color Sequence] cannot be changed The thread colors assigned to each needle bar can be while operations are being performed in the manually specified/managed. -
Page 61: Using The Manual Color Sequence
BASIC EMBROIDERY Touch a number button (between ) to Using the manual color sequence select the number of the needle bar whose settings are to be specified. The needle bar number for the thread color selected ■ Manually assign thread colors to all needle in step changes to the selected needle bar bars... -
Page 62: Previewing The Image
PREVIEWING THE IMAGE PREPARING THE FABRIC Checking a preview image CAUTION Display the preview image to check that the embroidery will • Your machine can embroider fabric that is up be performed as desired. to 2 mm (5/64 inch) thick. If thicker fabric is Touch embroidered, the needle may bend or break. -
Page 63: Fabric/Stabilizer Compatibility Chart
BASIC EMBROIDERY No. of Topping Fabric/stabilizer compatibility chart No. of Backing Pieces Fabric/ Pieces Garment Comments No. of Topping No. of Backing Pieces 1 tear-away 1 water-soluble Fabric/ Pieces Garment A higher stitch density or more under Comments Corduroy stitches, as well as a topping, may be 1 tear-away 1 water-soluble necessary to prevent stitches from sinking... - Page 64 Select an embroidery frame. From the sizes of embroidery frames indicated in the CAUTION screen, select the embroidery frame that you wish to use. • Use the four included frames or recommended optional frames. • If the size of the embroidery frame is wrong, Embroidery frames that can be used appear lighter the embroidery frame may hit the presser foot and damage the machine, or cause injury to...
- Page 65 BASIC EMBROIDERY Lightly tighten the screw. Place the embroidery sheet on the inner frame. Align the guidelines on the embroidery sheet with the marks that you drew on the fabric. 1 Guidelines 2 Inner frame Securely tighten the screw, and then check to make sure that the fabric is taut.
-
Page 66: Attaching The Embroidery Frame To The Machine
■ Embroidering small pieces of fabric ATTACHING THE EMBROIDERY When embroidering small pieces of fabric that cannot be hooped in an embroidery frame, use stabilizer material as FRAME TO THE MACHINE a base. After lightly ironing the fabric to the stabilizer material, hoop it in the embroidery frame. -
Page 67: Correctly Using The Embroidery Frames
BASIC EMBROIDERY Loosen the two left thumb screws on the embroidery Note frame holder. • Please firmly tighten the two thumb screws with If the screw is too tight, please use the included 3 way included 3 way screwdriver. If the thumb screws screwdriver. - Page 68 300 mm (W) × 200 When the reference page is “*”, contact your authorized mm (H) (11-3/4 inches (W) × 7-7/8 inches (H)) hoop. Brother dealer. Embroidery frame holder B is used with the optional embroidery frames. In addition, if you purchase optional...
- Page 69 BASIC EMBROIDERY Embroidery frames that use embroidery frame holder B Embroidery frames that use embroidery frame holder D (optional) Embroidering area Embroidering area Embroidery frame Usage Embroidery frame Usage Reference page Reference page Quilt frame (optional) 200 mm (W) × 200 mm (H) (7-7/8 inches (W) ×...
- Page 70 Embroidery frames that do not use embroidery frame Embroidering area holders Embroidery frame Usage Embroidering area Reference page Embroidery frame Usage Cylinder frame 90 mm (W) × 80 mm (H) Reference page (optional) (3-1/2 inches (W) × 3 inches (H)) Advanced cap frame 2 130 mm (W) ×...
-
Page 71: Specifying Embroidering Setting
BASIC EMBROIDERY Display SPECIFYING EMBROIDERING Function Page Key Name SETTING Shows the rotation angle that the pattern being edited is — Rotation angle rotated. Understanding the embroidering settings Shows the total number of screen Number of thread colors for the pattern —... - Page 72 Display Display Function Page Function Page Key Name Key Name Move the embroidering Specify the needle position position of the whole pattern Starting/ at the beginning of in the direction of the arrow. ending embroidering and at the end. — is touched, the position key Positioning...
-
Page 73: Automatic Lock Stitch Setting
BASIC EMBROIDERY Automatic lock stitch setting Thread color sorting When the machine is purchased, it is set to automatically You can embroider while replacing the thread spool a embroider lock stitches at the beginning of the pattern, before minimal number of times. embroidering after each thread color change, and before Before starting to embroider, touch in the embroidering... -
Page 74: Checking The Embroidery Area
The embroidery color order is rearranged and sorted by thread CHECKING THE EMBROIDERY colors. AREA Touch to cancel the color sorting and embroider with the embroidery color order. The pattern is usually placed at the center of the Note embroidery frame. If you want to change where in the fabric the pattern will be embroidered, you can check the •... - Page 75 BASIC EMBROIDERY Touch in the pattern editing screen. Touch Touch , and then press the “Start/Stop” button to start embroidering. When embroidery is finished, the fabric displayed in the background disappears. ■ Improving scanned images and camera images The machine software adjusts images according to the table installation setting.
- Page 76 ■ Displaying the fabric in the background Affix the embroidery positioning sticker to the fabric within the area indicated by the red frame in the LCD, Whether or not the fabric is displayed in the background can be specified. In addition, [Standard] or [Fine] can be and then touch selected for the quality of the background image.
-
Page 77: Using The Built-In Camera
BASIC EMBROIDERY Touch in the embroidering settings screen. Using the built-in camera The camera built into this machine can be used to easily align the embroidering position. This is useful for patterns which need to be embroidered in particular position as shown below. - Page 78 Touch the positioning keys to move the embroidery Touch and adjust the orientation of the pattern frame until the chalk mark drawn on the fabric is until the pattern is parallel with the chalk mark drawn displayed in the camera view window. on the fabric.
- Page 79 BASIC EMBROIDERY The camera image is displayed enlarged. Memo • You can change the display settings that are specified • When you touch , you can change the camera in the normal camera image display. mode. For details, refer to “Memo” in step “Using the built-in camera”...
-
Page 80: Using The Included Embroidery Positioning Sticker
Memo Using the included embroidery positioning • The three key panels can be repositioned so that sticker the pattern can easily be viewed. Touch the center of the top of a key panel to view Using the camera built into this machine and the included possible locations where the panel can be embroidery positioning stickers, the embroidering position repositioned. -
Page 81: Checking The Embroidery Pattern
When purchasing new ones, check “Optional accessories” on page 14 for the part code, and then contact your nearest authorized Brother dealer. Checking the embroidery pattern The built-in camera automatically detects the embroidery positioning sticker, and then the The carriage moves and shows the pattern position. - Page 82 The presser foot is lowered and the embroidery frame Touch the arrow keys in the embroidering settings moves to show the embroidery area. screen to move the embroidery frame so that the needle drop point is at the center of the area where you wish to embroider.
-
Page 83: Upper Threading
BASIC EMBROIDERY Thread with the color name that appears below each needle UPPER THREADING bar number is threaded on that needle bar. Touch Check the embroidering screen for information on which Current assigned colors are stored in the machine’s needle bars should be threaded with specified thread memory, and the screen indicating that the spools be colors, and then thread the upper threads. -
Page 84: Upper Threading
On the spool pin, place a spool with the thread color specified for the corresponding needle bar. CAUTION • When (unlock key) in the embroidering screen is touched, the “Start/ Stop” button begins flashing in green and the machine can start embroidering. If the upper threading is being performed or the needle is being threaded, be careful that the machine is not accidentally started, otherwise injuries... - Page 85 BASIC EMBROIDERY The numbers indicate the thread path for each of the Pass the thread through the hole (with the numbered needle bars. Be very careful to correctly thread the corresponding needle bar number) in thread guide C, needle bars. then through the corresponding hole in thread guide D.
- Page 86 Hold the thread with both hands, and then pass it (steps through ) may differ depending on the under the guide plate from the right. spool number. Passing the thread through the thread guide pins is designed to prevent the thread from becoming tangled.
-
Page 87: Threading The Needle
• If enough thread is not pulled out, the thread mechanism is bent or damaged, contact your cannot be pulled through the thread cutter. authorized Brother dealer. • While the hook of the automatic needle- Memo threading mechanism is passed through the •... - Page 88 ■ Moving and threading a selected needle bar Press the automatic needle-threading button. You can move and thread a selected needle bar to the embroidering position at any time. Touch The needle bar move screen appears. 1 Automatic needle-threading mechanism Memo 2 Wiper •...
-
Page 89: Performing The Embroidery
BASIC EMBROIDERY Press the “Start/Stop” button. PERFORMING THE EMBROIDERY Press the “Start/Stop” button while it is flashing in green. If the “Start/Stop” button returns to being lit in red, Now, the machine is ready to begin embroidering. perform this procedure again from step When the machine starts embroidering, the presser foot is automatically lowered, the necessary thread trimming operations at the beginning of stitching and at the end of... -
Page 90: Stopping Embroidering
■ Temporarily pausing for extended periods of Memo time • When embroidering a pattern that contains 11 or more colors, it is necessary to change the thread Press the “Start/Stop” button. spools. (page 91) ■ Continuing embroidering To embroider the same pattern again, touch ... -
Page 91: Understanding The Embroidering Screen
BASIC EMBROIDERY Display Understanding the embroidering screen Function Page Key Name This red line indicator shows From this screen, the total number of thread colors, the embroidering order and embroidering time can be checked, when the thread spools will Spool change need to be changed. -
Page 92: Removing The Embroidery Frame
Display REMOVING THE EMBROIDERY Function Page Key Name FRAME Shows the amount of time until the machine will stop. When the last thread spool is being embroidered, the CAUTION number appears in red. Time until the If the thread color needs to machine stops •... -
Page 93: Embroidering A Pattern Containing 11 Or More Colors
BASIC EMBROIDERY ■ Spool change indicator ( EMBROIDERING A PATTERN The spool change indicator in the stitch navigating screen indicates the number of times that the thread spools will CONTAINING 11 OR MORE need to be changed and the amount of time between COLORS changes. -
Page 94: Changing The Thread Spools
Memo CHANGING THE THREAD SPOOLS • To use a different thread color than the one that was specified, use the temporary needle bar This section provides details on the spool thread indicators setting key, and then change the thread color in addition to the procedure for easily changing the spools. -
Page 95: Adjusting While Embroidering
BASIC EMBROIDERY Pull out the old thread just after the needle bar thread ADJUSTING WHILE guide. EMBROIDERING If the thread breaks or the bobbin thread runs out while embroidering If the thread breaks or the bobbin thread runs out while embroidering, the machine will automatically stop. - Page 96 Touch to go back through the stitching Touch to a point where stitches have already been embroidered. Touch The embroidering screen appears again. Touch , and then press the “Start/Stop” button to continue embroidering. ■ Specifying a stitch number Touch 1 Each touch of this key moves one stitch back through the stitching.
- Page 97 BASIC EMBROIDERY ■ If the bobbin thread breaks or runs out ■ If the bobbin thread ran out, replace the bobbin at this point in the procedure. Touch , and then press the thread trimming button. Replace the bobbin with a bobbin wound with bobbin thread.
-
Page 98: Embroidering From The Beginning Or Middle Of The Pattern
• Touch to zoom up the camera view twice the Embroidering from the beginning or middle size of normal view. of the pattern Use the scroll bar to select the thread color, and then If you wish to restart embroidering from the beginning, for touch example, if trial embroidery was performed and an incorrect to select the specific stitch. -
Page 99: Resume Embroidering After Turning Off The Machine
BASIC EMBROIDERY When is touched in this screen to enlarge the Resume embroidering after turning off the display, a stitch number can be specified with the machine number keys. In either of the following cases, the remaining stitches of the embroidery are stored in the machine’s memory. -
Page 101: Chapter 3 Advanced Embroidery
ADVANCED EMBROIDERY ADVANCED Chapter EMBROIDERY Touch to return to the embroidering settings VARIOUS EMBROIDERY screen. FUNCTIONS Touch to select the basting setting. Basting embroidery Before embroidering, basting stitches can be embroidered along the outline of the pattern. This is useful for embroidering fabric that cannot have stabilizer material affixed with an iron or adhesive. -
Page 102: Embroidering Appliqué Patterns
• If the appliqué is cut out along the inside of the Embroidering appliqué patterns embroidered cut line, the appliqué may not be correctly attached to the fabric. Therefore, carefully Some of the built-in embroidery patterns can be used for cut out the appliqué... -
Page 103: Creating An Appliqué Piece
ADVANCED EMBROIDERY Use to specify the distance between the Creating an appliqué piece pattern and the appliqué outline. Appliqué pieces can be created from the built-in patterns and patterns from other sources. This is convenient for fabrics that cannot be embroidered or when you wish to attach an appliqué... - Page 104 Carefully cut along the stitching. After cutting, Lightly apply glue or spray adhesive, and paste the carefully remove all of the cutting line thread. appliqué piece so that it aligns with the placement line. 1 Cutting line for appliqué Note Note •...
-
Page 105: Using A Frame Pattern To Create Appliqués
ADVANCED EMBROIDERY Remove the embroidery frame from the machine, and Using a frame pattern to create appliqués then cut off the excess appliqué fabric along the outside of the stitching. With this method, there is no need to change the fabric in the embroidery frame. -
Page 106: Creating Stippling Or Echo Patterns Automatically
3 Specify the distance from the outline of the pattern to the Creating stippling or echo patterns stippling. 4 Specify the spacing for the stippling. automatically Stippling or echo quilting patterns can be created around the machine’s built-in patterns or original embroidery data without using My Design Center. -
Page 107: Quilting Borders
ADVANCED EMBROIDERY Touch QUILTING BORDERS By rehooping the fabric to embroider connecting patterns, a quilting border of 3 m × 3 m (approx. 118 inches × 118 inches) can be created. ■ Using the camera When embroidering a quilting border, use the built-in camera to display a camera image of the fabric in order to align the pattern. - Page 108 Check the pattern, and then touch to save it. You can check where and how many times the pattern will be embroidered with the codes written on each key. C: Corner 1 The thread colors can be changed. V1: First pattern of the vertical side V2: Second pattern of the vertical side Memo H1: First pattern of the horizontal side...
- Page 109 ADVANCED EMBROIDERY 1 When embroidering the edge pattern Select whether or not to display the needle If the fabric has just been rehooped, use the move pattern keys drop point to align the start point on the screen with the end point of the Each touch of this key changes the previous pattern, and then touch brightness of the camera image.
- Page 110 3 When embroidering the corner pattern ■ Rehooping the fabric Rotate the fabric 90 degrees counterclockwise, rehoop it, and If necessary, the on-screen instructions to rehoop the then attach the embroidery frame to the machine. Use the fabric appears. While the on-screen instructions are being move pattern keys to align the start point on the screen with displayed, the embroidery frame moves to the position the end point of the previous pattern, and then touch...
-
Page 111: Using The Camera To Connect Patterns
ADVANCED EMBROIDERY Hoop fabric in the extra-large embroidery frame (360 USING THE CAMERA TO CONNECT mm × 200 mm (14 inches × 7 7/8 inches)), and then attach the frame to the machine. PATTERNS Instead of using thread marks, the camera can be used to connect patterns. - Page 112 • Use the positioning stickers included with this product or purchase replacement stickers (refer to “Optional accessories” on page 14) from your Brother dealer. If any other sticker is used, the camera may not recognize it. • You can adjust the position of the second pattern,...
- Page 113 ADVANCED EMBROIDERY Affix the first embroidery positioning sticker onto the Affix the second embroidery positioning sticker onto fabric as shown on machine. Then, touch the fabric as shown on machine. Then, touch The camera detects the first positioning sticker. Note •...
- Page 114 While making sure that the two positioning stickers do Note not peel off, remove the embroidery frame from the machine, and then rehoop the fabric. Be sure to hoop • If the next pattern and the centers of the large the fabric so the next pattern and both the positioning circles of the two positioning stickers do not fit stickers are within the embroidering area.
- Page 115 ADVANCED EMBROIDERY Touch , then touch and then press Touch the position where the third pattern will be the “Start/Stop” button to embroider the second connected on the screen, and then touch . In pattern. this example, touch the upper right side of the second pattern.
-
Page 116: Changing The Position Of A Sticker
Following message appears in step if the next Changing the position of a sticker pattern or affixed positioning stickers are close to being out of the embroidering area. Follow the If the selected pattern or positioning stickers for connecting the next pattern do not easily fit in the embroidering area, instructions and then touch follow the on-screen instructions that appear after step page 111 in order to move the positioning stickers. -
Page 117: Resume Feature
ADVANCED EMBROIDERY Affix the second sticker and then touch Resume feature If the machine is turned off while the pattern connecting function is being used, the machine will return to the operation indicated below when it is turned on again. The machine operation will differ depending on when it is turned off. -
Page 118: Making Embroidery Adjustments
Finish detecting positioning stickers (2 locations). MAKING EMBROIDERY ADJUSTMENTS Adjusting the tension of the bobbin thread Note Begin embroidering the second pattern. • Be sure to check the tension of the bobbin thread each time that the bobbin is changed. Depending on the bobbin thread type and whether Finish embroidering the second pattern. - Page 119 ADVANCED EMBROIDERY As shown in the illustration, hold the bobbin case After making the adjustments, try embroidering with against a smooth vertical surface. all needle bars to check the thread tension. Memo • In the built-in embroidery patterns, one pattern is used for checking the thread tension.
-
Page 120: Adjusting The Tension Of The Upper Thread
■ Upper thread is too tight Adjusting the tension of the upper thread The tension of the upper thread is too tight, resulting in the bobbin thread being visible from the right side of the When embroidering, the thread tension should be set so that fabric. -
Page 121: Setting The Machine To Stop At Color Changes
ADVANCED EMBROIDERY From the thread color sequence display, select the Setting the machine to stop at color changes thread color where you wish to stop the machine before continuing to embroider. The machine can be stopped at any time; however, if the machine is stopped while it is embroidering, it is better to go back a few stitches before continuing embroidering to overlap the stitching. -
Page 122: Temporary Needle Bar Setting
The embroidering screen appears again. After specifying the desired settings, touch Memo • If the machine is temporarily turned off when it is stopped at the specified location after embroidering, • The thread color (needle bar) cannot be changed in you will be asked if you wish to continue the middle of an area that is being embroidered. -
Page 123: Reserved Needle Bar And Embroidery Speed Settings
ADVANCED EMBROIDERY Select the color to be assigned to the needle bar. Reserved needle bar and embroidery speed Touch , or directly touch a color, settings to select the desired color. Normally, the machine automatically assigns thread colors to the needle bars; however, a specific thread color can be manually assigned to a certain needle bar. - Page 124 ■ Cancelling the setting If necessary, touch to cancel automatic needle threading. To change the setting, first cancel it, and then select the new setting. Touch any of the key from for the number of the needle bar whose setting you wish to cancel. 1 Disable needle threader key Touch •...
-
Page 125: Changing The Display Guides
ADVANCED EMBROIDERY Changing the display guides Changing the thread color information The guides in the pattern display area can be specified. The You can display the name of the thread colors, embroidery machine automatically detects the type of embroidery frame thread number or the embroidering time. -
Page 126: Deleting Short Stitches
Locate [Thread Trimming]. Touch , then The embroidery settings screen appears. Touch [ON] or [OFF] to select the desired setting. Locate [Short Stitch Delete]. When [ON] is selected, touch specify the jump stitch length. For example, when Touch to select the stitch length. -
Page 127: Deselect Region Setting
ADVANCED EMBROIDERY Touch Deselect region setting The mark appears to indicate that the selected thread color will not be embroidered. The deselect region setting (which specifies that a thread color will not to be embroidered) can be applied to a part of the pattern with a specific color. -
Page 128: Starting/Ending Position Settings
After specifying the desired settings, touch Starting/ending position settings Memo Touch in the embroidering settings screen. • If the deselect region setting is applied to a character pattern, all characters in the pattern will not be embroidered. To deselect region for a single character, use to separate the character pattern (page 44), or use... - Page 129 ADVANCED EMBROIDERY ■ Repeatedly embroidering a pattern along a Embroider the first pattern. diagonal Touch to display the embroidering screen, and Example then touch and press the “Start/Stop” button. 1 Starting position 2 Ending position Touch in the embroidering settings screen to After embroidering is finished, the machine stops at the display the starting/ending position settings screen.
- Page 130 ■ Embroidering aligned characters Touch , and then press the “Start/Stop” button to begin embroidering. Follow the procedure described below to embroider aligned characters in a single row when the pattern After the characters are embroidered, cut the threads, extends beyond the embroidery frame. remove the embroidery frame, and then attach the Example: Aligning “DEF”...
- Page 131 ADVANCED EMBROIDERY ■ Embroidering a pattern aligned with a mark on the fabric to align the needle with the end of By specifying the beginning of stitching and the end of embroidering for the previous pattern. stitching, the exact position of the pattern can be checked. •...
-
Page 132: Using The Memory Function
• Select the pattern’s .phx file in “Removable Disk” and USING THE MEMORY FUNCTION copy the file to the computer. Saving embroidery patterns Note • Do not turn the main power to OFF while the [Saving…] screen is displayed. You will lose the pattern you are saving. -
Page 133: Connecting The Usb Using The Included Usb Cord Clamps
ADVANCED EMBROIDERY Hold the clip end of the USB cord clamp, and then Connecting the USB using the included USB firmly insert the other end into the screw hole where the protective cap was removed. cord clamps When connecting the machine to a computer, use the included USB cord clamps to keep the cord away from the carriage. -
Page 134: Sending Embroidery Patterns From Acomputer To The Machine (Link Function)
(Example of multiple machines connected by the wireless SENDING EMBROIDERY PATTERNS LAN function) • A maximum of ten machines can be connected. FROM A COMPUTER TO THE MACHINE (LINK FUNCTION) This machine is compatible with the Link function. This function allows embroidery patterns edited in embroidery software with the Link function, such as PE-DESIGN NEXT or later, to be transferred from a computer to multiple machines. - Page 135 ADVANCED EMBROIDERY When the following message appears, touch Memo • When the Link function by the USB cable connection is turned on while [Wireless LAN Enable] is set to [ON], the message to set [Wireless LAN Enable] to [OFF] appears. •...
- Page 136 After the embroidery pattern has been opened by the After the desired settings have been specified, touch machine, the embroidering screen appears. to return to the embroidering screen. The opened embroidery pattern appears in the • USB cable connection •...
-
Page 137: Disabling The Link Function
ADVANCED EMBROIDERY Disabling the Link function EMBROIDERY APPLICATIONS Touch , then Embroidering split (large-size) patterns The general settings screen appears. Split (large-size) patterns created with PE-DESIGN version 7 or Locate [Link]. later can be embroidered. With large-size patterns, embroidery designs larger than the embroidery hoop are Touch [OFF] to disable the Link function. - Page 138 Select section to be embroidered, then touch Touch • Select the sections in alphabetical order. Memo • The pattern can be rotated to either the left or right when is touched. If necessary, edit the pattern. Then, touch Touch , and then press the “Start/Stop” button to embroider the pattern section.
-
Page 139: Installing The Included Wide Table
ADVANCED EMBROIDERY Touch to select the next section of the pattern, and INSTALLING THE INCLUDED WIDE then touch TABLE CAUTION • Be sure to install the wide table when using the optional magnetic sash frame, jumbo frame, border frame, quilt frame or flat frame. If these frames are used without the wide table installed, the weight of the frame and fabric may cause the frame to slant and result in poor... - Page 140 Position the wide table so that the notch at the center Slide in the wide table while supporting it so that it aligns with the machine bed, and then place the wide remains level. Push the wide table in until it lightly table flat on the guide plates.
-
Page 141: Removing The Wide Table
ADVANCED EMBROIDERY Tighten the two thumb screws so that the wide table is After the pins on each side reach the notches in the secured. guide plates, raise the wide table to lift the pins up through the notches. 1 Thumb screw Removing the wide table Loosen the two thumb screws, lift up the wide table, and then pull it off toward you. -
Page 142: Embroidery Patterns For The Optional Jumbo Frame
For details on creating jumbo frame patterns, refer to the pattern, prepare the optional jumbo frame. Instruction Manual provided with the embroidery editing • Contact your authorized Brother dealer for software version PE-DESIGN NEXT or later. purchasing the optional jumbo frame. - Page 143 ADVANCED EMBROIDERY Attach the jumbo frame to the machine. • The positioning detection area is under the built-in camera. Touch 1 Built-in camera is in this box. 2 Affix the sticker in this area. When the machine's built-in camera has finished detecting the location of the embroidery positioning sticker, the following message appears.
-
Page 144: Using The Optional Bobbin Winder
Check that the following bobbin winder and accessories are included. When the part code is “*”, contact your authorized Touch to select the next section of the pattern to Brother dealer. be embroidered, and then touch Part Name Part Code... -
Page 145: Setting Up The Optional Bobbin Winder
ADVANCED EMBROIDERY Part Name Setting up the optional bobbin winder Part Code Thread guide Insert the spool pin and the spool cushion. XC6644-151 Lower the holder, and then insert the spool pin straight into the hole. And insert the spool cushion. AC adapter Power supply cord 1 Spool pin... -
Page 146: Connecting The Ac Adapter
Connecting the AC adapter Winding the bobbin Prepare the bobbin and the spool of bobbin thread. Use Insert the plug of the power supply cord into the AC cotton or spun polyester bobbin thread (from 74 dtex/2 to 100 adapter. dtex/2). - Page 147 ADVANCED EMBROIDERY Pass the thread through the hole in the left of the Wind the thread clockwise around the bobbin 4 or 5 thread guide toward the front of the winder. times, as shown in the illustration. Pass the end of the thread through the guide slit in the bobbin winder seat, and pull the thread.
- Page 148 Press the main power switch to start winding the Pull the thread through the guide slit in the bobbin bobbin. winder seat to cut the thread with the cutter. Start winding the bobbin. The bobbin will stop rotating automatically when it is CAUTION done winding, and the bobbin holder will return to its original position.
-
Page 149: Chapter 4 My Design Center
MY DESIGN CENTER MY DESIGN CENTER Chapter ABOUT MY DESIGN CENTER PATTERN DRAWING SCREEN With My Design Center, you can use the functions listed below: • Hand-drawn functions - create embroidery patterns by drawing on the LCD screen • Scanning functions - create embroidery patterns by not only scanning drawings /illustrations with built-in camera, but also importing data from USB media or computer. - Page 150 ■ Key Functions Display Explanation Page Key Name Display Explanation Page Select the stamp shape for Key Name pattern drawing. Scan the attached frame and Stamp key display on the screen as the background while using the Erase lines and shapes that Image scan My Design Center.
-
Page 151: Before Creating Designs
MY DESIGN CENTER Display Before creating designs Explanation Page Key Name Select the center point marker or grid lines setting for [Frame Paint with brush and set the Display] to apply the frame display to the pattern drawing color. You can select the area of My Design Center. - Page 152 ■ Setting the line types, stitch types and colors Stitch types You can set or change the line types, stitch types and colors anytime. You can also specify the line types, stitch Zigzag stitch types and colors before drawing lines. Running stitch Touch to set the line types, stitch types and colors.
-
Page 153: Drawing Regions
MY DESIGN CENTER ■ Setting the brush types, fill patterns and fill Memo colors • Touch to magnify the image when you cannot touch on the line correctly. Touch to set the brush types, fill patterns and fill colors. • Touch , and then select a color within the pattern drawing area to apply the same color to other lines or parts of the pattern. -
Page 154: Using The Stamp Key
Touch to return to the pattern drawing screen. Using the stamp key The color bar on the brush tool key is changed to the Touch selected color. 1 Color bar 2 Fill stitch type If a stippling pattern or decorative fill pattern has been specified, the settings are displayed. -
Page 155: Using The Erase Key
MY DESIGN CENTER Saved outlines Using the select key Embroidery pattern outlines can be registered as stamp shapes. When registering stamp You can select the part of the design to move and/or edit. shapes, select from the last six embroidery Some keys are available only after you select the part. -
Page 156: Stitch Settings Screen
Select the area you want to edit, and then touch STITCH SETTINGS SCREEN To select an area you want to edit, hold the touch Before creating the embroidery pattern, specify the stitch pen at a point on the screen and drag the touch pen settings. - Page 157 MY DESIGN CENTER Candlewicking Stitch Fill stitch settings Specifies the embroidering direction. Select [Size] Increases/reduces the size of the stitch. [Direction] [Manual] to change to the desired direction of Specifies the spacing of the candlewicking [Spacing] fill stitch. stitch. Specifies the stitch density of fill stitch. [Density] Specifies to correct the shrinkage of the [Pull...
-
Page 158: Specifying Global Stitch Settings
Specifying global stitch settings MY DESIGN CENTER WITH SCAN The same stitch settings can be changed at the same time for multiple patterns of the same type. Memo • The scanning frame is an optional accessory in to select the stitch whose settings are to some countries or regions. - Page 159 MY DESIGN CENTER Install the needle plate cover included with the Memo machine. • If you want to scan an image from a small piece of paper that can't be held with the magnets, copy that image onto a larger piece of paper, and then place it on the scanning frame.
-
Page 160: Scanning To Trace Background Image
Scanning to trace background image If you have a favorite picture or drawing, it can easily be traced on the scanned background image and you can create your own pattern. Touch When scanning is finished, scanned image is displayed transparently in the pattern drawing area. ... - Page 161 MY DESIGN CENTER ■ Importing the background image The selected image is displayed transparently in the pattern drawing area. You can import an image as a background from computer or USB media. Touch After the scanned image is converted to stitching, it appears as a background in the pattern drawing screen.
-
Page 162: Line Scan
• When the background image has already imported, LINE SCAN continue with step • When the background image has not imported, continue with step Custom patterns can be created from drawings. You can create patterns by scanning your drawings using the Touch scanning frame* or importing an image from USB media or If you scan the image, make sure that the scanning... - Page 163 MY DESIGN CENTER Touch Note • During scanning, the small dots that appear and The screen for confirming the converted image unnecessary lines can be erased. appears. In the screen for confirming the converted image, you can adjust the [Gray-Scale Detection level], the line color and stitch type again, if necessary.
-
Page 164: Illustration Scan
Touch ILLUSTRATION SCAN Custom patterns can be created from color illustrations. You can create patterns by scanning an illustration using the included scanning frame* or importing an image from USB media or computer. The scanning frame is an optional accessory in some countries or regions. - Page 165 MY DESIGN CENTER When scanning is finished, specify the necessary In the screen for confirming the converted image, settings in the scan image confirmation screen. adjust the image as necessary as in step Change the settings to adjust the image so it can easily be converted to the desired pattern.
-
Page 166: Stippling
Touch STIPPLING Basic stippling with My Design Center Create a stippling design with the basic procedure. Example: Touch Select the heart shape, and then touch Touch Touch Select the square shape, and then touch... -
Page 167: Scanning Drawing To Create Stippling Pattern
MY DESIGN CENTER Touch until the heart shape fits in the square Touch shape, and then touch Touch , and then touch Adjust the stippling stitch settings to create the desired effect, and then touch Touch , and then select the stitch color. Touch after setting the color. - Page 168 Touch When scanning is finished, move to frame the image for the pattern, and then touch • When the background image has already imported, continue with step The screen for confirming the converted image • When the background image has not imported, continue with step appears, adjust the image if necessary and then touch Position the scanning frame on the machine, and then...
- Page 169 MY DESIGN CENTER Touch and then Touch and select the stitch color, and then touch This will set the outline without a stitch. Select the stitch line around the stippling effect. Select the outline of the pattern. 1 Stitch line 1 Outline of the pattern To set the stitch color and fill stitch type, touch Touch...
-
Page 170: Scanning Fabric And Stippling
Attach the embroidery frame on the machine, and then Touch , and then select the stitch color. touch Touch after setting the color. Memo Select the area you want to set stippling effect. • Although the instructions in the LCD screen refer to the scanning frame, this example uses an embroidery frame for scanning. - Page 171 MY DESIGN CENTER Select the circle shape, and then touch To set the stitch color and fill stitch type, touch and then Touch to increase or decrease the size of the circle. Touch , and then select the stitch color. Touch after setting the color.
-
Page 172: Decorative Stitching Around A Pattern In Embroidery (A Quilting Function)
To set the outline of the pattern, touch , and then Decorative stitching around a pattern in embroidery (a quilting function) Memo • For best results, reduce the embroidery speed. • For best results, hoop the stabilizer and fabric and embroidery the design prior to adding the batting and backing under the hoop for quilting. - Page 173 MY DESIGN CENTER Touch to use a stamp or rectangular frame to Touch to continue to the embroidery determine the area to be stitched. screen, and then embroider the pattern. Note Touch in the pattern type selection screen • If the area is to be drawn by hand, be sure to draw a completely closed shape.
- Page 174 Touch for the line tool keys to select Touch , then select the frame outline, and then touch 1 Frame outline Adjust the stippling stitch settings to create the desired effect, and then touch For details, refer to “Specifying individual stitch settings”...
-
Page 175: Chapter 5 Appendix
Note • If the hook is scratched or damaged, consult • Do not use chemical products, such as benzene or your authorized Brother dealer. thinner. After cleaning is finished, insert the bobbin case into the hook, and then close the hook cover. (page 35) -
Page 176: Cleaning Around The Needle Plate
Use the included cleaning brush to remove any lint and Cleaning around the needle plate dust from the moving knife, the fixed knife, the thread retaining plate, and their surrounding areas. If lint and dust collect around the moving knife, the fixed knife or the thread retaining plate, the thread may not be cut correctly and various parts of the machine may be damaged. -
Page 177: Cleaning The Bobbin Case
APPENDIX After cleaning is finished, insert the bobbin into the Cleaning the bobbin case bobbin case and the bobbin case into the hook, and then close the hook cover. (page 34) Thread wax and dust easily collect around the hole in the tension-adjusting spring on the bobbin case, resulting in an incorrect thread tension. -
Page 178: Replacing The Needle
■ Disassembling and cleaning the tension unit Replacing the needle To remove tension dial, turn dial counterclockwise as shown on illustration. CAUTION • Be sure to turn off the machine before replacing the needle, otherwise injuries may result if the machine starts embroidering. •... - Page 179 • If the hook of the automatic needle-threading 1 Needle bar stopper mechanism is bent or damaged, contact your 2 Needle authorized Brother dealer. 3 Flat side of needle 4 Needle changing tool Hold the needle changing tool and press the end of the needle changing tool 1 in to extend the needle- mounting clamp 2.
-
Page 180: Oiling The Machine
Put a drop of oil onto the hook. Oiling the machine In order to extend the life of the machine’s parts and keep the machine operating correctly, be sure to oil the machine before the first time that it is used. Afterward, put a drop of oil onto the hook once a day before use. -
Page 181: About The Maintenance Message
The needle breaks. The needle is not installed correctly. Once this message appears, it is recommended to take your machine to your nearest authorized Brother dealer for a The needle set screw is loose. regular maintenance check. Although this message will The needle is bent or blunt. - Page 182 Symptom Symptom Probable Cause/Remedy Page Probable Cause/Remedy Page The needle breaks. The hook stopper is not correctly installed, the hook is making a complete rotation. The area around the hole in the needle plate is The upper thread is not threaded correctly. damaged.
- Page 183 APPENDIX Symptom Symptom Probable Cause/Remedy Page Probable Cause/Remedy Page Sliding surface on hook is not smooth. There are The upper thread breaks. burns on it. The needle is not correctly installed. The needle set screw is loose. The needle is bent or blunt. The area around the hole in the needle plate is damaged.
- Page 184 Symptom Symptom Probable Cause/Remedy Page Probable Cause/Remedy Page The upper thread breaks. The embroidery pattern is misaligned. A bobbin designed specifically for this machine is The thread is tangled. — not used. • Use tweezers to remove any tangled thread from the hook.
- Page 185 APPENDIX Symptom Symptom Probable Cause/Remedy Page Probable Cause/Remedy Page There are loops in the upper thread. The thread tension is incorrect. The upper thread tension is low. — The upper thread is not threaded correctly. The bobbin thread is not correctly threaded. The bobbin thread tension is incorrect.
- Page 186 Symptom Symptom Probable Cause/Remedy Page Probable Cause/Remedy Page Fabric is puckering. There is misalignment in the scanned image or camera image. The thread tension is too tight. • Adjust the tension according to the type of The correct table installation setting has not been fabric and thread being used.
-
Page 187: Error Messages
This message is displayed when there may be another cause. Refer to “The upper thread breaks.” on page 181 or “The bobbin thread breaks.” on page 182. Touch to advance or reverse through the stitching. (page 93) Communication error. When this message is displayed, consult your nearest authorized Brother dealer. - Page 188 Error messages Cause/solution Communication time out error. When this message is displayed, consult your nearest authorized Brother dealer. Data receiving command error. When this message is displayed, consult your nearest authorized Brother dealer. EEPROM read/write error. When this message is displayed, consult your nearest authorized Brother dealer.
- Page 189 This message is displayed when a combined border pattern is being rotated in the embroidering settings screen. Panel communication error. When this message is displayed, consult your nearest authorized Brother dealer. Pattern extends to the outside of embroidery frame. This message is displayed when the entered character patterns exceed the Add no additional characters.
- Page 190 USB media is loaded. Load USB media. This message is displayed when you try to use incompatible USB media. For a list of compatible USB media, visit “ http://s.brother/cpbag/ ”. Wiper error This message is displayed when thread is tangled on the wiper. Remove the tangled thread.
-
Page 191: If The Machine Does Not Respond When A Key Is Touched
• If the keys still do not respond, even after the touch panel is adjusted, or if the touch panel cannot be adjusted, contact your nearest authorized Brother dealer. Turn the machine off, and on again. -
Page 192: Specifications
SPECIFICATIONS Machine specifications Item Specification Weight 41.8 kg (92 lb) Machine size 561 (W) × 589 (D) × 790 (H) mm (22 (W) × 23-1/4 (D) × 31-1/8 (H) inches) Embroidery speed Speed range / Max.: 1,000 spm, Min.: 400 spm Depending on the embroidery frame, maximum stitches in one minute is 600. - Page 193 USB media is commercially available, but some USB media may not be usable with this machine. Please visit our website “ http://s.brother/cpbag/ ” for more details. Depending on the type of USB devices/media being used, either directly plug the USB device into the machine’s USB port or plug the USB media Reader/Writer into the machine’s USB port.
-
Page 194: Upgrading Your Machine'ssoftware
You can use USB media to download software upgrades for your machine. When an upgrade program is available on “ http:// s.brother/cubah/ ”, please download the files following the instructions on the website and steps below. You can use USB to download software upgrades/updates (**********.upf) for your machine. - Page 195 APPENDIX Note • If an error occurs, a red text error message will appear. When the download is performed successfully, following message will appear. Remove the USB media, and turn the machine off and on again.
-
Page 196: Index
INDEX Symbols Denim ..................61 Density key ................46 “DST” Setting ................123 Display guides ................123 Distance from center (horizontal) ..........44 Distance from center (vertical) ............. 44 Dress shirt (woven) ..............61 AC adapter ................. 144 Adjusting camera view ................73 legs .................. - Page 197 APPENDIX Jump code ................. 123 Silk ....................61 Jump stitch trimming ..............123 Size (horizontal) ................44 Size (vertical) ................44 Size key ..................45 Speaker ..................12 LCD ..................12 Specifications ................190 Lingerie or silk ................61 Split (large-size) patterns ............135 Link function ................
- Page 200 Be sure to install the latest software. A variety of functional improvements are being performed in the latest version. This machine is approved for use in the country of purchase only. Local Brother companies or their dealers will only support machines purchased in their own countries.