Bose L1 Model II Owner's Manual
System with tonematch port
Hide thumbs
Also See for L1 Model II:
- Owner's manual (180 pages) ,
- Manual (15 pages) ,
- Application manual (13 pages)
Table of Contents
Advertisement
Advertisement
Table of Contents

Related Manuals for Bose L1 Model II


Summary of Contents for Bose L1 Model II
- Page 1 Model II System with ToneMatch port Owner’s Guide...
- Page 2 This product conforms to the EMC Directive 89/336/EEC and to the Low Voltage Directive 73/23/EEC. The complete Declaration of Conformity can be found at www.Bose.com/static/compliance/index.html. ©2007 Bose Corporation. No part of this work may be reproduced, modified, distributed, or otherwise used without prior written permission.
- Page 3 1. Read these instructions. 2. Keep these instructions. 3. Heed all warnings. 4. Follow all instructions. 5. Do not use this apparatus near water. 6. Clean only with a dry cloth. 7. Do not block any ventilation openings. Install in accordance with the manufacturer’s instruc- tions.
- Page 4 Dette produkt opfylder EØF-direktiv 89/336/EEC og Lavspændings-direktiv 73/23/EEC. Den fulde overens- stemmelseserklæring finder du på adressen http://www.bose.com/static/compliance/index.html. ©2007 Bose Corporation. Gengivelse, ændring, distribution eller anden brug af dette dokument eller dele heraf er forbudt uden forudgående skriftlig tilladelse. Venice_Safety_DAN.fm...
- Page 5 Das Gerät entspricht der EMV-Richtlinie 89/336/EWG und der Niederspannungs-Richtlinie 73/23/EWG. Die voll- ständige Konformitätserklärung finden Sie unter www.bose.com/static/compliance/index.html. ©2007 Bose Corporation. Dieses Dokument darf ohne vorherige schriftliche Genehmigung weder ganz noch teilweise reproduziert, verändert, vertrieben oder auf andere Weise verwendet werden.
- Page 6 Este producto cumple con la directiva sobre compatibilidad electromagnética 89/336/EEC y la directiva sobre límites de tensión 73/23/EEC. Podrá encontrar la declaración de conformidad completa en www.bose.com/static/ compliance/index.html. ©2007 Bose Corporation. Ninguna parte de esta obra puede reproducirse, modificarse, distribuirse o usarse de ninguna otra manera sin consentimiento previo por escrito. Venice_Safety_SPA.fm...
- Page 7 Ce produit est conforme à la directive CEM 89/336/CEE et à la directive sur les basses tensions 73/23/CEE. La déclaration complète de conformité est disponible sur le site Web www.bose.com/static/compliance/ index.html. ©2007 Bose Corporation. Toute reproduction, modification, distribution ou autre utilisation, même partielle, de ce document est interdite sans autorisa- tion écrite préalable. NFORMATIONS DE SÉCURITÉ...
- Page 8 73/23/CEE sui dispositivi a bassa tensione. La dichiarazione di conformità completa è disponibile all'indi- rizzo www.bose.com/static/compliance/index.html. © 2007 Bose Corporation. Nessuna parte di questo documento può essere riprodotta, modificata, distribuita o usata in altro modo senza previa autor- izzazione scritta della Bose Corporation o della Bose S.p.A.
- Page 9 Dit product voldoet aan de EMC-richtlijn 89/336/EEC en bepalingen van de richtlijn inzake lage spanning 73/23/EEC. De volledige conformiteitsverklaring kunt u vinden op www.bose.com/static/compliance/ index.html. ©2007 Bose Corporation. Geen enkel deel van deze uitgave mag gereproduceerd, gemodificeerd, gedistribueerd of op andere wijze worden gebruikt zonder schriftelijke toestemming vooraf. Venice_Safety_NED.fm...
- Page 10 Denna produkt uppfyller EMC-föreskriften i EU-direktiv 89/336/EEC och lågspänningsföreskriften i EU- direktiv 73/23/EEC. Den kompletta konformitetsdeklarationen finns på www.bose.com/static/compliance/ index.html. ©2007 Bose Corporation. Ingen del av denna publikation får reproduceras, modifieras, distribueras eller på annat sätt användas utan föregående skriftligt medgivande. Venice_Safety_SVE.fm...
-
Page 11: Table Of Contents
II power stand ............Assembling the L1 model II Cylindrical Radiator Connecting to AC power . -
Page 12: Introduction
• Quick and easy setup – The L1 model II system is easy to carry and can be set up in min- utes, not hours. This frees you from the time-consuming and often frustrating effort required to properly set up conventional sound equipment. -
Page 13: Product Overview
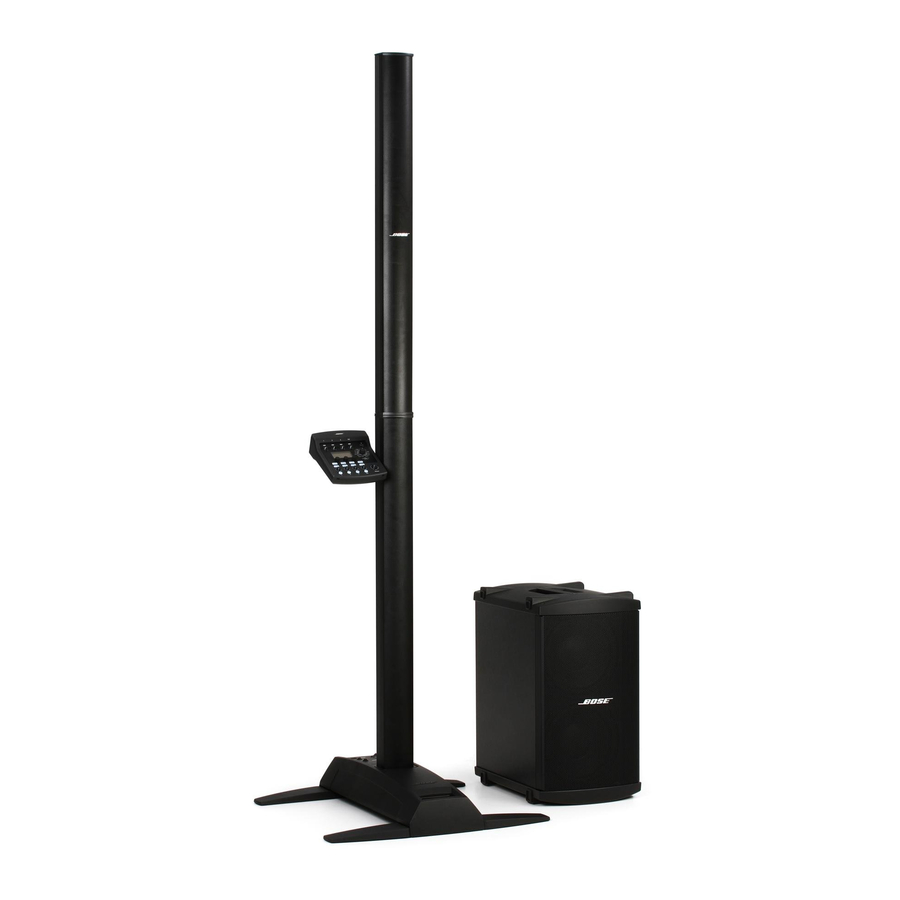
L1 model II system and optional equipment model II system – with ToneMatch ® loudspeaker, and a B1 bass module. The L1 model II ® power amplifier model A1 for adding up to two more B1 bass modules to your L1 model II Cylindrical Radiator ®... -
Page 14: Connections And Controls
NTRODUCTION Connections and controls The top panel of the power stand provides system connectors and controls (Figure 2). Figure 2 Power stand top panel Power/Fault LED Indicates power status. Blue = system on Red = system fault AC Mains AC power input connector. -
Page 15: System Setup
Now is a good time to record the serial numbers of your system here and on your product registration card. You can register your product online at www.Bose.com/register or call (800) 905-1044. Failure to do so will not affect your warranty rights. -
Page 16: Ystem Etup
YSTEM ETUP Positioning your system Placing the power stand in the right location is an important part of setting up this product. Determining the best location for your performance depends on several things. • Size of staging area • Number of performers •... -
Page 17: Setting Up The L1
Cylindrical Radiator ® loud- speaker top and bottom audio engine on the L1 model II system, see “Adding a T1 audio engine (optional)” on page 12 before installing the top section of the loud- L1 top L1 bottom Front of system bottom section into the power stand. -
Page 18: Connecting To Ac Power
Power switch AC Mains CAUTION: Bose recommends using a quality surge suppressor on all electronic equipment. Voltage variations and spikes can damage electronic components in any system. A quality suppressor, which can eliminate the vast majority of failures attributed to surges, may be pur- chased at electronics stores. -
Page 19: Connecting The B1 Bass Module
Connecting the B1 bass module You can place the B1 bass module either vertically or horizontally on the floor. It fits neatly bewteen the legs of the power stand. 1. Plug one end of the B1 bass module cable into one of the B1 connectors. Rotate the plug 2. -
Page 20: Adding A T1 Tonematch
6. Plug the other end of the cable into the ToneMatch port on the power stand. Figure 8 Mounting the T1 Mounting bar Carriage Locking knob L1 model II Cylindrical Radiator audio engine (optional) audio engine provides additional input/output capabilities to your ® loudspeaker. -
Page 21: Adding A Second B1 Bass Module (Optional)
Adding a second B1 bass module (optional) The bass module output of the power stand can adequately drive one or two B1 bass modules. When placed horizontally, the modules are stackable (Figure 9). One or two additional B1 modules can be added with the use of a PackLite Refer to “Adding a PackLite CAUTION: Do not connect more than two B1 bass modules to the Bass Module Out connector on the power stand. -
Page 22: Adding A Packlite
YSTEM ETUP ® Adding a PackLite power amplifier model A1 (optional) Using a PackLite ules to your system. Refer to the A1 owner’s guide for detailed operating instructions. 1. Make sure the A1 amplifier power switch is OFF. 2. Plug one end of the supplied ¼" TRS cable into the Bass - Line Out connector on the 3. -
Page 23: Operating Information
T1 ToneMatch audio engine, refer to its owner’s guide for more information on setup and operation. Single musician A solo musician might play a single instrument through the L1 model II system (Figure 11). A solo musician also might play an instrument and use a microphone for vocals (Figure 12 on page 16). -
Page 24: Multiple Musicians
II system with guitar and microphone Multiple musicians In this scenario, a keyboard-guitar duo sings and plays through a single T1 ToneMatch audio engine and an L1 model II system. Figure 13 Single L1 model II system with multiple instruments... -
Page 25: Full Band
A full band scenario is built around multiple T1 ToneMatch systems. Each musician plays and sings through a single T1 ToneMatch audio engine and L1 model II system. Figure 14 Multiple L1 model II systems, each with a T1 ToneMatch audio engine audio engines and L1... -
Page 26: Dj Events
DJs use many types of input sources (CD player, turntable, MP3 player, etc.) plugged into a mixer. In this scenario, two mixer outputs can be fed into two L1 sound. Figure 15 Two L1 model II systems, a mixer, and input devices model II systems for stereo... -
Page 27: Care And Maintenance
Troubleshooting If you experience problems while using this product, try the following solutions. If you still can’t solve the problem, please call the Bose Live Music Product and Technical Support Team direct at (877) 335-2673 to arrange for service. Problem... - Page 28 Bass - Line Out connector sounds poor Microphone is • Orient the microphone so that it is not pointing directly at its respective L1 model II encountering feedback • Try a different microphone. • Try a different position for the loudspeaker and/or vocalist on stage.
-
Page 29: Limited Warranty And Registration
Limited Warranty and Registration Your product is covered by a limited transferable warranty. Details of the warranty are provided with your product. Register your products online at www.Bose.com/register or call (800) 905-1044. Failure to do so will not affect your warranty rights. - Page 32 ©2007 Bose Corporation, The Mountain, Framingham, MA 01701-9168 USA 303153 AM Rev.00 N10I www.Bose.com/musicians...