Table of Contents
Advertisement
Advertisement
Table of Contents

Related Manuals for Bose L1 Model I


Summary of Contents for Bose L1 Model I
- Page 1 I system Owner’s Guide www.Bose.com/musicians...
- Page 2 CAUTION: No naked flame sources, such as lighted candles, should be placed on the apparatus. CAUTION: Where the mains plug is used as the disconnect device, such disconnect device shall remain readily operable. ©2007 Bose Corporation. No part of this work may be reproduced, modified, distributed or otherwise used without prior written permission.
- Page 3 1. Read these instructions. 2. Keep these instructions. 3. Heed all warnings. 4. Follow all instructions. 5. Do not use this apparatus near water. 6. Clean only with a dry cloth. 7. Do not block any ventilation openings. Install in accordance with the manufacturer’s instruc- tions.
- Page 4 11. Brug kun tilslutningsudstyr/tilbehør, der er angivet af producenten. ©2007 Bose Corporation. Gengivelse, ændring, distribution eller anden brug af dette dokument eller dele heraf er forbudt uden forudgående skriftlig tilladelse. 12. Brug kun den/det vogn, stativ, trefod, beslag eller bord, der er angivet af producenten eller solgt sammen med apparatet.
- Page 5 Netzkabel aus dem Gerät herausgeführt wird. 11. Verwenden Sie nur Zubehör-/Anbauteile, die vom Hersteller zugelassen sind. © 2007 Bose Corporation. Dieses Dokument darf ohne vorherige schriftliche Genehmigung weder ganz noch teilweise reproduziert, verändert, vertrieben oder in anderer Weise verwendet werden. ICHTIGE ICHERHEITSHINWEISE 12.
-
Page 6: Instrucciones De Seguridad Importantes
©2007 Bose Corporation. Ninguna parte de esta obra puede reproducirse, modificarse, distribuirse o usarse de ninguna otra manera sin consentimiento previo por escrito. 13. Desenchufe el aparato eléctrico en caso de tormenta eléctrica o cuando no vaya a utilizarlo durante mucho tiempo. - Page 7 à l’appareil. 11. Utilisez uniquement les accessoires spécifiés par le fabricant. ©2007 Bose Corporation. Toute reproduction, modification, distribution ou autre utilisation, même partielle, de ce document est interdite sans autorisation écrite préalable.
- Page 8 Quando utilizza un carrello, presti attenzione durante lo © 2007 Bose Corporation. Nessuna parte di questo documento può essere riprodotta, modificata, distribuita o usata in altro modo senza previa autorizzazione scritta della Bose Corporation o della Bose S.p.A.
- Page 9 ©2007 Bose Corporation. Geen enkel deel van deze uitgave mag gereproduceerd, gemodificeerd, gedistribueerd of op andere wijze worden gebruikt zonder schriftelijke toestemming vooraf. ELANGRIJKE VEILIGHEIDSINSTRUCTIES 13.
- Page 10 11. Använd endast tillbehör som godkänts av tillverkaren. ©2007 Bose Corporation. Ingen del av denna publikation får reproduceras, modifieras, distribueras eller på annat sätt användas utan föregående skriftligt medgivande. 12. Använd bara apparaten tillsammans med vagn, stativ, trefotsstativ konsol eller bord som rekommenderats av tillverkaren eller sålts...
-
Page 12: Table Of Contents
Disassembly ............. . . Connecting a B1 bass module to the L1 model I power stand (optional) .... -
Page 13: Setup
Before you begin Thank you for purchasing one of the Bose technology brings the benefits of the intimate acoustic concert to amplified performances. Benefits for musicians • You control the sound – Just as in an unamplified performance, you, and no one else, control the sound. -
Page 14: Unpacking
Your L1™ model I system products are delivered to you in two cartons. One carton contains the L1 model I power stand, AC power cord, R1 remote control with cable, Owner’s and Quick Setup guides, L1 model I carrying bag, CD-ROM, and a spare fuse. The other carton... -
Page 15: Placing The Product In The Right Location For Your Performance
WARNING: The completed unit weighs about 60 lb (27 kg). Moving the completely assembled unit is not recommended. Placing the L1 model I power stand in the right location is an important step in the process of setting up this product to create your own individualized sound. Determining the best location for your performance depends on several things: size of staging area, number of performers, and if you will be sharing the L1 model I power stand connections. -
Page 16: Product Assembly
R1 remote control are at center position (12 o’clock). 6. Plug in the L1 model I power stand and turn it on. Plug the female end of the power cord into the AC Mains jack on the L1 model I power stand. -
Page 17: Disassembly
L1 model I power stand. Remove the top L1 model I Cylindrical Radiator Place one foot on the L1 model I power stand to support your back. Firmly grasp the top section with one hand. Using your other hand, press the release button with your thumb and remove the top section from the bottom section. -
Page 18: Connecting A B1 Bass Module To The L1 Model I Power Stand (Optional)
Connecting a B1 bass module to the L1 model I power stand (optional) The B1 Bass Module jack on the L1 model I power stand can adequately drive one or two B1 bass modules. B1 bass modules can be placed on the floor vertically or horizontally. Up to four modules can be stacked when placed horizontally (Figure 5). -
Page 19: Connecting Two B1 Bass Modules
Note: Use only the supplied (blue) B1 bass module 4-wire cable to connect B1 bass modules to the L1 model I power stand. The L1 model I power stand uses the signals on two of the four wires to automatically sense how many B1 bass modules are connected to it. DO NOT SUB- STITUTE the supplied cable with a 2-wire speaker cable. -
Page 20: Channel 1/2 Connections And Controls
00 to 99 apply only to channels 1 and 2. Settings are identical on both channels but are indepen- dently selected. See the preset guide inside the L1 model I power stand panel door for a list of available presets. -
Page 21: Channel 3/4 Connections And Controls
ONTROLS NDICATORS AND ONNECTIONS Channel 3/4 connections and controls Line IN ... ¼-inch phone connector unbalanced line input Level 0 to 12 ... Controls the source input level... -
Page 22: Bass, Remote And Ac Power Connections
B1 Bass Module ... Bass output jack. Used to drive one or two B1 bass Bass - Line OUT ... Balanced or unbalanced bass signal output for Note: For more information on extended bass configurations, visit www.Bose.com/musicians. Data IN ... Digital data input. Used for updating product software Data OUT ... -
Page 23: R1 Remote Control Features
R1 remote control features SIG / OL CH1/CH2 HIGH -12 to +12 ...Cuts (-) or boosts (+) high-frequency sounds CH1/CH2 MID -12 to +12 ...Cuts (-) or boosts (+) mid-frequency sounds CH1/CH2 LOW -12 to +12...Cuts (-) or boosts (+) low-frequency sounds CH1/CH2 LEVEL 0 to 12...Adjusts the channel’s volume level MASTER 0 to 12...Adjusts volume level of all channels CH 1... -
Page 24: Operating Instructions
Unless you make big changes in how you perform, this is typically a one-time event. 1. Set all Trim and Level controls on the L1 model I power stand to zero (0). 2. Set the MASTER and all LEVEL controls on the R1 remote control to zero (0). -
Page 25: Using An Effects Processor
Using an effects processor IMPORTANT: When using an effects processor, determine and use the proper connection method (serial or parallel) for your application. Some effects MUST be hooked up in serial. Serial connection method With the serial method, the complete signal is routed directly into one or more effects processors. -
Page 26: Using A Serial Effects Connection With The L1 Model I Power Stand
Internet. 1. Insert the TRS plug into the Channel 1 Insert jack on the L1 model I power stand. 2. Connect the ¼-inch mono plug (labeled “send”, “ring”, or “right”) to the input of the 3. -
Page 27: Using Parallel Effects Connection With The L1 Model I Power Stand
“insert” cable (with a ¼-inch TRS connector on one side and two mono ¼-inch phone connec- tors on the other). 1. Insert the TRS plug into the Channel 1 Insert jack on the L1 model I power stand. 2. Connect both ¼-inch plugs from the “insert” cable into both receptacles on the “Y” cable 3. - Page 28 • If you have more than three L1 model I power stands plugged into a single 15 amp With nothing plugged into • Using an AC outlet tester, test the AC outlet that the L1 model I power stand is plugged the audio input or output connectors on the rear •...
- Page 29 • Try cleaning the contacts on the L1 model I Cylindrical Radiator™ loudspeakers with electronic contact spray cleaner. System momentarily mutes • This is a feature of the L1 model I power stand that allows the user to hear that internal when changing presets or changes have been made.
-
Page 30: Customer Service
• Make sure the R1 remote control cable is firmly seated in the jack on the remote and the • Try resetting the L1 model I power stand: Turn the L1 model I power stand off, wait 30 Poor-sounding •... -
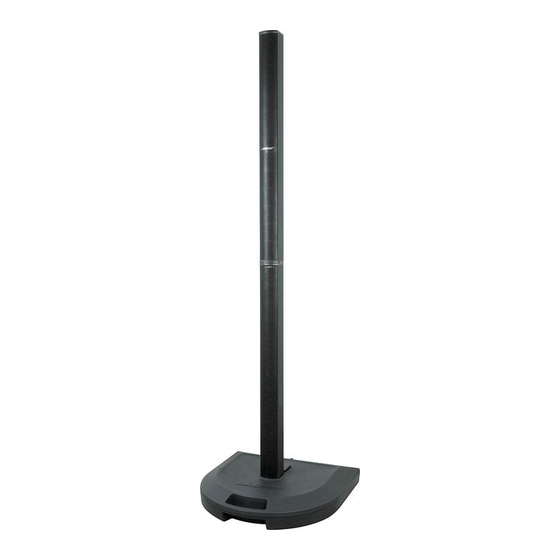
Page 31: Mechanical
Mechanical Dimensions • L1 model I power stand: 26.0''W x 26.0''D x 5.0''H (66 cm x 66 cm x 12.7 cm) • L1 model I Cylindrical Radiator 3.5''W x 4.0''D x 43.0''H (8.9 cm x 10.5 cm x 109.2 cm) •... - Page 32 ©2007 Bose Corporation, The Mountain, Framingham, MA 01701-9168 USA 263976 AM Rev.04 www.Bose.com/musicians...