Agilent Technologies 100 Operator's Manual
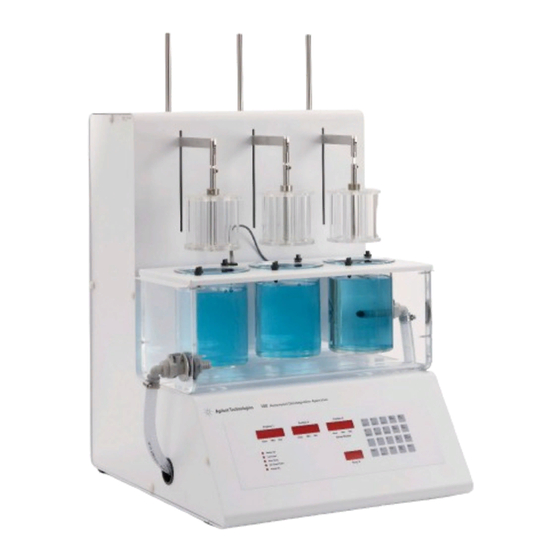
Automated disintegration apparatus
Hide thumbs
Also See for 100:
- Operator's manual (54 pages) ,
- Operator's manual (48 pages) ,
- User manual (48 pages)
Table of Contents
Advertisement
Quick Links
Advertisement
Table of Contents
Troubleshooting

Related Manuals for Agilent Technologies 100


Summary of Contents for Agilent Technologies 100
- Page 1 100 Automated Disintegration Apparatus Operator’s Manual...
- Page 2 Copyright editions. Further, to the maximum extent A CAUTION notice denotes a permitted by applicable law, Agilent © Agilent Technologies, Inc. 2020 hazard. It calls attention to an disclaims all warranties, either express or operating procedure, practice, or implied, with regard to this manual and...
-
Page 3: Table Of Contents
Electrical Hazards Warning Caution Note Information Symbols Introduction Conventions Used in this Manual Serial Number Format Setting Up the 100 Unpacking Your 100 Environmental Requirements for Installation Setting up the Water Bath Initial Power Up Electrical Connections 100 Operator’s Manual... - Page 4 Setting the Date / Time Clock Mounting Baskets and Filling Beakers Draining the Water Bath Hidden Key Functions Operating the 100 Setting Water Bath Temperature Setting Print Frequency for the Report Center Printer Adjusting Basket Height Placing Dosage Units in the Baskets...
- Page 5 Content Replacing the Paper Roll Toggling Your Printer Online Printer Self Test Printer Configuration Troubleshooting Obtaining Warranty and Other Services 100 Operator’s Manual...
- Page 6 Content This page was intentionally left blank, except for this message. 100 Operator’s Manual...
-
Page 7: Safety
Safety Electrical Hazards 9 100 Operator’s Manual... - Page 8 Safety The Agilent 100 has been designed and tested so that when used properly you have an accurate, fast, flexible, and safe instrument. If the equipment is used in a manner not specified by the manufacturer, the protection provided by the equipment may be impaired.
-
Page 9: Electrical Hazards
Safety Electrical Hazards The Agilent 100 contains electrical circuits, devices, and components operating at dangerous voltages. Contact with these circuits, devices, and components can cause death, serious injury, or painful electric shock. Panels or covers that are retained by fasteners which require the use of a tool for removal may be opened only by Agilent-trained, Agilent-qualified, or Agilent-authorized service engineers. -
Page 10: Warning
A ‘Caution’ message appears in the manual when failure to observe instructions C A U T I O N could result in damage to equipment (Agilent supplied and / or other associated equipment). Note A ‘Note’ appears in the manual to give advice or information. NOTE 100 Operator’s Manual... -
Page 11: Information Symbols
European Standard EN 50419. For more information on collection, reuse, and recycling systems, please contact your local/regional waste administration, your local distributor, or Agilent. Indicates the product complies with regulatory compliance requirements of New Zealand and Australia. 100 Operator’s Manual... - Page 12 Safety This page was intentionally left blank, except for this message. 100 Operator’s Manual...
-
Page 13: Introduction
Introduction Conventions Used in this Manual 15 Serial Number Format 15 100 Operator’s Manual... - Page 14 In addition to the standard six-tube USP-approved basket rack, a variety of optional basket racks are available for large and bolus tablets. The 100 is used for disintegration testing in accordance with current USP requirements.
-
Page 15: Conventions Used In This Manual
Country of origin 2 alpha characters matching the required trade designation for the country of origin Year of manufacture ‘09’ for 2009, ‘10’ for 2010, etc. Week of manufacture ‘01’ for week 1 to ‘52’ for week 52 100 Operator’s Manual... - Page 16 Introduction This page was intentionally left blank, except for this message. 100 Operator’s Manual...
-
Page 17: Setting Up The 100
Setting Up the 100 Unpacking Your 100 18 Setting up the Water Bath 20 Initial Power Up 21 Installing the Temperature Probe 23 Water Bath Status LEDs 24 Setting the Date / Time Clock 25 Mounting Baskets and Filling Beakers 26... -
Page 18: Unpacking Your 100
Systems Service Department. Though claims for damage should be filed with the carrier, we can help you file a claim. 2 Carefully remove the 100 from its shipping carton. Hold the unit firmly to prevent it from dropping. Hold the unit only by the base. Do not hold by the reciprocating WARNING shafts to avoid damage. -
Page 19: Environmental Requirements For Installation
Setting Up the 100 Environmental Requirements for Installation • Humidity: max relative humidity 80% for temperatures up to 31 ºC decreasing linearly to 50% relative humidity at 40ºC • Indoor use only • Pollution Degree: 2 • Installation Category: II •... -
Page 20: Setting Up The Water Bath
Setting up the Water Bath 1 Ensure the 100 is not plugged in. 2 Place the water bath on the 100 with the lower quick-connect fitting positioned on the left side of the apparatus. Use the locator holes on the water bath and the locator pins on the 100 to ensure proper placement. -
Page 21: Initial Power Up
The electrical connection at the back of the apparatus is the primary disconnect for the instrument. Figure 2, “100 Rear Panel,” on page 21to complete the steps that follow. Figure 2. 100 Rear Panel 1 Ensure the power is off. - Page 22 Setting Up the 100 3 Turn on the 100. The three position screens and the temperature screen on the front panel illuminates immediately. You will hear the circulator working as it begins to pump the bath water through the system. Bubbles may appear at the water bath inlet as air is expelled from the system.
-
Page 23: Installing The Temperature Probe
Both probes are necessary and the temperature readings must remain within 5 °C of each other or the 100 will not operate. If either probe is not functioning or not installed, the alarm sounds and the keypad is inactive. -
Page 24: Water Bath Status Leds
Setting Up the 100 Water Bath Status LEDs water bath status LEDs Figure 3. 100 Keypad The Heater On LED flashes to indicate heater activity. When the heater is on continuously, as will occur when the water bath is cold, the LED remains illuminated. -
Page 25: Setting The Date / Time Clock
Setting Up the 100 The Ext Temp Probe LED illuminates when the external temperature probe reading displays in the temperature screen. Otherwise the internal probe reading displays. If the external temperature probe is not connected, the NOTE temperature display reads 4.4. This is normal and changes as soon as the probe is installed. -
Page 26: Mounting Baskets And Filling Beakers
If not, either add additional water or drain excess water until the proper working level is reached. Draining the Water Bath Disconnect the 100 from the AC power receptacle before WARNING draining the tank. 1 Disengage the quick-connect fitting on the left side of the tank and attach the supplied drain hose. -
Page 27: Hidden Key Functions
The following seldom-used operations can be performed by pressing and holding CLEAR and then pressing the number on the keypad and releasing both keys at the same time. Refer to Figure 3, “100 Keypad,” on page 24. Table 1 Hidden Key Functions Key Sequence Function CLEAR >... - Page 28 Setting Up the 100 This page was intentionally left blank, except for this message. 100 Operator’s Manual...
-
Page 29: Operating The 100
Operating the 100 Setting Water Bath Temperature 30 Setting Print Frequency for the Report Center Printer 30 Adjusting Basket Height 31 Placing Dosage Units in the Baskets 32 Selecting Operating Mode 32 Printer Operation During Manual or Program Operation (Optional) 36... -
Page 30: Setting Water Bath Temperature
Setting Print Frequency for the Report Center Printer If your 100 is equipped with a Report Center Printer and you want an automatic periodic printout of test conditions, enable the built-in Report Center Printer and indicate the desired automatic print interval. -
Page 31: Adjusting Basket Height
Operating the 100 Adjusting Basket Height 1 Lower the basket to the lowest position and measure the distance from the bottom of the beaker to the bottom of the basket. This measurement should be no less than 2.5 cm. 2 If necessary, adjust the basket height by loosening the screw on the basket hanger with an Allen wrench. -
Page 32: Placing Dosage Units In The Baskets
Operating the 100 Placing Dosage Units in the Baskets Place one dosage unit in each of the six tubes of the basket. USP fluted disks may be added where specified in the individual monograph. Selecting Operating Mode You can select single-basket, multi-basket, or three-basket operation. -
Page 33: Multi-Basket Operation
This feature allows the 100 to function as a conventional two- or three-basket apparatus. • You can program the 100 to drop the baskets at staggered times and to remove them at the same time. This feature is useful when running different products with different test lengths simultaneously without returning to the apparatus at different times to view the end of each test. - Page 34 Operating the 100 The example on page 33 indicates the previously programmed test length for Position 1 was 30 minutes. • To accept the current test length, press ENTER. • To change it, enter the new value in hhmmss format and press ENTER.
- Page 35 Operating the 100 • To disable Position 2, enter 000000 and press ENTER. 4 In the display, the numeral 3 flashes, alternating with the previously programmed delay time for Position 3 in hhmmss format. The delay time is the amount of time between the start of the program and the start of dipping for Position 3.
-
Page 36: Three-Basket Operation
Printer Operation During Manual or Program Operation (Optional) If your 100 is equipped with the optional Report Center Printer, you can generate a printout of the instrument status at any time by pressing PRINT. This does not affect automatic printing as set by the PRINT FREQ function. -
Page 37: Troubleshooting And Maintenance
Troubleshooting and Maintenance Preventive Maintenance 38 Water Bath Temperature Probe Accuracy Test 43 Report Center Impact Printer 45 Troubleshooting 51 100 Operator’s Manual... -
Page 38: Preventive Maintenance
• Ensure media is removed and the system is wiped with a clean, damp cloth. ™ • Lightly spray Lube1/ WD-40 onto the shafts and run the machine for a few minutes. 100 Operator’s Manual... -
Page 39: Every Six Months Maintenance
• Change the bath water and add algaecide. • Inspect the tubing for algae, foreign material, and cracks / damage. • Inspect the security of wires and wiring harnesses. • Inspect the drive motor—ensure no leaking of oil has occurred. 100 Operator’s Manual... -
Page 40: Disintegration Basket Care
Place them back into the original shipping containers or other appropriate containers between uses. This will prevent them from coming into contact with each other or anything else in the storage area. 100 Operator’s Manual... -
Page 41: Water Bath / Acrylic Care
C A U T I O N cleaners on your water bath. The water bath supplied with the 100 Disintegration Apparatus should be maintenance free except for an occasional cleaning. If you use a water bath algaecide or clear bath product, ensure it is compatible with PETG and acrylic. -
Page 42: Visual Checks
Panels or covers that are retained by fasteners which require the C A U T I O N use of a tool for removal may be opened only by Agilent-trained, Agilent-qualified, or Agilent-authorized service engineers. See “Obtaining Warranty and Other Services” on page 52.. 100 Operator’s Manual... -
Page 43: Water Bath Temperature Probe Accuracy Test
59.0 580.90 6644 31.0 1739 60.0 560.30 6319 32.0 1667 61.0 540.50 6011 33.0 1599 62.0 521.50 5719 34.0 1533 63.0 503.30 5444 35.0 1471 64.0 485.80 5183 36.0 1412 65.0 469.00 4937 37.0 1355 66.0 452.90 100 Operator’s Manual... - Page 44 946.20 75.0 333.10 18.0 3081 47.0 910.20 76.0 322.30 19.0 2944 48.0 875.80 77.0 311.80 20.0 2814 49.0 842.80 78.0 301.70 21.0 2690 50.0 811.30 79.0 292.00 22.0 2572 51.0 781.10 80.0 282.70 23.0 2460 52.0 752.20 100 Operator’s Manual...
-
Page 45: Report Center Impact Printer
5 Turn the cartridge knob (marked by an arrow) clockwise to stretch the ribbon taut. 6 Replace the cover. 7 Toggle the printer online by pressing the printer toggle switch to the OnLine / Off Line position. The Ready LED illuminates. 8 Replace the paper if necessary. 100 Operator’s Manual... -
Page 46: Replacing The Paper Roll
10 Release the printer toggle switch. 11 Turn the paper roll to take up any slack in the paper feeding to the printer. 12 Place the paper roll into the paper compartment. 100 Operator’s Manual... -
Page 47: Toggling Your Printer Online
When you first turn on the PRINT READY instrument, it prints a message to assure you that the built-in READY microprocessor is operating properly. When you turn off the printer, wait at least three seconds before turning it on again. 100 Operator’s Manual... -
Page 48: Printer Self Test
You can test the print head and ribbon only after inserting paper. Do not attempt to print without paper. Follow these steps to perform a printer self test: 1 Turn off the 100. 2 Press and hold the printer toggle switch in the Paper feed position. -
Page 49: Printer Configuration
Contact the Dissolution Systems Service Department for assistance, if necessary. 1 Turn off the 100. 2 Press and hold the printer toggle switch in the OnLine / Off Line position while turning on the instrument. Hold the printer toggle switch in the OnLine / Off Line position for six seconds after the instrument is turned on, then release the switch. - Page 50 POUND SIGN = # [NEXT/OK] Press OK _(UNDERSCORE) [NEXT/OK] Press OK ONLINE/OFFLINE = YES [NEXT/OK] Press OK EXT CH SET = NO [NEXT/OK] Press OK PRINT READY = YES [NEXT/OK] Press NEXT PRINT READY = NO [NEXT/OK] Press OK READY... 100 Operator’s Manual...
-
Page 51: Troubleshooting
Inspect the position and condition of the water wrong position or faulty. bath temperature probe. Ensure the probe is plugged into the 100. Check the position of the probe within the water bath and ensure it is fully submerged. The temperature probe should only be used to measure the water bath temperature. -
Page 52: Obtaining Warranty And Other Services
To place a service order (warranty or other services), please contact your local Customer Care Center. Contact information can be found at www.agilent.com under your country using the Contact Us link. Place your service request using the displayed phone number or E-mail address. 100 Operator’s Manual... - Page 53 In This Book • Chapter 1 Safety • Chapter 2 Introduction • Chapter 3 Setting Up the 100 • Chapter 4 Operating the 100 • Chapter 5 Troubleshooting and Maintenance www.agilent.com © Agilent Technologies, Inc. 2020 70-9066 Rev E February 2020...