Table of Contents
Advertisement
Advertisement
Table of Contents

Related Manuals for Bowflex MAX TRAINER M6


Summary of Contents for Bowflex MAX TRAINER M6
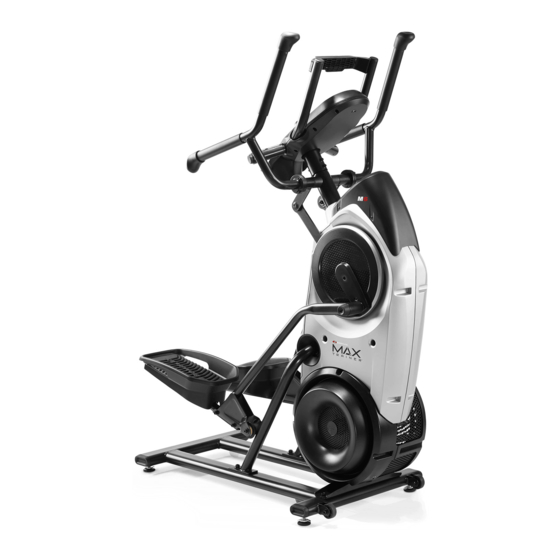
- Page 1 ™ ™ ™ OWNER’S / ASSEMBLY MANUAL OWNER’S / ASSEMBLY MANUAL...
-
Page 2: Table Of Contents
Table of Contents / Registration Important Safety Instructions - Assembly Getting Started Safety Warning Labels / Serial Number Power Up / Idle Mode Warm Up Mode MAX 14 MINUTE INTERVAL Program Parts Hardware Workout Programs Tools Paused / Results Mode Assembly Moving the Machine Leveling the Machine... -
Page 3: Important Safety Instructions - Assembly
Important Safety Instructions for future reference. • Keep bystanders and children away from the product you are assembling at all times. • Do not connect power supply to the machine until instructed to do so. • The machine should never be left unattended when plugged in. Unplug from outlet when not in use and before cleaning, maintaining or repairing the machine. - Page 4 • Children must not be let on or near to this machine. Moving parts and other features of the machine can be dangerous to children. • Not intended for use by anyone under 14 years of age. chest, become short of breath, or feel faint. Contact your doctor before you use the machine again. Use the values calculated or measured reference only.
-
Page 5: Safety Warning Labels / Serial Number
Safety Warning Labels and Serial Number • Injury or death is possible if caution is not used while using this machine. • Keep children and pets away. • Read and follow all warnings on this machine. • Refer to the Owner’s Manual for additional warnings and safety information. - Page 6 Specifications / Before Assembly 65.5” 48.5 cm ( 19.1 inches ) (166.4 cm) Machine Weight: Power Requirements: Output Voltage: 9V DC, 1.5A 49” (124.5 cm) 30.5” (77.5 cm) DO NOT dispose of this product as refuse. This product is to be recycled. For proper disposal of this product, please follow the prescribed methods at an approved waste center.
-
Page 7: Parts
Parts ( 2 Boxes ) Box 1 Item Description Frame Shroud, Rear Foot Platform Foot Pad Hardware Card Box 2 Item Description Item Description Console Assembly (w/Aerobars) Dynamic Handlebar, Left Dynamic Handlebar, Right AC Adapter Pedal Manual Kit Stabilizer Assembly Media Capture Bar Rail Assembly Assembly / Owner’s Manual... -
Page 8: Hardware
Hardware / Tools Item Description Item Description Lock Nut, M8 Note: Select pieces of Hardware have been provided as spares on the Hardware Card. Be aware that there may be remaining Hardware after the proper assembly of your machine. Tools Included 5 mm 8 mm... -
Page 9: Assembly
Assembly 1. Attach Rail Assembly to Frame and then Release the Frame from the Shipping Plate NOTICE: Hand tighten hardware. 13mm Assembly / Owner’s Manual... - Page 10 2. Carefully Lift the Frame Assembly from the Shipping Plate and Attach to the Stabilizer Assembly NOTICE: Once all hardware has been hand tightened, fully tighten ALL hardware from previous steps. Assembly / Owner’s Manual...
- Page 11 3. Attach Rear Shroud and Caps to the Frame Assembly NOTICE: Place the inside hook of the Rear Shroud on the Frame Assembly and then pivot it up into place. Assembly / Owner’s Manual...
- Page 12 4. Attach Legs to Frame Assembly Assembly / Owner’s Manual...
- Page 13 5. Attach Pedals to Frame Assembly 13mm Assembly / Owner’s Manual...
- Page 14 6. Attach the Foot Platforms and then the Foot Pads to the Pedals Assembly / Owner’s Manual...
- Page 15 7. Cut the Shipping Zip-Tie that Secures the Cables, Connect the Cables, and Attach the Console Assem- bly and Media Capture Bar NOTICE: Do not let the Cables drop into the Frame Assembly. Do not cut or crimp the Console Cables. Assembly / Owner’s Manual...
- Page 16 8. Attach the Upper Handlebars to Frame Assembly NOTICE: Be sure to attach the Upper Handlebars so that they are in the range of operation for the User. Assembly / Owner’s Manual...
- Page 17 9. Connect the AC Adapter to the Frame Assembly NOTICE: Be sure to use the appropriate AC Adapter plug for your region. 10. Final Inspection Inspect your machine to ensure that all hardware is tight and components are properly assembled. Note: Remove any protective covers from the face of the Console.
-
Page 18: Moving The Machine
Adjustments Moving the Machine Grasp the Aero Bars to carefully tilt the machine toward you onto the transport rollers. Be sure not to grab the Media Shelf. Push the machine into position. Carefully lower the machine into position. NOTICE: Be careful when you move the machine. All abrupt motions can affect the computer operation. -
Page 19: Features
Features Console Rail Assembly Media Shelf Roller Media Capture Bar Pedal Aerobars Water Bottle Holder / Tray Resistance Fan Contact Heart Rate (CHR) Sensors Power Connector Static Handlebars Transport Roller Dynamic Handlebars Leveler Bluetooth Connectivity (not shown) ® Assembly / Owner’s Manual... -
Page 20: Console Features
Console Features Burn Rate display The Burn Rate display shows the level of calories being burned per Burn Rate minute (CAL/MIN). This rate is a function of Intensity, which is the Display Target Burn Rate either of those values increase, the Burn Rate will increase. LED Range Burn Rate Target LED range The Burn Rate Target LED range is a workout coach based on... - Page 21 PAUSE/STOP button Pauses an active workout, ends a paused workout, or goes to the Power-Up Mode screen. Add Time button Increases the length of a workout by 2.5 minutes for non-Interval Workouts. Note: Button is disabled during a Manual program. Resistance Level buttons Adjusts the resistance level of the workout, selects a workout program, or changes a displayed value.
-
Page 22: Connectivity With Fitness App
Calorie Burn Rate Heart Rate The Heart Rate display shows the heart rate in beats per minute (BPM) from the heart rate sensors. This value will not be shown if a heart rate signal is not detected. Resistance Level als. Bluetooth ®... -
Page 23: Secure Your Device
Workout with Other Apps connectivity which allows it to work with a number of digital partners. For our latest list of supported ® USB Charging If a USB Device is attached to the USB Port, the Port will attempt to charge the Device. The power supplied from the USB Port may not be enough to operate the Device and charge it at the same time. - Page 24 • Movement of the upper body muscles (including arms) produces an electrical signal (muscle artifact) that can interfere with pulse detection. Slight hand movement while in contact with the sensors can also produce interference. • Calluses and hand lotion may act as an insulating layer to reduce the signal strength. •...
-
Page 25: Fitness Basics
Fitness Basics Frequency of 3 times per week, around 14 minutes each day. training if you are new to vigorous activity. Consistency chances of success: your workout times. Make a commitment to a family member, friend or spouse, and encourage each other to stay on track each week. Leave messages with friendly reminders to be consistent, and keep each other accountable. - Page 26 Warm-Up * the workout: Stand with the feet together. Bring one knee forward and up toward the chest. Place the hands around the shin and pull the knee into the chest. Release the stretch by putting the quence 10 or 20 times. Repeat the stretch with the other leg. Stand with the feet together.
- Page 27 Stand with one foot forward and one foot back, hip-width apart and feet facing forward. Hold onto a wall for balance with one hand, if necessary. Bend both knees putting weight on the back heel. Release the stretch by returning to the start position.
- Page 28 Workouts Steady State workouts A Steady State workout involves slowly increasing your workout speed to a challenging, but comfortable, speed you can hold for most of your work- Interval Training workouts and calorie burn. This form of workout allows you to burn more calories than a standard workout in a shorter period of time. Using the Calorie Burn Rate display, you can adjust the intensity of your workout quickly to achieve your goals.
- Page 29 Workout Log Use this log to track your workouts and progress. Tracking your workouts helps you stay motivated and achieve your goals. Date Calories Burn Rate (aver- Time RPM (average) Heart Rate (aver- Level (average) age) age) Cool-Down * up toward the ceiling, keeping the knee straight. Place the hands (or a strap) around the thigh and move the leg closer to the head.
- Page 30 the lower arm. Bend the top knee and hold the ankle with the same-side hand, then pull the heel toward the gluteals. Hold the stretch for 10 to 30 seconds. Lie on the other side and repeat the stretch with the other leg. Remember to hold the knees close together.
-
Page 31: Operations
Operations How Often Should You Exercise • 3 times a week for about 14 minutes each day. • Schedule workouts in advance and try to follow the schedule. Note: Intensity of Workout To increase the intensity of your workout: • Push yourself to increase the number of Pedal revolutions per minute. •... -
Page 32: Getting Started
Move the Pedal you want to dismount from to the highest position, and bring the machine to a complete stop. Grasp the Static Handlebars under the Console to steady yourself. Step off of the machine and release your grip from the Static Handlebars. Getting Started machine. -
Page 33: Warm Up Mode
Auto Shut-Off (Sleep Mode) Note: The Console does not have an On/Off switch. Warm Up Mode A Warm Up mode is available from the Power-Up screen. To begin, just start using the machine until ready for a workout. During Warm Up, the User Note: MAX 14 MINUTE INTERVAL Program The MAX Interval Workout Program is a workout that alternates from intense... -
Page 34: Workout Programs
Push and hold the USER button for 3 seconds to begin the Edit User mode. value, and push ENTER/START to set the value. The Console will display the WEIGHT prompt with the current weight value. Use the Resistance Level/Increase or Decrease buttons to adjust the value, and push ENTER/START to set the value. -
Page 35: Paused / Results Mode
Stairs (4 segments) Manual The Manual workout program is an open-ended workout that tracks the total workout time. During a Manual Note: Because of the open-ended design of the Manual workout, the Add Time button is disabled. To start a Workout Program: Stand on the machine. - Page 36 Console Setup Mode The Console Setup Mode lets you view maintenance statistics (Total Run Hours and Software Version) or fully reset the Console. Push and hold down the Volume and PAUSE/STOP buttons for 3 seconds while in the Power-Up Mode to go into the Console Setup Mode. Note: The Console display shows the TOTAL HOURS the machine has operated.
-
Page 37: Maintenance
Maintenance Read all maintenance instructions fully before you start any repair work. In some conditions, an assistant is required to do the necessary tasks. Daily: a damp cloth to wipe your machine and Console free of sweat. Weekly: Check for smooth roller operation. Wipe the machine to remove dust, dirt, or grime. Clean the rails and surface of the rollers with a damp cloth. -
Page 38: Maintenance Parts
Maintenance Parts Assembly / Owner’s Manual... - Page 39 Dynamic Handlebar, Left Transport Wheel Power Cord Console Assembly (w/Aerobars) Stabilizer Arm Drive Assembly Media Capture Bar Leveler Crank Arm Dynamic Handlebar, Right Pedal Drive Pulley, Lower Crank Cover Foot Pad Fan Belt Shroud, Right Roller Disc Brake Speed Sensor Shroud, Right Fan Shroud, Left Fan Speed Sensor (behind Fan)
-
Page 40: Troubleshooting
Troubleshooting Condition/Problem Solution No display/partial display/unit Check electrical (wall) outlet Make sure unit is plugged into a functioning wall outlet. will not turn on Check connection at front of unit Connection should be secure and undamaged. Replace adapter or connec- tion at unit if either are damaged. - Page 41 Condition/Problem Solution Console shuts off (enters sleep Check electrical (wall) outlet Make sure unit is plugged into a functioning wall outlet. mode) while in use Check connection at front of unit Connection should be secure and undamaged. Replace adapter or connec- tion at unit if either are damaged.
-
Page 42: Body Weight Loss Plan
Bowflex™ Body Weight Loss Guide Introduction and Overview • Lose weight and get lean • Improve your health and wellness • Increase your energy and vitality Consult a physician before you start an exercise program or a new health and diet plan. Stop exercising if you feel pain or tightness in your chest, become short of breath, or feel faint. - Page 43 • Turkey for tuna • • Cooked vegetables instead of salad • • and sometimes it will pass. • needs in order to gain muscle and strength. • Focus on post-workout nutrition by having one of your snacks within 30 minutes after you complete your workout. Make sure to have a com- bination of carbohydrates such as fruit with protein (yogurt, milk, or protein powder) to promote muscle growth and recovery.
- Page 44 Here’s an overview of what an ideal day looks like: (See Portion Size Guide for proper serving sizes) Breakfast Snack #1 smart rich fruit protein carb carbs smart protein carb veggies protein/fat Lunch Snack #2 smart protein carb smart protein carb Dinner smart...
- Page 45 Breakfast Options Fruit Smart Carb Protein/Fat Fruit and Nut Oatmeal Cook Berries or banana Plain oats Nuts and milk plain oats in water. Top with fruit, (Regular or quick-cook) nuts, milk, cinnamon, and honey. Cook egg/s. Toast Tomato Egg, ham, and cheese bread and top with 1 slice of cheese, 1 slice of ham, and tomato.
- Page 46 Snack Options Smart Carb Protein 1 medium apple 10-15 almonds Baby carrots 2 tbsp hummus 1 serving of crackers* 1 string cheese Energy or protein bar with <200 calories* Optional Treats You have the choice of replacing Snack #2 with a 100-150 calorie treat. You can have an optional treat every day but for optimal health it is recom- •...
- Page 47 Portion Size Guide Portion Samples: Each of the items listed are for one serving MALE FEMALE 1 cup = baseball 2 eggs 1 egg 2/3 cup beans or lentils* 1/2 cup beans or lentils* 1 cup greek yogurt* 1/2 cup greek yogurt* 1.5oz cheese* 1.5oz cheese* 2 Tblspn peanut or nut butter*...
- Page 48 Grocery List Sprouted grain breads less than 100 calories per slice. Sandwich or bagel thins Corn or low-carb whole wheat tortillas Plain oats: 1 minute or old fashioned Whole grains: brown rice, bulgar, barley, quinoa, couscous Plain non-fat greek yogurt Any unsalted nuts or seeds Energy bars Air-popped or light popcorn...
- Page 49 Keep It Going • , even after you’ve reached your goal weight • If you have your meal plan well-established, log your food every other week to keep yourself on track. Don’t feel like you have to do it every day. •...
-
Page 50: Buy Back Guarantee
Buy Back Guarantee ( if purchased in US/Canada ) purchase price, less shipping and handling. does not apply to sales made by dealers or distributors. 2. If an RMA is granted, the following instructions will prevent delays in the processing of your refund. a. -
Page 51: Warranty
Warranty ( if purchased in US/Canada ) Who Is Covered This warranty is valid only to the original purchaser and is not transferable or applicable to any other person(s). What Is Covered Nautilus, Inc. warrants that this product is free from defects in materials and workmanship, when used for the purpose intended, under normal conditions, and provided it receives proper care and maintenance as described in the Product’s Assembly and Owner’s manual. - Page 52 ™ ™ ™ ™ ™ ™ 8020272.081518.A...