Advertisement
Quick Links
Æ
QUICK INSTALLATION GUIDE
ABOUT THESE CASES
These cases are designed to be ready for remote installation of a top-mounted, air-cooled condensing unit. The unit
controller is programmed for low or medium temperature use and setting can be adjusted using the controller
keypad.
HOW TO MOVE CASES INTO STORE
All components must be removed from top of case for store door clearance.
Forklift pockets at end of case(s) are for safely moving case(s) with a forklift. Insert
forks into pockets (if provided). Electrical tray is suspended in support frame on
rear of case(s).
Top of Case with Splashguard Panels
and Facade removed
Remote
Display
Enclosure
Electrical
Box
Refrigeration
Lines
GFCI
Service
Disconnect
Electrical Tray is stowed in Support Frame on back of Case.
KIT INSTRUCTION- FAMILY DOLLAR & DOLLAR TREE INSTALL GUIDE
®
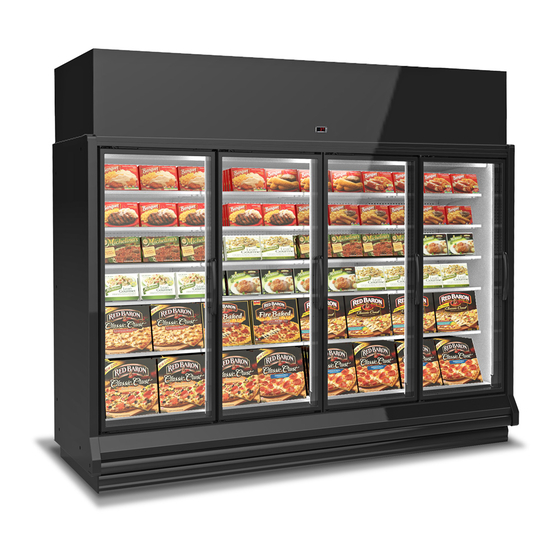
FREEDOM RFL & RFM / RFLN & RFMN
Standard & Narrow Reach-in Merchandisers
Remove Components from top of Case.
Forklift Pockets
Refrigeration components
can be shifted to the side
of case and held by an
installer to pass through
narrow doors.
P/N 3124450_A
June 2020
Advertisement

Related Manuals for Hussmann Freedom RFL


Summary of Contents for Hussmann Freedom RFL
- Page 1 ® FREEDOM RFL & RFM / RFLN & RFMN Standard & Narrow Reach-in Merchandisers Æ QUICK INSTALLATION GUIDE ABOUT THESE CASES These cases are designed to be ready for remote installation of a top-mounted, air-cooled condensing unit. The unit controller is programmed for low or medium temperature use and setting can be adjusted using the controller keypad.
- Page 2 Route unit’s electrical wiring. Attach electrical tray and GFCI. Make sure evaporation pan is level and plug cord into GFCI. Fasten Condensing Unit to Mounting Plate. Condensing Unit GFCI Receptacle for 5-door Case Shown Evaporation Pan Mounting Location Evaporation Pan Electrical Tray P/N 3124450_A U.S. & Canada 1-800-922-1919 • Mexico 1-800-890-2900 • WWW.HUSSMANN.COM...
- Page 3 Connect Inlet / Outlet Lines to Cond. Unit. Insulate lines after connecting IMPORTANT! Tighten swivel fitting until the fitting has significant resistance (fittings bottoming out). Apply ¼ turn past the resistance. Ensure no threads are visible. Freedom Reach-in HUSSMANN CORPORATION • BRIDGETON, MO 63044-2483 U.S.A.
-
Page 4: Installation
2. Connect case wire whip to pump. Field-Installed Hose Pump & Collection Pan Kit (sits underneath case) Green White Connector 3-wire Black 12-18AWG 600V 3(Total) Wiring for Pump Pump Connected to Case Wire Whip P/N 3124450_A U.S. & Canada 1-800-922-1919 • Mexico 1-800-890-2900 • WWW.HUSSMANN.COM... - Page 5 Insert Drain Tubing at least 1” onto slot on pump. 5. Place pan and pump under case. Collection Pan & Pump Installed 3-door case layout shown (RFLN3) Freedom Reach-in HUSSMANN CORPORATION • BRIDGETON, MO 63044-2483 U.S.A.
- Page 6 5-door case layout shown (RFMN5) 6. Connect tubing to condensate pan. Secure Pan Tubing Plug Pan into GFCI Outlet Condensate Pan Tubing to Pump Condensate Pan (Installed on top of case) P/N 3124450_A U.S. & Canada 1-800-922-1919 • Mexico 1-800-890-2900 • WWW.HUSSMANN.COM...
- Page 7 (E) Back panels from both cases by lifting up and our near the bottom. No tools are necessary. RFL / RFM (F) Remove “J” molding from door frames next to RFLN / RFMN partition. Verify Nut Retainers are installed. Freedom Reach-in HUSSMANN CORPORATION • BRIDGETON, MO 63044-2483 U.S.A.
- Page 8 3. Insert long narrow rods (or screwdrivers) through three or more joining holes of the cases and the partition to maintain alignment, then bring the cases firmly together to compress the gaskets against the partition. P/N 3124450_A U.S. & Canada 1-800-922-1919 • Mexico 1-800-890-2900 • WWW.HUSSMANN.COM...
- Page 9 Replace rear shelf support, back panels, display racks and pans, and shelves removed in Step 1. Once line-up is complete, install bumpers and rails. Be sure to install the splashguard brackets before wiring or piping cases. Freedom Reach-in HUSSMANN CORPORATION • BRIDGETON, MO 63044-2483 U.S.A.
- Page 10 Screws — 5, Washers — 6, and Locking Nut — 7 as shown in Figure 3, Detail A. Fasten the Top Right Retainer — 4 to the interior top panel of right case using Screws — 2. Detail A P/N 3124450_A U.S. & Canada 1-800-922-1919 • Mexico 1-800-890-2900 • WWW.HUSSMANN.COM...
- Page 11 Return to the joining instruction for fastener Left Case tightening sequence, joint molding installation and Partition other steps necessary to complete lineup. Right Case Partition Installed DETAIL A Partition Detail A Freedom Reach-in HUSSMANN CORPORATION • BRIDGETON, MO 63044-2483 U.S.A.
- Page 12 Evaporation Pan to be located in for easy service Vertical screws (every 2 feet). this area for 4 & 5-door cases. access. Supports Field Installation 4 & 5-Door Cases Field Installation 2&3-Door Cases P/N 3124450_A U.S. & Canada 1-800-922-1919 • Mexico 1-800-890-2900 • WWW.HUSSMANN.COM...
- Page 13 Attach brackets and balloon guard near inlet coil as shown. Attach Bracket to top of Case Install Balloon Guard near Air Inlet side of Coil. Freedom Reach-in HUSSMANN CORPORATION • BRIDGETON, MO 63044-2483 U.S.A.
-
Page 14: Installing Splashguard Brackets
Splashguards are joined with a galvanized metal splice connector that comes with the joint kit. Join the splashguards before installing on case. Side Splashguard Detail Splashguard Splice Connector Retaining Bracket Splashguard Joint P/N 3124450_A U.S. & Canada 1-800-922-1919 • Mexico 1-800-890-2900 • WWW.HUSSMANN.COM... -
Page 15: Installing Bumpers
Before installing the last full-length section, measure the remaining space. Use a miter box and fine-tooth saw to cut last bumper to length. Install the last section. Remove protective film from bumpers once installation is complete. Optional end bumpers are factory-installed. Freedom Reach-in HUSSMANN CORPORATION • BRIDGETON, MO 63044-2483 U.S.A. - Page 16 TEST AND ADJUST DOORS FOR PROPER OPENING AND CLOSING SPEED After leveling and joining the merchandisers, adjust and level doors according to manufacturer’s instructions shipped with each product. Factory settings may be lost due to vibration during shipment. P/N 3124450_A U.S. & Canada 1-800-922-1919 • Mexico 1-800-890-2900 • WWW.HUSSMANN.COM...