
Related Manuals for Delta Ultron DPM Series


Summary of Contents for Delta Ultron DPM Series
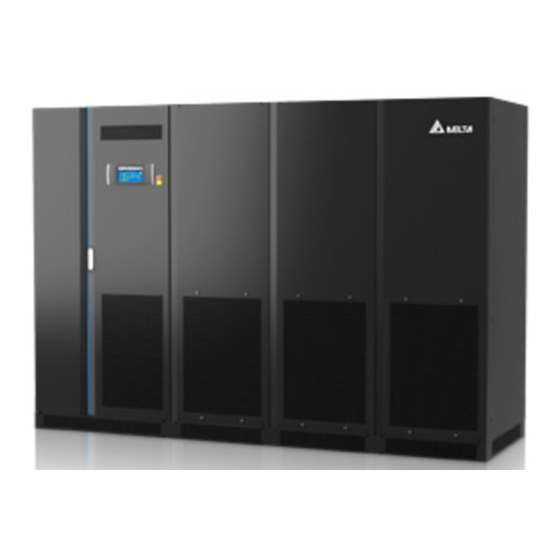
- Page 1 EMERGE Don’t POWER operate emergency! unless The power behind competitiveness Delta UPS - Ultron Family DPM Series, Three Phase 1000/ 1250 kW User Manual www.deltapowersolutions.com...
- Page 2 Copyright © 2019 by Delta Electronics Inc. All Rights Reserved. All rights of this User Manual (“Manual”), including but not limited to the contents, information, and figures are solely owned and reserved by Delta Electronics Inc.
-
Page 3: Table Of Contents
Table of Contents Table of Contents Important Safety Instructions ---------------------------------------------- 1-1 Installation Warnings --------------------------------------------------------------------- 1-2 Connection Warnings -------------------------------------------------------------------- 1-2 Usage Warnings -------------------------------------------------------------------------- 1-4 Storage Warnings ------------------------------------------------------------------------- 1-5 Standard Compliance -------------------------------------------------------------------- 1-6 Introduction ---------------------------------------------------------------------- 2-1 General Overview ------------------------------------------------------------------------ 2-2 Package Inspection --------------------------------------------------------------------- 2-2 2.2.1 1000kW UPS Package List ------------------------------------------------- 2-3 2.2.2... - Page 4 Installation and Wiring -------------------------------------------------------- 5-1 Before Installation and Wiring --------------------------------------------------------- 5-2 Installation Environment ---------------------------------------------------------------- 5-2 Fixing the UPS ---------------------------------------------------------------------------- 5-5 Wiring ---------------------------------------------------------------------------------------5-19 5.4.1 Pre-Wiring Warnings ---------------------------------------------------------5-19 ------------------------------------5-23 5.4.3 Internal Wiring between the UPS System Cabinet and the Power Modules ----------------------------------------------------5-25 Ultron DPM series...
- Page 5 Table of Contents 5.4.4 Single Unit Wiring ------------------------------------------------------------5-33 5.4.5 Parallel Units Wiring ---------------------------------------------------------5-40 External Battery Cabinet Connection Warnings ---------------------------------5-46 UPS Operation------------------------------------------------------------------- 6-1 and Parallel Units ----------------------------------------------------------------------- 6-2 Start-up Procedures --------------------------------------------------------------------- 6-5 6.2.1 On-Line Mode Start-up Procedures -------------------------------------- 6-5 6.2.2 Battery Mode Start-up Procedures ---------------------------------------6-10 6.2.3 Bypass Mode Start-up Procedures --------------------------------------6-13 6.2.4...
- Page 6 7.10.5 Battery Discharging History ------------------------------------------------7-44 7.10.6 Clear -----------------------------------------------------------------------------7-45 7.10.7 Advanced Diagnosis ---------------------------------------------------------7-46 7.10.8 Version --------------------------------------------------------------------------7-47 7.10.9 Self-Diagnosis -----------------------------------------------------------------7-48 7.10.10 IP Setting -----------------------------------------------------------------------7-50 Optional Accessories --------------------------------------------------------- 8-1 Maintenance ---------------------------------------------------------------------- 9-1 10. Troubleshooting ---------------------------------------------------------------10-1 --------------------------------------- A1-1 Appendix 2 : Warranty ------------------------------------------------------------- A2-1 Ultron DPM series...
-
Page 7: Important Safety Instructions
Important Safety Instructions Important Safety Instructions 1.1 Installation Warnings 1.2 Connection Warnings 1.3 Usage Warnings 1.4 Storage Warnings 1.5 Standard Compliance... -
Page 8: Installation Warnings
Leave adequate space around all sides of the UPS for proper ventilation and mainte- nance. Please refer to 5.2 Installation Environment. Only authorized Delta engineers or service personnel can perform installation and maintenance. If you want to install the UPS by yourself, please install it under the su- pervision of authorized Delta engineers or service personnel. - Page 9 Important Safety Instructions 3. Each breaker mentioned above must be a 3-pole (L1/ L2/ L3) device and meets the Table 5-5. auxiliary switch must have a normally open (NO) contact and a normally closed (NC) contact connected to the UPS system cabinet’s dry contacts to detect each breaker’s ON/ OFF status.
-
Page 10: Usage Warnings
(that have serious surge current) to the UPS, it needs to be de-rated according to on-site applications. For such special applications, please contact Delta service personnel for the accurate UPS sizing. The UPS is not suitable for connecting with any asymmetrical loads. -
Page 11: Storage Warnings
5. Disconnect the charging source prior to connecting or disconnecting the batteries’ terminals. You must contact Delta customer service if either of the following events occur: 1. Liquid is poured or splashed on the UPS. 2. The UPS is deformed. -
Page 12: Standard Compliance
Standard Compliance UPS Capacity 1000kW 1250kW UL 1778 Ultron DPM series... -
Page 13: Introduction
Introduction Introduction 2.1 General Overview 2.2 Package Inspection 2.3 Functions & Features 2.4 Exterior & Dimensions 2.5 UPS System Cabinet 2.6 Power Modules 2.7 Fans 2.8 Tri-color LED Indicator & Buzzer... -
Page 14: General Overview
3. Please check if any items are missing according to 2.2.1 1000kW UPS Package List and 2.2.2 1250kW UPS Package List. 4. If there is any damage or anything missing, please immediately contact the dealer from whom you purchased the unit. Ultron DPM series... -
Page 15: 1000Kw Ups Package List
3. For pallet C, it carries one power module with one box underneath (see Figure 2-3). For pallet C’s package list, please refer to Table 2-3. 1000kW UPS System Cabinet The power behind competitiveness Delta UPS - Ultron Family DPM Series, Three Phase 1000/ 1250 kW User Manual Box 1 www.deltapowersolutions.com... - Page 16 Rodent Shield C: 4 PCS Rodent Shield D: 1 PC Rodent Shield E: 1 PC Rodent Shield A/ B/ C/ D/ E/ F/ G Rodent Shield F: 4 PCS Rodent Shield G: 2 PCS (include forty-eight M4 round-head screws and Ultron DPM series...
- Page 17 Introduction Power Modules Box 2 Box 3 Box 4 Box 2 Box 3 Box 4 Cable ×11 Cable ×11 Cable ×11 Pallet B (Figure 2-2: Pallet B, Power Modules, Box 2, Box 3 & Box 4) Table 2-2: 1000kW UPS_ Pallet B’s Package List Item Q'ty Power Module...
-
Page 18: 1250Kw Ups Package List
2. For pallet E, it carries three power modules with three boxes underneath (see Figure 2-5). For pallet E’s package list, please refer to Table 2-5. 3. For pallet F, it carries two power modules with two boxes underneath (see Figure 2-6). For pallet F’s package list, please refer to Table 2-6. Ultron DPM series... - Page 19 Introduction 1250kW UPS System Cabinet The power behind competitiveness Delta UPS - Ultron Family DPM Series, Three Phase 1000/ 1250 kW User Manual Box I www.deltapowersolutions.com EMERG Don’t POWER ENCY emergency operate unless A×1 D×1 G×2 Box I B×1 E×1 ×...
- Page 20 Power Modules Box II Box III Box IV Box II Box III Box IV Cable ×11 Cable ×11 Cable ×11 Pallet E (Figure 2-5: Pallet E, Power Modules, Box II, Box III & Box IV) Ultron DPM series...
- Page 21 Introduction Table 2-5: 1250kW UPS_ Pallet E’s Package List Item Q'ty Power Module 3 PCS 1 PC (There are 11 internal cables packed in box II for you to Box II perform internal wiring. Please refer to 5.4.3 Internal Wiring between the UPS System Cabinet and Power Modules).
-
Page 22: Functions & Features
2. The UPS returns automatically to normal mode from bypass mode after an overload condition or a short circuit condition is cleared. Both of auxiliary power and control circuit adopt redundancy design, which doubly en- hances UPS reliability. Ultron DPM series 2-10... -
Page 23: Exterior & Dimensions
Introduction Battery test schedule and battery replacement alarm are settable. Smart battery charger design allows auto-charging or manual-charging to reduce charg- ing time. Input/ output cables entry from top, bottom or lateral sides. Generator compatible. The special modularized design and structure of power modules ensure high reliability and realize easy maintenance. - Page 24 Power Modules 74.9" (1900 mm) EMERG POWER ENCY Don’t emergency! operate unless 74.9" (1900 mm) 24.2" (615 mm) 24.2" (615 mm) 57.1" (1450 mm) 34.4" 72.6" (875 mm) (1845 mm) (Figure 2-7: UPS Exterior & Dimensions) Ultron DPM series 2-12...
-
Page 25: Ups System Cabinet
Introduction UPS System Cabinet 2.5.1 Front View NOTE: For 1000kW UPS and 1250kW UPS, their external views of UPS system cabinets are the same. On the front of the UPS system cabinet, there is a 7” color touch panel, a tri-color LED indic- Figure 2-6. -
Page 26: Internal View
2.5.2 Internal View WARNING: Only authorized Delta engineers or service personnel can perform installation, wiring, panel/ cover removal, maintenance and operation. If you want to execute any action mentioned above by yourself, the action must be under the supervision of authorized Delta engineers or service personnel. - Page 27 Introduction 1000/ 1250kW (UPS System Cabinet with Two Front Doors Open) SCR Panel RS-232 PARALLEL EXTERNAL BATT. OUTPUT/INPUT SMART SLOT EXTERNAL BREAKER DETECTION TEMPERATURE DETECTION DRY CONTACT REPO BATT. START Communication PARALLEL SWITCH DISPLAY Interfaces BYPASS BREAKER OUTPUT BREAKER BATTERY BREAKER EXTERNAL BATT.
- Page 28 Battery Input Terminals (-) UPS System Cabinet's Grounding Terminals ( Bypass Input Terminals (L1/ L2/ L3) AC Input Terminals (L1/ L2/ L3) UPS Output Terminals (L1/ L2/ L3) UPS System Cabinet's Grounding Terminals ( Battery Input Terminals (+) Ultron DPM series 2-16...
-
Page 29: Rear View
Introduction 1250kW UPS System Cabinet's Power Module (Front Bottom View of the UPS Battery Input Terminals (+) System Cabinet with Two Front Doors Open and Panel Removal) UPS System Cabinet's Power Module Input Terminals (L1/ L2/ L3) UPS System Cabinet's Power Module Grounding Terminals ( ) UPS System Cabinet's Power Module Output Terminals (L1/ L2/ L3) -
Page 30: Power Modules
For 1000kW UPS and 1250kW UPS, each power module’s structure, exterior and dimensions are the same. Only the total number of the power modules is 5.3 Fixing the UPS for relevant information. 1000kW Power Module Power Module Power Module Power Module Ultron DPM series 2-18... -
Page 31: Internal View
(Figure 2-13: Front View of the Power Modules) 2.6.2 Internal View WARNING: Only authorized Delta engineers or service personnel can perform installation, wiring, panel/ cover removal, maintenance and operation. If you want to execute any action mentioned above by yourself, the action must be under the supervision of authorized Delta engineers or service personnel. - Page 32 Figure 2-15 and Figure 2-16. For how to perform wiring, please refer to 5.4 Wiring. 1250kW (Internal View of the Power Modules) Front Bottom Wiring Terminals NOTE: For 1000kW UPS, there is no this power module. (Figure 2-15: Location of the Power Modules’ Wiring Terminals) Ultron DPM series 2-20...
-
Page 33: Rear View
Introduction (Internal Front Bottom View of Each Power Module) Output Terminals Input Terminals (L1/ L2/ L3) (L1/ L2/ L3) Grounding Terminal ( Battery Input - Terminal Battery Input + Terminal (Figure 2-16: Power Module's Wiring Terminals) 2.6.3 Rear View The rear view of the power modules is shown in Figure 2-17. There are no user operable or replaceable parts at the rear. -
Page 34: Fans
(battery over temperature is excluded). 1000kW Fans on the Top of the Power Module Fans on the Top of the UPS System Cabinet Fans on the Top of the Power Modules EMERG POWER ENCY Don’t operate emergency! unless Ultron DPM series 2-22... -
Page 35: Tri-Color Led Indicator & Buzzer
Introduction 1250kW Fans on the Top of the Power Modules Fans on the Top of the UPS System Cabinet Fans on the Top of the Power Modules EMERGE POWER Don’t operate emergency! unless (Figure 2-18: Location of Fans) Tri-color LED Indicator & Buzzer Please see Figure 2-19 for the location of the tri-color LED indictor. - Page 36 Indicates that the UPS is operating in one of the fol- lowing modes with the corresponding text shown in the lower right corner of the LCD. Green UPS Operation Mode LCD Display On-Line Mode 'AC' ECO Mode 'ECO' Ultron DPM series 2-24...
- Page 37 Introduction Tri-color LED Status Meaning Indicator Indicates that the UPS is operating in one of the fol- lowing modes with the corresponding text shown in the lower right corner of the LCD. UPS Operation Mode LCD Display Battery Mode 'DC' Bypass Mode 'Bypass' Softstart Mode...
-
Page 39: Operation Modes
Operation Modes Operation Modes 3.1 Single Input 3.2 Dual Input 3.3 Hot Standby Redundancy (Only for Dual Input & at Least Two UPSs) 3.4 Common Battery (Only for Parallel UPSs Connected to the Same External Battery Cabinet(s)) - Page 40 External Maintenance Bypass Cabinet MAIN LOAD Batteries (Figure 3-1: Single Input Application_ UPS & External Maintenance Bypass Cabinet’s Structure) External Maintenance Bypass Cabinet BYPA. MAIN LOAD Batteries (Figure 3-2: Dual Input Application_ UPS & External Maintenance Bypass Cabinet’s Structure) Ultron DPM series...
-
Page 41: Single Input
Operation Modes 3. In this user manual, the meaning of Q1, Q2, Q3, Q4 and Q5 represents the following. Code Meaning External Maintenance Bypass Cabinet’s Input Breaker. External Maintenance Bypass Cabinet’s Bypass Breaker. External Maintenance Bypass Cabinet’s Manual Bypass Breaker. External Maintenance Bypass Cabinet’s Output Breaker. -
Page 42: Battery Mode_ Single Input_ Single Unit
'DC' appears in the lower right corner of the screen. (OFF) Static Switch (ON) MAIN LOAD Rectifier Inverter Static Switch Converter Power Module 1 Power Module 2 Power Module... (Figure 3-4: Battery Mode Diagram_ Single Input Single Unit) Ultron DPM series... -
Page 43: Bypass Mode_ Single Input_ Single Unit
Operation Modes 3.1.3 Bypass Mode_ Single Input_ Single Unit When the inverter encounters abnormal situations such as over temperature, overload, short circuit, abnormal output voltage or low battery, it will automatically shut itself down. If the UPS detects the bypass AC source is normal, it will automatically switch to Bypass mode to protect the connected critical loads from power interruption. -
Page 44: Manual Bypass Mode_ Single Input_ Single Unit
Turn ON the external maintenance bypass cabinet’s Manual Bypass Breaker (Q3). Turn OFF the external maintenance bypass cabinet’s Input Breaker (Q1) and Output Breaker (Q4). Turn OFF each external battery cabinet’s breaker (Q5). personnel can perform maintenance safely. Please see Figure 3-6 for Manual Bypass Ultron DPM series... -
Page 45: Eco Mode_ Single Input_ Single Unit
Operation Modes (OFF) Static Switch (OFF) MAIN LOAD Rectifier Inverter Static Switch Converter Power Module 1 Power Module 2 Power Module... (Figure 3-6: Manual Bypass Mode Diagram_ Single Input Single Unit) 3.1.5 ECO Mode_ Single Input_ Single Unit To activate ECO mode, please refer to 6.2.5 ECO Mode Start-up Procedures, 7.6 Main Screen and 7.9.2 Mode Setting. -
Page 46: On-Line Mode_ Single Input_ Parallel Units
Power Module 2 Power Module... LOAD UPS 1 (OFF) Static Switch (ON) MAIN Rectifier Inverter Static Switch Converter Power Module 1 Power Module 2 Power Module... UPS 2 (Figure 3-8: On-Line Mode Diagram_ Single Input Parallel Units) Ultron DPM series... -
Page 47: Battery Mode_ Single Input_ Parallel Units
Operation Modes 3.1.7 Battery Mode_ Single Input_ Parallel Units If the main AC source is abnormal, for example, when unstable voltage or a power outage occurs, all parallel UPSs will automatically transfer from On-Line mode to Battery mode. During the conversion process, output voltage remains the same. During Battery mode (parallel), each UPS’s tri-color LED illuminates yellow and each UPS’s LCD shows the text 'DC' in the lower right corner. -
Page 48: Bypass Mode_ Single Input_ Parallel Units
Power Module 2 Power Module... LOAD UPS 1 (ON) Static Switch (OFF) MAIN Rectifier Inverter Static Switch Converter Power Module 1 Power Module 2 Power Module... UPS 2 (Figure 3-10: Bypass Mode Diagram_ Single Input Parallel Units) Ultron DPM series 3-10... -
Page 49: Manual Bypass Mode_ Single Input_ Parallel Units
Operation Modes 3.1.9 Manual Bypass Mode_ Single Input_ Parallel Units WARNING: 1. In Manual Bypass mode, make sure that all of the breakers (except the external maintenance bypass cabinet’s Manual Bypass Breaker (Q3)) are in the OFF position before working on any of the parallel UPSs’ internal circuits. This avoids electric shock. - Page 50 Power Module 2 Power Module... LOAD UPS 1 (OFF) Static Switch (OFF) MAIN Rectifier Inverter Static Switch Converter Power Module 1 Power Module 2 UPS 2 (Figure 3-11: Manual Bypass Mode Diagram_ Single Input Single Unit) Ultron DPM series 3-12...
-
Page 51: Eco Mode_ Single Input_ Parallel Units
Operation Modes 3.1.10 ECO Mode_ Single Input_ Parallel Units To activate ECO mode, please refer to 6.2.5 ECO Mode Start-up Procedures, 7.6 Main Screen and 7.9.2 Mode Setting. In ECO mode (parallel), when each parallel UPS’s bypass input voltage and frequency are within the range of rating voltage ±10% and rating frequency ±5Hz respectively, it will be bypass power to supply power to the connected loads;... -
Page 52: Dual Input
On-Line mode, the UPS’s tri-color LED illuminates green and the text 'AC' appears in the lower right corner of the screen. (OFF) BYPA. Static Switch (ON) MAIN LOAD Rectifier Inverter Static Switch Converter Power Module 1 Power Module 2 Power Module... (Figure 3-13: On-Line Mode Diagram_ Dual Input Single Unit) Ultron DPM series 3-14... -
Page 53: Battery Mode_ Dual Input_ Single Unit
Operation Modes 3.2.2 Battery Mode_ Dual Input_ Single Unit The UPS transfers to Battery mode automatically if the main AC source is abnormal, for example, when unstable voltage or a power outage occurs. In Battery mode, the batteries provide DC power and the UPS converts it into AC power and supplies it to the connected critical loads via the external maintenance bypass cabinet’s Output Breaker (Q4). -
Page 54: Bypass Mode_ Dual Input_ Single Unit
'Bypass' appears in the lower right corner of the screen. (ON) BYPA. Static Switch (OFF) MAIN LOAD Rectifier Inverter Static Switch Converter Power Module 1 Power Module 2 Power Module... (Figure 3-15: Bypass Mode Diagram_ Dual Input Single Unit)) Ultron DPM series 3-16... -
Page 55: Manual Bypass Mode_ Dual Input_ Single Unit
Operation Modes 3.2.4 Manual Bypass Mode_ Dual Input_ Single Unit WARNING: 1. In Manual Bypass mode, make sure that all of the breakers (except the external maintenance bypass cabinet’s Manual Bypass Breaker (Q3)) are in the OFF position before working on the UPS’s internal circuits. This avoids electric shock. -
Page 56: Eco Mode_ Dual Input_ Single Unit
LED illuminates green and the text 'ECO' appears in the lower right corner of the screen. (ON) BYPA. Static Switch (OFF) MAIN LOAD Rectifier Inverter Static Switch Converter Power Module 1 Power Module 2 Power Module... (Figure 3-17: ECO Mode Diagram_ Dual Input Single Unit) Ultron DPM series 3-18... -
Page 57: On-Line Mode_ Dual Input_ Parallel Units
Operation Modes 3.2.6 On-Line Mode_ Dual Input_ Parallel Units In On-Line mode (parallel), the total loads will be equally shared by parallel UPSs. If one of the parallel units fails and its load is less than the total capacity of the remaining parallel units, the failing UPS’s output will be switched off and its load will be equally shared by the remaining parallel units. -
Page 58: Battery Mode_ Dual Input_ Parallel Units
Power Module 2 Power Module... LOAD UPS 1 (OFF) BYPA. Static Switch (ON) MAIN Rectifier Inverter Static Switch Converter Power Module 1 Power Module 2 Power Module... UPS 2 (Figure 3-19: Battery Mode Diagram_ Dual Input Parallel Units) Ultron DPM series 3-20... -
Page 59: Bypass Mode_ Dual Input_ Parallel Units
Operation Modes 3.2.8 Bypass Mode_ Dual Input_ Parallel Units In Bypass mode (parallel), when all inverters encounter abnormal situations such as overload, short circuit, abnormal output voltage or low battery, they will automatically shut themselves down. Meanwhile, if all parallel UPSs detect the bypass AC source is normal, they will automatically switch to Bypass mode to protect the connected critical loads from power interruption. -
Page 60: Manual Bypass Mode_ Dual Input_ Parallel Units
Power of the connected critical loads will be supplied by manual bypass. During Manual Bypass mode (parallel), all parallel Figure 3-21 for the path of electrical power through the parallel UPSs in Manual Bypass mode. Ultron DPM series 3-22... - Page 61 Operation Modes (OFF) BYPA. Static Switch (OFF) MAIN Rectifier Inverter Static Switch Converter Power Module 1 Power Module 2 Power Module... LOAD UPS 1 (OFF) BYPA. Static Switch (OFF) MAIN Rectifier Inverter Static Switch Converter Power Module 1 Power Module 2 UPS 2 (Figure 3-21: Manual Bypass Mode Diagram_ Dual Input Single Unit) 3-23...
-
Page 62: Eco Mode_ Dual Input_ Parallel Units
Power Module 2 Power Module... LOAD UPS 1 (ON) BYPA. Static Switch (OFF) MAIN Rectifier Inverter Static Switch Converter Power Module 1 Power Module 2 Power Module... UPS 2 (Figure 3-22: ECO Mode Diagram_ Dual Input Single Unit) Ultron DPM series 3-24... -
Page 63: Hot Standby Redundancy (Only For Dual Input & At Least Two Upss)
Operation Modes Hot Standby Redundancy (Only for Dual Input & at Least Two UPSs) can have a hot standby redundancy function. If you use two UPSs and wish them to work in hot standby redundancy mode, please connect the output of UPS1 to the bypass input of UPS 2. -
Page 64: Common Battery
Delta customer service. 2. Whether you use the lead-acid batteries or the lithium-ion batteries, please contact Delta service personnel for any battery/ battery cabinet’s setup and To save on your costs and installation space, the parallel UPSs can share their connected external battery cabinet(s). - Page 65 Operation Modes (OFF) Static Switch (ON) MAIN Rectifier Inverter Static Switch Converter Power Module 1 Power Module 2 Power Module... UPS 1 LOAD (OFF) Static Switch (ON) MAIN Rectifier Inverter Static Switch Converter Power Module 1 Power Module 2 Power Module... UPS 2 (Figure 3-24: Common Battery Diagram_ only for Parallel UPSs Connected to the Same External Battery Cabinet(s))
-
Page 67: Communication Interfaces
Communication Interfaces Communication Interfaces 4.1 Communication Interfaces on the Front of the UPS System Cabinet with Two Front Doors Open 4.2 Communication Interfaces at the Rear of the Touch Panel... -
Page 68: Communication Interfaces On The Front Of The Ups System Cabinet With Two Front Doors Open
The following communication interfaces (see Figure 4-2) are located on the front of the UPS system cabinet with two front doors open. For each function description, please refer to 4.1.1 SMART Slot ~ 4.1.10 EPO Dry Contacts. Ultron DPM series... -
Page 69: Smart Slot
Communication Interfaces External External Battery Output/ Breaker Temperature Input Battery SMART RS-232 Parallel Parallel Detection Display Detection Dry REPO Start Slot Ports Ports Ports Switch Dry Contacts Port Contacts Contacts Port Button RS-232 PARALLEL SMART SLOT EXTERNAL BATT. OUTPUT/INPUT EXTERNAL BREAKER DETECTION TEMPERATURE DETECTION DRY CONTACT REPO... - Page 70 For bottom entry, please route the user-supplied signal cable ( ) through the cable tray ( ) and connect the cable ( ) to the optional card ( ). Please refer to Figure 4-5 and Figure 4-6. Ultron DPM series...
-
Page 71: Ports & Usb Ports
UPS’s RS-232 port or USB port with a computer and install the UPSentry 2012 software (https://www.deltapowersolutions.com/en/mcis/software-center.php) to record UPS power events, set up alarms, and shut down the UPS safely. If you wish to monitor several UPSs placed in a computer room or a factory to facilitate centralized control, please contact Delta customer service. - Page 72 T/INPU CONTA BYPA SS BREA OUTP UT BREA BATT BREA MANU AL BYPA EXTER SS BREA BATT. TEMP. DETEC TION INPUT BREA OUTP BATT UT DRY FUSE CONT INPUT CONT REPO (Figure 4-8: Other USB Ports’ Location) Ultron DPM series...
-
Page 73: Parallel Ports
Communication Interfaces 4.1.3 Parallel Ports 1. The parallel ports (see Figure 4-9) are used to connect parallel UPSs to increase the system capacity and redundancy. 2. You can parallel at maximum eight UPS units. For 1000kW UPS, you can parallel at maximum 8 UPS system cabinets, and each UPS system cabinet can connect to up to 5 power modules. -
Page 74: External Breaker Detection Dry Contacts
The user-supplied signal cable of the auxiliary switch should be connect to the External Breaker Detection Dry Contacts shown in Figure 4-11. For how to route the auxiliary switch signal cable (user-supplied), please follow the instructions below. Ultron DPM series... - Page 75 Communication Interfaces For top entry, please route the user-supplied auxiliary switch signal cable ( ) through the top cover ( ) and the cable tray ( ), and connect the cable ( ) to the External Breaker Detection Dry Contacts ( ).
- Page 76 2. In accordance with National Electrical Codes (NEC), please install a suitable conduit and bushing for cable protection. 3. Please refer to national and local electrical codes for acceptable cable size. Ultron DPM series 4-10...
- Page 77 Communication Interfaces Bypass Breaker Detection Dry Contacts If your external maintenance bypass cabinet’s bypass breaker (Q2) has the auxiliary switch design, and you connect the auxiliary switch to the Bypass Breaker Detection Dry Contacts shown in Figure 4-16, you can monitor the bypass breaker’s status. If not, the default setting of the external maintenance bypass cabinet’s bypass breaker (Q2) shown on the LCD is ON.
- Page 78 For how to route the auxiliary switch signal cable (user-supplied), please refer to Figure 4-12, Figure 4-13, Figure 4-14 and Figure 4-15. The Auxiliary Switch of the External Maintenance Bypass Cabinet’s Output Breaker (Q4). ’ (Figure 4-18: Output Breaker Detection Dry Contacts_ Pins Location and Wiring Diagram) Ultron DPM series 4-12...
- Page 79 Communication Interfaces Input Breaker Detection Dry Contacts If your external maintenance bypass cabinet’s input breaker (Q1) has the auxiliary switch design, and you connect the auxiliary switch to the Input Breaker Detection Dry Contacts shown in Figure 4-19 you can monitor the input breaker’s status. If not, the default setting of the external maintenance bypass cabinet’s input breaker (Q1) shown on the LCD is ON.
-
Page 80: Display Port
Battery Cabinet’s Fuse. NOTE: (NC) (NC) (NC) (NC) The Q’ty will be varied according to on-site application. ’ (Figure 4-21: Battery Fuse Detection Dry Contacts_ Pins Location and Wiring Diagram) 4.1.6 Display Port DISPLAY (Figure 4-22: Display Port) Ultron DPM series 4-14... -
Page 81: External Battery Temperature Detection Dry Contacts
Before shipment, the display port has been connected to the 7” touch panel with the designated D-SUB15 communication cable in Delta factory. For how to operate the touch panel, please refer to 7.2 How to Turn on the LCD and 7.3 ON/ OFF Button. - Page 82 The #n power module has abnormalities and it Power module fault shuts down the UPS to let the bypass supply shutdown power to the critical loads. The #n power module has abnormalities but the Power module warning UPS still runs in normal mode. Ultron DPM series 4-16...
- Page 83 Communication Interfaces Event Description The EPO button is pressed to urgently power EPO activated The external maintenance bypass cabinet's Load on manual bypass Manual Bypass Breaker (Q3) is turned on and the UPS transfers to manual bypass mode. Battery cabinet over The external battery cabinet’s temperature is too temperature warning/ high.
- Page 84 Figure 4-28 to complete the set-up procedures mentioned above. After that, connect the external battery cabinet’s signal cable to the input dry contacts ( ). When the UPS receives relevant signal, the UPS will initiate an alarm. Ultron DPM series 4-18...
-
Page 85: Repo Dry Contacts
Communication Interfaces UPS Setup Battery Setting UPS-0.1 EVENT LOG Battery Cut Off Voltage (380~441) Install Date 2019-Mar-01 Next Replace Date 2021-Mar-01 Battery Charging Disable Protection (IP DRY 2) Battery Fault Alarm (IP Disable DRY 1) Baseline build for Aging Reference Standby 2019-Mar-01 09:30... -
Page 86: Communication Interfaces At The Rear Of The Touch Panel
MANU EXTER AL BYPA BATT. SS BREA TEMP. DETEC INPUT TION BREA BATT OUTP UT DRY FUSE CONT INPUT CONT REPO 1 2 3 (Figure 4-31: Communication Interfaces _ at the Rear of the Touch Panel) Ultron DPM series 4-20... - Page 87 Communication Interfaces Item Function (USB Ports) Green Indicator Network Port Yellow Indicator There are a network port , a green LED indicator and a yellow LED indicator . The network port can connect to the Ethernet network, communicate with the UPS and acquire the UPS’s information so you can remotely manage the UPS.
- Page 88 Flashing rapidly (every 50ms): The (Network Yellow LED UPS is linked with the built-in SNMP Port) Indicator system. (Continued) Flashing rapidly (every 500ms): The UPS is not linked with the built-in SNMP system. CONSOLE Reserved. Port Ultron DPM series 4-22...
-
Page 89: Installation And Wiring
Installation and Wiring Installation and Wiring 5.1 Before Installation and Wiring 5.2 Installation Environment 5.3 Fixing the UPS 5.4 Wiring 5.5 External Battery Cabinet Connection Warnings... -
Page 90: Before Installation And Wiring
If you want to execute any action men- tioned above by yourself, the action must be under the supervision of authorized Delta engineers or service personnel. If you use a forklift or other equipment to move the Table 5-1. - Page 91 Installation and Wiring 1000kW 1250kW Weight Weight Weight Weight Loading Loading 176 lb/ft 185 lb/ft 861 kg/m 902 kg/m UPS System 6357 lb 7695 lb (including (including Cabinet & Power 2883 kg 3490 kg 139 lb (63 kg) 185.2 lb (84 kg) Modules cables) cables)
- Page 92 For safety concerns, we suggest that you: 1. Equip surroundings of the installation area with CO sonnel to keep the UPS key. WARNING: Do not use air conditioners or similar equipment to blow into the top of the UPS and hinder ventilation. Ultron DPM series...
-
Page 93: Fixing The Ups
Installation and Wiring Fixing the UPS The UPS system cabinet and power modules must be installed side by side. Before fixing the UPS system cabinet and power modules in a designated area, please Please refer to Table 5-1. There is a knockout panel at each side of the UPS system cabinet. Please see Figure 5-2. - Page 94 (Front) (Rear) (Front) Knockout Panels Power Modules (at the UPS System Power Modules (at the UPS System Cabinet’s Left-hand Side) Cabinet’s Right -hand Side) (Figure 5-3: Location of the Power Modules’ Knockout Panels) Ultron DPM series...
- Page 95 Installation and Wiring On the top of the UPS system cabinet, there are four fasteners (see Figure 5-4). On the top of the power modules, there are four screw holes, which you will see after you remove the four M8 hexagon socket screws (see Figure 5-5). After the UPS system cabinet and the power modules are placed in the designated area, please follow Figure 5-4 ~ Figure 5-6 to join the top of the UPS system cabinet and the power modules together.
- Page 96 UPS system cabinet and the power modules respectively. Please use a 0.7" (19 mm) socket wrench and twenty-eight M12 expansion screws (provided by the service Please refer to Figure 5-7 ~ Figure 5-9 system cabinet and power modules on the ground. Ultron DPM series...
- Page 97 Installation and Wiring 1000kW (Front of the Power Modules) 66.7 " (1693 mm) 0.9 " (22 mm) 5.7 " 18.4 " (Front of the (Front of the (146 mm) (467 mm) Power Module) UPS System Cabinet) 0.9 " (22 mm) 3.6 "...
- Page 98 3413 lb (1548 kgf) & Ultimate Shear Force: 6477 lb (2938 kgf)) (Figure 5-9: Balance Support Installation Method for the Power Module) a. Open the UPS system cabinet’s two front doors ( ) and remove all internal panels ( Ultron DPM series 5-10...
- Page 99 Installation and Wiring 1000/ 1250kW (Front View of the UPS System Cabinet with Two Front Doors Open) SCR Panel PARALLEL RS-232 EXTERNAL BATT. OUTPUT/INPUT SMART SLOT EXTERNAL BREAKER DETECTION TEMPERATURE DETECTION DRY CONTACT REPO BATT. START PARALLEL SWITCH DISPLAY BYPASS BREAKER OUTPUT BREAKER BATTERY BREAKER EXTERNAL BATT.
- Page 100 UPS system cabinet’s PF5 power board. Please refer to Figure 5-13. When connecting the two provided D-SUB15 communication cables, please route them via the snap bushings. For information about the snap bushings, please refer Ultron DPM series 5-12...
- Page 101 Installation and Wiring 1250kW D-SUB15 NOTE: Communication Cables Before shipment, the D-SUB15 communication cables have already been CNPF410 CNPF507 attached to the CNPF411A port and CNPF506 CNPF411A CNPF410 port located (PF4 Power Board) (PF4 Power Board) at the power modules’ (PF5 Power Board) PF4 power boards.
- Page 102 UPS system cabinet and install the four rodent shields C at the front bottom of the power modules. For 1250kW UPS, follow Figure 5-14 to install a rodent shield A and a rodent shield B the front bottom of the power modules. Ultron DPM series 5-14...
- Page 103 Installation and Wiring 1000kW Front of the Front of the UPS Power Module System Cabinet Front of the Power Modules Rodent Shield C (M4 Round Head Screw × 4) Rodent Shield B (M4 Round Head Rodent Shield A Screw × 4) (M4 Round Head Screw ×...
- Page 104 Rodent Shield F (M4 Round Head Screw × 4) Rodent Shield F (M4 Round Head Screw × 4) (Figure 5-15: Install the Rodent Shields at the Rear Bottom of the UPS System Cabinet and the Power Modules) Ultron DPM series 5-16...
- Page 105 Installation and Wiring For 1000/ 1250kW UPS, face the rear of the power modules and follow Figure 5-16 to install the rodent shield G at the right bottom side of the power modules. 1250kW Rear of the UPS Rear of the System Cabinet Power Modules NOTE:...
- Page 106 After you complete the procedures above, the front view of the UPS is as follows. 1000kW 1250kW (Figure 5-18: Front View after Rodent Shields Installation) Ultron DPM series 5-18...
-
Page 107: Wiring
1. Before wiring, please ensure that you have followed 5.3 Fixing the UPS 2. Before wiring, please read 5.4 Wiring thoroughly. 3. Only authorized Delta engineers or service personnel can perform installation, wiring, panel/ cover removal, maintenance and operation. If you want to execute any action mentioned above by yourself, the action must be under the supervision of authorized Delta engineers or service personnel. - Page 108 PE: 600 kcmil × 1 PC (300 mm × 1 PC) (300 mm × 1 PC) Cable lug width 2" (50 mm) 2" (50 mm) Screw size Nominal discharge Battery current (condition: 2205A 2756A 12V × 40 PCS) Ultron DPM series 5-20...
- Page 109 Installation and Wiring UPS Capacity 1000kW 1250kW 500 kcmil × 8 PCS 500 kcmil × 9 PCS Recommended (240 mm × 8 PCS) (240 mm × 9 PCS) cable size (+/ -/ PE) PE: 400 kcmil ×1 PC PE: 500 kcmil ×1 PC (185 mm ×...
- Page 110 WARNING: 1. Wrong wiring will cause damage to the UPS and electric shock. 2. If the UPS is not grounded, the power boards and components might be damaged after the UPS is powered on. Ultron DPM series 5-22...
- Page 111 Installation and Wiring WARNING: Only authorized Delta engineers or service personnel can modify single input/ dual input setup. NOTE: For 1000kW UPS and 1250kW UPS, their single input/ dual input modification methods are the same and only their UPS system cabinets rather than power The UPS default setting is single input.
- Page 112 OUTPUT BREAKER BATTERY BREAKER EXTERNAL BATT. TEMP. DETECTION OUTPUT DRY CONTACT INPUT DRY CONTACT REPO MANUAL BYPASS BREAKER INPUT BREAKER BATTERY FUSE Firmly Fix the Twenty-four M12 Screws Here. (Figure 5-21: Firmly Fix the M12 Screws) Ultron DPM series 5-24...
-
Page 113: Internal Wiring Between The Ups System Cabinet And The Power Modules
Installation and Wiring NOTE: If you want to modify the UPS from dual input into single input, please use the socket wrench to reinstall the three copper bars. 5.4.3 Internal Wiring between the UPS System Cabinet and the Power Modules Open the UPS system cabinet’s two front doors ( ) and remove all internal panels ( 1000/ 1250kW... - Page 114 M5 screws and six M4 screws. Please see Figure 5-24. (Front View of the Power Module) M5 Screw × M4 Screw × M5 Screw × (Figure 5-24: Removal of Every Power Module’s Front Panel) Ultron DPM series 5-26...
- Page 115 Installation and Wiring Upon delivery, the 1000kW UPS is placed on three pallets: pallet A, pallet B and pallet For pallet A, it carries one UPS system cabinet with one box underneath. For pallet B, it carries three power modules with three boxes underneath. For pallet C, it carries one power module with one box underneath.
- Page 116 Power Module For power module 2 : M29 cables Grounding Terminals ( ) and For power module 3 : M39 the power modules’ Grounding in total For power module 4 : M49 Terminals ( Ultron DPM series 5-28...
- Page 117 Installation and Wiring 5-29...
- Page 118 1250kW Power Modules System Cabinet Power Modules EMERGE POWER Don’t emergency! operate unless Box VI Box V Box I Box II Box III Box IV Pallet F Pallet D Pallet E (Figure 5-27: Six Boxes’ Location) Ultron DPM series 5-30...
- Page 119 Installation and Wiring Open the box II ~ box VI and you will see 55 cables. Each cable is marked with a number. Please follow the number marked on each cable, the table below and Figure 5-28 to perform internal wiring between the UPS system cabinet and the power modules.
- Page 120 Ultron DPM series 5-32...
-
Page 121: Single Unit Wiring
5.4.4 Single Unit Wiring NOTE: 1. Only authorized Delta engineers or service personnel can perform installation, wiring, panel/ cover removal, maintenance and operation. If you want to execu- te any action mentioned above by yourself, the action must be under the supervision of authorized Delta engineers or service personnel. - Page 122 Terminals terminals. cabinet’s bypass breaker. The terminal connects to the external maintenance bypass cabinet’s For the UPS’s protective grounding terminal ( ) and the external battery cabinet’s grounding earthing. terminal ( Ultron DPM series 5-34...
- Page 123 Installation and Wiring Item* Description Function The terminals connect to the external AC Input Include L1/ L2/ L3 maintenance bypass cabinet’s input Terminals terminals. breaker. The terminals connect to the external UPS Output Include L1/ L2/ L3 maintenance bypass cabinet’s output Terminals terminals.
- Page 124 Input Breaker Source (Q1) AC Input Terminals (L1/ /L2/ L3) Bypass Source Manual Bypass and Loads Breaker (Q3) UPS Output Output Breaker Loads Terminals (L1/ /L2/ L3) (Q4) Battery Input Terminals (+/ -) External Battery Cabinet Ultron DPM series 5-36...
- Page 125 Installation and Wiring 1250kW Front of the Power Modules External Maintenance Front of the UPS Front of the Bypass Cabinet System Cabinet Power Modules Bypass Input Terminals (L1/ /L2/ L3) Main AC Input Breaker Source (Q1) AC Input Terminals (L1/ /L2/ L3) Bypass Source Manual Bypass and Loads...
- Page 126 Table 5-6: Wiring between the UPS System Cabinet and the External Maintenance Bypass Cabinet Table 5-7: External Maintenance Bypass Cabinet Wiring Information Figure 5-33: Single Unit Dual Input Wiring Diagram 5.5 External Battery Cabinet Connection Warnings Ultron DPM series 5-38...
- Page 127 Installation and Wiring 1000kW Front of the Power Module External Maintenance Front of the UPS Front of the Bypass Cabinet System Cabinet Power Modules Bypass Bypass Breaker Bypass Input Source (Q2) Terminals (L1/ L2/ L3) Main AC Input Breaker AC Input Source (Q1) Terminals (L1/ L2/ L3)
-
Page 128: Parallel Units Wiring
5.4.5 Parallel Units Wiring NOTE: 1. Only authorized Delta engineers or service personnel can perform installation, wiring, panel/ cover removal, maintenance and operation. If you want to execu- te any action mentioned above by yourself, the action must be under the supervision of authorized Delta engineers or service personnel. - Page 129 Installation and Wiring Figure 5-30: Wiring Terminals of the UPS System Cabinet Table 5-6: Wiring between the UPS System Cabinet and the External Maintenance Bypass Cabinet Table 5-7: External Maintenance Bypass Cabinet Wiring Information Figure 5-31: Single Unit Single Input Wiring Diagram Figure 5-34: Parallel Units Single Input Wiring Diagram 5.5 External Battery Cabinet Connection Warnings AC Input...
- Page 130 Cables Cover Parallel Cables PARALL SWITCH Parallel Cover Cables PARALL SWITCH Cover Last UPS PARALL SWITCH UPS System Cabinet Middle UPS(s) UPS System Cabinet 1 UPS UPS System Cabinet (Figure 5-36: Top Entry_ Parallel Cables Routing) Ultron DPM series 5-42...
- Page 131 Installation and Wiring Parallel Cables Cable Tray Cover Parallel Ports (Figure 5-37: Top Entry & Location of Parallel Cables, Top Cover, Cable Tray and Parallel Ports) For bottom entry, please route the provided parallel cables ( ) through the cable tray ( ) and connect the cables ( ) to the parallel ports (...
- Page 132 UPS’s 'Parallel Group ID' (1 or 2) and 'Parallel ID' (1 ~ 8) through the LCD. Otherwise, the parallel UPSs cannot be started. Please refer to 6.2.3 Bypass Mode Start-up Procedures and 7.9.6 Parallel Setting. Ultron DPM series 5-44...
- Page 133 Installation and Wiring 1000/ 1250kW (At Maximum Five) (At Maximum Five) External External External External External Maintenance External Maintenance Load Load Load Battery Battery Battery Battery UPS 1 UPS 2 UPS 3 UPS 4 Bypass Bypass Cabinet Cabinet Cabinet Cabinet Cabinet Cabinet Load...
-
Page 134: External Battery Cabinet Connection Warnings
2. Whether you use the lead-acid batteries or the lithium-ion batteries, please contact Delta service personnel for any battery/ battery cabinet’s setup and You should connect the DPM series UPS with at least one external battery cabinet (at maximum five) to ensure that the critical loads connected are protected when a power failure occurs. - Page 135 Installation and Wiring To ensure that the batteries are fully charged, please charge the batteries at least 8 hours before initial use of the UPS. The charging procedures are as follows. 1. Connect (1) the UPS to the external maintenance bypass cabinet (user-supplied), (2) the external maintenance bypass cabinet to the AC power source, and (3) the UPS to the external battery cabinet(s).
- Page 136 (e.g. insulated trays or boxes) in-between. For relevant information about the insulated materials for such application, please contact Delta customer service. Please follow your UPS rating to install an appropriate protective device for each exter- nal battery cabinet. There are two installation methods for selection.
- Page 137 2. The above-mentioned DC circuit breaker, DC isolated switch and DC fuse are optional. If you want to buy any of them, please contact Delta service personnel. 3. If you need to parallel multiple units of external battery cabinets, please contact Delta service personnel for relevant information.
- Page 138 Table 5-8. These maximum values are suggested for general applications only. For actual maximum values, the maximum short-circuit capacity of the on-site batteries must be taken into consideration. Please contact Delta customer service for relevant information.
- Page 139 Installation and Wiring The external battery cabinet’s protective device installation methods are as follows. Option 1: Installation of a 2-pole DC circuit breaker or DC isolated switch (voltage per External Battery Cabinet DC Fuse 2-Pole DC Circuit Breaker or DC Isolated Switch (Figure 5-43: Installation of a 2-Pole DC Circuit Breaker or DC Isolated Switch Connected in Series with a DC Fuse) External...
- Page 140 Battery Over Charged Long beep Battery Test Fail Sounds 50ms every second. Battery End of Discharge Imminent Sounds 50ms every second. Battery End of Discharge Long beep Battery Life Time Expired Sounds 50ms every 3 seconds Ultron DPM series 5-52...
-
Page 141: Ups Operation
UPS Operation UPS Operation Warnings for Single Unit and Parallel Units 6.2 Start-up Procedures... - Page 142 6. Only after you are in the Administrator login status can you see the ON/ OFF button on the Main Screen. Each Main Screen presented in 6. UPS Operation has the ON/ OFF button shown because the scenario is set as 'Administrator Login Ultron DPM series...
- Page 143 UPS Operation UPS-1.1 Bypass Load Mains 10 mins ON/ OFF Button Administrator Bypass 2019-Mar-01 09:30 Login 7. For the ON/ OFF button information, please refer to 7.3 ON/ OFF Button. For the Main Screen information, please refer to 7.6 Main Screen. 8.
- Page 144 If the remaining parallel units’ total capacity is less than the total critical loads, all parallel units will shut down due to overload. Ultron DPM series...
-
Page 145: Start-Up Procedures
UPS Operation Start-up Procedures 6.2.1 On-Line Mode Start-up Procedures WARNING: 1. For parallel units, please follow 6.2.3 Bypass Mode Start-up Procedures to turn on each parallel UPS. After confirming that parallel operation works normally, follow the procedures below step by step. 2. - Page 146 Meanwhile, it will be the bypass source to supply power to the connected loads. UPS-1.1 EVENT LOG Bypass Load Mains 10 mins Bypass 2019-Mar-01 09:30 (b) Dual Input: Switch ON the external maintenance bypass cabinet’s bypass breaker (Q2) and output indicator will illuminate yellow. Ultron DPM series...
- Page 147 UPS Operation After 1 minute of LCD initialization, the LCD will enter the Main Screen as shown in ) will illuminate green. UPS-1.1 Bypass Load Mains 10 mins Bypass 2019-Mar-01 09:30 NOTE: For the Main Screen information, please refer to 7.6 Main Screen. Turn on the external maintenance bypass cabinet’s input breaker (Q1).
- Page 148 After you are in the log in as an Administrator login status, the ON/ OFF button will appear on the Main Screen UPS-1.1 EVENT LOG Bypass Load Mains 10 mins ON/ OFF Button Bypass Administrator 2019-Mar-01 09:30 Login Ultron DPM series...
- Page 149 UPS Operation NOTE: For the Main Screen information, please refer to 7.6 Main Screen. Tap the ON/ OFF button shown on the Main Screen above for the button location) and the following screen will pop up to ask you if you want to power on the UPS’s inverter.
-
Page 150: Battery Mode Start-Up Procedures
Open the UPS system cabinet’s two front doors and press the BATT. START button for 3 seconds and release it. For the location of the BATT. START button, please refer to Figure 4-2 indicator illuminates yellow. Ultron DPM series 6-10... - Page 151 UPS Operation After 1 minute of LCD initialization, the LCD will enter the Main Screen as shown in UPS-1.1 Bypass Load Mains 10 mins Bypass 2019-Mar-01 09:30 NOTE: For the Main Screen information, please refer to 7.6 Main Screen. Please ensure that you are in the Administrator login status. For the Administrator password, please contact service personnel.
- Page 152 LCD and select UPS Setup Output Setting Force Bypass to Inverter. Next, the following screen will pop up to ask you if you want to manually force the UPS to run from bypass to inverter. Please select 'YES'. Ultron DPM series 6-12...
-
Page 153: Bypass Mode Start-Up Procedures
UPS Operation UPS Setup UPS Setup Output Setting Output Setting UPS-1.1 UPS-1.1 EVENT LOG EVENT LOG Voltage Voltage (470~500) (470~500) Frequency Frequency Are you sure to force Bypass to Inverter? PM Redundancy PM Redundancy (10~20) (10~20) Asnyc Transfer Time Asnyc Transfer Time (2~99) (2~99) DC to AC Delay Time... - Page 154 For the Main Screen information, please refer to 7.6 Main Screen. (b) Dual Input: Switch ON the external maintenance bypass cabinet’s bypass breaker (Q2). Now, the the location of the tri-color LED indicator, please refer to Figure 2-13. Ultron DPM series 6-14...
- Page 155 UPS Operation After 1 minute of LCD initialization, the LCD will enter the Main Screen as shown in ) will illuminate green. UPS-1.1 EVENT LOG Bypass Load Mains 10 mins Bypass 2019-Mar-01 09:30 NOTE: For the Main Screen information, please refer to 7.6 Main Screen. For parallel application, please use the LCD to set each UPS’s 'Parallel Group ID' (1 or 2) and 'Parallel ID' (1 ~ 8).
- Page 156 After the steps mentioned above is finished, it will be the bypass source to supply power to the connected loads. Once the bypass start-up procedures are completed, the following screen appears and the tri-color LED indicator remains yellow. UPS-1.1 EVENT LOG Bypass Load Mains 10 mins Bypass 2019-Mar-01 09:30 Ultron DPM series 6-16...
-
Page 157: Manual Bypass Mode Start-Up Procedures
UPS Operation (b) Dual Input: power to the connected loads. Once the bypass start-up procedures are completed, the following screen appears and the tri-color LED indicator remains yellow. UPS-1.1 EVENT LOG Bypass Load Mains 10 mins Bypass 2019-Mar-01 09:30 6.2.4 Manual Bypass Mode Start-up Procedures WARNING: 1. - Page 158 ON/ OFF button will appear on the Main Screen. Please UPS-1.1 EVENT LOG Bypass Load Mains 10 mins ON/ OFF Button 2019-Mar-01 09:30 Administrator Login NOTE: For the Main Screen information, please refer to 7.6 Main Screen. Ultron DPM series 6-18...
- Page 159 UPS Operation Tap the ON/ OFF button shown on the Main Screen above for the button location) and the following screen will pop up to ask you if you YES'. UPS-1.1 UPS-1.1 EVENT LOG EVENT LOG Bypass Bypass Load Load Are you sure to set Inverter to OFF? Mains Mains...
- Page 160 Switch ON the external maintenance bypass cabinet’s input breaker (Q1) and LED indicator illuminates yellow. (b) Dual Input: Switch ON the external maintenance bypass cabinet’s bypass breaker (Q2), input and the tri-color LED indicator illuminates yellow. Ultron DPM series 6-20...
- Page 161 UPS Operation After 1 minute of LCD initialization, the LCD will enter the Main Screen as shown UPS-1.1 Bypass Load Mains 10 mins Manual Bypass Mode Bypass 2019-Mar-01 09:30 NOTE: For the Main Screen information, please refer to 7.6 Main Screen. Turn OFF the external maintenance bypass cabinet’s manual bypass breaker (Q3).
- Page 162 Main Screen (please see the figure above for the button location) and the following screen will pop up to ask you if you want to power on the UPS’s inverter. Please select 'YES'. Ultron DPM series 6-22...
- Page 163 UPS Operation UPS-1.1 UPS-1.1 EVENT LOG EVENT LOG Bypass Bypass Load Load Are you sure to set Inverter to ON? Mains Mains 10 mins 10 mins Bypass Bypass 2019-Mar-01 2019-Mar-01 09:30 09:30 After selection of 'YES', the UPS’s inverter will start up, the UPS will perform self- inspection, the system will begin synchronization with the bypass AC source and the tri-color LED indicator will remain yellow.
-
Page 164: Eco Mode Start-Up Procedures
After 1 minute of LCD initialization, the LCD will enter the Main Screen as shown in the starts running and establishing the DC BUS voltage, but the charger converter has not charged the batteries yet. During this time, the tri-color LED indicator remains yellow. Ultron DPM series 6-24... - Page 165 UPS Operation UPS-1.1 EVENT LOG Bypass Load Mains 10 mins Bypass 2019-Mar-01 09:30 NOTE: For the Main Screen information, please refer to 7.6 Main Screen. After the DC BUS voltage is established, the charger converter will start up and begin to charge the batteries.
- Page 166 For the Main Screen information, please refer to 7.6 Main Screen. Turn ON the external maintenance bypass cabinet’s input breaker (Q1). Now, the has not charged the batteries yet. During this time, the tri-color LED indicator remains yellow. Ultron DPM series 6-26...
- Page 167 UPS Operation UPS-1.1 EVENT LOG Bypass Load Mains 10 mins Bypass 2019-Mar-01 09:30 After the DC BUS voltage is established, the charger converter will start up and begin to charge the batteries. Meanwhile, it will be the bypass source to supply power to the connected loads.
- Page 168 For the Main Screen information, please refer to 7.6 Main Screen. After selection of 'YES' to start up the UPS’s inverter, the UPS will perform self- inspection, the system will begin synchronization with the bypass AC source and the tri-color LED indicator will remain yellow. Ultron DPM series 6-28...
- Page 169 UPS Operation UPS-1.1 EVENT LOG Bypass Load Mains 10 mins Softstart 2019-Mar-01 09:30 After the self-inspection and synchronization are both completed, the UPS will automatically transfer from bypass to inverter and let the inverter supply power to the connected loads. After the online mode start-up procedures are completed, the LCD will show the following screen and the tri-color LED indicator will illuminate green.
- Page 170 For the location of the tri-color LED indicator, please refer to Figure 2-13. UPS-1.1 EVENT LOG Bypass Load Mains 10 mins 2019-Mar-01 09:30 NOTE: For the Main Screen information, please refer to 7.6 Main Screen. Ultron DPM series 6-30...
- Page 171 UPS Operation Please ensure that you are in the Administrator login status. For the Administrator password, please contact service personnel. After you are in the Administrator login status, the ON/ OFF button will appear on the Main Screen. Please UPS-1.1 EVENT LOG Bypass Load...
- Page 172 Switch OFF the external maintenance bypass cabinet’s input breaker (Q1). After that, the grey inverter icon will become green and the UPS will begin shutdown. About 3 ~ 5 minutes, the green inverter icon becomes grey Ultron DPM series 6-32...
- Page 173 UPS Operation UPS-1.1 EVENT LOG Bypass Load Mains 10 mins Bypass 2019-Mar-01 09:30 Next, turn OFF the external maintenance bypass cabinet’s output breaker (Q4) and each external battery cabinet’s breaker (Q5). At this moment, the tri-color LED indicator still illuminates yellow. Now, switch OFF the external maintenance bypass cabinet’s bypass breaker (Q2), WARNING: 1.
- Page 174 After selection of 'YES', the inverter will shut down, and the UPS will stop supplying power to the connected loads and start up shut-down procedures. About 3 ~ 5 minutes, the green inverter icon becomes grey and the tri-color LED indicator remains yellow. Ultron DPM series 6-34...
- Page 175 UPS Operation UPS-1.1 Bypass Load Mains 10 mins Bypass 2019-Mar-01 09:30 Switch OFF the external maintenance bypass cabinet’s output breaker (Q4). Turn OFF each external battery cabinet’s breaker (Q5). After that, both of the LCD and WARNING: 1. For parallel units, ensure that every operation procedure mentioned below is synchronized to all parallel UPSs.
- Page 176 1. For parallel units, ensure that every operation procedure mentioned below is synchronized to all parallel UPSs. 2. For parallel application, if you just want to operate a specific UPS but not all parallel ones, please contact service personnel. Ultron DPM series 6-36...
- Page 177 UPS Operation In manual bypass mode, the LCD and the tri-color LED indicator are both OFF. For either single input or dual input, please directly switch OFF the external maintenance bypass cabinet’s manual bypass breaker (Q3) to completely shut down the UPS. NOTE: 1.
- Page 178 Are you sure to set Inverter to OFF? Mains Mains 10mins 10mins 2019-Mar-01 2019-Mar-01 09:30 09:30 After selection of 'YES', the inverter will shut down. Now, the bypass source supplies power to the connected loads and the tri-color LED indicator illuminates yellow. Ultron DPM series 6-38...
- Page 179 UPS Operation UPS-1.1 EVENT LOG Bypass Load Mains 10 mins Bypass 2019-Mar-01 09:30 Tap the Main Menu icon located in the lower left corner of the LCD and select UPS Setup Mode Setting On-Line. Next, the following screen appears. UPS Setup Mode Setting UPS-1.1 EVENT LOG...
- Page 180 Next, turn OFF the external maintenance bypass cabinet’s output breaker (Q4) and each external battery cabinet’s breaker (Q5). At this moment, the tri-color LED indicator still illuminates yellow. Now, switch OFF the external maintenance bypass cabinet’s bypass breaker (Q2), Ultron DPM series 6-40...
-
Page 181: Lcd Display & Settings
LCD Display & Settings LCD Display & Settings 7.1 LCD Display Hierarchy 7.2 How to Turn on the LCD 7.3 ON/ OFF Button 7.4 Introduction of Touch Panel and Function Keys 7.5 Password Entry 7.6 Main Screen 7.7 Main Menu 7.8 Check System Readings 7.9 UPS Settings 7.10 System Maintenance... -
Page 182: Lcd Display Hierarchy
(Level 3) DNS 1 IP DNS 2 IP Other Setting Search Domain Host Name Serial COM ID/ Dust Filter Installation Dust Filter Installation Date Dust Filter Due Date / Admin Password (Figure 7-1: LCD Display Hierarchy) Ultron DPM series... -
Page 183: How To Turn On The Lcd
LCD Display & Settings NOTE: 1. * means that the Administrator password is needed. For password information, please refer to 7.5 Password Entry. 2. The information on the LCD screen presented in 7. LCD Display & Settings, including the UPS operation mode, machine number, date, time, total number of alarms, load (%), battery remaining time, and user/ administrator login are for reference only. - Page 184 (see Figure 7-4). After you see the Main Screen, you can operate the LCD. Please note that the Main Screen appears in the User login status as default (see Figure 7-4). (Figure 7-3: LCD Initial Screen) Ultron DPM series...
-
Page 185: On/ Off Button
LCD Display & Settings UPS-1.1 EVENT LOG Bypass Load Mains Default: Bypass 2019-Mar-01 09:30 User Login (Figure 7-4: Main Screen_ User Login) ON/ OFF Button After you turn on the touch panel in accordance with the steps stated in 7.2 How to Turn on the LCD, the Main Screen will appear in the User login status as default. - Page 186 After selection of 'Yes', the ON/ OFF Button will turn gray , indicating that the UPS-1.1 UPS-1.1 EVENT LOG EVENT LOG Bypass Bypass Load Load Are you sure to set Inverter to OFF? Mains Mains 10 mins 10 mins Bypass Bypass 2019-Mar-01 2019-Mar-01 09:30 09:30 Ultron DPM series...
-
Page 187: Introduction Of Touch Panel And Function Keys
LCD Display & Settings Introduction of Touch Panel and Function Keys UPS-1.1 EVENT LOG Bypass Bypass Load Mains Mains 10 mins Standby 2019-Mar-01 09:30 (Figure 7-8: Introduction of Touch Panel and Function Keys) Text/ Button Symbol Digital Function Display Icon/ Text Display Description (Yes or... - Page 188 Page 6-15 ~ Page 6-16. 1. Event log shortcut icon . Tap the icon to EVENT LOG check all the event logs. EVENT LOG 2. When the warning icon blue, it indicates that there is no warning. Ultron DPM series...
- Page 189 LCD Display & Settings Text/ Button Symbol Digital Function Display Icon/ Text Display Description (Yes or (Yes or (Yes or 1. Warning event shortcut icon 2. Buzzer icon 3. When the warning icon yellow, it indicates that there is a warning.
- Page 190 Sleep' mode, you will still be logged out after the screen is idle for 5 minutes. 4. The default language is English. To change the displayed language of the screen, please go to Main Menu UPS Setup General Setting Language. The default language will be different according to different countries. Ultron DPM series 7-10...
-
Page 191: Password Entry
LCD Display & Settings Password Entry 1. Password entry is only required for login as an Administrator. User login does not require a password. 2. Tap Administrator password (please contact service personnel for the appears, indicating that the Administrator login is successful. - Page 192 The screen above indicates that the UPS is in DC mode, and power supply of the loads comes from the batteries. Please refer to 6.2.2 Battery Mode Start-up Procedures. UPS-1.1 EVENT LOG Bypass Load Mains 10 mins 2019-Mar-01 09:30 Ultron DPM series 7-12...
-
Page 193: Main Menu
LCD Display & Settings The screen above indicates that the UPS is in ECO mode. The inverter is in the ready-to-power-on status, and the power supply of the loads comes from the bypass. For ECO mode settings, please refer to 7.9.2 Mode Setting and 6.2.5 ECO Mode Start-up Procedures. - Page 194 2. Historical Event 3. Output Voltage Abnormality Record Maintenance 4. Statistics 5. Battery Discharging History 6. Clear 7. Advanced Diagnosis 8. Version 9. Self-Diagnosis 10. IP Setting For more information, please refer to 7.10 System Maintenance. Ultron DPM series 7-14...
-
Page 195: Check System Readings
LCD Display & Settings NOTE: inspection items and setup items. Please refer to 7.1 LCD Display Hierarchy. Check System Readings 7.8.1 Main Input Path: Main Menu After entering the Main Input of Line Voltage, Phase Current, Frequency, Kilowatt-Hour and Input Power Factor. For more information about Kilowatt-Hour, please refer to 7.8.1.1 Check Kilowatt-Hour. - Page 196 Please refer to 7.10.6 Clear for relevant information. Descriptions of the kWH Statistics Sheet Tabs A. Tap the kWH statistics sheet tab ( ), and you can view the daily kWH statistics of the UPS main input by hour Ultron DPM series 7-16...
- Page 197 LCD Display & Settings Measurement Measurement Main Input Main Input UPS-0.1 UPS-0.1 EVENT LOG EVENT LOG C O NS UMP T IO N Last Reset Date : 2018-Jan-18 Line Voltage(V) Line Voltage(V) 500.4 500.4 500.5 500.5 501.4 501.4 Present 10.0 Phase Current(A) Phase Current(A) 69.5...
- Page 198 5405 5405 Input power factor Input power factor 0.00 0.00 kWH/d 2018/12/23 2018/12/27 2018/12/25 2018/12/29 The Corresponding kWH/d 2018/12/28 16:00 4 kWH Piece of Data Week Month Year Since Reset 2019-Mar-01 2019-Mar-01 09:30 09:30 Standby Standby Ultron DPM series 7-18...
- Page 199 LCD Display & Settings data bar that shows the corresponding piece of data will appear below the chart and show the kWH statistics '4 kWH' of the UPS main input from 16:00 ~ 17:00 of that date. Tap the icon ( ) on either side of the data bar, and you can view the statistics of the previous/ next hour.
- Page 200 Input power factor 0.00 kWH/d 2018/03/11 2018/07/29 2018/12/16 2018/05/20 2018/10/07 kWH/d kWH Statistics Sheet Tab Year Week Month Since Reset 2019-Mar-01 09:30 Standby On the X-axis (1) Minimum unit: one week (a piece of data); interval: 10 weeks. Ultron DPM series 7-20...
- Page 201 LCD Display & Settings (2) Interval marks: (starting from Sunday) 1 week/ 11 week/ 21 week/ 31 week/ week/ 51 week of the year. (3) Pieces of data from the 1 Sunday to the last Sunday of the year (the total number of the weeks depends on the calendar) are shown in the curve chart.
- Page 202 '4781 kWH' of the UPS main input of the month. Tap the icon ( ) on either side of the data bar, and you can view the statistics of the previous/ next month. Ultron DPM series 7-22...
-
Page 203: Bypass Input
LCD Display & Settings (2) At the moment of viewing, if it is still within the month (the minimum unit), the window shows the current statistics and the system will keep updating. For example, if you view the kWH statistics on 2018-05-23 at 06:00 (still within the minimum unit of the month 2018-05-01 ~ 2018-05-31), the statistics of the curve shown on the chart is from 2018-05-01 00:00 ~ 2018-05-23 06:00, and the system will keep updating. -
Page 204: Ups Output
Administrator password is needed. For password information, please refer to 7.5 Password Entry. Measurement Battery Status UPS-1.1 EVENT LOG 539.2 Voltage(V) 15.2 Current(A) Remaining Capacity(%) 3523 Remaining Time(mins) Rest Status 25°C Battery Temperture 2019-Mar-01 09:30 Standby Ultron DPM series 7-24... -
Page 205: Ups Settings
LCD Display & Settings UPS Settings 7.9.1 Bypass Setting Path: Main Menu After entering the Bypass Setting screen (shown in the figure below), you can set up Voltage Range (Max.), Voltage Range (Min.) and Frequency Range of the bypass. If any value is out of range, the system will issue an alarm. -
Page 206: Output Setting
7.9.3 Output Setting Path: Main Menu After entering the Output Setting screen* contact Delta customer service for assistance. NOTE: means that the Administrator password is needed. For password information, please refer to 7.5 Password Entry. Ultron DPM series... -
Page 207: Battery Setting
On-Line mode successfully. 7.9.4 Battery Setting Path: Main Menu After entering the Battery Setting screen* contact Delta customer service for assistance. NOTE: means that the Administrator password is needed. For password information, please refer to 7.5 Password Entry. - Page 208 Protection (IP DRY 2) Battery Fault Alarm (IP Aging Test Current (C) Disable DRY 1) Battery Test Fail Voltage (400~520) Battery Test Duration (1~360) Baseline Build for Aging Reference Auto Battery Test None Standby Standby 2019-Mar-01 2019-Mar-01 09:30 09:30 Ultron DPM series 7-28...
- Page 209 LCD Display & Settings Item Description Set up the battery type. NOTE: 1. If you use lead-acid batteries, please set up Battery Type the battery type as Lead-acid. 2. If you use lithium-ion batteries, please set up the battery type as LiB (Dry Contact). Battery Rating Voltage Set up the battery rating voltage.
- Page 210 Baseline Build for Aging Reference None Auto Battery Test 2019-Mar-01 2019-Mar-01 09:30 09:30 Standby Standby (2) Click the and the following Abort Baseline Establishment screen will pop up to ask if you would like to stop the baseline establishment. Ultron DPM series 7-30...
- Page 211 LCD Display & Settings Item Description UPS Setup UPS Setup Battery Setting Battery Setting UPS-1.1 UPS-1.1 EVENT LOG EVENT LOG Battery Charging Battery Test Fail Voltage (V) Battery Test Fail Voltage (V) Disable (399~483) (399~483) Protection (IP DRY 2) Please confirm if you would like to stop the Battery Fault Alarm (IP Aging Test Current (C) Aging Test Current (C)
-
Page 212: Charge Setting
Set up the auto-equalized charge period. Auto Equalized Charge Time Set up the duration of auto-equalized charge time. 7.9.6 Parallel Setting Path: Main Menu After entering the Parallel Setting screen* contact Delta customer service for assistance. Ultron DPM series 7-32... - Page 213 LCD Display & Settings NOTE: means that the Administrator password is needed. For password information, please refer to 7.5 Password Entry. UPS Setup Parallel Setting UPS-1.1 EVENT LOG Parallel Group ID Parallel ID Common Battery Enable Standby 2019-Mar-01 09:30 Item Description The UPSs in parallel connection must be assigned the same parallel group ID No.
-
Page 214: Control
UPS but the UPS does not respond, please Reset System select 'Reset' to reset the system. After the system is reset, please tap the ON/ OFF Button to start up the UPS. 7.9.8 Test Path: Main Menu In the Test Ultron DPM series 7-34... - Page 215 LCD Display & Settings UPS Setup Test UPS-1.1 EVENT LOG Start Buzzer & LED Test You haven't established the baseline. Battery Aging Test Please execute Baseline build for Aging Reference before battery aging test. Manual Battery Test Start Standby 2019-Mar-01 09:30 Item Description...
- Page 216 UPS-1.1 History Voltage (V) 2017/3/6 14:53:25 BaseLine End of Testing Voltage 33.8 Time (Min) 39.3 Standby 2019-Mar-01 09:30 Except the baseline line (the yellow one), there are at maximum three battery discharging curves. The newest below. Ultron DPM series 7-36...
- Page 217 LCD Display & Settings Item Description Battery Discharging Maintenance UPS-1.1 History Voltage (V) 2018/2/21 15:49:55 2017/8/16 14:35:28 2017/3/6 14:53:25 BaseLine End of Testing Voltage 28.4 Time (Min) 39.3 Standby 2019-Mar-01 09:30 Condition B: When the test is failed, the following screen will pop up. Battery Aging Test Click 'YES' to go back to the original screen and contact (Continued)
-
Page 218: General Setting
Path: Main Menu After entering the Advanced Setting screen* (shown in the figure below), you can set Please contact Delta customer service for assistance. NOTE: means that the Administrator password is needed. For password information, please refer to 7.5 Password Entry. -
Page 219: Other Setting
Set up the lower limit 480v- (5% ~ 20%). Default: -10%. Tolerance (Min) 7.9.11 Other Setting Path: Main Menu After entering the Other SETTING contact Delta customer service for assistance. UPS Setup Other Setting UPS-1.1 EVENT LOG Serial COM ID... -
Page 220: System Maintenance
No. to check the warning logs. The system can store at maximum 200 warning logs. The greater the event number is, the newer the event is. The WARNING screen also displays relevant solutions. For warning solutions, please refer to 10. Troubleshooting. Ultron DPM series 7-40... -
Page 221: Historical Event
LCD Display & Settings Maintenance Warning UPS-1.1 Solution TOUCH PANEL COMMUNICATION LOSS Standby 2019-Mar-01 09:30 7.10.2 Historical Event Path: Main Menu The Historical Event screen shown below provides each historical event’s No., start date, time, code (red: serious; orange: minor; green: normal), location, and log description. You can use the icons to check the historical event logs or use the function The system can save up to 10000 historical event logs. -
Page 222: Output Voltage Abnormality Record
Output Voltage Maintenance UPS-1.1 Abnormality Record 2019-02-27 13:44:50:810 L1L2 L2L3 L3L1 1 st 2 nd 3 rd 4 th 5 th 6 th 7 th 8 th 9 th 10 th 11 th Cycle Standby 2019-Mar-01 09:30 Ultron DPM series 7-42... -
Page 223: Statistics
LCD Display & Settings Output Voltage Maintenance UPS-1.1 Abnormality Record 2019-02-27 13:44:50:810 L1L2 500.3 500.0 500.1 500.2 500.3 319.9 213.7 208.7 202.8 196.6 190.3 L2L3 501.6 501.6 501.6 501.4 501.5 412.0 432.0 420.6 408.8 396.6 384.6 L3L1 503.5 503.6 503.5 503.4 503.4 638.5... -
Page 224: Battery Discharging History
2019-Mar-01 09:30 09:30 After setting the baseline, you can view the battery discharging history record as shown in Battery Discharging Maintenance UPS-1.1 History Voltage (V) BaseLine End of Testing Voltage 39.3 Time (Min) Bypass 2019-Mar-01 09:30 Ultron DPM series 7-44... -
Page 225: Clear
LCD Display & Settings Scenario 2: If you have already set up the baseline (please refer to 7.9.4 Battery Setting) and followed the Path mentioned above to enter the Battery Discharging History screen* , you can view the Battery Discharging History record as follows. NOTE: means that the Administrator password is needed. -
Page 226: Advanced Diagnosis
Administrator password is needed. For password information, please refer to 7.5 Password Entry. Maintenance Advanced Diagnosis UPS-1.1 EVENT LOG DC BUS Voltage 779.7 V PM A/D PM D/D Charge Voltage 540.0 V Charge Current 0.0 A Standby 2019-Mar-01 09:30 Ultron DPM series 7-46... -
Page 227: Version
LCD Display & Settings 7.10.8 Version NOTE: To operate the UPS in parallel mode, please make sure the version of each following item is the same for each parallel unit. Path: Main Menu After entering the Version screen (shown in the figure below), you can check relevant please refer to the table below. -
Page 228: Self-Diagnosis
Ambient Battery Fan Speed (°C) Temperature Temperature (rpm) (°C) (°C) 1760 1635 1640 1723 1677 1615 1632 Standby 2019-Mar-01 09:30 Maintenance Self-Diagnosis UPS-1.1 EVENT LOG Power Module - 01 IGBT Speed Temperature (°C) Standby 2019-Mar-01 09:30 Ultron DPM series 7-48... - Page 229 LCD Display & Settings Maintenance Self-Diagnosis UPS-1.1 EVENT LOG Power Module - 01 IGBT Speed I/P Current O/P Current Standby 2019-Mar-01 09:30 Maintenance Self-Diagnosis UPS-1.1 EVENT LOG Power Module - 01 IGBT Speed CHGR/DD (°C) (°C) (°C) L1-1. L1-1. L1-2. L1-2.
-
Page 230: Ip Setting
Path: Main Menu After entering the IP Setting screen* (shown in the figures below), you can set up the contact Delta customer service for assistance. NOTE: means that the Administrator password is needed. For password information, please refer to 7.5 Password Entry. - Page 231 LCD Display & Settings Item Description DHCP Client Enable or disable the DHCP client. IP Address Set up the IP address. Subnet Mask Set up the subnet mask. Gateway IP Set up the gateway IP address. DNS 1 IP Set up the DNS server 1 IP address. DNS 2 IP Set up the DNS server 2 IP address.
-
Page 233: Optional Accessories
Optional Accessories Optional Accessories... - Page 234 Quick Guide, User Guide, or Installation & Operation Guide included in the package of the relevant optional accessory. 2. If you want to purchase any accessories mentioned above, please contact your local dealer or customer service. Ultron DPM series...
-
Page 235: Maintenance
Maintenance Maintenance... - Page 236 1. Please ask your local dealer or customer service for more maintenance information. Do not perform maintenance if you are not trained for it. 2. The fan replacement procedures for the UPS system cabinet and power modules are the same. Ultron DPM series...
- Page 237 Maintenance The fan replacement procedures are as follows. Use a Phillips screwdriver to counterclockwise unscrew the fan cover’s two panel fasteners Lift the fan ( ) and disconnect the fan power cord ( ). After that, you can remove the fan from the UPS.
- Page 238 Located at the Rear of the UPS System Cabinet’s Right Door. Loosen the Two Screws of the D-SUB15 Communication Cable. (Figure 9-2: Disconnect the D-SUB15 Communication Cable Located at the Rear of UPS System Cabinet’s Right Door) Ultron DPM series...
- Page 239 Maintenance Use a Phillips screwdriver to remove the two screws ( ) from the protection cover ( ) located at the rear of the UPS system cabinet’s right door and remove the protection cover ( Screw Protection Cover Screw (Figure 9-3: Remove the Protection Cover Located at the Rear of the UPS System Cabinet’s Right Door) Use a Phillips screwdriver to remove the three screws ( ) from the rear of the LCD (...
- Page 240 (Each Lower Filter is Fixed with Two M4 Screws) Three Lower Filters (Each Lower Filter is Fixed with Two M4 Screws) (Figure 9-6: Dust Filters Located at the Rear of the UPS System Cabinet’s Right and Left Doors) Ultron DPM series...
- Page 241 Maintenance & ) located behind the UPS system cabinet’s two front rodent shields & ) as shown in Figure 9-7. Each filter is fixed with one M4 screw. For replacement, the new one(s). 1000/ 1250kW (UPS System Cabinet with Two Front Doors Open) Behind the Front Rodent Shield Filter...
- Page 242 Filter × 1 Filter × 1 M4 Screw × 1 M4 Screw × 1 Right Rodent Shield Front Rodent Shield (Figure 9-8: Dust Filters Located behind the Power Module’s Vent Cover and Front & Right Rodent Shields) Ultron DPM series...
-
Page 243: Troubleshooting
Troubleshooting Troubleshooting 10-1... - Page 244 When you see the following alarm messages appear on the LCD, please follow the solutions shown below. If you see other alarm messages that are not listed in the table below, please contact Delta service personnel for assistance. Do not perform troubleshooting if you are not trained for it.
- Page 245 Troubleshooting Alarm Possible Cause Solution Message The bypass AC source’s Please check the bypass AC source’s BYPASS VOLT voltage or frequency exceeds voltage and frequency. If there is OUT ECO RANGE the range suitable for ECO any abnormality, please wait for the mode.
- Page 246 The battery wiring is wrong. REVERSED contact service personnel for assistance. Check the batteries. If wrong battery BATTERY TEST The battery wiring is wrong or wiring or battery abnormalities exist, FAULT battery abnormalities exist. please contact service personnel for assistance. Ultron DPM series 10-4...
- Page 247 Troubleshooting Alarm Possible Cause Solution Message 1. Please check if the external battery cabinet’s breaker is turned off or not. If yes, please turn it on. BATTERY The external battery cabinet’s 2. If the alarm message still exists BREAKER OFF after the solution mentioned above has been executed, please contact service personnel.
- Page 248 1. Check if any foreign matter blocks SYSTEM FAN The foreign matter blocks the the fans or not. If yes, remove the POWER OVER fans or the circuit board is foreign matter. HEAT WARNING abnormal. 2. Contact service personnel for assistance. Ultron DPM series 10-6...
- Page 249 Troubleshooting Alarm Possible Cause Solution Message PARALLEL IO NOT The parallel cable is loose or Please contact service personnel for READY the circuit board is abnormal. assistance. EXT PARALLEL The parallel cable is UPS ABNORMAL connected or not, and contact service removed.
- Page 250 PFC OVER HEAT foreign matter. components are damaged. SHUTDOWN 2. Contact service personnel for assistance. PWR MODULE #n The PFC of the power Please contact service personnel for PFC FUSE OPEN module #n is abnormal. assistance. SHUTDOWN Ultron DPM series 10-8...
- Page 251 Troubleshooting Alarm Possible Cause Solution Message PWR MODULE #n The IGBT of the power Please contact service personnel for PFC IGBT SHORT module #n is abnormal. assistance. SHUTDOWN PWR MODULE #n The circuit board of the power Please contact service personnel for PFC I/P CURRENT module #n is abnormal.
- Page 252 The circuit board of the power Please contact service personnel for CHARGER FAULT module #n is abnormal. assistance. PWR MODULE #n The battery fuse of the power Please contact service personnel for BATTERY FUSE module #n is abnormal. assistance. OPEN Ultron DPM series 10-10...
- Page 253 Troubleshooting Alarm Possible Cause Solution Message 1. Check if any foreign matter blocks PWR MODULE the fans or not. If yes, remove the The fans of the power module #n DC/DC OVER foreign matter. #n are abnormal. HEAT WARNING 2. Contact service personnel for assistance.
- Page 254 PWR MODULE #n The circuit board of the power Please contact service personnel for PFC I/P CURRENT module #n is abnormal. assistance. WITH DC OFFSET Ultron DPM series 10-12...
- Page 255 Troubleshooting Alarm Possible Cause Solution Message PWR MODULE 1. The sensor cable of the #n AMBIENT power module #n is loose. Please contact service personnel for THERMAL 2. The circuit board of the assistance. SENEOR NOT power module #n is INSTALLED abnormal.
- Page 257 Appendix 1 Technical A1-1...
- Page 258 REPO × 1, EPO × 1, Ethernet × 1 Online Mode Up to 96% ECO Mode Up to 99% Nominal Voltage 480 Vdc Charge Voltage 544V (±2 Vdc) _ Float Charge Battery Charge Voltage 576V (±2 Vdc) _ Boost Charge Charge Current 280A 350A Ultron DPM series A1-2...
- Page 259 Appendix 1 Model DPM-1000K DPM-1100K DPM-1250K DPM-1375K 1000kW/ 1000kW/ 1250kW/ 1250kW/ UPS Capacity 1000kVA 1100kVA 1250kVA 1375kVA 3280 ft (without derating) Operating Altitude 1000 meters (without derating) Environment Operating 32 ~ 104°F Temperature (0 ~ 40°C) Relative Humidity < 95% (non-condensing) Audible Noise <...
-
Page 261: Appendix 2 : Warranty
Appendix 2 Warranty Warranty A2-1... - Page 262 The User Manual must be carefully followed. Seller makes no representation No. 501327530101 Version : V 1.1 Release Date : 2019_12_02 Ultron DPM series A2-2...
- Page 263 - Regional Office The United States Australia Delta Electronics (Americas) Ltd. Delta Energy Systems Australia Pty Ltd. 46101 Fremont Blvd. Fremont, CA 94538 Unit 20-21, 45 Normanby Road, Notting Hill VIC 3168, Australia T +1 510 344 2157 T +61 3 9543 3720 E ups.na@deltaww.com...