Table of Contents
Advertisement
Advertisement
Table of Contents

Related Manuals for Toastmaster TLWTOB6


Summary of Contents for Toastmaster TLWTOB6
- Page 1 Lightwave Oven USE AND CARE GUIDE AND RECIPE BOOK MODELS TLWTOB6 AND TLWTOB6CAN...
-
Page 2: Important Safeguards
IMPORTANT SAFEGUARDS When using electrical appliances, basic safety precautions should always be followed including the following: Read all instructions. Do not touch hot surfaces. Use handles or knobs. To protect against electrical shock do not immerse cord, plugs, or appliance in water or other liquid. Close supervision is necessary when any appliance is used by or near children. -
Page 3: Save These Instructions
Do not store any materials, other than manufacturer's recommended accessories, in this oven when not in use. Do not place any of the following materials in the oven: paper, cardboard, plastic and the like. Do not cover Crumb Tray or any part of the oven with metal foil. This will cause overheating of the oven. -
Page 4: Short Cord Instructions
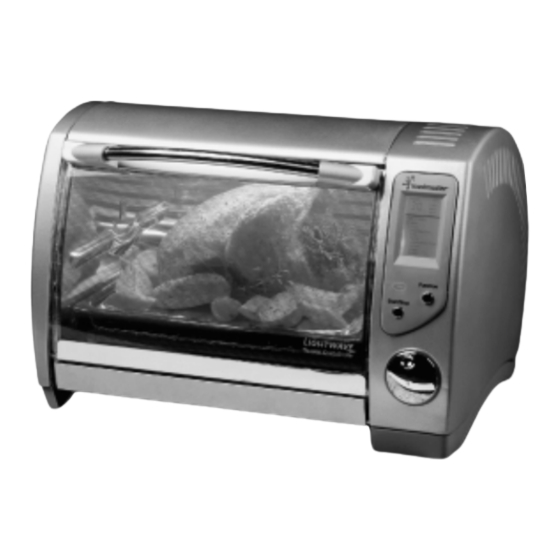
Polarized Plug This appliance has a polarized plug (one blade is wider than the other). To reduce the risk of electrical shock, this plug is intended to fit into a polarized outlet only one way. If the plug does not fit fully in the outlet, reverse the plug. - Page 5 Getting To Know Your Lightwave Oven Your product may vary slightly from illustration. Figure 1 1. Door Handle 2. Curved Glass Door 3. Lower Infrared Heating Elements 4. Time/Toast Color Dial 5. Start/Stop Button 6. Operation Light 7. Function Button 8.
-
Page 6: Control Panel
Figure 2 16. (P/N 22319) TIME/TOAST COLOR DIAL Turn to set the minutes of the Cooking Time or Toast Color after function is chosen. Control Panel DISPLAY WINDOW Indicates time, function, toast color, amount of time left for completion of function. - Page 7 Control Panel (cont.) Default Function Time/Min. Basic Toast Broil Cake Pastry Conv. Food Prepackaged: Defrost Potato Poultry Bake/Broil Pan, Broil Insert, Wire Rack and Crumb Tray For best results use Bake/Broil Pan to bake, defrost and top brown, to minimize clean up due to spills. When toasting, place bread directly on Wire Rack.
- Page 8 Bake/Broil Pan, Broil Insert, Wire Rack and Crumb Tray (cont.) Bake/Broil Pan (P/N 22320) Wire Rack (Shelf Positions 1 and 3) (P/N 22322) When defrosting, you may either use the Bake/Broil Pan or your own pan. Place pan directly on Wire Rack. Place in Shelf Position #4. To insert or remove the empty Wire Rack, slide the Wire Rack in or out until it makes contact with the Wire Rack Stop.
-
Page 9: Cooking Containers
Cooking Containers The Bake/Broil Pan included with the Lightwave Oven is suitable for items such as cookies, rolls and biscuits. A variety of standard baking dishes, such as an 8" round or square cake pan, a 6-cup muffin pan, and a 1 & 2 quart round, square, or rectangular casserole dish may be used for other foods. - Page 10 Operating Instructions (cont.) 6. Remove any dust that may have accumulated during packaging, simply wipe the Lightwave Oven exterior and interior with a clean, damp cloth. 7. Do not use abrasive cleaners. 8. Do not put the Lightwave Oven cord or plug in water. 9.
-
Page 11: Operating Instructions
Lightwave Oven Tips The Lightwave Oven has preset temperatures for each function to cook frequently prepared foods. The temperature can not be adjusted. The Lightwave Oven has a 2 hour timer. The Operation Light on the Control Panel will be on while the unit is plugged in. - Page 12 Preset Functions (cont.) 4. Open the Glass Door and place your food in the Lightwave Oven. Close Glass Door. 5. Press the Start/Stop button. The Timer will begin to count down and “min.” will flash in the Display Window. 6. Condensation may build-up on the inside of the Glass Door, but will evaporate during Preset Function.
-
Page 13: Toast Function
Toast Function 1. Plug unit into a 120 V outlet. Open the Glass Door. Place Wire Rack into Shelf Position #3. Place Bread on Wire Rack. Close the Glass Door. The Operation Light and Display Window will illuminate while the Unit is plugged in. 2. -
Page 14: User Maintenance Instructions
Top Brown Instructions To top brown foods, follow the toasting instructions above but place the food on the Bake Pan on the Wire Rack. Hints For Top Brown Watch food to avoid over-browning. You may brown the top of bagels (cut side up), English muffins or melt cheese on sandwiches or casseroles. - Page 15 Clean-Up Of Lightwave Oven Glass Door And Exterior 1. Unplug oven and allow to cool before cleaning. 2. Wipe exterior with a damp cloth after each use. 3. To clean the Glass Door, use a glass cleaner or mild detergent and a damp cloth or plastic scouring pad.
- Page 16 Time and Temperature Charts (cont.) NOTE: The United States Department of Agriculture recommends that meat and poultry be cooked to the following internal temperature to be sure any harmful bacteria has been killed. Ground turkey and chicken should be cooked to an internal temperature of 165˚F and ground beef, veal, lamb and pork be cooked to an internal temperature of 160˚F.
- Page 17 Time and Temperature Charts Broil (Broil Function) When broiling, place the food on the Broil insert inside the Bake/Broil Pan. Place on Wire Rack in Shelf Position # 1, # 2 or # 3. Food should be 2 to 3 inches from top element. Turn food halfway through cooking time.
-
Page 18: Curry Yogurt
Marinades Marinate meat for added flavor and tenderizing. A marinade must include an acidic ingredient like lemon juice, vinegar, wine or salsa to tenderize. To prepare, blend all ingredients together. Marinate in refrigerator at least 30 minutes turning to coat meat completely. Pat dry before cooking. -
Page 19: Recipes
Recipes FIESTA CORN BREAD cup all-purpose flour cup corn meal cup sugar 1-1/2 teaspoons baking powder teaspoon salt cup milk tablespoons oil egg, beaten ounce can diced in shelf #4 green chilies, drained ounce jar, diced pimento, drained Combine dry ingredients, set aside. Mix wet ingredients together and stir into dry ingredients until moist. -
Page 20: Crab And Cheese Muffins
TOFFEE BARS Layer 1: 8-ounce package Jiffy tablespoons butter, melted Layer 2: cup evaporated milk teaspoon vanilla extract Layer 3: cup nuts (optional) ounces toffee chips Spray an 8x8-inch baking pan with non-stick spray. Beat cake mix, egg and butter with an electric mixer for 2 minutes. Spread into prepared pan. -
Page 21: Brie Kisses
BRIE KISSES pound Brie cheese can Hungry Jack Flaky Layer Biscuits hot pepper jelly Cut Brie into 1/2 inch squares (leave the rind on if you like). Spray a mini-muffin pan with non-stick spray. Separate each biscuit into 3-4 layers pressing each layer into one section of a mini-muffin pan. -
Page 22: Broiled Shrimp Skewers
BROILED SHRIMP SKEWERS large shrimp, peeled and de-veined tablespoons olive oil tablespoons chopped fresh parsley medium garlic cloves, minced salt and freshly ground black pepper lemon wedges to serve Rinse the shrimp in cold water and pat dry with paper towels. In a bowl, combine the olive oil, parsley, garlic, salt and pepper to season. -
Page 23: Table Of Contents
Index MARINADES Curry Yogurt ..........17 Lemon Oriental . - Page 24 9:00 am and 5:00 pm Central Standard Time and ask for CONSUMER SERVICE stating that you are a consumer with a problem. Please refer to model number TLWTOB6 when you call. In-Warranty Service (USA): For an appliance covered under the warranty period, no charge is made for service or postage.
- Page 25 Date code (stamped on bottom)________________________________ EVERYBODY EATS. It’s a fact of life. But sometimes preparing meals can become a chore. That’s why TOASTMASTER has been invited into millions of kitchens just like yours so we can HELP YOU MASTER your mixing, baking, grilling, toasting, brewing, heating and serving tasks WITH EASE AND STYLE.
- Page 26 Service Consommateurs : 1-800-947-3744 Pièces Consommateurs : 1-800-947-3745 consumer_relations@toastmaster.com Horaires : De 8h00 à 17h30, heure GMT - 6 En México: Toastmaster de México, S.A. de C.V. Cerrada de Recursos Hidráulicos Número 6 La Loma Industrial Tlalnepantla de Baz, C.P. 54060 Estado de México...
- Page 27 Lightwave Oven Use and Care Guide...
- Page 29 Questions toll free 1-800-947-3744 Call Monday – Friday, 8:00 a.m. - 5:30 p.m. CST www.toastmaster.com TLWTOB6 AND TLWTOB6CAN...