Table of Contents
Advertisement
Advertisement
Chapters
Table of Contents

Related Manuals for NEC QX-S5500G Series


Summary of Contents for NEC QX-S5500G Series
- Page 1 GVT-048974-001-00 1.1 QX-S5500G Series Ethernet Switches Installation Guide...
-
Page 2: Revision History
Revision History Revision Date Reason for Change First Revision 2017/10 2017/10/31 ・A writing error of the weight of "Chapter 9 Appendix A Technical specifications" was corrected. ・Writing error correction... - Page 3 All Rights Reserved No part of this manual may be reproduced or transmitted in any form or by any means without prior written consent of NEC Corporation. Trademarks All other trademarks that may be mentioned in this manual are the property of their respective owners.
- Page 4 Preface Version This command reference corresponds after software version 7.1.X. Documentation Set The Documentation Set of QX-S5500G Series Ethernet Switches includes the following documentations. Documentation Set Description QX-S5500G Series Ethernet Switches This documentation describes installation. Installation Guide QX-S5500G Series Ethernet Switches This documentation describes configuration.
- Page 5 The Appendix C Ports and LEDs describe commands for Ports, UTP cables, LEDs, etc. Appendix D Cooling system The Appendix D Cooling system describes commands for QX-S5500G Series cooling system. Conventions This section describes the conventions used in this documentation set.
- Page 6 Convention Description A line that starts with a pound (#) sign is comments. II. GUI conventions Convention Description < > Button names are inside angle brackets. For example, click <OK>. Window names, menu items, data table and field names are inside square brackets.
- Page 7 This installation guide includes 11 sections. 01 - Product overview 02 - Preparing for installation 03 - Installing the switch 04 - Accessing the switch for the first time 05 - Setting up an IRF fabric 06 - Upgrading software 07 - Maintenance and troubleshooting 08 - Appendix A Technical specifications 09 - Appendix B FRUs and compatibility matrixes...
-
Page 8: Table Of Contents
Installation Guide QX-S5500G Series Ethernet Switches Contents Contents 1. Product overview ........................1-1 1.1 QX-S5524GT-4X2Q panel views ..................1-1 1.2 QX-S5548GT-4X2Q panel views ..................1-2 1.3 QX-S5524GT-4X1C panel views ..................1-3 1.4 QX-S5548GT-4X1C panel views ..................1-4 1.5 QX-S5524GP-4X1C panel views ..................1-5... -
Page 9: Product Overview
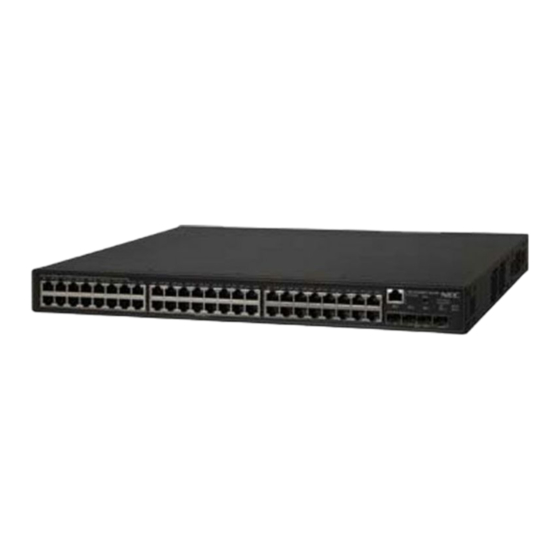
Installation Guide QX-S5500G Series Ethernet Switches 1. Product overview 1. Product overview 1.1 QX-S5524GT-4X2Q panel views Figure 1-1 QX-S5524GT-4X2Q front panel (1) 10/100/1000 BASE-T autosensing Ethernet port (2) 10/100/1000 BASE-T autosensing Ethernet port LED (3) SFP+ port (4) Console port... -
Page 10: Qx-S5548Gt-4X2Q Panel Views
Installation Guide QX-S5500G Series Ethernet Switches 1. Product overview 1.2 QX-S5548GT-4X2Q panel views Figure 1-3 QX-S5548GT-4X2Q front panel (1) 10/100/1000 BASE-T autosensing Ethernet port (2) 10/100/1000 BASE-T autosensing Ethernet port LED (3) SFP+ port (4) Console port (5) USB mini Console port... -
Page 11: Qx-S5524Gt-4X1C Panel Views
Installation Guide QX-S5500G Series Ethernet Switches 1. Product overview 1.3 QX-S5524GT-4X1C panel views Figure 1-5 QX-S5524GT-4X1C front panel (1) 10/100/1000 BASE-T autosensing Ethernet port (2) 10/100/1000 BASE-T autosensing Ethernet port LED (3) Management Ethernet port (4) Console port (5) USB mini Console port... -
Page 12: Qx-S5548Gt-4X1C Panel Views
Installation Guide QX-S5500G Series Ethernet Switches 1. Product overview "Installing/removing a power module." The QX-S5524GT-4X1C switch comes with the two fan tray slots empty. You must install two fan trays of the same model for the switch. In this figure, two LSPM5FANSA fan trays are installed in the fan tray slots. -
Page 13: Qx-S5524Gp-4X1C Panel Views
Installation Guide QX-S5500G Series Ethernet Switches 1. Product overview Figure 1-8 QX-S5548GT-4X1C rear panel (1) Grounding screw (2) Interface card slot (3) Fan tray slot1 (4) Fan tray slot2 (5) Power module slot1 (6) Power module slot2 The QX-S5548GT-4X1C switch comes with power module slot 1 empty and power module slot 2 installed with a filler panel. - Page 14 Installation Guide QX-S5500G Series Ethernet Switches 1. Product overview (1) SFP port (2) SFP port (Combo port, port 17S to 24S) (3) SFP port LED (4) 10/100/1000 BASE-T autosensing Ethernet port (Combo port, port 17T to 24T) (5) 10/100/1000 BASE-T autosensing Ethernet port LED...
- Page 15 Installation Guide QX-S5500G Series Ethernet Switches 1. Product overview removing an interface card, see "Installing/removing an interface card."...
- Page 16 Installation Guide QX-S5500G Series Ethernet Switches Contents Contents 2. Preparing for installation ......................2-1 2.1 Safety recommendations ....................2-1 2.2 Connecting the RJ45 connector ..................2-1 2.3 Examining the installation site ................... 2-2 2.3.1 Temperature/humidity ..................... 2-2 2.3.2 Cleanness ....................... 2-3 2.3.3 EMI ..........................
-
Page 17: Preparing For Installation
Installation Guide 2. Preparing for installation QX-S5500G Series Ethernet Switches 2. Preparing for installation 2.1 Safety recommendations To avoid any equipment damage or bodily injury caused by improper use, read the following safety recommendations before installation. Note that the recommendations do not cover every possible hazardous condition. -
Page 18: Examining The Installation Site
Figure 2-1 Connecting the RJ45 connector 2.3 Examining the installation site The QX-S5500G Series switches must be used indoors. You can mount your switch in a rack, or on a workbench, and make sure: Adequate clearance is reserved at the air inlet and exhaust vents for ventilation. -
Page 19: Cleanness
Use electromagnetic shielding, for example, shielded interface cables, when necessary. Route interface cables only indoors to prevent signal ports from getting damaged by overvoltage or overcurrent caused by lightning strikes. 2.3.4 Laser safety The QX-S5500G Series switches are Class 1 laser devices. -
Page 20: Installation Tools
Installation Guide 2. Preparing for installation QX-S5500G Series Ethernet Switches WARNING: Do not stare into any fiber port when the switch has power. The laser light emitted from the optical fiber may hurt your eyes. 2.4 Installation tools Phillips screwdriver ... - Page 21 Installation Guide QX-S5500G Series Ethernet Switches Contents Contents 3. Installing the switch ........................3-1 3.1 Installation flow ........................3-1 3.2 Installing the switch in a 19-inch rack ................3-3 3.2.1 Mounting bracket kits ....................3-3 3.2.2 Rack-mounting by using front mounting brackets ........... 3-3 3.2.3 Mount the chassis in the rack ..................
- Page 22 Installation Guide QX-S5500G Series Ethernet Switches Contents 3.10.2 Connecting a fiber optic-cable ................3-31 3.11 Verifying the installation ....................3-32...
-
Page 23: Installing The Switch
Keep the tamper-proof seal on a mounting screw on the chassis cover intact. If you tear off the tamper-proof seal, switch shall not be guarantee applying. If you tear off the tamper-proof seal and open the chassis, NEC shall not be liable for any consequence caused thereby. - Page 24 Installation Guide QX-S5500G Series Ethernet Switches 3. Installing the switch Figure 3-1 Hardware installation flow Start Install the switch Ground the switch Hot-swap fan trays? Select and install fan trays Hot-swap power modules? Select and install power modules Connect power cords...
-
Page 25: Installing The Switch In A 19-Inch Rack
Installation Guide QX-S5500G Series Ethernet Switches 3. Installing the switch 3.2 Installing the switch in a 19-inch rack The mounting bracket kit can be installed on the port side, power module side, or the middle bracket installation position. Attach on the appropriate location with an actual necessary condition . - Page 26 Installation Guide QX-S5500G Series Ethernet Switches 3. Installing the switch Identify the mounting positions. Wear an ESD wrist strap and make sure it makes good skin contact and is correctly grounded. Attach the front mounting brackets to the chassis: Unpack the front mounting brackets and the M4 screws (supplied with the switch) for attaching the brackets to the switch chassis.
-
Page 27: Mount The Chassis In The Rack
Installation Guide QX-S5500G Series Ethernet Switches 3. Installing the switch Figure 3-5 Attaching the front mounting bracket to the middle installation position Figure 3-6 Attaching the front mounting bracket to the power module side 3.2.3 Mount the chassis in the rack This task requires two people. - Page 28 Installation Guide QX-S5500G Series Ethernet Switches 3. Installing the switch Figure 3-7 け Mounting the switch in the rack (front mounting brackets at the port side) Figure 3-8 Mounting the switch in the rack (front mounting brackets at the power module side)
-
Page 29: Mounting The Switch On A Workbench
Installation Guide QX-S5500G Series Ethernet Switches 3. Installing the switch Figure 3-9 Mounting the switch in the rack (front mounting brackets at the middle installation position) 3.3 Mounting the switch on a workbench IMPORTANT: Ensure good ventilation and 10 cm (3.9 in) of clearance around the chassis for heat dissipation. -
Page 30: Grounding The Switch With A Grounding Strip
Installation Guide QX-S5500G Series Ethernet Switches 3. Installing the switch The power input end of the switch has a noise filter, whose central ground is directly connected to the chassis to form the chassis ground (commonly known as PGND). You must securely connect this chassis ground to the earth so the faradism and leakage electricity can be safely released to the earth to minimize EMI susceptibility of the switch. -
Page 31: Connecting The Rear Grounding Point To A Grounding Strip
Installation Guide QX-S5500G Series Ethernet Switches 3. Installing the switch 3.4.2 Connecting the rear grounding point to a grounding strip WARNING: Connect the grounding cable to the grounding system in the equipment room. Do not connect it to a fire main or lightning rod. -
Page 32: Grounding The Switch With A Grounding Conductor Buried In The Earth Ground
Installation Guide QX-S5500G Series Ethernet Switches 3. Installing the switch Figure 3-12 Connecting the grounding cable to a grounding strip (1) Grounding post (2) Grounding strip (3) Grounding cable (4) Hex nut 3.4.3 Grounding the switch with a grounding conductor buried in the earth ground If the installation site has no grounding strips, but earth ground is available, hammer a 0.5... -
Page 33: Grounding The Switch By Using The Ac Power Cord
Installation Guide QX-S5500G Series Ethernet Switches 3. Installing the switch Figure 3-13 Grounding the switch by burying the grounding conductor into the earth ground (1) Grounding screw (2) Chassis rear panel (3) Grounding cable (4) Earth (5) Joint (6) Grounding conductor 3.4.4 Grounding the switch by using the AC power cord... - Page 34 Installation Guide QX-S5500G Series Ethernet Switches 3. Installing the switch Figure 3-14 Grounding through the PE wire of the AC power cord (1) Three-wire AC power cord (2) Chassis rear panel NOTE: To guarantee the grounding effect, use the grounding cable provided with the switch to connect to the grounding strip in the equipment room as long as possible.
-
Page 35: Installing/Removing A Fan Tray
Installation Guide QX-S5500G Series Ethernet Switches 3. Installing the switch 3.5 Installing/removing a fan tray CAUTION: Install two fan trays of the same model on the switch. Do not power on the switch when it does not have fan ... -
Page 36: Removing A Fan Tray
Installation Guide QX-S5500G Series Ethernet Switches 3. Installing the switch Grasp the two handles of the fan tray with the side marked TOP facing up, and slide the fan tray along the guide rails into the slot until the fan tray seats in the slot and has a firm contact with the backplane. -
Page 37: Installing/Removing A Power Module
Installation Guide QX-S5500G Series Ethernet Switches 3. Installing the switch Figure 3-16 Removing a fan tray 3.6 Installing/removing a power module CAUTION: Provide a circuit breaker for each power module. There is power supply module slot 2 on which power supply module slot 1 in the empty and a blank panel were mounted with two power supply module slots for the QX-S5524GT-4X1C, QX-S5548GT-4X1C or QX-S5524GP-4X1C. -
Page 38: Installing A Power Module
Installation Guide QX-S5500G Series Ethernet Switches 3. Installing the switch Figure 3-18 Removal procedure Remove the power Turn off the circuit Disconnect the power module breaker cord These procedures are common by PSR150-A1 and PSR150-D1. It's explained taking PSR150-A1 for instance at this chapter. - Page 39 Installation Guide QX-S5500G Series Ethernet Switches 3. Installing the switch Figure 3-19 Installing a power module NOTE: If the power module slot where you want to install a power module is covered by a filler panel, remove the filler panel first.
-
Page 40: Removing A Power Module
Installation Guide QX-S5500G Series Ethernet Switches 3. Installing the switch 3.6.2 Removing a power module CAUTION: When two of power supply module is mounted on switch, even if one of power supply module is removed, it doesn't influence movement of switch. When only one of power supply module is mounted on equipment, when power supply module is removed, a power supply of equipment becomes off. -
Page 41: Connecting A Ac Power Cord To The Switch
Installation Guide QX-S5500G Series Ethernet Switches 3. Installing the switch Figure 3-21 Power cord Specifications Connector(on the Device Side) Cable Ratings Cable Length Plug(Power Facility) IEC-320-C13 Comply the standard of Comply the standard of 125V, 10A each country each country... -
Page 42: Connecting A Dc Power Cord To The Switch
Installation Guide QX-S5500G Series Ethernet Switches 3. Installing the switch Figure 3-22 Connecting an AC power cord to the switch (1) Figure 3-23 Connecting an AC power cord to the switch (2) 3.7.2 Connecting a DC power cord to the switch... -
Page 43: Connecting A Ac Power Cord To The Psr150-A1
Installation Guide QX-S5500G Series Ethernet Switches 3. Installing the switch Connect the two wires at the other end of the power cord to a –48 VDC power source or QX-PS800-T2. Please classify two cord by a mark of (+) and (-) to stop a connection mistake. -
Page 44: Connecting A Dc Power Cord To The Psr150-D1
Installation Guide QX-S5500G Series Ethernet Switches 3. Installing the switch Figure 3-25 Connecting the PSR150-A1 (1) Figure 3-26 Connecting the PSR150-A1 (2) 3.7.4 Connecting a DC power cord to the PSR150-D1 To connect an AC power cord to the QX-S5524GT-4X1C, QX-S5548GT-4X1C, or QX-S5524GP-4X1C use PSR150-D1 power supply module. -
Page 45: Making Of Dc Power Cord
Installation Guide QX-S5500G Series Ethernet Switches 3. Installing the switch Figure 3-27 Connecting the PSR150-D1 3.7.5 Making of DC power cord NOTE: Please prepare the single line type for DC power cord. The procedure which makes DC power cord is indicated below. - Page 46 Installation Guide QX-S5500G Series Ethernet Switches 3. Installing the switch Figure 3-28 DC power cord connector supplied Figure 3-29 Connectors B of parts Please pass the DC power cord prepared into A of parts as shown in Figure 3-30. 3-24...
- Page 47 Installation Guide QX-S5500G Series Ethernet Switches 3. Installing the switch Figure 3-30 A of parts through DC power cord A terminal for DC power cord is connected to B of parts. When connecting, please connect so that it may correspond to a connector on the switch side. Please fix by the screw which sticks to the upper part after connecting, so that a terminal doesn't come off.
-
Page 48: Installing/Removing An Interface Card
Installation Guide QX-S5500G Series Ethernet Switches 3. Installing the switch Figure 3-32 DC power cord completion figure 3.8 Installing/removing an interface card The QX-S5524GT-4X1C, QX-S5548GT-4X1C, or QX-S5524GP-4X1C each have one expansion interface slot. It's possible to mount at most 1 expansion interface card as needed. - Page 49 Installation Guide QX-S5500G Series Ethernet Switches 3. Installing the switch Wear an ESD wrist strap and make sure it makes good skin contact and is correctly grounded. Remove the mounting screws on the filler panel over the interface card slot with a Phillips screwdriver and remove the filler panel.
- Page 50 Installation Guide QX-S5500G Series Ethernet Switches 3. Installing the switch Figure 3-34 Installing an interface card with an ejector lever Figure 3-35 Installing an interface card without an ejector lever 3-28...
-
Page 51: Removing An Interface Card
Installation Guide QX-S5500G Series Ethernet Switches 3. Installing the switch NOTE: When LSWM5SP8PM was inserted, the chassis depth increases by 55 mm (2.17 in). Figure 3-36 The LSWM2XGT8PM interface card installed in the switch 3.8.2 Removing an interface card... -
Page 52: Installing A Sfp/Sfp+/Qsfp+ Transceiver Module
Installation Guide QX-S5500G Series Ethernet Switches 3. Installing the switch 3.9.1 Installing a SFP/SFP+/QSFP+ transceiver module CAUTION: To prevent damage to the connectors inside the switch chassis, insert a SFP/SFP+/QSFP+ transceiver module gently. If you encounter a hard resistance while inserting a SFP/SFP+/QSFP+ transceiver module, pull out a SFP/SFP+/QSFP+ transceiver module and insert it again. -
Page 53: Connecting An Interface Cable
Installation Guide QX-S5500G Series Ethernet Switches 3. Installing the switch 3.10 Connecting an interface cable CAUTION: After the interface cable connects to the switch, disconnect the interface cable if the port LED is green blinking. Switch sends a great deal of broadcast packets or, there is a possibility which is being received. In this case, cut off the network connection of equipment, and check the network and the configuration of the switch. -
Page 54: Verifying The Installation
Installation Guide QX-S5500G Series Ethernet Switches 3. Installing the switch Figure 3-37 SFP/SFP+/QSFP+ transceiver module LC connector (1) TX (2) RX NOTE: Please check the RX/TX position of SFP transceiver module is connected correctly. If the LED of the SFP/SFP+/QSFP+ port does not turn on, the connected port(RX/TX) may be wrong. - Page 55 Installation Guide QX-S5500G Series Ethernet Switches Contents Contents 4. Accessing the switch for the first time ................... 4-1 4.1 Setting up the configuration environment ................4-1 4.2 Connecting the console cable .................... 4-1 4.2.1 Serial console cable ....................4-1 4.2.2 Connecting the USB mini console cable ..............4-3 4.3 Setting terminal parameters ....................
-
Page 56: Accessing The Switch For The First Time
4. Accessing the switch for the first time 4.1 Setting up the configuration environment You can access Swich through the serial port or the mini USB port. NEC recommends that you access the switch through the serial port by using the provided console cable. - Page 57 Installation Guide QX-S5500G Series Ethernet Switches 4. Accessing the switch for the first time Figure 4-2 Console cable A side Pos.9 Main label B side Pos.1 Table 4-1 Console port signaling and pinout RJ-45 Signal DB-9 Signal To connect a terminal (for example, a PC) to the switch: Plug the DB-9 female connector of the console cable to the serial port of the PC.
-
Page 58: Connecting The Usb Mini Console Cable
Installation Guide QX-S5500G Series Ethernet Switches 4. Accessing the switch for the first time 4.2.2 Connecting the USB mini console cable A USB mini console cable isn't attached to switch. The A USB mini console cable has to be prepared by a user. -
Page 59: Setting Terminal Parameters
Installation Guide QX-S5500G Series Ethernet Switches 4. Accessing the switch for the first time Click Continue Anyway if the following dialog box appears. Figure 4-4 Software Installation Click Finish. 4.3 Setting terminal parameters To configure and manage the switch, you must run a terminal emulator program on the... -
Page 60: Powering On The Switch
After the startup completes, you can access the CLI to configure the switch. For more information about the configuration commands and CLI, see “QX-S5500G Series Ethernet Switch Configuration Guides” and “QX-S5500G Series Ethernet Switch... - Page 61 Installation Guide QX-S5500G Series Ethernet Switches Contents Contents 5. Setting up an IRF fabric ......................5-1 5.1 IRF fabric setup flowchart ....................5-1 5.2 Planning IRF fabric setup ....................5-2 5.2.1 Planning IRF fabric size and the installation site ............ 5-2 5.2.2 Identifying the master switch and planning IRF member IDs........
-
Page 62: Setting Up An Irf Fabric
5. Setting up an IRF fabric 5. Setting up an IRF fabric You can use IRF technology to connect and virtualize QX-S5500G Series Ethernet Switches into a large virtual switch called an "IRF fabric" for flattened network topology, and high availability, scalability, and manageability. -
Page 63: Planning Irf Fabric Setup
Installing the switch”. Power on the switches. See “Chapter 2 IRF” of QX-S5500G Series Ethernet Switches Configuration Configure basic IRF settings. Guides. Connect physical IRF ports on switches. Use SFP+/QSFP+ transceiver modules and fibers to connect 10-Gigabit SFP+... -
Page 64: Identifying The Master Switch And Planning Irf Member Ids
Distribute the IRF member switches in different racks to implement the top-of-rack (ToR) access solution for a data center. As your business grows, you can plug QX-S5500G Series Ethernet Switches into the IRF fabric to increase the switching capacity without any topology change or replacement. NOTE: An IRF fabric of QX-S5500G Series can compose at most 9. - Page 65 IRF-port 1 on one switch to the physical ports of IRF-port 2 on the other switch. The QX-S5500G Series switches can provide 10-GE IRF connections through SFP+ ports and 40-GE IRF connections through QSFP+ ports, and you can bind several SFP+/QSFP+ ports to an IRF port for increased bandwidth and availability.
-
Page 66: Identifying Physical Irf Ports On The Member Switches
Installation Guide QX-S5500G Series Ethernet Switches 5. Setting up an IRF fabric Figure 5-3 IRF fabric in ring topology IRF-port1 IRF-port2 IRF-port2 IRF-port1 IRF-port1 IRF-port2 5.2.4 Identifying physical IRF ports on the member switches Identify the physical IRF ports on the member switches according to your topology and connection scheme. -
Page 67: Planning The Cabling Scheme
SFP+/QSFP+ DAC cables. For more information about SFP+/QSFP+ DAC cables and SFP+/QSFP+ transceiver modules, see "Appendix C Ports and LEDs." The following subsections describe several NEC recommended IRF connection schemes, and all these schemes use a ring topology. IMPORTANT: In these schemes, all physical IRF ports are located on the same side. - Page 68 Installation Guide QX-S5500G Series Ethernet Switches 5. Setting up an IRF fabric Figure 5-4 Connecting the switches in one rack Figure 5-5 IRF fabric topology II. Connecting the IRF member switches in a ToR solution You can install IRF member switches in different racks side by side to deploy a top of rack...
-
Page 69: Configuring Basic Irf Settings
After you install the IRF member switches, power on the switches, and log in to each IRF member switch (see “Chapter 2 IRF” of QX-S5500G Series Ethernet Switches Configuration Guides) to configure their member IDs, member priorities, and IRF port bindings. -
Page 70: Verifying The Irf Fabric Setup
To avoid IP address collision and network problems, configure a minimum of one multi-active detection (MAD) mechanism to detect the presence of multiple identical IRF fabrics and handle collisions. For more information about MAD detection, see “Chapter 2 IRF” of QX-S5500G Series Ethernet Switches Configuration Guides. - Page 71 Installation Guide QX-S5500G Series Ethernet Switches Contents Contents 6. Upgrading software ........................6-1 6.1 System software file types ....................6-1 6.2 System startup process ..................... 6-1 6.3 Upgrade methods ......................6-2 6.4 The overview of a CLI upgrade procedure ................ 6-3 6.4.1 Preparing for the upgrade ..................
-
Page 72: Upgrading Software
Installation Guide QX-S5500G Series Ethernet Switches 6. Upgrading software 6. Upgrading software This chapter describes types of software used on the switch and how to upgrade software while the switch is operating normally or when the switch cannot correctly start up. -
Page 73: Upgrade Methods
Installation Guide QX-S5500G Series Ethernet Switches 6. Upgrading software Figure 6-1 System startup process Start Boot ROM runs Enter Boot menu to Press Ctrl+B upgrade Boot ROM or promptly? startup software images Startup software images run System starts up and CLI appears Finish 6.3 Upgrade methods... -
Page 74: The Overview Of A Cli Upgrade Procedure
For more information about setting up and configuring an IRF fabric, see “Chapter 5 Setting up an IRF fabric” and “Chapter 2 IRF“ of QX-S5500G Series Ethernet Switches Configuration Guides. 6.4.1 Preparing for the upgrade Before you upgrade software, complete the following tasks: Log in to the IRF fabric through Telnet or the console port (details not shown). - Page 75 Installation Guide QX-S5500G Series Ethernet Switches 6. Upgrading software * indicates the device is the master. + indicates the device through which the user logs in. The Bridge MAC of the IRF is: 0023-8927-afdb Auto upgrade : no Mac persistent...
- Page 76 Installation Guide QX-S5500G Series Ethernet Switches 6. Upgrading software drw- Jan 02 2011 00:00:07 logfile -rw- 13611008 Aug 23 2013 15:59:00 boot.bin -rw- 9012224 Nov 25 2011 09:53:48 backup.bin 524288 KB total (453416 KB free) Compare the free Flash space of each IRF member switch with the size of the software file to load.
-
Page 77: Downloading Software To The Master Switch
Installation Guide QX-S5500G Series Ethernet Switches 6. Upgrading software 6.4.2 Downloading software to the master switch Before you start upgrading software images, make sure you have downloaded the upgrading software files to the root directory in Flash memory. This section describes downloading an “.ipe”... - Page 78 Installation Guide QX-S5500G Series Ethernet Switches 6. Upgrading software Perform the get command in FTP client view to download the file from the FTP server. ftp> get newest.ipe 227 Entering Passive Mode (10,10,110,1,17,97). 125 BINARY mode data connection already open, transfer starting for /newest.ipe 226 Transfer complete.
-
Page 79: Upgrading The Software Images
Installation Guide QX-S5500G Series Ethernet Switches 6. Upgrading software c:\> ftp 1.1.1.1 Connected to 1.1.1.1. 220 FTP service ready. User(1.1.1.1:(none)):abc 331 Password required for abc. Password: 230 User logged in. Enable the binary file transfer mode. ftp> binary 200 TYPE is now 8-bit binary. - Page 80 Installation Guide QX-S5500G Series Ethernet Switches 6. Upgrading software Specify the upgrading image file (newest.ipe in this example) used at the next startup for the master switch, and assign the M attribute to the boot and system images in the file.
- Page 81 Installation Guide QX-S5500G Series Ethernet Switches 6. Upgrading software switch to new member switches when you expand the IRF fabric. This function enables a Standby switch to compare its main startup software image version with that of the IRF master. If the versions are different, the Standby switch automatically...
-
Page 82: Upgrading From The Boot Menu
Installation Guide QX-S5500G Series Ethernet Switches 6. Upgrading software NOTE: The system automatically checks the compatibility of the Boot ROM image and the boot and system images during the reboot. If you are prompted that the Boot ROM image in the upgrading image file is different than the current Boot ROM image, upgrade both the basic and extended sections of the Boot ROM image for compatibility. - Page 83 Installation Guide QX-S5500G Series Ethernet Switches 6. Upgrading software Parity :None Stop bits Flow control :None Emulation :VT100 II. TFTP/FTP download To use TFTP or FTP: Run a TFTP or FTP server program on the file server or the console terminal.
-
Page 84: Accessing The Boot Menu
Installation Guide QX-S5500G Series Ethernet Switches 6. Upgrading software 6.5.2 Accessing the Boot menu When a power supply of switch is turned on, the following message is indicated. Starting..Press Ctrl+D to access BASIC BOOT MENU ***************************************************************************** BOOTROM, Version 109... -
Page 85: Accessing The Basic Boot Menu
Installation Guide QX-S5500G Series Ethernet Switches 6. Upgrading software Shortcut keys Prompt message Function Remarks Press <CTRL+D> within 1 seconds after the message appears. Press Ctrl+D to access Accesses the basic Ctrl+D You can upgrade Boot ROM or BASIC BOOT MENU Boot menu. -
Page 86: Accessing The Extended Boot Menu
Installation Guide QX-S5500G Series Ethernet Switches 6. Upgrading software Table 6-2 Basic Boot ROM menu options Option Tasks Update the entire Boot ROM, including the basic segment and the extended segment. To do so, you must use XMODEM and the console 1. - Page 87 Installation Guide QX-S5500G Series Ethernet Switches 6. Upgrading software more information about password recovery capability, see Chapter 1 Fundamentals Configuration Guide in QX-S5500G Switch Series Configuration Guides. Password recovery capability is enabled. EXTENDED BOOT MENU 1. Download image to flash 2.
-
Page 88: Upgrading Comware Images From The Boot Menu
Installation Guide QX-S5500G Series Ethernet Switches 6. Upgrading software Option Tasks Start the switch without loading any configuration file. Skip current system This is a one-time operation and takes effect only for the first system boot configuration or reboot after you choose this option. - Page 89 Installation Guide QX-S5500G Series Ethernet Switches 6. Upgrading software 3. Set XMODEM protocol parameters 0. Return to boot menu Enter your choice(0-3): Enter 1 to set the TFTP parameters. Load File Name :update.ipe Server IP Address :192.168.0.3 Local IP Address :192.168.0.2...
- Page 90 Installation Guide QX-S5500G Series Ethernet Switches 6. Upgrading software Enter the M (main), B (backup), or N (none) attribute for the images. In this example, assign the main attribute to the images. Please input the file attribute (Main/Backup/None) M Image file boot.bin is self-decompressing...
- Page 91 Installation Guide QX-S5500G Series Ethernet Switches 6. Upgrading software 5. Restore to factory default configuration 6. Enter BootRom upgrade menu 7. Skip current system configuration 8. Set switch startup mode 9. Set The Operating Device 0. Reboot Ctrl+Z: Access EXTENDED ASSISTANT MENU...
- Page 92 Installation Guide QX-S5500G Series Ethernet Switches 6. Upgrading software Item Description Subnet Mask Subnet mask of the switch (for example, 255.255.255.0). IP address of the gateway (in this example, no gateway is required because Gateway IP Address the server and the switch are on the same subnet).
- Page 93 Installation Guide QX-S5500G Series Ethernet Switches 6. Upgrading software Writing flash............................................................................................................Done! EXTENDED BOOT MENU 1. Download image to flash 2. Select image to boot 3. Display all files in flash 4. Delete file from flash 5.
- Page 94 Installation Guide QX-S5500G Series Ethernet Switches 6. Upgrading software NOTE: The switch always attempts to boot with the main images first. If the attempt fails, for example, because the main images are not available, the switch tries to boot with the backup images. An image with the none attribute is only stored in flash memory for backup.
- Page 95 Installation Guide QX-S5500G Series Ethernet Switches 6. Upgrading software Set the serial port on the terminal to use the same baud rate and protocol as the console port. If you select 9600 bps as the download rate for the console port, skip this task.
- Page 96 Installation Guide QX-S5500G Series Ethernet Switches 6. Upgrading software Figure 6-4 Modifying the baud rate Select Call > Call to reestablish the connection. Figure 6-5 Reestablishing the connection Press Enter. The following prompt appears: Are you sure to download file to flash? Yes or No (Y/N):Y Enter Y to start downloading the file.
- Page 97 Installation Guide QX-S5500G Series Ethernet Switches 6. Upgrading software Loading ...CCCCCCCCCCCCCCCCCCCCCCCCC Select Transfer > Send File in the HyperTerminal window. Figure 6-6 Transfer menu In the dialog box that appears, click Browse to select the source file, and select Xmodem from the Protocol list.
- Page 98 Installation Guide QX-S5500G Series Ethernet Switches 6. Upgrading software Figure 6-8 File transfer progress 10) Enter the M (main), B (backup), or N (none) attribute for the images. In this example, assign the main attribute to the images. Please input the file attribute (Main/Backup/None) m The boot.bin image is self-decompressing...
- Page 99 Installation Guide QX-S5500G Series Ethernet Switches 6. Upgrading software Your baudrate should be set to 9600 bps again! Press enter key when ready NOTE: The switch always attempts to boot with the main images first. If the attempt fails, for example, because the ...
-
Page 100: Upgrading Boot Rom From The Boot Menu
Installation Guide QX-S5500G Series Ethernet Switches 6. Upgrading software Ctrl+R: Download image to SDRAM and run Enter your choice(0-9): 0 12) Enter 0 in the Boot menu to reboot the system with the new software images. 6.5.6 Upgrading Boot ROM from the Boot menu... - Page 101 Installation Guide QX-S5500G Series Ethernet Switches 6. Upgrading software Table 6-8 TFTP parameter description Item Description Load File Name Name of the file to download (for example, update.btm). Server IP Address IP address of the TFTP server (for example, 192.168.0.3).
- Page 102 Installation Guide QX-S5500G Series Ethernet Switches 6. Upgrading software 2. Update extended BootRom 3. Update basic BootRom 0. Return to boot menu Enter your choice(0-3): Enter 1 in the Boot ROM update menu to upgrade the full Boot ROM. The file transfer protocol submenu appears: 1.
- Page 103 Installation Guide QX-S5500G Series Ethernet Switches 6. Upgrading software NOTE: To use the default setting for a field, press Enter without entering any value. If the switch and the server are on different subnets, you must specify a gateway address for the switch.
- Page 104 Installation Guide QX-S5500G Series Ethernet Switches 6. Upgrading software 2. Set FTP protocol parameters 3. Set XMODEM protocol parameters 0. Return to boot menu Enter your choice(0-3): Enter 3 to set the XMODEM download baud rate. Please select your download baudrate: 1.* 9600...
- Page 105 Installation Guide QX-S5500G Series Ethernet Switches 6. Upgrading software Figure 6-10 Properties dialog box Select 115200 from the Bits per second list and click OK. 6-34...
- Page 106 Installation Guide QX-S5500G Series Ethernet Switches 6. Upgrading software Figure 6-11 Modifying the baud rate Select Call > Call to reestablish the connection. Figure 6-12 Reestablishing the connection Press Enter to start downloading the file. Now please start transfer file with XMODEM protocol If you want to exit, Press <Ctrl+X>...
- Page 107 Installation Guide QX-S5500G Series Ethernet Switches 6. Upgrading software Figure 6-13 Transfer menu In the dialog box that appears, click Browse to select the source file, and select Xmodem from the Protocol list. Figure 6-14 File transmission dialog box Click Send. The following dialog box appears:...
- Page 108 Installation Guide QX-S5500G Series Ethernet Switches 6. Upgrading software Figure 6-15 File transfer progress 10) Enter Y at the prompt to upgrade the basic Boot ROM section. Loading ...CCCCCCCCCCCCCC ...Done! Will you Update Basic BootRom? (Y/N):Y Updating Basic BootRom...Done. 11) Enter Y at the prompt to upgrade the extended Boot ROM section.
-
Page 109: Managing Files From The Boot Menu
Installation Guide QX-S5500G Series Ethernet Switches 6. Upgrading software 3. Update basic BootRom 0. Return to boot menu Enter your choice(0-3): 15) Enter 0 in the Boot menu to reboot the switch with the new Boot ROM image. 6.5.7 Managing files from the Boot menu... - Page 110 Installation Guide QX-S5500G Series Ethernet Switches 6. Upgrading software File Number File Size(bytes) File Name ============================================================================= 8177 flash:/testbackup.cfg 2(*) 53555200 flash:/system.bin 3(*) 9959424 flash:/boot.bin 3678 flash:/startup.cfg_backup 30033 flash:/default.mdb 42424 flash:/startup.mdb flash:/.pathfile 232311 flash:/logfile/logfile.log 5981 flash:/startup.cfg_back 10(*) 6098 flash:/startup.cfg flash:/.snmpboots Free space: 464298848 bytes The current image is boot.bin...
- Page 111 Installation Guide QX-S5500G Series Ethernet Switches 6. Upgrading software 5981 flash:/startup.cfg_back 10(*) 6098 flash:/startup.cfg flash:/.snmpboots Free space: 464298848 bytes The current image is boot.bin (*)-with main attribute (b)-with backup attribute (*b)-with both main and backup attribute Enter the number of the file to delete. For example, enter 1 to select the file testbackup.cfg.
- Page 112 Installation Guide QX-S5500G Series Ethernet Switches 6. Upgrading software 6. Enter BootRom upgrade menu 7. Skip current system configuration 8. Set switch startup mode 9. Set The Operating Device 0. Reboot Ctrl+Z: Access EXTENDED ASSISTANT MENU Ctrl+F: Format file system...
-
Page 113: Handling Software Upgrade Failures
Installation Guide QX-S5500G Series Ethernet Switches 6. Upgrading software system-update.bin. Enter file No.(Allows multiple selection):3 Enter another file No.(0-Finish choice):4 Enter 0 to finish the selection. Enter another file No.(0-Finish choice):0 You have selected: flash:/boot-update.bin flash:/system-update.bin Enter M or B to change its attribute to main or backup. If you change its attribute to M, the attribute of boot.bin changes to none. - Page 114 Installation Guide QX-S5500G Series Ethernet Switches 6. Upgrading software Check that the storage device has sufficient space for the upgrade file. 6-43...
- Page 115 Installation Guide QX-S5500G Series Ethernet Switches Contents Contents 7. Maintenance and troubleshooting ................... 7-1 7.1 Power module failure ......................7-1 7.1.1 Fixed power module failure of QX-S5524GT-4X2Q or QX-S5548GT-4X2Q ..7-1 7.1.2 Hot swappable power module failure of QX-S5524GT-4X1C, QX-S5548GT-4X1C, or QX-S5524GP-4X1C ......................
-
Page 116: Maintenance And Troubleshooting
Installation Guide QX-S5500G Series Ethernet Switches 7. Maintenance and troubleshooting 7. Maintenance and troubleshooting 7.1 Power module failure 7.1.1 Fixed power module failure of QX-S5524GT-4X2Q or QX-S5548GT-4X2Q The QX-S5524GT-4X2Q or QX-S5548GT-4X2Q switches use fixed power modules, and support three power input modes: AC input, RPS DC input, and concurrent AC and RPS DC inputs. - Page 117 Verify that the operating temperature of the switch is in an acceptable range, and the power module has good ventilation. Over-temperature can cause the power module to stop working and enter protection state. If the problem persists, contact NEC Support. II. RPS DC input Symptom ...
-
Page 118: Hot Swappable Power Module Failure Of Qx-S5524Gt-4X1C, Qx-S5548Gt-4X1C, Or Qx-S5524Gp-4X1C
Over-temperature can cause the power module to stop working and enter protection state. If the problem persists, contact NEC Support. Symptom 2 The system status LED is on but the RPS status LED is steady yellow. -
Page 119: Fan Failure
If the problem persists, contact NEC Support. 7.2 Fan failure 7.2.1 Fixed fan failure of QX-S5524GT-4X2Q, QX-S5548GT-4X2Q, or QX-S5524GP-4X1C The QX-S5524GT-4X2Q, QX-S5548GT-4X2Q, or QX-S5524GP-4X1C switches use fixed fans. If a fan failure occurs, contact NEC Support and do not attempt to fix the problem yourself. -
Page 120: Hot Swappable Fan Tray Failure Of Qx-S5524Gt-4X1C, Qx-S5548Gt-4X1C, Or Qx-S5524Gp-4X1C
Installation Guide QX-S5500G Series Ethernet Switches 7. Maintenance and troubleshooting 7.2.2 Hot swappable fan tray failure of QX-S5524GT-4X1C, QX-S5548GT-4X1C, or QX-S5524GP-4X1C WARNING: If both fan trays fail during operation, replace them within 2 minutes while the switch is operating. Do not ... -
Page 121: Garbled Terminal Display
Installation Guide QX-S5500G Series Ethernet Switches 7. Maintenance and troubleshooting If the problem persists, contact NEC Support. 7.3.2 Garbled terminal display I. Symptom Terminal display is garbled. II. Solution To resolve the problem: Verify that the following settings are configured for the terminal: Baud rate—9,600. - Page 122 Installation Guide QX-S5500G Series Ethernet Switches Contents Contents 8. Appendix A Technical specifications ..................8-1 8.1 Technical specifications ..................... 8-1...
-
Page 123: Technical Specifications
Installation Guide QX-S5500G Series Ethernet Switches 8. Appendix A Technical specifications 8. Appendix A Technical specifications 8.1 Technical specifications Item QX-S5524GT-4X2Q QX-S5548GT-4X2Q QX-S5524GT-4X1C QX-S5548GT-4X1C 440 x 360 x 43.6 mm (17.32 × 14.17 × 1.72 in) (*2) Dimensions (W x D x 440 x 260 x 43.6 mm (17.32 ×... - Page 124 Installation Guide QX-S5500G Series Ethernet Switches 8. Appendix A Technical specifications Item QX-S5524GT-4X2Q QX-S5548GT-4X2Q QX-S5524GT-4X1C QX-S5548GT-4X1C The DC power supply by QX-PS800-T2. The DC power supply by -48 VDC power The DC power supply by -48 VDC power source. DC-input voltage source.
- Page 125 Installation Guide QX-S5500G Series Ethernet Switches 8. Appendix A Technical specifications Item QX-S5524GP-4X1C 10/100/1000 BASE-T 8 (The number of maximum port when using a combo port. 10/100/1000BASE-T autosensing autosensing Ethernet Ethernet port (Port 17T to 24T) and 1000BASE-X SFP port (Port 17S to 24S) are combo port.
- Page 126 Installation Guide QX-S5500G Series Ethernet Switches Contents Contents 9. Appendix B FRUs and compatibility matrixes ............... 9-1 9.1 Hot swappable power modules ..................9-1 9.2 Hot swappable fan trays ....................9-2 9.3 Hot swappable interface cards ..................9-4 9.3.1 Overview ......................... 9-4...
-
Page 127: Appendix B Frus And Compatibility Matrixes
Installation Guide 9. Appendix B FRUs and compatibility matrixes QX-S5500G Series Ethernet Switches 9. Appendix B FRUs and compatibility matrixes This appendix describes the field replaceable units (FRUs) available for the QX-S5500G Series and their compatibility. All the FRUs in this appendix are hot swappable. -
Page 128: Hot Swappable Fan Trays
Installation Guide 9. Appendix B FRUs and compatibility matrixes QX-S5500G Series Ethernet Switches I. PSR150-A1 (1) Handle (2) Hook of Power Cable Holder (3) AC-input power receptacle (4) Screw II. PSR150-D1 (1) Handle (2) Screw (3) Screw for receptacle (4) receptacle 9.2 Hot swappable fan trays... - Page 129 Installation Guide 9. Appendix B FRUs and compatibility matrixes QX-S5500G Series Ethernet Switches QX-S5524GP-4X1C. Install two fan trays on two fan tray slot. You can install two fan tray for the switch. There are two kinds, LSPM5FANSA and LSPM5FANSB by the difference in the directions of the airflow for the fan tray.
-
Page 130: Hot Swappable Interface Cards
Installation Guide 9. Appendix B FRUs and compatibility matrixes QX-S5500G Series Ethernet Switches II. LSPM5FANSB (1) Handle (Red) (2) Status LED 9.3 Hot swappable interface cards 9.3.1 Overview The QX-S5524GT-4X1C, QX-S5548GT-4X1C, or QX-S5524GP-4X1C provide an interface card slot at the rear. The following table describes the interface cards available for these switches. - Page 131 Installation Guide 9. Appendix B FRUs and compatibility matrixes QX-S5500G Series Ethernet Switches CAUTION: LSWM5SP2PM and LSWM5XGT2PM operate only in 10Gbps. LSWM5SP2PM and LSWM5SP8PM are supporting 10GBASE-ER-SFP+ and 10GBASE-ZR-SFP+ module. The SFP/SFP+ port in front of switch aren't supporting 10GBASE-ER-SFP+ and 10GBASE-ZR-SFP+ ...
- Page 132 Installation Guide 9. Appendix B FRUs and compatibility matrixes QX-S5500G Series Ethernet Switches Table 9-2 The port LED of QSFP+ description LED status Description A transceiver module is normally installed on a port. The port has a link and is operating at Steady green 40 Gbps.
- Page 133 Installation Guide 9. Appendix B FRUs and compatibility matrixes QX-S5500G Series Ethernet Switches LED status Description A transceiver module doesn’t installed on a port. No link is present on the port. CAUTION: LSWM5SP2PM doesn't operate by 1Gbps. III. LSWM5XGT2PM (1) 10GBase-T port LED...
- Page 134 Installation Guide 9. Appendix B FRUs and compatibility matrixes QX-S5500G Series Ethernet Switches CAUTION: LSWM5XGT2PM doesn't operate by 1Gbps. IV. LSWM5SP8PM (1) SFP+ port LED (2) SFP+ port (3) Screw (4) Ejecting lever Table 9-5 The port LED of SFP+ description...
-
Page 135: Operation Mode
Installation Guide 9. Appendix B FRUs and compatibility matrixes QX-S5500G Series Ethernet Switches V. LSWM5XGT8PM (1) 1/10GBase-T port (2) 1/10GBase-T port LED (3) Screw (4) Handle Table 9-6 The port LED of 1/10GBase-T description LED status Description Steady green The port has a link and is operating at 10 Gbps. - Page 136 GigabitEthernet 1/0/48 of a front panel becomes invalid. Only when restarting switch, an operation mode becomes effective. For more information about operation mode, see “Ethernet interface commands” of “Chapter 3 Layer 2 - LAN Switching“ of “QX-S5500G Series Ethernet Switches Command References”. CAUTION: When making them recognize an expansion interface card by switch, it's necessary to specify an operation mode as 1 or 2 by the port-configuration-mode command in advance.
- Page 137 Installation Guide QX-S5500G Series Ethernet Switches Contents Contents 10. Appendix C Ports and LEDs ....................10-1 10.1 Ports ..........................10-1 10.1.1 Console port ......................10-1 10.1.2 Management Ethernet port ................. 10-1 10.1.3 USB port ......................10-2 10.1.4 10/100/1000BASE-T autosensing Ethernet port ..........10-2 10.1.5 100/1000Base-X SFP port ..................
-
Page 138: Appendix C Ports And Leds
10. Appendix C Ports and LEDs 10. Appendix C Ports and LEDs 10.1 Ports 10.1.1 Console port The QX-S5500G Series has two console ports: a serial console port and a USB mini console port. Table 10-1 Console port specifications Item... -
Page 139: Usb Port
It isn't possible to use for switching between the interface ports. 10.1.3 USB port The QX-S5500G Series has one OHC-compliant USB2.0 port that can upload and download data at a rate up to 480 Mbps. You can use this USB port to access the file system on the flash of the switch, for example, to upload or download application and configuration files. -
Page 140: 100/1000Base-X Sfp Port
Installation Guide QX-S5500G Series Ethernet Switches 10. Appendix C Ports and LEDs 10.1.5 100/1000Base-X SFP port The QX-S5524GP-4X1C provide 24 SFP ports into a front panel. You can plug the 100/1000BASE-X SFP transceiver modules in Table 10-4. To expand IRF fabric, it's possible to use a SFP port as the IRF fabric physical port to connect to switch. -
Page 141: Sfp+ Port
RJ-45 Category-5 twisted pair - (328.08ft) NOTE: Use SFP transceiver module items of NEC designation for the transceiver module and the cable used for switch. There is a changed possibility for supported transceiver module and cable. 10.1.6 SFP+ port The QX-S5500G Series provide 4 SFP+ ports into a front panel. - Page 142 Installation Guide QX-S5500G Series Ethernet Switches 10. Appendix C Ports and LEDs Central Transceiver module Connector Fiber diameter transmission wavelength distance 50/125 μm multi-mode optical fiber (1804.46 ft.) 62.5/125 μm multi-mode 275 m (902.23 1000BASE-LX-SFP 1310 nm optical fiber ft.) 9/125 μm single-mode optical...
- Page 143 40G QSFP+/10G*4 SFP+ copper cable 3 m (9.84ft) NOTE: Use SFP transceiver module items of NEC designation for the transceiver module and the cable used for switch. There is a changed possibility for supported transceiver module and cable.
- Page 144 Installation Guide QX-S5500G Series Ethernet Switches 10. Appendix C Ports and LEDs CAUTION: In case of a port with 1000BASE-T-SFP, it takes about 1 second for link down measure. Therefore it's recommended that a quick change uses standard 10/100/1000BASE-T port or optical module for the time of an obstacle at a necessary port.
- Page 145 Installation Guide QX-S5500G Series Ethernet Switches 10. Appendix C Ports and LEDs Figure 10-3 40G QSFP+/10G*4 SFP+ copper cable (1) QSFP+ connector (2) QSFP+ handle (3) SFP+ handle (4) SFP+ connector CAUTION: 10G SFP+ side minimum bend radius of 40G QSFP+/10G*4 SFP+ copper cable is 35mm.
-
Page 146: Qsfp+ Port
QSFP+ cable on the Table 10-9 in 40Gbps SFP+ transceiver module. QSFP+ cable is indicated on Figure 10-5. An indicated 40G QSFP+/10G*4 SFP+ copper cable can also be used for Figure 10-3. Table 10-8 QSFP+ transceiver modules available for QX-S5500G Series Central Transceiver module Connector... - Page 147 Refer to Figure 10-4 for a figure of the minimum bend radius of 40G QSFP+/10G*4 SFP+ copper cable. NOTE: Use SFP transceiver module items of NEC designation for the transceiver module and the cable used for switch.
-
Page 148: Combo Port
} command, the other port is automatically disabled. 10.1.9 Port LED mode switching button The QX-S5500G Series can change a mode of a Port mode LED using a Port LED mode switching button. For more information about a Port LED mode switching button, see “Port mode LED” of “LED”... - Page 149 Installation Guide QX-S5500G Series Ethernet Switches 10. Appendix C Ports and LEDs Figure 10-6 RJ-45 connector PIN #8 PIN #1 Numbering of the pins Twisted pair cable is defined in TIA/EIA-568-A or TIA/EIA-568-B. Table 10-10 Numbering of the pins TIA/EIA-568-A Color...
- Page 150 Installation Guide QX-S5500G Series Ethernet Switches 10. Appendix C Ports and LEDs Category Specification The cable provides performance of up to 100 MHz and is suitable for a max speed of Category-5e 1000Mbps. The cable provides performance of up to 250 MHz and is suitable for a speed higher Category-6 than 1Gbps.
- Page 151 Installation Guide QX-S5500G Series Ethernet Switches 10. Appendix C Ports and LEDs cable. The pinout of a 100BASE-TX crossing cable in one end is based on the 568B standard, and other is based on the 568A standard. By the way, the pinout of a 10/100/1000BASE-T crossing cable in one end is based on the 568B standard, and other isn’t based on the 568A standard.
-
Page 152: Led
Installation Guide QX-S5500G Series Ethernet Switches 10. Appendix C Ports and LEDs 10BASE-T/100BASE-TX 1000BASE-T Signal Specification Signal Specification Receive BIDB- Two directions B- Non-data BIDD+ Two directions D+ Non-data BIDD- Two directions D- Table 10-13 Pin arrangement of MDI-X 10BASE-T/100BASE-TX... -
Page 153: Power Module Status Led
Installation Guide QX-S5500G Series Ethernet Switches 10. Appendix C Ports and LEDs LED mark Status Description The switch is powered off. 10.3.2 Power module status LED The QX-S5524GT-4X1C, QX-S5548GT-4X1C, or QX-S5524GP-4X1C provide two power module slots at the rear. For each power module, these switches provide a power module status LED on the front panel. -
Page 154: 10/100/1000Base-T Autosensing Ethernet Port Led
ID of the switch is 5. 10.3.5 10/100/1000BASE-T autosensing Ethernet port LED The QX-S5500G Series provides a status LED for each 10/100/1000BASE-T autosensing Ethernet port. The status LED and the port mode LED work in conjunction to indicate the operating status of the 10/100/1000BASE-T autosensing Ethernet port. -
Page 155: Sfp+ Port Led
LEDs are off, the IRF member ID of the switch is 5. 10.3.7 SFP+ port LED SFP+ port LED of a front panel of the QX-S5500G Series indicates operating state in a SFP+ port. Table 10-20 SFP+ port LED description... -
Page 156: Management Ethernet Port Leds
Installation Guide QX-S5500G Series Ethernet Switches 10. Appendix C Ports and LEDs Table 10-21 QSFP+ port LED description LED status Description Steady green A link is present on the port and the port is operating at 40 Gbps. Flashing green The port is sending or receiving data at 40 Gbps. -
Page 157: Port Status Led On The Interface Card
Installation Guide QX-S5500G Series Ethernet Switches 10. Appendix C Ports and LEDs 10.3.11 Port status LED on the interface card The interface cards provide a port status LED for each port. For more information about the LEDs, see “Appendix B FRUs and compatibility matrixes”. - Page 158 Installation Guide QX-S5500G Series Ethernet Switches Contents Contents 11. Appendix D Cooling system ....................11-1 11.1 Cooling system of the QX-S5524GT-4X1C, QX-S5548GT-4X1C, and QX-S5524GP-4X1C ............................... 11-1 11.2 Cooling system of the QX-S5524GT-4X2Q and QX-S5548GT-4X2Q ......11-3...
- Page 159 Installation Guide QX-S5500G Series Ethernet Switches 11. Appendix D Cooling system 11. Appendix D Cooling system The cooling system of the switch includes the air vents in the chassis, fan trays, and built-in fans of hot swappable power modules. For correct operation of this cooling system, you must consider the site ventilation design when you plan the installation site for the switch.
- Page 160 Installation Guide QX-S5500G Series Ethernet Switches 11. Appendix D Cooling system Figure 11-1 Airflow through the QX-S5524GT-4X1C chassis with the LSPM5FANSA fan tray (1) Power module air vents (2) Fan tray air vents (3) Air vents in the switch side...
- Page 161 Installation Guide QX-S5500G Series Ethernet Switches 11. Appendix D Cooling system (1) Power module air vents (2) Fan tray air vents (3) Air vents in the switch side (4) Port side air vents IMPORTANT: The chassis and the power modules use separate air aisles. Make sure both aisles are not blocked.