Technics SA-DA10 Operating Instructions Manual
Technics av control stereo receiver sa-da10, sa-da8
Hide thumbs
Also See for SA-DA10:
- Service manual (149 pages) ,
- Operating instructions manual (96 pages) ,
- Operating instrutions (59 pages)
Table of Contents
Advertisement
AV Control Stereo Receiver
Operating Instructions
SA-DA10
Model No.
SA-DA8
The photographs show the gold version of SA-DA8.
Model SA-DA10 is only for the United Kingdom.
The black version of SA-DA8 is only for the United Kingdom.
EB GN
Note:
"EB" on the packaging indicates the United Kingdom.
Before connecting, operating or adjusting this product,
please read these instructions completely.
Please keep this manual for future reference.
RQT5518-B
Advertisement
Table of Contents

Related Manuals for Technics SA-DA10


Summary of Contents for Technics SA-DA10
-
Page 1: Operating Instructions
SA-DA10 Model No. SA-DA8 The photographs show the gold version of SA-DA8. Model SA-DA10 is only for the United Kingdom. The black version of SA-DA8 is only for the United Kingdom. EB GN Note: “EB” on the packaging indicates the United Kingdom. -
Page 2: Table Of Contents
MFM indoor antenna ... 1 pc. MAntenna plug ... 1 pc. MAntenna plug ... 1 pc..32 MBatteries ... 2 pcs. MRemote control ... 1 pc. SA-DA10 SA-DA8 For the United Kingdom (EUR647136) Use numbers indicated in parentheses when asking for replacement parts. -
Page 3: Caution For Ac Mains Lead
Caution for AC Mains Lead (For United Kingdom) (“EB” area code model only) For your safety, please read the following text carefully. This appliance is supplied with a moulded three pin mains plug for your safety and convenience. A 5-ampere fuse is fitted in this plug. Should the fuse need to be replaced please ensure that the replacement fuse has a rating of 5-ampere and that it is approved by ASTA or BSI to BS1362. -
Page 4: Safety Precautions
Safety precautions Placement Set the unit up on an even surface away from direct sunlight, high temperatures, high humidity, and excessive vibration. These conditions can damage the cabinet and other components, thereby shortening the unit’s service life. Place it at least 15 cm away from wall surfaces to avoid distortion and unwanted acoustical effects. -
Page 5: To Enjoy Surround Sound
To enjoy surround sound Do the connections, settings, and adjustments in the order shown to enjoy surround sound. Be sure to make the correct speaker settings. If, for example, you have not connected a center speaker and you leave the initial setting value of LARGE as it is, then dialog and other sounds may not be reproduced. -
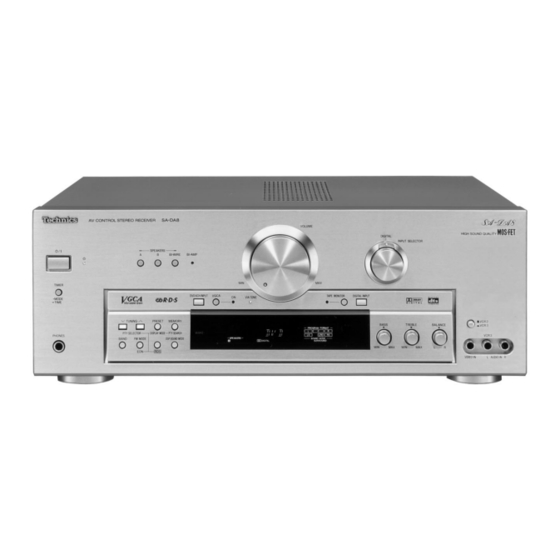
Page 6: Front Panel Controls
Front panel controls TIMER -MODE –TIME PHONES Main unit Name q q q q q Standby/on switch ( Press to switch the unit from on to standby mode or vice versa. In standby mode, the unit is still consuming a small amount of power. - Page 7 TUNED STEREO WAKE MONO LOW IMP SPEAKERS A B BI-WIRE Display section Name @ 9 @ 9 @ 9 @ 9 @ 9 Tuned indicator (TUNED) ... 28 # 0 # 0 # 0 # 0 # 0 Stereo indicator (STEREO) ... 28 # 1 # 1 # 1 # 1 # 1 Monaural indicator (MONO) ...
- Page 8 SA-DA10 TAPE DIRECT TUNING/ DISC ENTER DISC/DECK 1/2 MD TOP MENU ENTER DISPLAY SUB TITLE AUDIO – GROUP – TV VOL SA-DA8 TAPE TOP MENU DISC/DECK ENTER DISPLAY STEREO SURROUND SFC DELAY LEVEL TV VOL DIMMER MUTING RQT5518 SA-DA10 TUNER/BAND...
-
Page 9: Concerning The Remote Control
For your reference This remote control can be used to operate the receiver you purchased and some other Panasonic and Technics cassette decks, MD decks, CD players, TVs, VCRs and DVD players, provided they are equipped with a remote control sensor. -
Page 10: Connections
Connections Stereo phono cable (not included) White (L) Turn off all components before making any connections. To connect equipment, refer to the appropriate operating instructions. Connecting a DVD player Optical fiber cable connection Dust cap ¡Do not bend the optical fiber cable. ¡If the digital optical connector is not going to be used, be sure to attach the dust cap to prevent exposure to... -
Page 11: Connecting Video Equipment
Optical fiber cable (not included) Connecting video equipment VCR (for play only) (not included) AV IN 21pin scart cable VIDEO (not included) (VIDEO OUT) (AUDIO OUT) TAPE/MD (OUT) OPTICAL LOOP ANT HOLDER DIGITAL OPTICAL VCR 2 VCR 1 OPTICAL PHONO FRONT SUBWOOFER CENTER... -
Page 12: Connecting Audio Equipment
Connections Connecting audio equipment Stereo phono cable (not included) White (L) Turntable (not included) OUTPUT Only for turntable with ground terminal. Note If you want to connect a graphic equalizer, connect it to the TAPE/MD (for the United Kingdom) or TAPE (for Australia and New Zealand) terminals (\ page 24). -
Page 13: Connecting The Ac Mains Lead And Other Information
To connect an outdoor antenna FM outdoor antenna ¡ Disconnect the FM indoor antenna. ¡ The antenna should be installed by a competent technician. For the United Kingdom TAPE PLAY (OUT) OPTICAL LOOP ANT HOLDER DIGITAL OPTICAL VCR 2 VCR 1 OPTICAL Antenna plug (included) PHONO... -
Page 14: Speaker Connections
Speaker connections Placement of speakers Center speaker Front speaker (not included) (left) (not included) Surround speaker (left) (not included) Connecting speakers Other connections are possible depending on your speaker system. See your speaker system’s operating instructions for details. Front speakers Front speaker (right) (not included) - Page 15 Bi-wiring connection Note When bi-wiring, use speakers designed for that purpose that have combined impedance of 6–16 Front speaker (right) (not included) TAPE/MD (OUT) OPTICAL LOOP ANT HOLDER DIGITAL OPTICAL VCR 2 VCR 1 OPTICAL PHONO FRONT SUBWOOFER CENTER DVD/ DVD 6CH SURROUND SURROUND...
- Page 16 Speaker connections Center speaker OPTICAL LOOP ANT HOLDER DIGITAL OPTICAL OPTICAL PHONO FRONT SUBWOOFER CENTER DVD/ DVD 6CH SURROUND SURROUND LOOP Surround speakers OPTICAL LOOP ANT HOLDER Surround speaker (right) DIGITAL OPTICAL (not included) OPTICAL PHONO FRONT Speaker cable (not included) SUBWOOFER DVD/ DVD 6CH...
-
Page 17: Preparatory Steps
SPEAKERS SPEAKERS SPEAKERS INPUT SELECTOR Preparatory steps Speaker settings These settings should be done to get the most from the unit’s DSP reproduction modes (a pages 20 and 21). In SIZE Set the type (LARGE or SMALL) and presence (NONE, YES or NO) of your speakers. - Page 18 SPEAKERS SPEAKERS INPUT SELECTOR SPEAKERS INPUT SELECTOR SPEAKERS RQT5518 If you allow about 10 seconds to elapse between settings, the procedure is canceled, all settings are returned to how they were, and the previous display is restored. Begin again if this occurs. For your reference The settings remain as they are until changed by the above procedure, even after the power has been turned off.
-
Page 19: Adjusting Speaker Output Level
Speakers set as “NONE” or “NO” are skipped. Note DSP sound mode switches to SURROUND mode when the test starts. by remote control Press [VOLUME (+ or –)] (SA-DA10) or [VOL (– or +)] (SA-DA8) to set the volume level normally used for enjoying the source. Note Use [BALANCE] if the left right balance of the front speakers is off. -
Page 20: Dsp Sound Modes
DSP SOUND MODE DSP SOUND MODE DSP SOUND MODE Dolby Digital DIGITAL Dolby Pro Logic RQT5518 This unit’s digital signal processor (DSP) has the following three modes–STEREO, SURROUND and SFC. Use this mode when you want to listen to stereo sources, whether they are digital or analogue, or when you want to play Dolby Digital or DTS sources through two channels. - Page 21 DSP SOUND MODE DIGITAL INPUT SA-DA10 – DIRECT TUNING/ 10/ENTER DISC ENTER MUTING -/-- DISC/DECK 1/2 MD SOUND MODE SLOW/ DELAY SEARCH TOP MENU MENU LEVEL ENTER – DISPLAY RETURN SUB TITLE AUDIO ANGLE TEST – GROUP PAGE DIMMER –...
-
Page 22: Enjoying The Sounds
SPEAKERS BI-WIRE INPUT SELECTOR DIGITAL INPUT DSP SOUND MODE RQT5518 Preparation: Set [VOLUME] to the “MIN” position. DIGITAL SPEAKERS PHONO TUNER TAPE/MD VCR 2 VCR 1 (TAPE) (Continued on next page) PROGRAM FORMAT SOUND MODE SURROUND Enjoying the sounds Press [ /l]. -
Page 23: Adjust The Volume
SA-DA10 – DIRECT TUNING/ 10/ENTER DISC ENTER MUTING -/-- DISC/DECK 1/2 MD SOUND MODE SLOW/ DELAY SEARCH DELAY TOP MENU MENU LEVEL LEVEL ENTER –, + – DISPLAY RETURN SUB TITLE AUDIO ANGLE TEST – GROUP PAGE DIMMER – TV VOL... -
Page 24: To Enjoy Bi-Amp Sound
SPEAKERS A, B BI-WIRE BI-AMP SPEAKERS BI-WIRE BI-AMP SPEAKERS BI-WIRE TAPE MONITOR RQT5518 Enjoying the sounds TAPE MONITOR To enjoy bi-amp sound By using the bi-wiring feature of this unit to connect your speakers, you are able to take advantage of two separate amplifiers for the high frequency and low frequency ranges. -
Page 25: To Adjust The Tone Quality
BASS TREBLE BASS TREBLE BALANCE VCR 2 VCR 3 Enjoying the sounds VCR 2 VCR 3 To adjust the tone quality Turn [BASS] to adjust the bass. Turn [TREBLE] to adjust the treble. To adjust the sound balance Turn [BALANCE] to adjust the left/right sound balance. -
Page 26: Switching Dvd Analogue Input
INPUT SELECTOR DVD 6CH INPUT RQT5518 Use analogue input to enjoy the high-quality, 96 kHz or 192 kHz linear PCM and multiple channel linear PCM audio found on some DVD-Video and DVD-Audio. Select the analogue input mode to suit the source. DVD: For two-channel audio. -
Page 27: Vgca Mode
ON VIA TONE INPUT SELECTOR VGCA VGCA mode This unit features a state-of-the-art variable gain control amplifier (VGCA). This feature cuts down greatly on noise encountered during normal use. Turn [INPUT SELECTOR] to select the source. Press [VGCA]. The “VIA TONE” indicator goes out and the “ON” indicator lights when “VGCA”... -
Page 28: The Radio
FM MODE, EON VGCA INPUT SELECTOR BAND Selected band TUNING PTY SELECTOR TUNED STEREO SPEAKERS RQT5518 The radio Sequential tuning Use the tuning buttons to tune-in radio stations. Turn [INPUT SELECTOR] to select “TUNER”. Press [BAND] to select “FM” or “AM”. Press [TUNING , SELECTOR] (for the United Kingdom) or [TUNING ,... -
Page 29: Direct Tuning
SA-DA10 TAPE TUNER/BAND TOP MENU VOLUME DISC/DECK – DISPLAY DIRECT TUNING/ 10/ENTER DISC ENTER MUTING STEREO -/-- DISC/DECK 1/2 MD SOUND MODE DELAY SLOW/ DELAY SEARCH TOP MENU MENU LEVEL DIMMER ENTER – DISPLAY RETURN SUB TITLE AUDIO ANGLE TEST –... -
Page 30: Preset Tuning
MEMORY PTY SEARCH MEMORY PTY SEARCH RQT5518 The radio Preset tuning Presetting radio stations into the memory channels of this unit makes selecting stations simple. A total of 30 FM and AM stations can be preset. Please remember this If a new station is preset into a channel, the setting for the station which was previously entered in that channel will be automatically erased. - Page 31 3 2,4 FM MODE, EON MEMORY PTY SEARCH TUNING PTY SELECTOR MEMORY SPEAKERS PTY SEARCH TUNED STEREO SPEAKERS PRESET DISPLAY MODE TUNING PTY SELECTOR The radio Manual memory presetting The desired stations can be preset into the desired channels by the user. Set to the desired frequency.
-
Page 32: Rds Broadcasts Only For The United Kingdom
TUNED STEREO SPEAKERS PRESET DISPLAY MODE TUNED STEREO SPEAKERS TUNED STEREO SPEAKERS TUNED STEREO SPEAKERS TUNED STEREO SPEAKERS RQT5518 RDS (Radio data system) is a multiplex broadcasting system. Along with the audio signals of FM broadcasts, text information and other signals are transmitted to help you enjoy radio more and make tuning into programs easier. -
Page 33: Pty Search And Eon Tuning
TUNED STEREO SPEAKERS TUNING PTY SELECTOR TUNED STEREO SPEAKERS MEMORY PTY SEARCH TUNED STEREO SPEAKERS RDS broadcasts Only for the United Kingdom PTY search and EON tuning Before trying to use these functions, it is necessary to preset radio stations into the receiver’s memory (a pages 30 and 31). Neither of these functions will work if stations have not been preset. - Page 34 TUNED STEREO SPEAKERS TUNING PTY SELECTOR TUNED STEREO SPEAKERS FM MODE TUNED STEREO SPEAKERS RQT5518 EON tuning is useful if the type of program you want to listen is not currently being broadcast. It allows you to set the unit to automatically change to a particular type of program when one begins.
-
Page 35: About The Pty Display
RDS broadcasts Only for the United Kingdom About the PTY display There are a total of 31 PTY displays on this unit. The display changes each time [TUNING, , PTY SELECTOR] is pressed. The table below shows the order in which the display changes, and also gives an explanation of each display. -
Page 36: Other Functions
SPEAKERS A, B PHONES VOLUME SPEAKERS SPEAKERS INPUT SELECTOR SPEAKERS RQT5518 VOLUME INPUT SELECTOR q q q q q Reduce the volume. w w w w w Connect the headphones. Plug type: 6.3 mm stereo e e e e e Adjust the volume. Select STEREO or turn both SPEAKERS A and B, or BI-WIRE off when using headphones. -
Page 37: To Mute The Sound Level
10/–/– – by remote control only TV VOL TV/AV DVD 6CH Dimming the display and turning off the white lights (SA-DA10 – DIMMER MUTING only) can improve video viewing in dark or dimly lit rooms. Press [DIMMER]. Repeat to turn on again. -
Page 38: The Remote Control
The remote control SA-DA10 TAPE TUNER/BAND VOLUME – DIRECT TUNING/ 10/ENTER DISC ENTER MUTING -/-- DISC/DECK 1/2 MD SOUND MODE SLOW/ DELAY SEARCH TOP MENU MENU LEVEL ENTER – DISPLAY RETURN SUB TITLE AUDIO ANGLE TEST – GROUP PAGE DIMMER –... -
Page 39: To Operate The Receiver
To operate the receiver To switch between on and standby To select an input source (except PHONO and VCR 2/ FRT-VCR 3) and switch the remote control to each operation mode To select DVD 6CH INPUT mode To adjust the volume To select the DSP sound modes To turn SFC on and select the mode To output a test signal... - Page 40 The remote control SA-DA10 TAPE TUNER/BAND VOLUME – DIRECT TUNING/ 10/ENTER DISC ENTER MUTING -/-- DISC/DECK 1/2 MD SOUND MODE SLOW/ DELAY SEARCH TOP MENU MENU LEVEL ENTER – DISPLAY RETURN SUB TITLE AUDIO ANGLE TEST – GROUP PAGE DIMMER –...
-
Page 41: To Operate A Cd Player Or Md Deck
To start play from the desired disc “MEGA CD changer” means any Technics CD changer that takes more than 50 discs. (When selecting discs, [ 10/ENTER, -/--] (SA-DA10) or [ 10/-/--] (SA-DA8) does not respond to touch.) For your reference If you press this button instead of [ procedure, the CD changer will stop and display the disc number. - Page 42 The remote control SA-DA10 TAPE TUNER/BAND VOLUME – DIRECT TUNING/ 10/ENTER DISC ENTER MUTING -/-- DISC/DECK 1/2 MD SOUND MODE SLOW/ DELAY SEARCH TOP MENU MENU LEVEL ENTER – DISPLAY RETURN SUB TITLE AUDIO ANGLE TEST – GROUP PAGE DIMMER –...
-
Page 43: To Watch Tv Broadcasts
To watch TV broadcasts To turn the TV ON/OFF To select the TV/AV mode To select the desired channel sequentially To select the desired channel directly To adjust the volume To watch video tapes To turn the VCR player ON/OFF To select the desired channel sequentially To select the desired channel directly To start play... - Page 44 The remote control SA-DA10 TAPE TUNER/BAND VOLUME – DIRECT TUNING/ 10/ENTER DISC ENTER MUTING -/-- DISC/DECK 1/2 MD SOUND MODE SLOW/ DELAY SEARCH TOP MENU MENU LEVEL ENTER – DISPLAY RETURN SUB TITLE AUDIO ANGLE TEST – GROUP PAGE DIMMER –...
-
Page 45: To Operate A Dvd Player
To operate a DVD player To turn the DVD player ON/OFF To start play To skip to the beginning of a track or chapter To display the top menu To display the menu To display the GUI menu icons To select items To enter the selected items To clear the GUI display To display the subtitle icon... -
Page 46: To Change The Remote Control Code
The remote control SA-DA10 only TAPE TUNER/BAND VOLUME – DIRECT TUNING/ 10/ENTER DISC ENTER MUTING -/-- DISC/DECK 1/2 MD SOUND MODE SLOW/ DELAY SEARCH TOP MENU MENU LEVEL ENTER – DISPLAY RETURN SUB TITLE AUDIO ANGLE TEST – GROUP PAGE DIMMER –... - Page 47 02, 03, 18, 23, 27, 32 02, 18, 23, 27 SHARP SIEMENS 03, 10, 11, 32 SONY 24, 25, 26 THOMSON THORN TOSHIBA 15, 17, 19, 32 UNIVERSUM 03, 08, 32, 37 SONY TECHNICS THOMSON TOSHIBA YAMAHA ZENITH 07, 12 RQT5518...
-
Page 48: Making A Recording
TAPE MONITOR INPUT SELECTOR VCR 2 VCR 3 TAPE MONITOR RQT5518 Making a recording Note ¡You cannot record a source connected through a digital terminal. ¡When recording CD, DVD, or TV, ensure the source is connected through the corresponding analogue terminals (a pages 10–12) and “ANALOG”... -
Page 49: Timer Function
WAKE TIMER -MODE –TIME WAKE TIMER WAKE -MODE –TIME TUNED STEREO WAKE SPEAKERS Timer function There are two timer functions: the sleep timer and the wake timer. ¡Sleep timer: The unit turns off after a set time. It can be set for 30, 60, or 90 minutes. ¡Wake timer: The unit can be set to turn on a certain number of hours after it is turned off. -
Page 50: Troubleshooting Guide
Troubleshooting guide Before requesting service for this unit, check the chart below for a possible cause of the problem you are experiencing. Some simple checks or a minor adjustment on your part may eliminate the problem and restore proper operation. Problem While listening to FM broadcasts Hiss is heard during... -
Page 51: The Reset Function
Problem Probable cause(s) Common Problems Unit doesn’t come on. The AC mains lead plug is not fully inserted. Sound is not heard. The speaker indicators are off. The tape monitor function is on. The muting function is on. Incomplete speakers and external equipment. incorrect selected. -
Page 52: Specifications
20 V, 330 V/m 55 dB 50 dB 1 0.1 Vp-p 1.5 Vp-p (unbalanced) AC 230–240 V, 50 Hz 270 W [SA-DA10] 430 x 180 x 370 mm [SA-DA8] 430 x 158 x 370 mm [SA-DA10] 12.7 kg [SA-DA8] 11.7 kg RQT5518-B H0500HM0...