Table of Contents
Advertisement
Advertisement
Table of Contents

Related Manuals for Star Trac E-RBi


Summary of Contents for Star Trac E-RBi
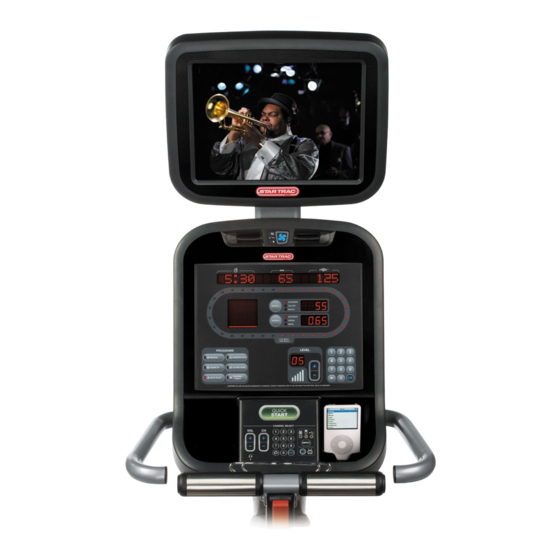
- Page 1 ITNESS ERSONAL IEWING CREEN ’ W N E R A N U A L...
-
Page 2: Table Of Contents
Maintenance Mode for E-TBTi, E-STi, E-RBi, and E-UBi ....... . . - Page 3 PULSE PULSE E-TRi STAR TRAC P ’ ERSONAL IEWING CREEN WNER UIDE...
-
Page 4: About This Manual
The design elements of this Personal Viewing Screen will provide you with a comfortable, intu- itive, safe and reliable experience, guiding you to a habit-forming lifestyle. Star Trac's mission is to provide products to mold lifelong habits for health and fitness. -
Page 5: Check Facilities Preparedness
Check to see that the equipment you will be adding the PVS to are place where they will be used. It is recommended that you follow your installation guides for each one of your Star Trac pieces of equipment in making sure that there is ample space around them to insure a safe and enjoyable experience. - Page 6 AUTIONS ATTENTION RISQUE DE CHOC ELECTRIQUE, NE PAS OUVRIR PRECAUCION RIESGO DE CHOQUE ELECTRICO NO ABRIR DO NOT REMOVE COVER ( OR BACK). NO USER-SERVICEABLE PARTS INSIDE. ARNING STAR TRAC P ’ ERSONAL IEWING CREEN WNER ANUAL...
- Page 7 This STAR TRAC Personal Viewing Screen has been engineered and manufactured to assure your safety. Before using this product, be sure to read your user’s manual in order to maximize the life of your display. DO NOT disassemble the PVS.
-
Page 8: Unpack Your Pvs
Inspect the shipping carton for any parts that may be missing BEFORE discarding the carton. Items can shift during transportation, and may be accidentally discarded with the carton. If any parts are missing, please contact Star Trac Product Support at 800-503-1221. Have the serial number of the PVS, and a list of the missing parts ready so they may be shipped to you. -
Page 9: Tools Needed
Power Cord, Nema 5-15 (NOT INCLUDED IN THE E-TRi KIT) • Owners Manual PAL/SECAM Kit (Europe, Middle East) NOTE: there are 4 different kits ie. E-TRi, E-TBTi/E-UBi, E-RBi, AND E-STi. • PVS assembly with Mounting Bracket, Cables, and Display Cap with Grommet (There are 5 cables in the neck) •... -
Page 10: E-Ub, E-Rb, E-Tbt, And E-St
The Star Trac Personal Viewing Screen is different for each of your Star Trac E-Series Cardio prod- ucts. Make sure you have the proper kit for the E-Series product you are installing. The E-UBi, E-RBi, E-TBTi, and the E-STi will follow the same basic steps for installation. For the E-TRi turn page 18 in this section. - Page 11 You can use the foam bag that ships inside the Personal Viewing Screen package to place the display face onto. This will help protect it from being damaged. Remove the cap cover with the Star Trac logo from the plastics by removing the (2) screws using a #2 Phillips screwdriver.
- Page 12 Detach the center console from the display. You will no longer need this item and it can be stored away for any possible future use. M8 Buttonhead Screws (4) Screws STAR TRAC P ERSONAL Ribbon Cable ’ IEWING CREEN WNER...
- Page 13 PC board. Next take the center console ribbon cable and attach it to the display PC board. Make sure pin one on the cable is connected to pin one on the board. STAR TRAC P ERSONAL IEWING CREEN...
- Page 14 Take the 5” piece of tape from the PVS kit and wrap the connectors so that all of the metal surface is covered. Heart Rate Ground Heart Rate Connector Connector (2) DC Power Connectors Coax Cable STAR TRAC P ERSONAL IEWING PVS Remote Connector ’ CREEN WNER UIDE...
- Page 15 • Connect the Ground cable from the front display minals on the display mount. • Connect the Ground cable from the front display minals on the display mount. STAR TRAC P ERSONAL IEWING CREEN Tie Wrap...
- Page 16 Using a #2 Phillips screwdriver, fasten the head phone jack into the front display with the screw that was saved from the earlier step. Screws STAR TRAC P ERSONAL IEWING Screws Screw ’...
- Page 17 Now with the Personal Viewing Screen installed on your Star Trac equipment, it is time to connect your entertainment cable and power to the unit Look at the bottom of the neck, next to the floor. Connect your in-house Entertainment cable to the RF input.
-
Page 18: E-Tr
Now remove the upper cap cover that has the STAR TRAC logo on it. This cap is held in by the upper back cover. You will no longer need this cap cover and, if desired, you can store it away for any possible future use. - Page 19 (do not tighten). Adjust the display cap up or down to align with the holes on the display front. Once the cap is aligned, tighten the buttonhead screws with the 5mm hex key. STAR TRAC P ERSONAL IEWING CREEN Ribbon...
- Page 20 Cable Window Center Console Ground Keypad Tail Backside of Entertainment Center Console from the treadmill from the through the dis- STAR TRAC P Center Console Hole Bottom View PVS Remote Connector Connectors (2) DC Power Connectors ’ ERSONAL IEWING CREEN...
- Page 21 Conect the Head Phone Jack to the cable in the jack opening. Use the previously retained screw to reinstall the Headphone Jack. Tighten snugly. STAR TRAC P ERSONAL IEWING CREEN DC connectors, (they are the same so it PVS Remote Connector.
- Page 22 Phillips screwdriver insert the (6) screws, retained from earlier step, into the plastic and tighten snug. Caution: Do Not over tighten screws. Quick Keypad con- Interface Screws F-Type Connector Mounting Bracket Using a #2 Screws STAR TRAC P Screws ’ ERSONAL IEWING CREEN WNER UIDE...
- Page 23 Caution: Do Not over tighten screws. This completes the installation of the Personal Viewing Screen on the E-TR treadmill. Now it is time to set it up. Turn to the appropriate section for your Personal Viewing Screen. STAR TRAC P ERSONAL IEWING...
-
Page 24: Ntsc/Atsc (Typically Us, Japan)
ETTING Now that your Personal Viewing Screen is installed on your Star Trac Cardio Equipment, it is time to set it up. There are 2 types of Personal Viewing Screens, turn to the section that applies to your unit. NTSC / ATSC Personal Viewing Screen Set up... -
Page 25: Setting Up The Channels
Personal Viewing Screen to show. You will also select the Language that will appear in the Sub Menus setup screens. Refer the remainder of this section for a more complete description of each sub category. STAR TRAC P ERSONAL IEWING CREEN . - Page 26 Channel set, press to the Channel Sub Menu. button. Broadcasting frequencies are automati- . Push , and , at the same time, to exit this menu and return STAR TRAC P to change between Viewable, ’ ERSONAL IEWING CREEN...
-
Page 27: Adjusting Image Quality
This section will allow you to change the visual look of the screen. Use the between selections. Press the adjust the item, when you are finished press CONTRAST: Adjust the white level of the picture. STAR TRAC P ERSONAL IEWING CREEN... -
Page 28: Adjusting Audio Quality
BASS: Will adjust the bass tone of the sound output. UALITY Audio Language English Bass Treble Balance Digital Audio Output Settings Preset to enter the the selected item. Use STAR TRAC P to return to the Audio ’ ERSONAL IEWING CREEN WNER UIDE... -
Page 29: Adjusting Special Features
PARENTAL CONTROL: Digital broadcasting includes several ratings/grades. This feature will allow you to set which ratings or grades to block. DISPLAY CAPTION OPTIONS: Allows you to adjust how you would like the captions to appear. STAR TRAC P ERSONAL IEWING CREEN... -
Page 30: Pal/Secam (Typically Europe, Middle East)
Before you can set up the Personal Viewing Screen you must first get into the “Maintenance Mode” of the Star Trac Cardio Equipment, while is this mode you will tell the equipment what type of Personal Viewing Screen you are installing. -
Page 31: Maintenance Mode For E-Tbti, E-Sti, E-Rbi, And E-Ubi
(level up) to change the variable from ATCS/NTSC to PAL/SECAM. 6. Press the to save the change and exit. This completes the E-TBT, E-ST, E-RB, and E-UB setup, now turn to “Accessing The On Screen Display” to continue. STAR TRAC P ERSONAL IEWING CREEN keys together. -
Page 32: Accessing On Screen Display Menus (Osd)
Sub Menu S e l e c t to navigate between Main menu items. . Once you are in a sub menu, use the to exit the sub menu. STAR TRAC P (OSD) Menu Name Picture U s e r... -
Page 33: Picture Menu
Sharpness: Adjust to sharpen or soften the picture. Saturation: Adjust Saturation of the picture. Tint: Adjust color tone. Color Temp: Default to NORMAL. Aspect Ratio: Image size on screen, Default to NORMAL. STAR TRAC P ERSONAL IEWING CREEN CREEN S e l e c t to exit that item. -
Page 34: Sound Menu
OUND S e l e c t to exit that item. Use the to exit the sub menu and return to the Main menu. STAR TRAC P Sound S t a n d a r d M O N O... -
Page 35: Channel Menu
Use this feature to automatically scan your service and add channels to the PVS. To do this follow this procedure. Use the start the Auto Search. This will scan for channels and exit the OSD. STAR TRAC P ERSONAL IEWING... - Page 36 S e l e c t to select the element you wish to to exit that item. Use the to exit the sub menu and return to the Main menu. STAR TRAC P O f f O f f O f f...
-
Page 37: Cleaning The Pvs
The following information may help you understand and troubleshoot any problems the you may encounter with your Star Trac Personal Viewing Screen. If the suggestions in this table do not help solve the problem that you encounter please contact Star Trac’s Service Hotline at (800) 503-1221, or USA 1-714-669-1660. - Page 38 Check to see if the “Maintenance Settings, PVS value” is set to the proper PVS type, (See “Setting up your Star Trac PVS”). “No Signal” displayed on See “NO PICTURE”, You may have to rerun the setup routine for the...
-
Page 39: Replace The Headphone Jack
The headphone jack was designed for an easy and quick replacement. Before you begin, make sure your have the proper replacement part available. For the E-TRi use part number 715-3668. For the E-TBTi, E-STi, E-RBi, and E-UBi use part number 718-5098 . - Page 40 • Connect the equipment into a separate outlet that uses a different circuit than the receiver. Consult a Star Trac Service Representative or an experienced radio/TV technician for help. Warning: Per FCC rules, changes or modifications not expressly approved by Star Trac could void the user’s authority to Operate the equipment.
- Page 41 STAR TRAC P ’ ERSONAL IEWING CREEN WNER UIDE...
- Page 42 STAR TRAC 14410 Myford Road Irvine, California 92606 Telephone: (800) 228-6635, (714) 669-1660 Fax: (714) 508-3303 http://www.startrac.com email: support@startrac.com Part Number 620-7838 REV A , July 2008...