Southbend Marathoner Gold ES/20SC Operator's Manual
Electric convection ovens
Hide thumbs
Also See for Marathoner Gold ES/20SC:
- Features & dimensions (2 pages) ,
- Owner's manual (48 pages)
Table of Contents
Advertisement
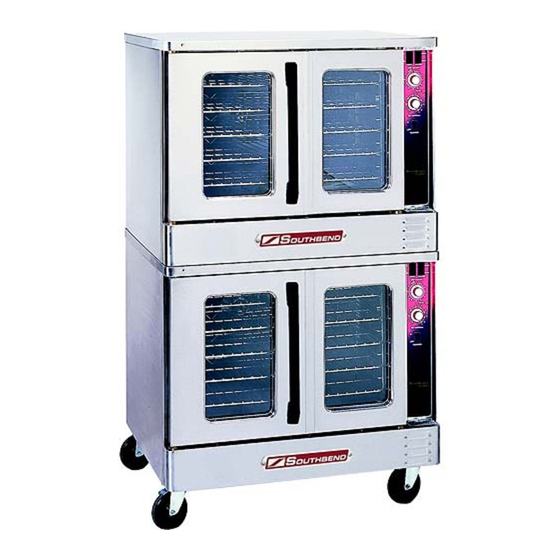
Marathoner Gold & SilverStar
ELECTRIC CONVECTION OVENS
SilverStar Models
SLEB/10CCH
SLEB/10SC
SLEB/20CCH
SLEB/20SC
Model SLES/10SC
Improper installation, adjustment, alteration, service or maintenance can cause property damage,
injury or death. Read the installation, operating and maintenance instructions thoroughly before
M
1181958
ANUAL
$18.00
OPERATOR'S MANUAL
SLES/10CCH
SLES/10SC
SLES/20CCH
SLES/20SC
!
installing or servicing this equipment.
1100 Old Honeycutt Road, Fuquay-Varina, NC 27526
www.southbendnc.com
Marathoner Gold Models
EB/10CCH
EB/10PC
EB/10RT
EB/10SC
WARNING
IMPORTANT FOR FUTURE REFERENCE
Please complete this information and retain this
manual for the life of the equipment:
Model #: ___________________________
Serial #: ___________________________
Date Purchased: ____________________
EB/20CCH
ES/10CCH
ES/20CCH
EB/20PC
ES/10PC
ES/20PC
EB/20RT
ES/10RT
ES/20RT
EB/20SC
ES/10SC
ES/20SC
Model ES/10SC
ELECTRIC CONVECTION OVENS
MANUAL SECTION CO
Advertisement
Table of Contents
Troubleshooting

Related Manuals for Southbend Marathoner Gold ES/20SC


Summary of Contents for Southbend Marathoner Gold ES/20SC
- Page 1 Please complete this information and retain this manual for the life of the equipment: Model #: ___________________________ Serial #: ___________________________ Date Purchased: ____________________ Marathoner Gold Models EB/20CCH ES/10CCH ES/20CCH EB/20PC ES/10PC ES/20PC EB/20RT ES/10RT ES/20RT EB/20SC ES/10SC ES/20SC Model ES/10SC ELECTRIC CONVECTION OVENS MANUAL SECTION CO...
-
Page 2: Safety Precautions
SAFETY PRECAUTIONS Before installing and operating this equipment, be sure everyone involved in its operation is fully trained and aware of precautions. Accidents and problems can be caused by failure to follow fundamental rules and precautions. The following symbols, found throughout this manual, alert you to potentially dangerous conditions to the operator, service personnel, or to the equipment. -
Page 3: Table Of Contents
Congratulations! You have purchased one of the finest pieces of heavy-duty commercial cooking equipment on the market. You will find that your new equipment, like all Southbend equipment, has been designed and manufactured to meet the toughest standards in the industry. Each piece of Southbend equipment is carefully engineered and designs are verified through laboratory tests and field installations. -
Page 4: Specifications
National Electrical Code, ANSI/NFPA 70, or the Canadian Electrical Code, CSA C22.2, as applicable. Southbend reserves the right to change specifications and product design without notice. Such revisions do not entitle the buyer to corresponding changes, additions, or replacements for previously purchased equipment. - Page 5 LECTRIC ONVECTION VENS DIMENSIONS Single-Deck Ovens 18.6" (473) 13.5" (343) 29.0" (737) 55.0" (1397) 26.0" (660) RIGHT SIDE Depth Model Number width ES/1… 38.8" 30.0" 29.0" SLES/1… (984) (762) (737) EB1… 45.2" 36.4" 29.0" SLEB/1… (1146) (924) (737) ’ PERATOR 1.0"...
- Page 6 PECIFICATIONS Double-Deck Ovens 2.0" (51) 18.6" (473) 13.5" (343) 29.0" (737) 64.0" (1626) 29.0" (737) 6.0" (152) RIGHT SIDE Depth Oven Interior Model Number width ES/2… 38.8" 30.0" 29.0" SLES/2… (984) (762) (737) EB2… 45.2" 36.4" 29.0" SLEB/2… (1146) (924) (737) 1.0"...
- Page 7 LECTRIC ONVECTION VENS MINIMUM CLEARANCES There must be adequate clearance between the left side of the ovens and combustible construction. Minimum Clearance from Combustible Construction Back Right Side Left Side Floor Adequate clearance must be provided in the aisle to allow the doors to open sufficiently to permit the removal of the racks and for serviceability.
-
Page 8: Installation
NSTALLATION NSTALLATION These installation procedures must be followed by qualified personnel or warranty will be void. Local codes regarding installation vary greatly from one area to another. The National Fire Protection Association, Inc. states in its NFPA 96 latest edition that local codes are the “authority having jurisdiction”... - Page 9 LECTRIC ONVECTION VENS Step 2a: Installation of Legs on Single-Deck Models 1. Raise oven sufficiently to allow clearance for the legs to be attached. Use of a lift truck or other mechanical lifting means is recommended. For safety, “shore up” and support the oven with an adequate blocking arrangement strong enough to support the load.
- Page 10 NSTALLATION LECTRIC ONVECTION VENS NOTE: Marathoner Gold ovens built before January 1, 2002, have straight legs, each of which is attached with four screws, as shown below: ’ 1181958 PERATOR ANUAL...
- Page 11 LECTRIC ONVECTION VENS Step 2b: Installation of Legs on Double-Deck Ovens Double-deck oven can be shipped either already bolted together, or as two separate ovens to be bolted together after delivery. In either case, the oven that is (or will be) the lower oven will have leg pads already bolted to the bottom corners of the oven.
- Page 12 NSTALLATION Step 3: Stack Double-Deck Oven (if necessary) Double-deck ovens can be shipped already assembled, but can instead be shipped as two single-deck ovens to be stacked in the field. Also, ovens that were originally ordered as single ovens can be stacked in the field (additional parts are required).
- Page 13 LECTRIC ONVECTION VENS 6. Lift the top oven and position it on top of the lower oven, as shown in the drawing below. 7. Move to the rear of the ovens and remove the six screws shown as items “A” in the left-hand drawing below.
- Page 14 NSTALLATION 8. Insert two bolts (items “A” in the following diagram) up through the top of the lower oven and screw them into the threaded holes in the bottom of the top oven. Tighten these bolts and the screws that you did not tightened in the previous step.
- Page 15 LECTRIC ONVECTION VENS Step 4a: Installation of Optional Open Pan Storage on SilverStar Ovens and on Marathoner Gold Ovens Built After January 1, 2002 The following describes how to assemble the optional open pan storage for SilverStar ovens and for Marathoner Gold ovens built after January 1, 2002.
- Page 16 NSTALLATION 4. Hang the two pan guides from the frame hangers. The guides cannot be inserted from the side of the oven because the legs are in the way. Instead, begin by holding the guide parallel to the side of the oven with the horizontal bars of the guide extending inward (so that the pans can rest on them).
- Page 17 LECTRIC ONVECTION VENS Step 4b: Installation of Optional Open Storage on Marathoner Gold Ovens Built Before January 1, 2002 The following describes how to assemble the optional open storage for Marathoner Gold ovens built before January 1, 2002. All holes are pre-drilled for the provided screws. 1.
- Page 18 NSTALLATION 4. Attach either the shelf or the two channel frames (depending on which option was ordered) as shown in the drawing below. Use the screws and four clips provided to secure the shelf or channel frames to the rack guides. 5.
- Page 19 LECTRIC ONVECTION VENS Step 5: Connect Electricity Supply ELECTRIC GROUNDING INSTRUCTIONS This appliance, when installed, must be electrically grounded in accordance with local codes, or in the absence of local codes, with the National Electrical Code, ANSI/NFPA 70 or the Canadian Electrical Code, CSA C22.2, as applicable.
- Page 20 NSTALLATION LECTRIC ONVECTION VENS 6. Attach each supply wire to the appropriate terminal of the contactor (according to the wiring diagram). 7. Insert the ground wire into the grounding lug and tighten the screw. 8. Check that all connections match the wiring diagram and are tight. 9.
-
Page 21: Operation
LECTRIC ONVECTION VENS PERATION OPERATING THE CONTROLS A convection oven is a different type of oven that offers many features and advantages to the food service operation. The additional capabilities and features of the oven require some learning. However, the operation of the oven is not difficult to understand or control once you have some practice. - Page 22 PERATION Control Panel of STANDARD Models Power Switch Switch ON to use the oven, switch OFF when done using the oven. Cook Timer Turn knob to set a time duration. An alarm will sound when the timer runs out. The timer is a reminder to the user;...
- Page 23 LECTRIC ONVECTION VENS Operation of STANDARD Models Models with Standard Controls operate much like a standard oven: you turn the oven ON and select a cooking temperature. Two additional controls are used to control the fan (as described below). The timer is a reminder to you of when to remove food from the oven. The timer does NOT control the temperature of the oven.
- Page 24 PERATION Control Panel of CYCLE/COOK and HOLD Models Power Switch Switch ON to use the oven, switch OFF when done using the oven. Time Display Displays time setting. Indicator lights indicate whether the numbers shown represent hours-and- minutes or minutes-and-seconds. Temperature Display Displays cook-temperature setting.
- Page 25 LECTRIC ONVECTION VENS Operation of CYCLE/COOK and HOLD Models CYCLE/COOK and HOLD models have electronic controls that enable the oven to cook food at a specified cook-temperature for a specified time period, then enter an optional Hold Mode during which the oven maintains a specified hold-temperature for an indefinite period of time.
- Page 26 PERATION If you open the oven doors, the fan and burners will temporarily shut off, and the time display will pause until the oven doors are closed again. For ovens that are equipped with an oven interior light, to turn on the light press and hold the switch located at the bottom of the control panel.
- Page 27 LECTRIC ONVECTION VENS Control Panel of PROGRAMMABLE Models Time Display Displays remaining cook time for the running program. Programs Indicators One of these indicators will be displayed indicating which program is running. Time Knob Turn to set the desired cook time. Start Timer Button Press to start a timed cook period, or to start a recorded program.
- Page 28 PERATION Operation of Models with PROGRAMMABLE Controls Models with Programmable Controls can follow a recorded sequence of timed cooking periods, with an option of the last period being an indefinite hold time. Each time period begins with an “event” that specifies what conditions will be maintained during the period that follows.
- Page 29 LECTRIC ONVECTION VENS 10. When you are done cooking, switch the Power Switch to OFF. To RECORD a cook program to use later, do the following: 1. Press the Program Mode On/Off button. 2. Select which program you want to record by pressing the corresponding program button (PGM1, PGM2, PGM3, PGM4, or PGM5).
- Page 30 PERATION Control Panel of RACK TIMER Models Time Display Displays remaining time for the rack with the least remaining cook time. When the timer runs out, the display will show the rack number of the rack which has timed out. Racks-Being-Timed Indicators Rack timers are running for the indicated racks.
- Page 31 LECTRIC ONVECTION VENS Operation of RACK TIMER Models Rack Timer models have five independent timers, one for each rack. After loading a rack, you can start a timer for that rack. The control panel displays which racks are being timed, which rack will be the next to time out, and how much time remains before that happens.
- Page 32 OOKING INTS OOKING INTS In a standard (non-convection) oven, the air is relatively still and an insulating layer of moisture surrounds the cooking food product. In a convection oven, the fan-blown circulating air strips away this insulating layer allowing the heat to penetrate faster for quicker baking and roasting. Hence, in a convection oven cooking procedures and techniques may require some modification for successful results.
- Page 33 LECTRIC ONVECTION VENS COOKING PROBLEMS AND SOLUTIONS If… Cakes are dark on the sides and not done in the center… Cake edges are too brown… Cakes have a light outer color… Cakes settle slightly in the center… Cakes ripple… Cakes are too coarse… Pies have uneven color…...
- Page 34 OOKING INTS Baked Goods Bread, 2 lb. loaf Biscuits Cornbread French Bread Sheet Cake Cream Puffs Brown & Serve Rolls Ginger Bread Yeast Rolls, sheet pan Pineapple Upside Down Cake Apple Turnovers Fruit Cobbler Brownies Danish Pastry Pie Shells Fresh Fruit Pies Pumpkin Pies Fresh Apple Pies Frozen Berry Pies...
-
Page 35: Cleaning
VENS LEANING Southbend equipment is sturdily constructed of the best materials and is designed to provide durable service when treated with ordinary care. To expect the best performance, your equipment must be maintained in good condition and cleaned daily. Naturally, the periods for this care and cleaning depend on the amount and degree of usage. - Page 36 VENS SEMIANNUAL CLEANING At least twice a year have your Southbend Authorized Service Agency or another qualified service technician clean and adjust the unit for maximum performance. At least twice a year the oven’s venting system should be examined and cleaned.
-
Page 37: Adjustments
ADVICE OR OTHER ASSISTANCE, AND FOR GENUINE FACTORY PARTS. Warranty will be void and the manufacturer is relieved of all liability if service work is performed by other than a qualified technician, or if other than genuine Southbend replacement parts are installed. LUBRICATION The door chains and sprockets have been lubricated at the factory with high temperature “Never Seeze”... - Page 38 DJUSTMENTS 3. Check that the door switch striker bar is attached to the door chain's first and second links (after the master link). If necessary, adjust or repair the door switch striker bar. 4. With the doors closed, loosen the two screws that hold the door switch bracket to the oven frame (shown below).
- Page 39 LECTRIC ONVECTION VENS SELECTING FAHRENHEIT OR CELSIUS DISPLAY (Cycle/Cook & Hold Models Only) Ovens with Cycle/Cook & Hold controls can be configured to display temperatures using the Fahrenheit or the Celsius scales. To change the choice, change the position of the blue jumper “J3” on the rear of the control panel circuit board.
- Page 40 DJUSTMENTS Wiring for Three- Phase Power Element Connections Contactor Phase A Phase B Supply-Power Wiring is different for 415V ovens; refer to corresponding wiring diagram (see page 43). 7. Locate the wires running from the contactor to the elements. If converting from three-phase to single- phase power, remove the wire L2 (as shown in the above drawing) and go on to the next step.
-
Page 41: Troubleshooting
Warranty will be void and the manufacturer is relieved of all liability if service work is performed by other than a qualified technician, or if other than genuine Southbend replacement parts are installed. When any difficulty arises it is always a good idea to check that the oven has been connected to the type of voltage for which it was manufactured. - Page 42 ROUBLESHOOTING INTERPRETING DISPLAYED ERROR CODES Programmable and Rack Timer models are able to detect some problems that might occur. If the control panel display is showing a letter “F” followed by a number, consult the following table to determine the problem and appropriate corrective action.
-
Page 43: Wiring Diagrams
3. Loosen the two square heads on blower wheel hub. 4. Pull blower wheel from motor shaft. If blower wheel is difficult to pull off, use puller disk (available from Southbend as part number 1179100). WIRING DIAGRAMS A wiring diagram is located on the side of the control panel assembly (as shown on page 42). Wiring diagrams also appear on the following pages of this manual. - Page 44 ROUBLESHOOTING LECTRIC ONVECTION VENS Wiring Diagram for 208-240 Volt Models with Standard Controls ’ 1181958 PERATOR ANUAL...
- Page 45 ROUBLESHOOTING LECTRIC ONVECTION VENS Wiring Diagram for 480 Volt Models with Standard Controls ’ 1181958 PERATOR ANUAL...
- Page 46 ROUBLESHOOTING LECTRIC ONVECTION VENS Wiring Diagram for 415/240 Volt Models with Standard Controls ’ 1181958 PERATOR ANUAL...
- Page 47 ROUBLESHOOTING LECTRIC ONVECTION VENS Wiring Diagram for 380/220 Volt Models with Standard Controls ’ 1181958 PERATOR ANUAL...
- Page 48 ROUBLESHOOTING LECTRIC ONVECTION VENS Wiring Diagram for 208-240 Volt Models with Cycle/Cook & Hold Controls ’ 1181958 PERATOR ANUAL...
- Page 49 ROUBLESHOOTING LECTRIC ONVECTION VENS Wiring Diagram for 480 Volt Models with Cycle/Cook & Hold Controls ’ 1181958 PERATOR ANUAL...
- Page 50 ROUBLESHOOTING LECTRIC ONVECTION VENS Wiring Diagram for 415/240 Volt Models with Cycle/Cook & Hold Controls ’ 1181958 PERATOR ANUAL...
- Page 51 ROUBLESHOOTING LECTRIC ONVECTION VENS Wiring Diagram for 380/220 Volt Models with Cycle/Cook & Hold Controls ’ 1181958 PERATOR ANUAL...
- Page 52 ROUBLESHOOTING LECTRIC ONVECTION VENS Wiring Diagram for 208-240 Volt Models with Programmable or Rack Timer Controls ’ 1181958 PERATOR ANUAL...
- Page 53 ROUBLESHOOTING LECTRIC ONVECTION VENS Wiring Diagram for 480 Volt Models with Programmable or Rack Timer Controls ’ 1181958 PERATOR ANUAL...
- Page 54 ROUBLESHOOTING LECTRIC ONVECTION VENS Wiring Diagram for 415/240 Volt Models with Programmable or Rack Timer Controls ’ 1181958 PERATOR ANUAL...
- Page 55 ROUBLESHOOTING LECTRIC ONVECTION VENS Wiring Diagram for 380/220 Volt Models with Programmable or Rack Timer Controls ’ 1181958 PERATOR ANUAL...
-
Page 56: Parts
The serial plate with voltage, model, and serial information is located inside the lower front panel of the oven. Replacement parts may be ordered either through a Southbend Authorized Parts Distributor or a Southbend Authorized Service Agency. When ordering parts, please supply the Model Number, Serial Number, Part Number, Description, Finish, and Electrical Characteristics as applicable. - Page 57 LECTRIC ONVECTION VENS Front Panel and Vent Cover Parts Part Number Description 1177867 Panel, front louver, co 1175281 Vent cover ’ PERATOR 1181958 ANUAL ARTS...
-
Page 58: Door Parts
ARTS Door Parts Part Number Description 1177102 Handle, coated, 15" 1164527 Bushing, bronze, lower oil lite 1092000 Oilite thrust bearing 1178049 Center door seal (for units built before February 15, 2001) 1181803 Center door seal (for units built after February 14, 2001) 1181923 Door assembly, left, 60%, window, co 1181921... -
Page 59: Door Chain Mechanism Parts
LECTRIC ONVECTION VENS Door Chain Mechanism Parts Part Number Description 1179937 Door chain assembly (includes items 2-6, chain, and additional parts) 1164523 Pivot rod 1164551 Nut, 3/8-16, hex head, right hand threaded 1164522 Turnbuckle, 2 3/4" long, brass 1164552 Nut, 3/8-16, jam, left hand threaded 1175214 Door mechanism, weld asm 1172326... - Page 60 ARTS Control Panel Parts for Models with Standard Controls (SC Models) See drawing on following page. Part Number Description 1-17 1179707 Control panel s/a, SC, 60Hz, M-Gold, 208/380/415V (assembled, w/o wiring harness) 1179656 Control panel s/a, SC, 60Hz, M-Gold, 480V (assembled, w/o wiring harness) 1179644 Control panel s/a, SC, 60Hz, SilverStar, 208/380/415V, w/lights (assembled, w/o wiring harness) 1179861...
- Page 61 LECTRIC ONVECTION VENS Control Panel Parts for Models with Standard Controls (SC Models) See parts list on previous page. ’ PERATOR 1181958 ANUAL ARTS...
- Page 62 ARTS Control Panel Parts for Cycle/Cook and Hold Models (CCH Models) See drawing on following page. Part Number Description 1-16 1180487 Control panel s/a, CCH, 60Hz, M-Gold, 220/380/415V (assembled, w/o wiring harness) 1180489 Control panel s/a, CCH, 60Hz, M-Gold, 480V (assembled, w/o wiring harness) 1180488 Control panel s/a, CCH, 60Hz, SilverStar, 220/380/415V, w/lights (assembled, w/o wiring harness) 1180496...
- Page 63 LECTRIC ONVECTION VENS Control Panel Parts for Cycle/Cook and Hold Models (CCH Models) See parts list on previous page. ’ PERATOR 1181958 ANUAL ARTS...
- Page 64 ARTS Control Panel Parts for Models with Programmable Controls (PC Models) See drawing on following page. Part Number Description 1-18 1179636 Control panel s/a, PC, 60Hz, M-Gold, 208/380/415V (assembled, w/o wiring harness) 1179701 Control panel s/a, PC, 60Hz, M-Gold, 480V (assembled, w/o wiring harness) 1179635 Wiring harness, PC 1177541...
- Page 65 LECTRIC ONVECTION VENS Control Panel Parts for Models with Programmable Controls (PC Models) See parts list on previous page. ’ PERATOR 1181958 ANUAL ARTS...
- Page 66 ARTS Control Panel Parts for Models with Rack Timer Controls (RT Models) See drawing on following page. Part Number Description 1-18 1179699 Control panel s/a, RT, 60Hz, M-Gold, 208/380/415V (assembled, w/o wiring harness) 1179708 Control panel s/a, RT, 60Hz, M-Gold, 480V (assembled, w/o wiring harness) 1179635 Wiring harness, RT 1177541...
- Page 67 LECTRIC ONVECTION VENS Control Panel Parts for Models with Rack Timer Controls (RT Models) See parts list on previous page. ’ PERATOR 1181958 ANUAL ARTS...
-
Page 68: Oven Interior And Fan Motor Parts
ARTS Oven Interior and Fan Motor Parts Part Number Description 1160289 Thumb screw 1/4-20 x 3/4 1181977 Baffle, oven, cr, elec co 1166819 Nut, 1/4 x 20, speed 1175412 Bracket, baffle mtg 1175715 Bracket, baffle locating 1175263 Element asm. 208V 1175264 Element asm. - Page 69 LECTRIC ONVECTION VENS Side Compartment Parts Part Number Description 1181806 Retainer, glass, co 1181807 Glass, bulb cover, co 1181828 Oven light subassembly, co (parts 3 through 7, assembled) 1160009 Bulb, oven light, 40 watt, clear P6497 Gasket, Teflon, white 1181805 Light box, co 1160032 Gasket, light socket, .062 ga...
- Page 70 ARTS Leg Parts for Single-Deck Models Part Number Description 1177849 Single deck leg, SilverStar (for legs with feet) 1184035 Single deck leg, Marathoner Gold (for legs with feet on ovens built after January 1, 2002) 1177850 Single deck leg, SilverStar (for legs with casters) 1184005 Single deck leg, Marathoner Gold (for legs with casters on ovens built after January 1, 2002) 1174266...
- Page 71 LECTRIC ONVECTION VENS Leg Parts for Single-Deck Marathoner Gold Models Built Before Jan. 1, 2002 NOTE: These parts are only for Marathoner Gold ovens built before January 1, 2002. Part Number Description 1175090 Single deck leg, M-Gold (for legs with feet) 1175089 Single deck leg, M-Gold (for legs with casters) 1174266...
-
Page 72: Storage Rack Parts
ARTS Storage Rack Parts Part Number Description 1175506 Cooling rack kit, with shelf, shallow depth (for Marathoner Gold ovens built before January 1, 2002) 1184046 Cooling pan kit, with shelf, shallow depth (for SilverStar & Marathoner Gold ovens built after January 1, 2002) 1175507 Cooling rack kit, with shelf, bakery depth (for Marathoner Gold ovens built before January 1, 2002) 1184044... - Page 73 LECTRIC ONVECTION VENS Double-Deck Oven Stacking Parts Part Number Description 1146213 Bolts 1175085 Tie bracket ’ PERATOR 1181958 ANUAL ARTS...
- Page 74 ARTS Leg Parts for Double-Deck Ovens Part Number Description 1172788 Leg pad 1174259 SS leg, 3/4" stud 1174260 Leg package (set of four legs only) 1174264 Caster with brake 1174263 Caster without brake 1174265 Set of four casters (two with brake, two without brake) 1146213 3/8 x 16 x 1 hex head bolt 1146513...
- Page 75 LECTRIC ONVECTION VENS Notes: ’ 1181958 PERATOR ANUAL...
- Page 76 When service is needed, contact a Southbend Authorized Service Agency, or your dealer. To avoid confusion, always refer to the model number, serial number, and type of your unit.