Table of Contents
Advertisement
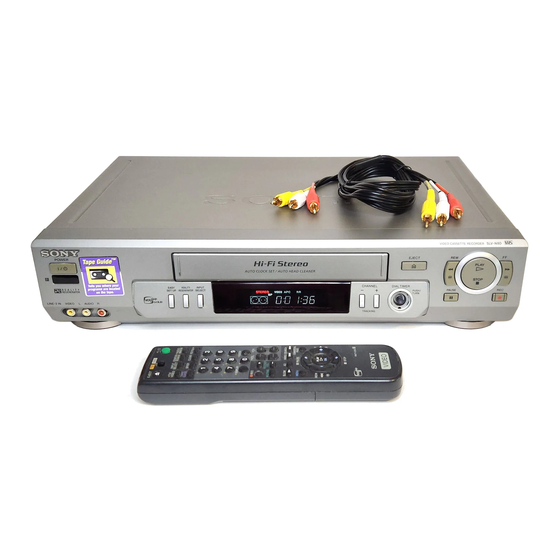
Video Cassette
Recorder
Operating Instructions
Owner's record
The model and serial numbers are located at the rear of the unit.
Record these numbers in the spaces provided below. Refer to them whenever
you call upon your Sony dealer regarding this product.
Model No._________________________
Serial No. _________________________
Declaration of Conformity
Trade Name:
SONY
Model No.:
SLV-N80/N70
Responsible Party: Sony Electronics Inc.
Address:
1 Sony Drive, Park Ridge, NJ.07656 USA
Telephone No.:
201-930-6970
This device complies with Part 15 of the FCC Rules. Operation is subject to
the following two conditions: (1) This device may not cause harmful
interference, and (2) this device must accept any interference received,
including interference that may cause undesired operation.
SLV-N80
SLV-N70
© 2000 Sony Corporation
3-868-116-12 (1)
Advertisement
Table of Contents

Related Manuals for Sony SLV-N80


Summary of Contents for Sony SLV-N80
-
Page 1: Operating Instructions
Owner’s record The model and serial numbers are located at the rear of the unit. Record these numbers in the spaces provided below. Refer to them whenever you call upon your Sony dealer regarding this product. Model No._________________________ Serial No. _________________________... - Page 2 • One blade of the plug is wider than the other for the purpose of safety and will fit into the power outlet only one way. If you are unable to insert the plug fully into the outlet, contact your Sony dealer. Installing •...
-
Page 3: Table Of Contents
Table of contents Getting Started 4 Step 1 : Unpacking 5 Step 2 : Setting up the remote commander 8 Step 3 : Hookups 30 Selecting a language 31 Setting the clock 38 Setting up the cable box control (SLV-N80 only) 44 Presetting channels 51 Setting up the VCR Plus+ GOLD system (SLV-N80 only) 58 Setting up the VCR Plus+ system (SLV-N70 only) -
Page 4: Getting Started
Getting Started Step 1 : Unpacking Check that you have received the following items with the VCR: • Remote commander • Size AA (R6) batteries • 75-ohm coaxial cable with F-type connectors Check your model name The instructions in this manual are for the 2 models: SLV-N80 and N70. Check your model number by looking at the rear panel of your VCR. -
Page 5: Step 2 : Setting Up The Remote Commander
Using the remote commander You can use this remote commander to operate this VCR and a Sony TV and/or AV receiver. Buttons on the remote commander marked with a dot (•) can be used to operate your Sony TV. The RECEIVER VOL +/– and MUTING buttons can be used to operate your Sony AV receiver. - Page 6 Now you can use the ?/1, VOL +/–, CH +/–, and TV/VIDEO buttons to control your TV. You can also use the buttons marked with a dot (•) to control a Sony TV. You can use the RECEIVER VOL +/– and MUTING buttons to control your AV receiver.
- Page 7 Code numbers of controllable TVs and AV receivers If more than one code number is listed, try entering them one at a time until you find the one that works with your TV and/or AV receiver. Code TV brand number Sony Akai Centurion Coronado Curtis-Mathes Daytron...
-
Page 8: Step 3 : Hookups
VCR. If your TV has audio/video inputs, refer to pages 9 and 10 for audio/video (A/V) hookup. Then follow one of the hookups below. For hookup 1 or 2, use the Sony RM-CM101 Cable Mouse (cable box controller) (not supplied). -
Page 9: Audio/Video (A/V) Hookup
TV programs, complete these connections first, and then go to the following pages for antenna or cable hookups. S-Link™ is a trademark of Sony Corporation. A Use this hookup if your TV has stereo jacks AUDIO VIDEO... - Page 10 C Use this hookup if your TV has the S-Link™ function (SLV-N80 only) AUDIO VIDEO LINE-1 S-LINK LINE Audio/video cable (supplied) Note • To play a tape in stereo, you must use the A/V connection. Completing A/V hookup: After you’ve connected your TV and completed antenna or cable hookup, return to this procedure to complete VCR set up.
- Page 11 Hookup 1 (SLV-N80 only) Using the cable box control feature Recommended use You should use this hookup if you have a cable box, especially if your cable system scrambles all or most channels. This hookup allows the VCR’s cable box control feature to control the channels on the cable box, simplifying the recording process.
- Page 12 Hookup 1 : VCR setup Set the RF UNIT switch to CH3 or CH4, whichever channel is not used in your area. If both are used, set the switch to either channel. For details, see page 101. If you made A/V connections (from page 9), you can skip this step.
-
Page 13: Automatic Clock Setting
4 The CABLE BOX CONTROL menu appears. Select ON. For details, see page 39. 5 Enter your cable box code number and press OK. For details, see page 39. 6 Select your cable box output channel and press OK. CABLE MOUSE BOX CODE NO. - Page 14 Hookup 2 (SLV-N80 only) Connecting to a digital satellite receiver Recommended use Use this hookup if you have a digital satellite receiver that is compatible with the Cable Mouse. It allows the VCR’s cable box control feature to control the channel on the digital satellite receiver, simplifying the recording process.
- Page 15 Hookup 2 : VCR setup Set the RF UNIT switch to CH3 or CH4, whichever channel is not used in your area. If both are used, set the switch to either channel. For details, see page 101. If you made A/V connections (from page 9), you can skip this step.
- Page 16 4 The CABLE BOX CONTROL menu appears. Select ON. For details, see page 39. 5 Enter your digital satellite receiver code number and press OK. For details, see page 6 Set your digital satellite receiver output channel (BOX OUTPUT CH) to LINE and press OK.
- Page 17 Hookup 3 You have no cable box, or a cable box with only a few scrambled channels Recommended use Use this hookup if you do not have a cable box. Also use this hookup if your cable system scrambles only a few channels. What you can do with this hookup •...
- Page 18 Hookup 3 : VCR setup Set the RF UNIT switch to CH3 or CH4, whichever channel is not used in your area. If both are used, set the switch to either channel. For details, see page 101. If you made A/V connections (from page 9), you can skip this step.
- Page 19 4 (For SLV-N80 only) The CABLE BOX CONTROL menu appears. Select OFF and press OK. 5 The TUNER PRESET menu appears. Set ANTENNA/CABLE to CABLE and press OK. For details, see page 45. 6 The AUTO PRESET starts. PLEASE WAIT You have now completed hookup.
- Page 20 Hookup 4 Antenna hookup Make the following connections if you’re using an antenna (if you don’t have cable TV). A Use this hookup if you’re using: • VHF/UHF antenna (you get channels 2–13 and channels 14 and higher) • UHF-only antenna (you get channels 14 and higher) •...
- Page 21 Hookup 4 : VCR setup Set the RF UNIT switch to CH3 or CH4, whichever channel is not used in your area. If both are used, set the switch to either channel. For details, see page 101. If you made A/V connections (from page 9), you can skip this step.
- Page 22 4 (For SLV-N80 only) The CABLE BOX CONTROL menu appears. Select OFF and press OK. 5 The TUNER PRESET menu appears. Set ANTENNA/CABLE to ANT and press OK. For details, see page 45. 6 The AUTO PRESET starts. You have now completed hookup. If you want to use the VCR Plus+ or VCR Plus+ GOLD system for recording, go to the page listed below.
-
Page 23: Connecting A Cable Box With Many Scrambled Channels
Hookup 5 Connecting a cable box with many scrambled channels Recommended use Use this hookup if your cable system scrambles all or most channels. What you can do with this hookup • Record any channel by selecting the channel on the cable box What you can’t do •... - Page 24 Hookup 5 : VCR setup Set the RF UNIT switch to CH3 or CH4, whichever channel is not used in your area. If both are used, set the switch to either channel. For details, see page 101. If you made A/V connections (from page 9), you can skip this step.
- Page 25 5 The TUNER PRESET menu appears. Set ANTENNA/CABLE to ANT and press OK. For details, see page 45. 6 The AUTO PRESET starts. PLEASE WAIT You have now completed hookup. If you want to use the VCR Plus+ or VCR Plus+ GOLD system for recording, go to the pages listed below.
- Page 26 Hookup 6 Connecting a cable box with only a few scrambled channels, using an A/B switch Recommended use By using an A/B switch (not supplied), this hookup allows you to record both scrambled and unscrambled channels conveniently. What you can do with this hookup •...
- Page 27 Hookup 6 : VCR setup Set the RF UNIT switch to CH3 or CH4, whichever channel is not used in your area. If both are used, set the switch to either channel. For details, see page 101. If you made A/V connections (from page 9), you can skip this step.
- Page 28 5 The TUNER PRESET menu appears. Set ANTENNA/CABLE to CABLE and press OK. For details, see page 45. 6 The AUTO PRESET starts. Preset the cable box output channel (usually 2, 3 or 4). For details, see page 47. 1 Press MENU, then select SETTINGS and press OK. 2 Select TUNER PRESET and press OK.
- Page 29 You have now completed hookup. If you want to use the VCR Plus+ or VCR Plus+ GOLD system for recording, go to the pages listed below. For SLV-N80: Set the A/B switch to A and go to page 51 for automatic VCR Plus+ GOLD system channel set up.
-
Page 30: Selecting A Language
Selecting a language You can change the on-screen display language. Before you start… • Turn on the VCR and the TV. • Set the TV to the VCR channel (channel 3 or 4). If your TV is connected to the VCR using A/V connections, set the TV to video input. -
Page 31: Setting The Clock
Setting the clock Using the Auto Clock Set feature Some TV and cable channels transmit time signals with their broadcasts. Your VCR can pick up this time signal to automatically set the clock. The Auto Clock Set feature works only if a channel in your area is broadcasting a time signal. - Page 32 Press M/m to highlight AUTO, then press PLAY Press M/m to highlight FULL AUTO, then press OK. PLAY Press M/m to highlight YES, then press OK. PLAY Press MENU to exit the menu. MENU To activate the Auto Clock Set function, turn off the VCR. “ACS” will flash in the display window.
- Page 33 If the clock does not activate Follow steps 1 to 4 in “Using the Auto Clock Set feature.” The AUTO CLOCK SET menu is displayed. Number buttons MENU AUTO CLOCK SET FULL AUTO CLOCK SET CH TIME ZONE DAYLIGHT SAVING RETURN SELECT : QUIT...
- Page 34 Press M/m to highlight NO for FULL AUTO and press OK. PLAY Press M/m to highlight the item you want to set and press OK. Then press M/m to make PLAY the setting and press OK. • For CLOCK SET CH Leave the setting to “–...
- Page 35 • If you want to return to the previous menu, highlight RETURN and press OK. Note • (SLV-N80 only) If you use both the cable box control feature and the Auto Clock Set feature, the VCR automatically changes channels on the cable box until a channel that carries a time signal is found whenever you turn off the VCR.
-
Page 36: Before You Start
Using Manual Clock Set Before you start… • Turn on the VCR and the TV. • Set the TV to the VCR channel (channel 3 or 4). If your TV is connected to the VCR using A/V connections, set the TV to video input. - Page 37 Press M/m to highlight MANUAL, then press OK. PLAY Press M/m to set the month. PLAY Press , to highlight the day and press M/ m to set the day. PLAY Set the year, hour, and minutes in the same way as the day. The day of the week is set automatically.
-
Page 38: Setting Up The Cable Box Control (Slv-N80 Only)
VCR is turned off. To use cable box control, you need to connect the Sony RM-CM101 Cable Mouse (not supplied) (pages 11 and 14) and set the code number and output channel. - Page 39 Press M/m to highlight CABLE BOX CONTROL, then press OK. PLAY Press M/m to highlight CABLE MOUSE, then press OK. PLAY Press M/m to highlight ON, then press OK. PLAY Press M/m to highlight BOX CODE NO., then press OK. PLAY When BOX CODE NO.
- Page 40 Press M/m to highlight BOX OUTPUT CH, then press OK. PLAY If you want to control a cable box, press M/m to highlight the cable box output channel, then press OK. PLAY If you want to control a digital satellite receiver, select LINE, then press Press MENU to exit the menu.
- Page 41 Cable box brand Code numbers Jerrold 014, 022, 025, 026, 035, 037, 058, 109, 287, 487 Linsay Macom Magnavox 038, 043, 080 Memorex Movie Time 089, 167, 214 Northcoast Novaplex 074, 081, 167, 214 018, 030, 259 Panasonic 032, 118 Paragon Philips 036, 038, 039, 040,...
- Page 42 Digital satellite Code numbers receiver brand Sony Hitachi To ensure correct operation • Place the Cable Mouse so that it hangs out over the front of the remote sensor on the cable box or digital satellite receiver. • Do not place the cable box or digital satellite receiver on top of the VCR.
- Page 43 To check the cable box control setting Press CH +/– on the remote commander. Does the channel indicator on the cable box or digital satellite receiver change? (Point the remote commander at the VCR, not at the cable box or digital satellite receiver.) Press all 10 number buttons (0 to 9) on the remote commander.
-
Page 44: Presetting Channels
Presetting channels (Skip this section if you are using a cable box or digital satellite receiver control.) This VCR is capable of receiving VHF channels 2 to 13, UHF channels 14 to 69 and unscrambled CATV channels 1 to 125. First, we recommend that you preset the receivable channels in your area using automatic presetting methods. - Page 45 Press M/m to highlight ANTENNA/CABLE, then press OK. PLAY • To preset cable TV channels: Press M/m to set ANTENNA/CABLE to PLAY CABLE, then press OK. PLAY • To preset VHF and UHF channels: Press M/m to set ANTENNA/CABLE to ANT, then press OK.
- Page 46 Tips • When receiving a VHF, UHF, or CATV channel, the display changes as follows each time you press DISPLAY. Channel number, program name, and station’s call letters (for SLV-N80 only) Remaining tape length and time counter The bar indicator and pointer for searching for a specific place on a tape No display •...
-
Page 47: Presetting/Disabling Channels Manually
Presetting/disabling channels manually Press MENU, then press M/m to highlight MENU SETTINGS and press OK. PLAY Number buttons, ENTER CH +/– MENU SETTINGS TUNER PRESET SET VCR Plus+ CHANNELS CABLE BOX CONTROL CLOCK SET LANGUAGE RETURN SELECT : QUIT MENU continued Presetting channels... - Page 48 Press M/m to highlight TUNER PRESET, then press OK. PLAY • To preset a channel: Press the number buttons to enter the channel number, then press ENTER. Press OK. Press M/m to set MANUAL SET to ADD, then press OK. PLAY •...
-
Page 49: If The Picture Is Not Clear
If the picture is not clear Normally, the Auto Fine Tuning (AFT) function automatically tunes in channels clearly. If, however, the picture of a channel is not clear, you can also use the manual tuning function. Press MENU, then press M/m to highlight MENU SETTINGS and press OK. - Page 50 Press M/m to highlight TUNER PRESET, then press OK. PLAY Press the number buttons to select the channel you want to fine-tune, then press ENTER. Press M/m to highlight FINE TUNING, then press OK. PLAY The fine tuning meter appears. Press </, to adjust to a clearer picture, then press OK.
-
Page 51: Setting Up The Vcr Plus+ Gold System (Slv-N80 Only)
Setting up the VCR Plus+ GOLD system (SLV-N80 only) How the VCR Plus+ GOLD system works Whenever you want to record a TV program, all you need to do is look up the “PlusCode” number, a number assigned to each program published in the TV section of most newspapers, cable TV listings, and even TV GUIDE magazine. - Page 52 Setting up the VCR Plus+ GOLD system automatically (Smart Channel Mapping) The VCR can automatically set the guide channels in your area from ZIP/POSTAL CODE you entered in EASY SET UP. The VCR receives the program information signal and renews the data everyday after you complete the following procedure.
- Page 53 Press M/m to highlight SET VCR Plus+ CHANNELS, then press OK. PLAY The SMART CHANNEL MAPPING menu appears. Press M/m to highlight AUTO, then press PLAY The instruction shown on the right appears on the TV screen for a few seconds, then the screen returns to the normal display.
- Page 54 To select the channel map If the program information signal in your area has several channel map patterns (up to 8), the CHOOSE YOUR CABLE CH MAP menu appears: • the first time you turn on the VCR after completing channel mapping •...
- Page 55 Setting up the VCR Plus+ GOLD system manually To set the guide channels, use the Channel Line-up Chart to check that the guide channel numbers match the TV channel your VCR receives. For example, if HBO is listed in the Channel Line-up Chart as channel 33, and your VCR receives HBO on channel 5, you need to coordinate these numbers using the...
- Page 56 Press M/m to highlight MANUAL, then press OK. PLAY Enter the guide channel number assigned in the program guide and press ENTER. • If you made Hookup 1, 3, or 4: Enter the actual number on your TV (and VCR) and press ENTER.
- Page 57 After all settings are complete, press MENU to exit the menu. MENU • If you want to return to the previous menu, highlight RETURN and press OK. Setting up the VCR Plus+ GOLD system (SLV-N80 only)
-
Page 58: Setting Up The Vcr Plus+ System (Slv-N70 Only)
Setting up the VCR Plus+ system (SLV-N70 only) How the VCR Plus+ system works Whenever you want to record a TV program, all you need to do is look up the “PlusCode” number, a number assigned to each program published in the TV section of most newspapers, cable TV listings, and even TV GUIDE magazine. - Page 59 Press MENU, then press M/m to highlight MENU SETTINGS and press OK. PLAY SETTINGS TUNER PRESET SET VCR Plus+ CHANNELS CABLE BOX CONTROL CLOCK SET LANGUAGE RETURN SELECT : QUIT MENU Setting up the VCR Plus+ system (SLV-N70 only) Number buttons, ENTER MENU...
- Page 60 Press M/m to highlight SET VCR Plus+ CHANNELS, then press OK. PLAY Enter the guide channel number assigned in the program guide and press ENTER. • If you made Hookup 3 or 4: Enter the actual number on your TV (and VCR) and press ENTER.
- Page 61 After all settings are complete, press MENU to exit the menu. MENU • If you want to return to the previous menu, highlight RETURN and press OK. Setting up the VCR Plus+ system (SLV-N70 only)
-
Page 62: Basic Operations
Basic Operations Playing a tape Turn on your TV and set it to the video channel. Insert a tape. The VCR turns on and starts playing automatically if you insert a tape with its safety tab removed. Playing a tape Z EJECT CLEAR DISPLAY... - Page 63 Press H PLAY. When the tape reaches the end, it will rewind automatically. PLAY Additional tasks Stop play Pause play Resume play after pause Fast-forward the tape Rewind the tape Eject the tape To skip playback By pressing a single button, you can skip a portion of playback you don’t want to watch (such as a commercial) and restart playback.
- Page 64 Notes • Tapes recorded in the LP mode on other VCRs can be played back on this VCR but the picture quality cannot be guaranteed. • While displaying a menu on the TV screen, you cannot use H PLAY, X PAUSE, FF, m •...
-
Page 65: Recording Tv Programs
Recording TV programs Turn on your TV and set it to the video channel. To record from a cable box, turn it on. Insert a tape with its safety tab in place. TV/VIDEO COUNTER/ REMAIN SP/EP DISPLAY CH +/– z REC x STOP continued Recording TV programs... - Page 66 Press CH +/– to select the channel or line input video source you want to • CH record. Press SP/EP to select the tape speed, SP or EP. SP / EP EP (Extended Play) provides recording time three times as long as SP (Standard Play).
- Page 67 To watch another TV program while recording Press TV/VIDEO to turn off the VIDEO indicator in the display window. If the TV is connected to the VCR’s LINE OUT jacks, set the TV to TV input; if not, skip this step. Select another channel on the TV.
-
Page 68: Recording Tv Programs Using The Dial Timer
Recording TV programs using the Dial Timer The Dial Timer function allows you to make timer recordings of programs without turning on your TV. Set the recording timer to record up to eight programs that will be broadcast within a month using the DIAL TIMER. - Page 69 Press DIAL TIMER. DIAL TIMER “START” and the current time appear alternately in the display window. Turn DIAL TIMER to set the recording start time. DIAL TIMER You can set the recording start time in 15 minute intervals or adjust the time in one minute intervals by pressing the CHANNEL +/–...
- Page 70 Press DIAL TIMER. DIAL TIMER The channel number or station ID (SLV-N80 only) appears in the display window. Turn DIAL TIMER to set the channel number. DIAL TIMER To record from a source connected to the LINE-1 IN or LINE-2 IN jacks, turn DIAL TIMER or press INPUT SELECT to display “L1”...
- Page 71 To lock the VCR after setting the timer (Child Lock) When the VCR is turned on, hold down ?/1 POWER on the VCR until the - indicator appears in the display window. The VCR turns off and the - indicator remains lit.
- Page 72 • The VCR will be unlocked when: – You stop timer recording by pressing x STOP. – You insert a tape. – The AC power cord is disconnected or power supply stops. • The station ID appears on the TV screen only when you complete Smart Channel Mapping and the VCR receives the program information signal (SLV-N80 only) (see page 52).
-
Page 73: Recording Tv Programs Using The Vcr Plus+ Or Vcr Plus+ Gold System
Recording TV programs using the VCR Plus+ or VCR Plus+ GOLD system Just enter the PlusCode number listed in the TV program guide. The date, time and channel number of that program are set automatically. You can preset up to eight programs together with the DIAL TIMER and manual timer settings at one time. -
Page 74: To Stop Recording
Press the number buttons to enter the PlusCode number. If you make a mistake, press CLEAR and re-enter the correct number. CLEAR Press SP/EP to select the tape speed, SP or SP / EP Press M/m to highlight ONCE, DAILY, or WEEKLY, then press ENTER: PLAY To record... - Page 75 To use the VCR after setting the timer To use the VCR before timer recording begins, just press ?/1. The disappears from the display window and the VCR switches on. Remember to press ?/1 to reset the VCR to the timer recording standby mode after using the VCR. You can also do the following tasks while the VCR is recording: •...
-
Page 76: Setting The Timer Manually
Setting the timer manually If the VCR Plus+ or VCR Plus+ GOLD system is not available in your area, follow the instructions below to set the timer to record programs. Before you start… • Check that the VCR clock is set to the correct time. - Page 77 Press M/m to highlight the line that is to be set, then press OK. PLAY Set the date, start and stop time, channel number, and tape speed: PLAY Press M/m to set each item. Press , to highlight and set each item INPUT in turn.
- Page 78 Daily/weekly recording In step 3 above, press m to select the recording pattern. Each time you press m, the indication changes as shown below. Press M to change the indication in reverse order. the current date t SUN-SAT t MON-SAT t MON-FRI t EVERY SAT t ... t EVERY MON t EVERY SUN t 1 month later t (dates count down) t the current date To use the VCR after setting the timer...
-
Page 79: Additional Operations
Additional Operations Playing/searching at various speeds H PLAY Playback options View the picture during fast- forward or rewind Play at high speed Play at twice the normal speed Play in slow motion Play frame by frame Rewind and start play To resume normal playback Press H PLAY. - Page 80 • Adjust the picture using the TRACKING +/– buttons if: – Streaks appear while playing in slow motion. – The picture shakes during pause. To set tracking to the center position, press both buttons (+/–) at the same time. Notes •...
-
Page 81: Setting The Recording Duration Time
Setting the recording duration time After you have started recording in the normal way, you can have the VCR stop recording automatically after a specified duration. While recording, press z REC. indicator appears in the display window. Press z REC repeatedly to set the duration time. Each press advances the time in increments of 30 minutes. -
Page 82: Checking/Changing/Canceling Timer Settings
Checking/changing/canceling timer settings Before you start… • Turn on your TV and set it to the video channel. Press ?/1 to turn on the VCR. Press MENU, then press M/m to highlight TIMER SET/CHECK and press OK. • If you want to change a setting, go on to the next step. •... - Page 83 Press M/m to highlight the setting you want to change or cancel. • To change the setting, press OK and press </ , to highlight the item you want to change, then press M/m to reset it. • To cancel the setting, press CLEAR. Press OK.
-
Page 84: Recording Stereo And Bilingual Programs
Recording stereo and bilingual programs Recording stereo programs This VCR automatically receives and records stereo programs. When a stereo program is received, the STEREO indicator lights up. If there is noise in the stereo program, set AUTO STEREO in the ADVANCED OPTIONS menu to OFF. The sound will be recorded in monaural (on both hi-fi and normal audio tracks) but with less noise. - Page 85 How sound is recorded on a video tape The VCR records sound onto two separate tracks. Hi-fi audio is recorded onto the main track along with the picture. Monaural sound is recorded onto the normal audio track along the edge of the tape. Normal audio track Hi-fi audio track (main track)
-
Page 86: Searching Using The Tape Guide Function (Slv-N80 Only)
Searching using the Tape Guide function (SLV-N80 only) If you record multiple programs on a tape, use the Tape Guide function to see what has been recorded on your tape. You can see information such as date, time, and channel of programs recorded on a tape. - Page 87 Press OK. The VCR starts searching, and playback starts automatically from the beginning of the selected program. To stop searching Press x STOP. To exit the TAPE GUIDE screen Press TAPE GUIDE. To record in a blank space Blank space on the tape will appear as a blank row in the TAPE GUIDE screen.
- Page 88 Press OK. The latest data stored in the VCR’s memory is displayed. Tips • You can store information for up to 24 programs on a single list. • While recording, you can display the TAPE GUIDE screen using the TAPE GUIDE button. If you decide to stop recording, press TAPE GUIDE to make the TAPE GUIDE screen disappear first.
-
Page 89: Searching Using The Index Function
Searching using the index function The VCR automatically marks the tape with an index signal at the point where each recording begins. Use these signals as references to find a specific recording. Insert an indexed tape into the VCR. Press ./> INDEX SEARCH. •... -
Page 90: Searching For A Selected Point On The Tape
Searching for a selected point on the tape You can easily find a specific point by moving the pointer on the TV screen. The VCR fast-forwards or rewinds to the point you indicate and starts playback automatically. Press DISPLAY repeatedly until the bar indication appears on the TV screen. - Page 91 To cancel searching Press H PLAY or x STOP. To turn off the bar indication Press DISPLAY again. Notes • The figure on the bar indication represents the total time length of the inserted tape as shown below. The total time length may not be displayed correctly for: –...
-
Page 92: Locating A Channel By Station Id (Slv-N80 Only)
Locating a channel by Station ID (SLV-N80 only) You can select a TV program using the station’s ID. Before you start... • Set FAVORITE CH to OFF in the ADVANCED OPTIONS menu (page 98). Turn on your TV and set it to the video channel. Press ENTER. -
Page 93: Creating A Favorite Channel List With Station Id (Slv-N80 Only)
Creating a favorite channel list with Station ID (SLV-N80 only) You can create your favorite channel list of TV channels with Station ID. You can store up to 10 channels with Station ID and select the channel from your favorite channel list. Before you start... - Page 94 Press </, to select the station ID you want to set. Repeat steps 2 and 3 to set the station IDs as needed. Press ENTER. Selecting a channel from your favorite channel list Turn on your TV and set it to the video channel. To choose a channel from a cable box, turn the cable box on.
-
Page 95: Adjusting The Picture
Adjusting the picture Adjusting the tracking Although the VCR automatically adjusts the tracking when playing a tape (the indicator flashes in the display window, then turns off), distortion may occur if the recording is in poor condition. In this case, manually adjust the tracking. - Page 96 About the Adaptive Picture Control (APC) function The Adaptive Picture Control (APC) function automatically improves recording and playback quality by adjusting the VCR to the condition of the video heads and tape. To maintain better picture quality, we recommend that you set APC to ON in the ADVANCED OPTIONS menu (The APC indicator lights up in the display window).
-
Page 97: Changing Menu Options
Changing menu options Press MENU, then select ADVANCED OPTIONS and press OK. Press M/m to highlight the option to change, then press OK. Press M/m to change the setting, then press OK. To adjust the sharpness, press </, and press OK. Press MENU to return to the original screen. - Page 98 Menu option FAVORITE CH (SLV-N80 only) SHARPNESS Changing menu options Set this option to • ON when using favorite channel list. • OFF when using station ID list. For details, see pages 92 and 93. • L (Low) through H (High) to adjust the sharpness of the picture.
-
Page 99: Editing With Another Vcr
Editing with another VCR How to connect to record on this VCR This VCR (Recorder) LINE-2 IN VMC-810HG audio/video cable (not supplied) : Signal flow If the other VCR has a CONTROL S OUT jack for synchronized editing (SLV-N80 only) Connect to record on this VCR, then connect the VCRs via the CONTROL S jacks. -
Page 100: Operation (When Recording On This Vcr)
Operation (when recording on this VCR) Before you start editing • Turn on your TV and set it to the video channel. • Press INPUT SELECT or CHANNEL +/– to display “L2” (or “L1”) in the display window. • Press SP/EP to select the tape speed, SP or EP. -
Page 101: Additional Information
Additional Information General setup information Setting the RF unit When connecting the VCR to the TV using only the antenna cable, you must set the RF UNIT switch on the rear of the VCR so that the TV can receive the correct signal from the VCR. -
Page 102: Attaching The External Antenna Connector
Attaching the external antenna connector When using a 300-ohm twin lead cable for a VHF/UHF antenna, use the EAC-32 antenna connector (not supplied) to connect the antenna to the VCR. Loosen the screws on the antenna connector. Wind the twin leads around the screws on the antenna connector. Retighten the screws. -
Page 103: Troubleshooting
Troubleshooting If you have any questions or problems not covered below, please consult your nearest Sony dealer. Symptom The ?/1 switch does not function. The power is turned on but the VCR does not operate. The clock has stopped and “–:– –”... - Page 104 Symptom The timer does not operate. A tape cannot be inserted. The remote commander does not function. The channels on the VCR cannot be changed. The tracking meter does not appear on the screen. You cannot control other TVs or AV receivers.
-
Page 105: Specifications
Audio/video cable (3-phono to 3-phono) (1) (SLV-N70 only) Design and specifications are subject to change without notice. ® NERGY is a U.S. registered mark. ® As an NERGY Partner, Sony Corporation has determined that this product meets the guidelines for energy efficiency. Specifications ® NERGY... -
Page 106: Index To Parts And Controls
Index to parts and controls Refer to the pages indicated in parentheses ( ) for details. Front panel A ?/1 POWER switch (74) B Remote sensor (5) C Tape compartment D Z EJECT button (63) REW (rewind) button (63) (79) F H PLAY button (63) (79) FF (fast-forward) button (63) (79) -
Page 107: Display Window
Display window STEREO SAP LP SP A Timer indicator (70) (74) (77) B SAP (Second Audio Program) indicator (84) C STEREO indicator (84) D Tape speed indicator (66) E VIDEO indicator (67) (101) F APC (Adaptive Picture Control) indicator (96) VIDEO APC G RR (Reality Regenerator) indicator (95) H Tracking indicator (95) -
Page 108: Rear Panel
Rear panel SLV-N80 SLV-N70 A AC power cord (8) B S-LINK (CONTROL S IN) jack (10) (99) (SLV-N80 only) C CABLE BOX CONTROL (CONTROL S OUT) jack (11) (14) (SLV-N80 only) D LINE-1 IN AUDIO R/L/VIDEO jacks (14) (99) Index to parts and controls E RF (Radio Frequency) UNIT switch (101) F VHF/UHF IN connector (11) (14) (17) - Page 109 Remote commander A [TV] / [VIDEO] switch (5) B Z EJECT button (63) C INPUT SELECT button (67) (100) D TV/VIDEO button (6) (67) E TAPE GUIDE button (86) (SLV-N80 only) F SP (Standard Play)/EP (Extended Play) button (66) G DISPLAY button (66) (90) H RECEIVER VOL (volume) +/–...
- Page 110 Index to parts and controls O ?/1 (power) switch (6) (74) P COUNTER/REMAIN button (66) Q AUDIO MONITOR button (84) R VCR Plus+ button (73) S CLEAR button (63) (74) (83) T Number buttons (74) U ENTER button (74) (92) (93) V CH (channel) +/–...
-
Page 111: Index
Index Adjusting picture 49 tracking 95 Advanced option 97 AFT (Auto Fine Tuning) 49 Antenna hookup 20 APC (Adaptive Picture Control) Audio track 85 Audio/video (A/V) hookup 9 Auto Clock Set 31 Auto Tape Speed 97 Cable box control cable box code number chart 40 setting 38 Cable hookup 8... -
Page 112: Quick Reference To Using The Vcr
(usually 2, 3, or 4). If you have any questions about this product, you may call: Sony Customer Information Center 1-800-222-SONY (7669) or write to: Sony Customer Information Center Sony Drive, Mail Drop #T1-11, Park Ridge, NJ 07656...