ResMed S8 AutoSet Spirit II Clinical Manual
Hide thumbs
Also See for S8 AutoSet Spirit II:
- User manual ,
- Quick setup manual (8 pages) ,
- User manual (19 pages)
Table of Contents
Advertisement
R
M
ES
ED
ResMed Confidential Proprietary Information, not to be reproduced or made available to third parties
without prior consent from ResMed and not to be used in any unauthorised way.
© ResMed Ltd. 2007
SPECIFICATION -
Rev
Change
Note
1
C17928
S8 AutoSet Spirit II Clinical Guide ROW English
PRINTED MATERIALS
Date
17/07/2007
CD\Web only — not for printing
Document created by
(Name)
Alison Besley
DOC NO
338356
REV
1
1 of 62
PAGE
Document checked by
(Name)
Andrew Cheung or delegate
(see change note)
Advertisement
Table of Contents

Related Manuals for ResMed S8 AutoSet Spirit II


Summary of Contents for ResMed S8 AutoSet Spirit II
- Page 1 DOC NO 338356 ResMed Confidential Proprietary Information, not to be reproduced or made available to third parties without prior consent from ResMed and not to be used in any unauthorised way. © ResMed Ltd. 2007 SPECIFICATION - 1 of 62...
- Page 2 1267270, JP 1267271, NZ 405614, NZ 406923, NZ 406924, NZ 406926, NZ 406927 . Others pending. S8 AutoSet Spirit, HumidAire, HumidAire 3i and SmartStart are trademarks of ResMed Ltd and AutoSet and HumidAire are registered in U.S. Patent and Trademark Office.
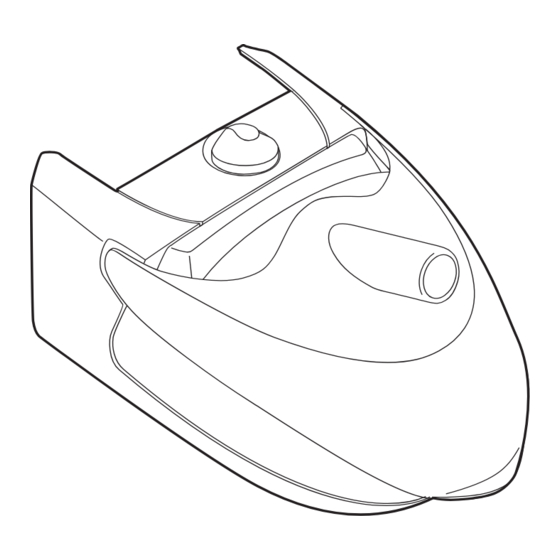
- Page 3 INTEGRATED HUMIDIFIER SETTING UP THE S8 ™ ™ S8 AutoSet Spirit II System Component of 338356/1 ILLUSTRATIONS SYSTEM COMPONENTS HumidAire 3i ™ Carry handle Keypad screen OTHER ACCESSORIES Air outlet Air filter Module cover Air inlet DC input AC input Note: Some products not available in all regions...
- Page 4 HUMIDAIRE 3i AND S8 USING THE DATA CARD USING AN ADAPTER HumidAire 3i BLANK MODULE Data communications port Note: Some products not available in all regions DATA CARD MODULE...
-
Page 5: Table Of Contents
........12 Using the Mask Fitting Feature Using Humidifiers Navigating the S8 AutoSet Spirit II Menus ....15 S8 AutoSet Spirit II Keypad and LCD... - Page 6 ........51 S8 AutoSet Spirit II (without Accessories)
-
Page 7: Introduction
This patient feature is called Smart Data™. You can download the data stored in the S8 AutoSet Spirit II and review it in a PC-based software program. You can download the data directly via cable. You can also access the data remotely, using a ResScan™... -
Page 8: Medical Information
The S8 AutoSet Spirit II flow generator is intended for home and hospital use. Contraindications The S8 AutoSet Spirit II is not a life support device and may stop operating with power failure or certain fault conditions. It should not be used by patients who are dependent on continuous therapy. -
Page 9: Cautions
In the event of power failure or machine malfunction, remove the mask. • The S8 AutoSet Spirit II can be set to deliver pressures up to 20 cm H O. In the unlikely event of certain fault conditions, pressures up to 30 cm H O are possible. -
Page 10: Adverse Effects
Adverse Effects Patients should report unusual chest pain, severe headache or increased breathlessness to their prescribing physician. An acute upper respiratory tract infection may require temporary discontinuation of treatment. The following side effects may arise during the course of therapy with the S8 device: •... -
Page 11: The S8 Autoset Spirit Ii System
Humidifier • Data management products • Accessories. S8 AutoSet Spirit II The components of the S8 AutoSet Spirit II device are shown in the illustration sheet at the front of this manual: • Front view (A-1) • Rear view (A-2) •... -
Page 12: Humidifiers
The S8 AutoSet Spirit II is compatible for use with the HumidAire 3i integrated heated humidifier See “Using Humidifiers” on page 14. Data Management Products The S8 AutoSet Spirit II will have either a ResScan™ Data Card module or a ‘blank’ module attached. The following data management products may be purchased separately. •... -
Page 13: Operating Information
The continuous air stream “splints” open the upper airway, preventing airway collapse. The S8 AutoSet Spirit II delivers pressure within the range 4 to 20 cm H depending on the patency of the upper airway. To make the beginning of treatment more comfortable, you may set a ramp so the pressure starts low and gradually increases to full treatment pressure over the ramp time. - Page 14 The AutoSet algorithm adjusts treatment pressure as a function of three parameters: inspiratory flow limitation, snore and apnoea. The flow sensor, located in the S8 AutoSet Spirit II device, enables detection of inspiratory flow limitation and apnoeas. The pressure sensor, also located in the device, enables measurement of pressure and snore.
- Page 15 Open unrestricted airway Time Figure 1: Inspiratory flow-time curve for an unrestricted airway As the upper airway begins to collapse, the shape of the inspiratory flow-time curve changes and the central section flattens. Silent partial airway obstruction Time Figure 2: Inspiratory flow-time curve for a partially obstructed airway The AutoSet algorithm analyses the shape of the central part of the curve for each breath.
- Page 16 Flattening is a measure of silent inspiratory airflow limitation. Flow limitation with loud snoring is handled by the snore detector. When a patient snores, sound is generated and the inspiratory flow/time curve is distorted by the frequency of the sound. Noisy partial airway obstruction Noisy partial airway obstruction Time...
-
Page 17: System Setup
System Setup Place the S8 AutoSet Spirit II on a table near the head of the patient’s bed. CAUTION Be careful to place the device where it cannot be bumped, and where no one will trip over the power cord. -
Page 18: Delivering Therapy
Delivering Therapy WARNING A mask should not be used unless the S8 AutoSet Spirit II is turned on and operating properly. Ensure the patient settings are correct. Instruct the patient to lie down in bed, arrange the air tubing and put on the mask as in steps 1 and 2 in the section “Using the Mask Fitting Feature”... -
Page 19: Using The Mask Fitting Feature
The S8 AutoSet Spirit II system should be set up beside the patient’s bed with the air tubing and mask system connected. (See “System Setup” on page 11.) Instruct the patient to lie down in bed. -
Page 20: Using Humidifiers
Remove the connector plug on the S8 AutoSet Spirit II before you attach the HumidAire 3i. Reattach the connector plug firmly after you detach the humidifier. Storing the HumidAire 3i Store the HumidAire 3i in its mesh-top pouch in the S8 AutoSet Spirit II travel bag when not in use. Delivering Therapy... -
Page 21: Navigating The S8 Autoset Spirit Ii Menus
Navigating the S8 AutoSet Spirit II Menus S8 AutoSet Spirit II Keypad and LCD The control panel of the S8 AutoSet Spirit II includes a keypad for navigating through the menus and delivering treatment. LCD screen Up key Right key... - Page 22 Table 2: Keys on the front panel and their functions Function LCD screen • Displays S8 AutoSet Spirit II information including the menus and treatment screens. • Starts or stops treatment. Start/Stop • Extended hold for at least three seconds starts the mask- fit feature.
-
Page 23: S8 Autoset Spirit Ii Menus
S8 AutoSet Spirit II Menus The S8 AutoSet Spirit II LCD displays a variety of submenus, parameters and data. Whether the machine is in standby mode, delivering therapy, or downloading data, you can view and change settings. When the S8 AutoSet Spirit II is first turned on, the Welcome screen appears while the device is performing self-checks. - Page 24 These screens appear only if access is enabled by a clinician. Figure 6: Detailed patient menu series: CPAP and AutoSet modes To navigate and make selections within the patient menu, use: • the Up/Down keys to scroll through items within a level Navigating the S8 AutoSet Spirit II Menus...
- Page 25 24. EPR (expiratory pressure relief) You can set the S8 AutoSet Spirit II to provide EPR (expiratory pressure relief) when the device is set to CPAP mode. You may want to set EPR for patients who find it difficult to exhale against positive airway pressure.
- Page 26 SEE Figure 9 enter exit SERVICING RUN HRS: 8888 enter exit exit SN:12345678912 exit PCB: 123456789123 4567 exit SW: SW3960200 exit BR: 19200 change exit Figure 7: Clinical menu series: CPAP and AutoSet modes Navigating the S8 AutoSet Spirit II Menus...
- Page 27 LEAK ALERT: OFF LEAK ALERT: OFF change exit change exit EPR: RAMP ONLY change exit EPR SETTING: 1 change exit EPR ACCESS: OFF change exit Figure 8: S8 Settings menu screens Navigating the S8 AutoSet Spirit II Menus...
- Page 28 QuickView is accessed by holding down the Right and Left keys simultaneously for 3 seconds.The screens in Figure 10 are then available to the patient. Navigating the S8 AutoSet Spirit II Menus...
- Page 29 USED HRS: 0800 USAGE DATA exit enter exit USAGE: 1000/1068 exit USAGE: 7.45 hrs USAGE: 7.2 hrs days... exit yr... exit RUN HRS: 00000 exit Figure 10: Quickview menu screens Navigating the S8 AutoSet Spirit II Menus...
- Page 30 Sets the length of the air tubing used. SmartStart* Enables or disables the SmartStart/Stop feature; when enabled, the device will start automatically when the patient breathes into the mask and stop automatically when the patient takes the mask off. Navigating the S8 AutoSet Spirit II Menus...
- Page 31 You can also set individual reminders to recur at intervals from 1 to 24 months. See “Setting Reminder Recurrence” on page 28. Factory Defaults Resets machine default settings (except for Language, Date and Time). Navigating the S8 AutoSet Spirit II Menus...
- Page 32 Displays the current software version. Sets the baud rate. This value is reset to 19200 every time the S8 AutoSet Spirit II is powered up. *These parameters may appear in one or both patient menus and the clinical menu. Note: When Leak Alert is set to ON, SmartStart/Stop is automatically set to OFF.
- Page 33 Service Due You can set a timed reminder to remind your patient when to return the device for service. The patient can press the Left (Ok) key to remove the message from the LCD. Navigating the S8 AutoSet Spirit II Menus...
- Page 34 S8 AutoSet Spirit II Reminder screens, you can only change it in 7-day increments. b. You can only set the recurrence period using the S8 AutoSet Spirit II. You cannot use a PC application to set the recurrence period.
-
Page 35: Data Management Using The Menus
Data Management Using the Menus The S8 AutoSet Spirit II system may be used to monitor patient usage as well as treatment pressure, mask leak and incidence of apnoeas and hypopnoeas. To assess the patient’s progress, data for the last session may be compared to median values for the last week, the last month, the last six months and the last year, as displayed in the Results menu. - Page 36 Figure 11: The clinical menu results series Data Management Using the Menus...
- Page 37 Statistics are provided for five time intervals (last day, last week, last month, last six months, last year) so you can assess the significance of recent events. All statistics calculated for a range of dates are median values. The median is the middle value after the data have been sorted in order (50% of the values are smaller and 50% are larger).
-
Page 38: Interpreting Data In The Clinical Menu
Interpreting Data in the Clinical Menu Note: When assessing results, check the leak data first. Leak values greater than 0.4 L/s (24 L/min) affect the accuracy of other measurements. Pressure The pressure transducer located in the device measures treatment pressure; the average pressure is calculated and recorded each minute. -
Page 39: Smart Data In The Patient Menu
Smart Data in the Patient Menu A Smart Data feature has been incorporated in the S8 AutoSet Spirit II device to increase patient involvement in their therapy. Display of Smart Data for the patient to review is at your discretion. Select some or all options for display in the patient menu from the Smart Data submenu in Clinical Menu, Options (see Figure 9, Options menu screens, on page 22). -
Page 40: S8 Data Management Products
The blank module is a protective cover on the S8 AutoSet Spirit II. At times, you may wish to remove or attach the module, for example to use an adapter. To remove the blank module, pull it off the back of the S8 AutoSet Spirit II to show the data communications port (F-1). -
Page 41: Patient Management Of The Data Card
Data Card, they will need to insert the card again. If you want a patient to update the settings in their S8 AutoSet Spirit II, you can load the new settings on to a Data Card and either give or mail them the card. - Page 42 Inserting the Data Card To insert the Data Card, the patient needs to: 1. Ensure the S8 AutoSet Spirit II is switched on and displaying the standby (RAMP or SETTLING) screen. 2. Insert the Data Card into the slot in the Data Card module (H-1). Continue inserting the Data Card smoothly until it stops moving (H-2) and messages start appearing on the LCD.
-
Page 43: Transmitting Data With The Data Card
ResMed PC application. A patient can then use the Data Card to update the settings in their S8 AutoSet Spirit II. If you mail the Data Card to the patient, send it in the mailback envelope. If you need the Data Card sent back to you for verification, use a postal envelope to mail the mailback envelope and its contents to the patient. -
Page 44: S8 Adapters
S8 adapters are specifically designed for use with ResMed S8 devices. Attach the S8 serial or USB adapter to a ResMed S8 device to create a serial or USB port. You can then connect a cable that enables transfer of data between the device and a personal computer. - Page 45 To attach an S8 adapter to an S8 device: 1. Unplug the device from the wall. 2. Remove the module currently attached to the S8 device (I-1). 3. Press and hold down the button on the adapter (I-2 a), while pushing it onto the device.
-
Page 46: Cleaning And Maintenance
4. Reconnect the air tubing to the air outlet and mask. Periodic Cleaning 1. Clean the exterior of the S8 AutoSet Spirit II with a damp cloth and mild liquid soap. 2. Check the air filter for blockage or holes (see “Replacing the Air Filter” on page 41). -
Page 47: Replacing The Air Filter
Under no circumstances should you attempt to service or repair the flow generator yourself. This product (S8 AutoSet Spirit II) has a service life of 5 years from the date of manufacture. At the end of that period, the device should be inspected by an authorised ResMed service centre. -
Page 48: Frequently Asked Questions
How long does the patient have to leave the Data Card in the S8 AutoSet Spirit II to collect data? The Data Card can be inserted at any time. Data in the S8 AutoSet Spirit II will be transferred to the Data Card within 30 seconds. - Page 49 Can patients use the S8 AutoSet Spirit II if mains (AC) power is not available? There is a DC input socket at the rear of the S8 AutoSet Spirit II. A ResMed DC- 12 converter must be used to connect the S8 AutoSet Spirit II to a 12V or 24V DC power source.
-
Page 50: Troubleshooting
CAUTION If the problem cannot be solved, contact your equipment supplier or ResMed. Do not attempt to open the S8 AutoSet Spirit II case. There are no user serviceable parts inside. Repairs and internal servicing should only be performed by an authorised service agent. - Page 51 Problem Possible Cause Solution Device does not start Power cord is not connected Connect power cord firmly when the patient properly. at both ends. breathes into the mask. Power outlet may be faulty. Try another power outlet. SmartStart not on. Enable SmartStart.
- Page 52 Check tube!! outlet on the front of the Key if done S8 AutoSet Spirit II. When you have checked the air tubing, press the Start/Stop key to restart the device. If this does not clear the...
- Page 53 Problem Possible Cause Solution Displays error Your patient has experienced Check air tubing message: leak levels of greater than connections and mask fit. 0.4 L/s (24 L/min) for more High leak in than 30% of the previous last session. session. Displays error Your patient has experienced Check air tubing...
- Page 54 Problem Possible Cause Solution Data Card has been removed Advise the patient to before the Copy Complete reinsert the Data Card and Remove Card message was wait for the Copy Complete Remove Card displayed. message to appear on the LCD. If this message occurs Issue a new Data Card to repeatedly even when the...
- Page 55 The Data Card was removed Check that the patient before settings were copied to does not remove the Data the S8 AutoSet Spirit II. Card before the Settings Success Remove Card message appears on the LCD. Troubleshooting...
- Page 56 Problem Possible Cause Solution Data Card given to patient did Use the appropriate PC not contain settings because application to reprogram programming of settings did the Data Card with the not complete. settings, making sure that programming completes. Reissue the card to the patient.
-
Page 57: System Specifications
Weight: 1.4 kg Power Supply Input ranges: • Input range for S8 AutoSet Spirit II with HumidAire 3i: 100–240V, 50/60Hz; 110V, 400Hz; 2.5A <140VA (110 W) (maximum power consumption). Instantaneous peak power consumption <340VA. • Refer to the DC-12 converter instructions for DC ratings. Only use the ResMed DC-12 converter for DC input. -
Page 58: Accessories
Noise Level AutoSet Spirit II—CPAP mode, 10 cm H O set pressure Measured total A-weighted sound pressure level 24 dBA (dB re 20 μPa) Uncertainty (dB re 20 μPa) 2 dBA Measured values are determined according to the noise test procedure given in ISO 17510-1. -
Page 59: Symbols Which Appear On The Device
If you need information on these disposal systems, please contact your local waste administration. The crossed-bin symbol invites you to use these disposal systems. If you require information on collection and disposal of your ResMed device please contact your ResMed office, local distributor or go to www.resmed.com/environment. System Specifications... -
Page 60: Index
Index Leak Alert 25 Mask 24 accessories 6 Max Press 24 adapters Max Ramp 24 removing 39 Max Settling 24 serial 38 Menu Type 26 USB 38 Min Press 24 air filter 51 Mode 24 replacing 41 Options Menu 25 air tubing 51 parameters 24 cleaning 40... - Page 61 date (setting) 26 Leak Alert 25 DC-12 converter 43 left key 16 delivering therapy 12 detailed data 42 down key 16 machine hours 26 dryness mailback envelope 36 mouth, nose or throat 42 Mask 24 mask available masks 5 Efficacy Data 25 mask-fit 13, 14 Electromagnetic Compatibility 52 mask settings 26...
- Page 62 16 statistics median values 31 summary data 42 quick key access system specifications clinical menu 16 S8 AutoSet Spirit II 51 Ramp 24 technical specifications 52 Recurring reminders 28 time (setting) 26 Reminders 25 travel bag 5 reminders 25, 27, 42...