Daikin R32 Split Series Installation Manual
Hide thumbs
Also See for R32 Split Series:
- Installer's reference manual (120 pages) ,
- Operation manual (116 pages) ,
- User reference manual (52 pages)
Table of Contents
Advertisement
Advertisement
Table of Contents

Related Manuals for Daikin R32 Split Series


Summary of Contents for Daikin R32 Split Series
- Page 1 INSTALLATION MANUAL R32 Split Series Models FVXM25FV1B9 FVXM35FV1B9 FVXM50FV1B9...
- Page 2 3P471028-15H...
-
Page 3: Safety Precautions
Improper installation may result in water leakage, electric shocks or fire. • Make sure installation, servicing, maintenance and repair comply with instruction from Daikin and with applicable legislation (for example national gas regulation) and are executed only by authorised persons. - Page 4 Safety Precautions • Make sure to provide for adequate measures in order to prevent that the outdoor unit be used as a shelter by small animals. Small animals making contact with electrical parts can cause malfunctions, smoke or fire. Please instruct the customer to keep the area around the unit clean.
-
Page 5: Operation Limits
Accessories – Indoor unit Mounting plate Insulation sheet AAA dry-cell batteries Titanium Apatite Deodorizing Wireless remote controller Operation manual Filter Drain hose Remote controller holder Installation manual Operation Limits Use the system in the following temperature and humidity ranges for safe and effective operation. Outdoor units Cool Heat... -
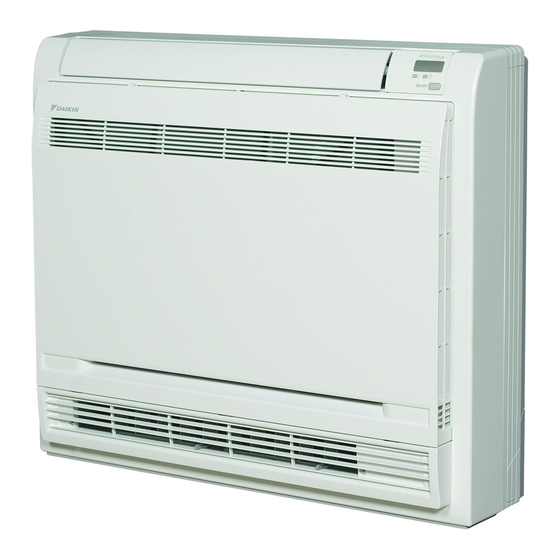
Page 6: Choosing An Installation Site
Choosing an Installation Site • Do not install the unit more than 6 cm above the floor. • Before choosing the installation site, obtain user approval. Indoor unit • The indoor unit should be sited in a place where: 1) the restrictions on installation specified in the indoor unit installation drawings are met, 2) both air intake and exhaust have clear paths met, 3) the unit is not in the path of direct sunlight, 6 cm... -
Page 7: Wireless Remote Controller
Choosing an Installation Site Wireless remote controller 1) Turn on all fluorescent lamps in the room, if any, and find site where remote controller signals are properly received by the indoor unit (within 7m). 2) Make the dipswitch settings. Set according to the type of unit purchased by the customer. The default settings are on the heat pump side. -
Page 8: Indoor Unit Installation Drawings
(Field supply: M3 × 20L) WARNING • Only use accessories, optional equipment and spare parts made or approved by DAIKIN. • Installation shall be done by an installer, the choice of materials and installation shall comply with the applicable legislation. -
Page 9: Preparation Before Installation
Preparation before Installation Removing and installing front panel • Removal method 1) Slide until the 2 stoppers click into place. 2) Open the front panel forward and undo the string. 3) Remove the front panel. • Installation method 1) Attach the front grille and front panel after pulling the string around them. -
Page 10: Boring A Wall Hole And Installing Wall Embedded Pipe
Indoor Unit Installation (1) Exposed installation Refrigerant piping 1) Drill a hole (65mm in diameter) in the spot indicated by the symbol in the illustration as below. 2) The location of the hole is different depending on which side of the pipe is taken out. 3) For piping, see 6. -
Page 11: Indoor Unit Installation
Indoor Unit Installation (1) Drain piping 1) Use commercial rigid polyvinyl chloride pipe (general VP 20 pipe, outer diameter 26mm, inner diameter 20mm) for the drain pipe. 2) The drain hose (outer diameter 18mm at connecting end, 220mm long) is supplied with the indoor unit. Prepare the drain pipe picture below position. -
Page 12: Flaring The Pipe End
Indoor Unit Installation (1) 4-2. Installation • Secure using 6 screws for floor installations. (Do not forget to secure to the rear wall.) • For wall installations, secure the mounting plate using 5 screws and the indoor unit using 4 screws. Do not install the unit more than 6 cm above the floor. -
Page 13: Connecting The Refrigerant Pipe
Indoor Unit Installation (1) Connecting the refrigerant pipe CAUTION 1) Use the flare nut fixed to the main unit. (To prevent cracking of the flare nut by aged deterioration.) 2) To prevent gas leakage, apply refrigeration oil only to the inner surface of the flare. (Use refrigeration oil for R32.) 3) Use torque wrenches when tightening the flare nuts to prevent damage to the flare nuts and gas leakage. -
Page 14: Checking For Gas Leakage
Indoor Unit Installation (1) Checking for gas leakage 1) Check for leakage of gas after air purging. 2) See the sections on air purges and gas leak Check for leakage here. checks in the installation manual for the outdoor • Apply soapy water and unit. - Page 15 Indoor Unit Installation (1) Wiring , install as described in the installation manual supplied with the Multi outdoor unit. With a Multi indoor unit • Lift the sensor securing plate, remove the front metal plate cover, and connect the branch wiring to the terminal block. 1) Strip wire ends (15mm).
-
Page 16: When Connecting To An Ha System
Indoor Unit Installation (2) When connecting to an HA system 1) Remove the electric box. (See 3. How to set the HA connector different addresses on page 7.) (S21) 2) Cut off the pins using a nipper. 3) Wire as shown in the diagram and connect the Sensor connection cord to the S21 connector. -
Page 17: Refrigerant Piping
Indoor Unit Installation (2) Refrigerant piping See 1. Refrigerant piping under Indoor Unit Installation (1) Wall (Unit: mm) Left bottom piping Right bottom piping Hole location Right/left piping Wall Installing indoor unit 1) Remove the front grille. 2) Remove 7 screws. 3) Remove the upper casing (2 tabs). -
Page 18: Unified Wiring Diagram Legend
Unified Wiring Diagram Legend Unified Wiring Diagram Legend For applied parts and numbering, refer to the wiring diagram on the unit. Part numbering is by Arabic numbers in ascending order for each part and is represented in the overview below by symbol “*” in the part code. CIRCUIT BREAKER PROTECTIVE EARTH CONNECTION... -
Page 19: Trial Operation And Testing
Trial Operation and Testing Trial operation and testing 1-1 Measure the supply voltage and make sure that it falls in the specified range. 1-2 Trial operation should be carried out in either cooling or heating mode. ■ For Heat pump •... - Page 20 Two-dimensional bar code is a code for manufacturing. 3P477070-1F (1903)